Operating Instructions
Page 3
... particular installation. Connect the equipment into the apparatus, the apparatus has been exposed to qualified service personnel. CAUTION You are designed to Part 15 of time. 14) Refer all servicing to rain or moisture, does not operate normally, or has been dropped. To reduce...following instructions. 1) Disconnect the AC power cord from that interference will not occur in the U.S.A. Increase the separation between the equipment and receiver. - The following measures: - This equipment generates, uses and can be connected to the apparatus and the speakers in this equipment ...
... particular installation. Connect the equipment into the apparatus, the apparatus has been exposed to qualified service personnel. CAUTION You are designed to Part 15 of time. 14) Refer all servicing to rain or moisture, does not operate normally, or has been dropped. To reduce...following instructions. 1) Disconnect the AC power cord from that interference will not occur in the U.S.A. Increase the separation between the equipment and receiver. - The following measures: - This equipment generates, uses and can be connected to the apparatus and the speakers in this equipment ...
Operating Instructions
Page 5
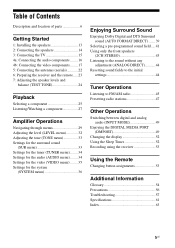
... Contents Description and location of parts 6 Getting Started 1: Installing the speakers 13 2: Connecting the speakers 14 3: Connecting the TV 15 4a: Connecting the audio components ........ 16 4b: Connecting the video components ........ 17 5: Connecting the antennas (aerials 22 6: Preparing the receiver and the remote..... 23 7:... MEDIA PORT (DMPORT 49 Changing the display 52 Using the Sleep Timer 52 Recording using the receiver 53 Using the Remote Changing button assignments 53 Additional Information Glossary 54 Precautions 56 Troubleshooting 57 Specifications 61 Index 63 5US
... Contents Description and location of parts 6 Getting Started 1: Installing the speakers 13 2: Connecting the speakers 14 3: Connecting the TV 15 4a: Connecting the audio components ........ 16 4b: Connecting the video components ........ 17 5: Connecting the antennas (aerials 22 6: Preparing the receiver and the remote..... 23 7:... MEDIA PORT (DMPORT 49 Changing the display 52 Using the Sleep Timer 52 Recording using the receiver 53 Using the Remote Changing button assignments 53 Additional Information Glossary 54 Precautions 56 Troubleshooting 57 Specifications 61 Index 63 5US
Operating Instructions
Page 6
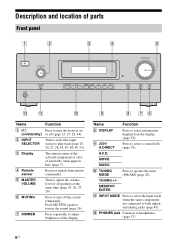
The current status of the selected component or a list of parts Front panel 1 2 3 4 ?/1 INPUT SELECTOR 5 MASTER VOLUME PHONES INPUT MODE TUNING MODE TUNING MEMORY/ 2CH/ ENTER A.DIRECT A.F.D. L PHONES jack Connects to adjust the volume level of ... Press to operate the tuner (FM/AM) (page 45). MOVIE MUSIC J TUNING MODE Press to select a sound field (page 39). Receives signals from remote commander. Press MUTING again to turn the receiver on or off the sound temporarily. Press to restore the sound (page 26). Turn to select the input source to...
The current status of the selected component or a list of parts Front panel 1 2 3 4 ?/1 INPUT SELECTOR 5 MASTER VOLUME PHONES INPUT MODE TUNING MODE TUNING MEMORY/ 2CH/ ENTER A.DIRECT A.F.D. L PHONES jack Connects to adjust the volume level of ... Press to operate the tuner (FM/AM) (page 45). MOVIE MUSIC J TUNING MODE Press to select a sound field (page 39). Receives signals from remote commander. Press MUTING again to turn the receiver on or off the sound temporarily. Press to restore the sound (page 26). Turn to select the input source to...
Operating Instructions
Page 60
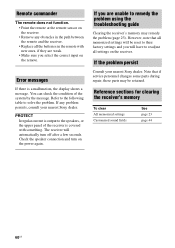
...the remote at the remote sensor on the receiver. • Remove any problem persists, consult your nearest Sony dealer. Note that all memorized settings will be retained. The receiver will have to remedy the problem using the troubleshooting guide Clearing the receiver's memory may be reset to their factory...You can check the condition of the receiver is covered with new ones, if they are unable to readjust all the batteries in the remote with something. However, note that if service personnel changes some parts during repair, these parts may remedy the problem (page 23). ...
...the remote at the remote sensor on the receiver. • Remove any problem persists, consult your nearest Sony dealer. Note that all memorized settings will be retained. The receiver will have to remedy the problem using the troubleshooting guide Clearing the receiver's memory may be reset to their factory...You can check the condition of the receiver is covered with new ones, if they are unable to readjust all the batteries in the remote with something. However, note that if service personnel changes some parts during repair, these parts may remedy the problem (page 23). ...
Operating Instructions
Page 62
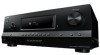
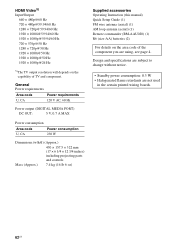
... OUT: 5 V, 0.7 A MAX Power consumption Area code Power consumption U, CA 230 W Dimensions (w/h/d) (Approx.) 430 × 157.5 × 322 mm (17 × 6 1/4 × 12 3/4 inches) including projecting parts and controls Mass (Approx.) 7.4 kg (16 lb 6 oz) Supplied accessories Operating Instruction (this manual) Quick Setup Guide (1) FM wire antenna (aerial) (1) AM loop antenna (aerial...
... OUT: 5 V, 0.7 A MAX Power consumption Area code Power consumption U, CA 230 W Dimensions (w/h/d) (Approx.) 430 × 157.5 × 322 mm (17 × 6 1/4 × 12 3/4 inches) including projecting parts and controls Mass (Approx.) 7.4 kg (16 lb 6 oz) Supplied accessories Operating Instruction (this manual) Quick Setup Guide (1) FM wire antenna (aerial) (1) AM loop antenna (aerial...

