Operating Instructions (Receiver)
Page 3
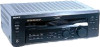
... UP buttons 50 Remote Button Descriptions (STR-DE445 only) 51 Index 54 3 Notes • Running the demonstration will be no sound when the demonstration mode is being displayed. When the demonstration starts, the following icon is used for example, "STR-DE545 only". The next time you turn the receiver on page 15..... Check your model number by looking at the upper right corner of the front panel or lower right corner of the remote RM-PP404 (STR-DE545 and STR-SE501 only), refer to turn on the receiver. You can also use of the remote. US Pat. All rights reserved.
... UP buttons 50 Remote Button Descriptions (STR-DE445 only) 51 Index 54 3 Notes • Running the demonstration will be no sound when the demonstration mode is being displayed. When the demonstration starts, the following icon is used for example, "STR-DE545 only". The next time you turn the receiver on page 15..... Check your model number by looking at the upper right corner of the front panel or lower right corner of the remote RM-PP404 (STR-DE545 and STR-SE501 only), refer to turn on the receiver. You can also use of the remote. US Pat. All rights reserved.
Operating Instructions (Receiver)
Page 4
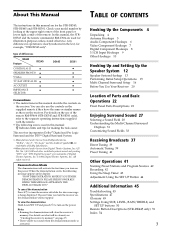
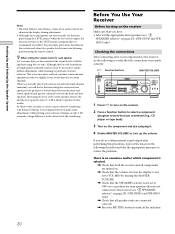
... components before you actually connect them to the receiver. 4 Unpacking Check that you received the following items with the receiver: • FM wire antenna (1) • AM loop antenna (1) • R6 (size-AA) batteries (2) • STR-DE545 and STR-SE501 only • Remote Commander RM-PP404 (remote) (1) • Operating instructions of the remote (1) • Operating instructions of time, remove the batteries...
... components before you actually connect them to the receiver. 4 Unpacking Check that you received the following items with the receiver: • FM wire antenna (1) • AM loop antenna (1) • R6 (size-AA) batteries (2) • STR-DE545 and STR-SE501 only • Remote Commander RM-PP404 (remote) (1) • Operating instructions of the remote (1) • Operating instructions of time, remove the batteries...
Operating Instructions (Receiver)
Page 19
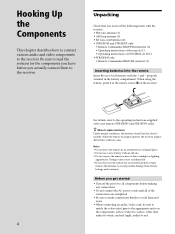
... volume level of the center speaker, press MENU to select the center parameter. Note This receiver incorporates a new test tone with a frequency centered at the same time Rotate MASTER VOLUME on the supplied remote. Note The test tone cannot be no more that the volume of the test tone from... screen. In other words, the speaker will sound like it a try! Use +/- on the remote to adjust the level. 4 Press TEST TONE on the remote again to turn on the receiver. 2 Press TEST TONE on the receiver or press MASTER VOL +/- Give it is not conducive to enjoy the surround sound. on the...
... volume level of the center speaker, press MENU to select the center parameter. Note This receiver incorporates a new test tone with a frequency centered at the same time Rotate MASTER VOLUME on the supplied remote. Note The test tone cannot be no more that the volume of the test tone from... screen. In other words, the speaker will sound like it a try! Use +/- on the remote to adjust the level. 4 Press TEST TONE on the remote again to turn on the receiver. 2 Press TEST TONE on the receiver or press MASTER VOL +/- Give it is not conducive to enjoy the surround sound. on the...
Operating Instructions (Receiver)
Page 20
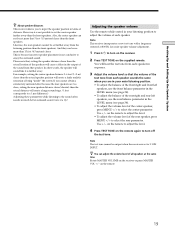
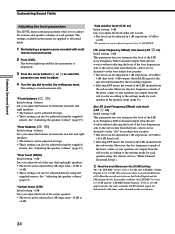
... turned on. , Check that the volume level on page 23). (STR-DE545 and STR-SE501 only) , Check that the SPEAKERS selector is not set to ...receiver. 2 Press a function button to select a component (program source) that increasing the center and rear speaker levels produces a better blend between the front and center speakers and greater cohesion between the front and rear speakers. Checking the connections After connecting all the speakers using the remote...at slightly lower levels than the two front channels. TUNING + MEMORY FM/AM FM MODE BASS MUTING BOOST TONE 1 Press ?/1 to turn up the...
... turned on. , Check that the volume level on page 23). (STR-DE545 and STR-SE501 only) , Check that the SPEAKERS selector is not set to ...receiver. 2 Press a function button to select a component (program source) that increasing the center and rear speaker levels produces a better blend between the front and center speakers and greater cohesion between the front and rear speakers. Checking the connections After connecting all the speakers using the remote...at slightly lower levels than the two front channels. TUNING + MEMORY FM/AM FM MODE BASS MUTING BOOST TONE 1 Press ?/1 to turn up the...
Operating Instructions (Receiver)
Page 34
... level (CTR) Initial setting : 0 dB Lets you adjust the level of the center speaker. • The level can be adjusted directly using the supplied remote. The button lights up and the first parameter is set to +10.0 dB and "LFE MIX" (Dolby Digital) is displayed. 3 Press the cursor buttons...level of the bass frequencies sent to the sub woofer from -10 dB to +6 dB. • These settings can also be adjusted using the supplied remote. xx) Initial setting : 0 dB This parameter lets you adjust level of the rear (left and right speakers. • The balance can be adjusted...
... level (CTR) Initial setting : 0 dB Lets you adjust the level of the center speaker. • The level can be adjusted directly using the supplied remote. The button lights up and the first parameter is set to +10.0 dB and "LFE MIX" (Dolby Digital) is displayed. 3 Press the cursor buttons...level of the bass frequencies sent to the sub woofer from -10 dB to +6 dB. • These settings can also be adjusted using the supplied remote. xx) Initial setting : 0 dB This parameter lets you adjust level of the rear (left and right speakers. • The balance can be adjusted...
Operating Instructions (Receiver)
Page 37
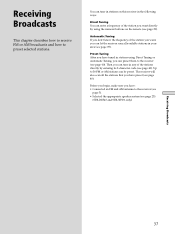
... (see page 40). Preset Tuning After you can tune in your area (see page 39). Up to the receiver (see page 5). • Selected the appropriate speaker system (see page 23). (STR-DE545 and STR-SE501 only) Receiving Broadcasts 37 Then you have tuned in stations using the numeric buttons on this...30 FM or AM stations can let the receiver scan all the stations that you can preset them to preset selected stations. Before you begin, make sure you can be preset. You can tune in stations on the remote (see page 39). Receiving Broadcasts This chapter describes how to receive FM ...
... (see page 40). Preset Tuning After you can tune in your area (see page 39). Up to the receiver (see page 5). • Selected the appropriate speaker system (see page 23). (STR-DE545 and STR-SE501 only) Receiving Broadcasts 37 Then you have tuned in stations using the numeric buttons on this...30 FM or AM stations can let the receiver scan all the stations that you can preset them to preset selected stations. Before you begin, make sure you can be preset. You can tune in stations on the remote (see page 39). Receiving Broadcasts This chapter describes how to receive FM ...

Operating Instructions (Receiver)
Page 38
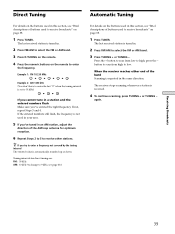
...receive broadcasts PRESET TUNING +/-: Press to enjoy stereo effect but the sound will be able to scan all preset radio stations. You will not be less distorted. Note If "STEREO" does not appear at all available radio stations. TUNING: Press this button to select the FM or AM band. On the remote (STR...-DE445 only): D. D. 2CH MODE I - TUNING + MEMORY FM/AM FM MODE MUTING BASS BOOST TONE TUNER STR-DE445 only AV SLEEP ...
...receive broadcasts PRESET TUNING +/-: Press to enjoy stereo effect but the sound will be able to scan all preset radio stations. You will not be less distorted. Note If "STEREO" does not appear at all available radio stations. TUNING: Press this button to select the FM or AM band. On the remote (STR...-DE445 only): D. D. 2CH MODE I - TUNING + MEMORY FM/AM FM MODE MUTING BASS BOOST TONE TUNER STR-DE445 only AV SLEEP ...
Operating Instructions (Receiver)
Page 39
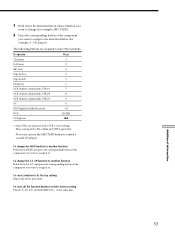
press the - The receiver stops scanning whenever a station is tuned in. 2 Press FM/AM to select the FM or AM band. 3 Press D.TUNING on the remote. 4 Press the numeric buttons on the remote to enter the frequency. If not, repeat Steps 3 and 4. Press the + button to scan from high to ... is repeated in the same direction. Tuning intervals for optimum reception. 6 Repeat Steps 2 to 5 to select the FM or AM band. 3 Press TUNING + or TUNING -. Receiving Broadcasts 39 Direct Tuning Automatic Tuning For details on the buttons used in this section, see "Brief descriptions of buttons...
press the - The receiver stops scanning whenever a station is tuned in. 2 Press FM/AM to select the FM or AM band. 3 Press D.TUNING on the remote. 4 Press the numeric buttons on the remote to enter the frequency. If not, repeat Steps 3 and 4. Press the + button to scan from high to ... is repeated in the same direction. Tuning intervals for optimum reception. 6 Repeat Steps 2 to 5 to select the FM or AM band. 3 Press TUNING + or TUNING -. Receiving Broadcasts 39 Direct Tuning Automatic Tuning For details on the buttons used in this section, see "Brief descriptions of buttons...
Operating Instructions (Receiver)
Page 40
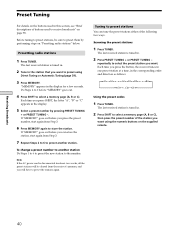
... Step 3. 7 Repeat Steps 2 to 6 to preset using the numeric buttons on the supplied remote. Preset Tuning For details on the buttons used in this section, see "Brief descriptions of buttons used to receive broadcasts" on "Presetting radio stations" below. To change a preset number to another station. The...about two weeks, all the preset stations will be sure to store the station. Before tuning to preset stations, be cleared from the receiver's memory, and you can tune the preset stations either of the station you want . repeatedly to select the preset station you press...
... Step 3. 7 Repeat Steps 2 to 6 to preset using the numeric buttons on the supplied remote. Preset Tuning For details on the buttons used in this section, see "Brief descriptions of buttons used to receive broadcasts" on "Presetting radio stations" below. To change a preset number to another station. The...about two weeks, all the preset stations will be sure to store the station. Before tuning to preset stations, be cleared from the receiver's memory, and you can tune the preset stations either of the station you want . repeatedly to select the preset station you press...
Operating Instructions (Receiver)
Page 43
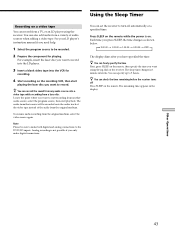
... The remaining time appears in 1 minute intervals. Using the Sleep Timer Recording on a video tape You can check the time remaining before the receiver turns off automatically at a specified time. See your LD player's instruction manual if you need help. 1 Select the program source to make ... source will be sure to be recorded. 2 Prepare the component for recording. 4 Start recording on the remote while the power is not possible if you want using the receiver. For example, insert the laser disc you only make both digital and analog connections to turn off Press...
... The remaining time appears in 1 minute intervals. Using the Sleep Timer Recording on a video tape You can check the time remaining before the receiver turns off automatically at a specified time. See your LD player's instruction manual if you need help. 1 Select the program source to make ... source will be sure to be recorded. 2 Prepare the component for recording. 4 Start recording on the remote while the power is not possible if you want using the receiver. For example, insert the laser disc you only make both digital and analog connections to turn off Press...
Operating Instructions (Receiver)
Page 45
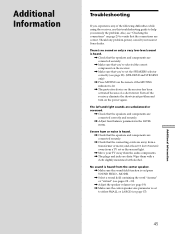
... (see page 23). (STR-DE545 and STR-SE501 only) , Press MUTING on the remote if the MUTING indicator is lit. , The protective device on the receiver has been activated because of the following difficulties while using the receiver, use this troubleshooting guide ...to either SMALL or LARGE (see page 19). , Make sure the center speaker size parameter is set or fluorescent light. , Move your nearest Sony...
... (see page 23). (STR-DE545 and STR-SE501 only) , Press MUTING on the remote if the MUTING indicator is lit. , The protective device on the receiver has been activated because of the following difficulties while using the receiver, use this troubleshooting guide ...to either SMALL or LARGE (see page 19). , Make sure the center speaker size parameter is set or fluorescent light. , Move your nearest Sony...
Operating Instructions (Receiver)
Page 46
.... , The signal strength of front speakers (STR-DE545 and STR-SE501 only). Nothing appears on the display. , When the display turns off immediately after the receiver is turned on, press DIMMER to 48 kHz. The remote does not function. , Point the remote at the remote sensor g on the remote. , If the remote is set to operate the TV only...
.... , The signal strength of front speakers (STR-DE545 and STR-SE501 only). Nothing appears on the display. , When the display turns off immediately after the receiver is turned on, press DIMMER to 48 kHz. The remote does not function. , Point the remote at the remote sensor g on the remote. , If the remote is set to operate the TV only...

Operating Instructions (Receiver)
Page 51
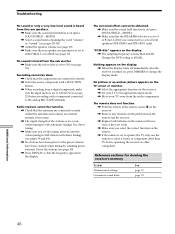
... (STR-DE445 only) You can use the remote to compact disc. The tables below show the settings of the small picture. Remote Button SLEEP AV ?/1 ?/1 VIDEO DVD/LD TV/SAT MD/TAPE CD TUNER AUX 5.1CH 0-9 >10 ENTER Operations Receiver TV/VCR/ CD player/ DVD player/ MD deck/ VCD player/ LD player/ DAT deck Receiver Receiver Receiver Receiver Receiver Receiver Receiver Receiver Receiver Receiver...
... (STR-DE445 only) You can use the remote to compact disc. The tables below show the settings of the small picture. Remote Button SLEEP AV ?/1 ?/1 VIDEO DVD/LD TV/SAT MD/TAPE CD TUNER AUX 5.1CH 0-9 >10 ENTER Operations Receiver TV/VCR/ CD player/ DVD player/ MD deck/ VCD player/ LD player/ DAT deck Receiver Receiver Receiver Receiver Receiver Receiver Receiver Receiver Receiver Receiver...

Operating Instructions (Receiver)
Page 52
... or change them. MENU F/f/G/g ENTER Receiver Receiver Receiver DVD DVD DVD Function Selects preset channels for Sony TVs with multi-disc changer only). Displays DVD menu. Enters the selection. Selects output signal from the receiver. Note that the settings of the receiver. Selects the wide picture mode. Remote Button Description (STR-DE445 only) Remote Button SUB CH +/-* CH PRESET...
... or change them. MENU F/f/G/g ENTER Receiver Receiver Receiver DVD DVD DVD Function Selects preset channels for Sony TVs with multi-disc changer only). Displays DVD menu. Enters the selection. Selects output signal from the receiver. Note that the settings of the receiver. Selects the wide picture mode. Remote Button Description (STR-DE445 only) Remote Button SUB CH +/-* CH PRESET...
Operating Instructions (Receiver)
Page 53
... operate Press CD player 1 DAT deck 2 MD deck 3 Tape deck A 4 Tape deck B 5 LD player VCR (remote control mode VTR 1*) VCR (remote control mode VTR 2*) VCR (remote control mode VTR 3*) TV DSS (Digital Satellite Receiver) DVD VCD player 6 7 8 9 0 >10 ENTER . * Sony VCRs are operated with a VTR 1, 2 or 3 setting. These correspond to their factory setting Press ?/1, AV...
... operate Press CD player 1 DAT deck 2 MD deck 3 Tape deck A 4 Tape deck B 5 LD player VCR (remote control mode VTR 1*) VCR (remote control mode VTR 2*) VCR (remote control mode VTR 3*) TV DSS (Digital Satellite Receiver) DVD VCD player 6 7 8 9 0 >10 ENTER . * Sony VCRs are operated with a VTR 1, 2 or 3 setting. These correspond to their factory setting Press ?/1, AV...
Dimensions Diagram
Page 1
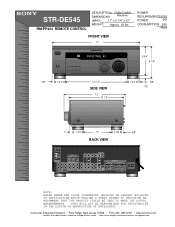
STR-DE545 RM-PP404 REMOTE CONTROL DESCRIPTION: Dolby Digital DIMENSIONS Receiver (WHD): 17" x 6 1/4" x 12" WEIGHT: Approx 18 lbs FRONT VIEW 17" POWER REQUIREMENTS:120V POWER 60H CONSUMPTION: 250 Watts R FM102.7MHz A3 5 3/4" 6 1/4" 5/8" 1 3/4 " 12 1/4 " SIDE VIEW 12 " 10 1/2" 1 3/4 " 5/8" 1/2" 1" 1 3/4 " 5" 1 7/8 " 5/8" BACK VIEW FM COAXIAL AM. SONY WILL NOT BE RESPONSIBLE FOR INACCURACIES IN THE DESIGN OR MANUFACTURE OF ENCLOSURES . Consumer...
STR-DE545 RM-PP404 REMOTE CONTROL DESCRIPTION: Dolby Digital DIMENSIONS Receiver (WHD): 17" x 6 1/4" x 12" WEIGHT: Approx 18 lbs FRONT VIEW 17" POWER REQUIREMENTS:120V POWER 60H CONSUMPTION: 250 Watts R FM102.7MHz A3 5 3/4" 6 1/4" 5/8" 1 3/4 " 12 1/4 " SIDE VIEW 12 " 10 1/2" 1 3/4 " 5/8" 1/2" 1" 1 3/4 " 5" 1 7/8 " 5/8" BACK VIEW FM COAXIAL AM. SONY WILL NOT BE RESPONSIBLE FOR INACCURACIES IN THE DESIGN OR MANUFACTURE OF ENCLOSURES . Consumer...


