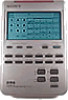
Operating Instructions (primary manual)
Page 3
... (page 16). System Control function allows one remote commander This Commander is useful when you the trouble of performing the same operations again for non-Sony components are its main features. The Commander is preset for your Sony AV components. Features The RM-AV2100 Remote Commander provides centralized control of all your components by setting their code numbers (page 8). The following are also preset This...
Operating Instructions (primary manual)
Page 4
... 22 Executing a Series of Controls 7 Basic Operations Setting the Code for Preset Audio and Visual Components 8 Setting a component code 8 Checking if the code number works 10 Finding a component code with the Search function 11 Operating Your Components with the Touch of commands to the Component Select buttons 28 Changing the interval between Remote Commanders 41 Transferring data ...41 4 Receiving the data ...43 Table...
Operating Instructions (primary manual)
Page 9
... You have to set a code for DECK A and DECK B. All the component names in the supplied "Component Code Numbers", and find the three-digit code number for the desired component. The selected component remains displayed, and the 0 - 9, ENTER and DISPLAY keys flash. 5 If you want to set one code number is listed, use the code number 056. 2 While pressing COMMANDER OFF, press MUTING. Note...
Operating Instructions (primary manual)
Page 10
... on the display. Setting the Code for Preset Audio and Visual Components (continued) Notes • If you press a component code number that is set Press the DISPLAY key in Step 3 to 5. When the remote control signal is sent, is displayed on the component with its power switch. 3 Aim the Commander at the component and press the POWER key in...
Operating Instructions (primary manual)
Page 11
...can find a code number available for the desired component will work even after you set the component code number. Before starting the Search function Set each key varies according to the brand. If the Commander does not seem to be displayed. Notes on keys which have "learned" a remote control signal already... If another signal has already been programmed on the touch-key display When you set a component code number, only the keys that have been...
Operating Instructions (primary manual)
Page 12
... Commander at the component and press the POWER key. Note It is displayed on the display. 2 Press the Component Select button for the desired component. Setting the Code for VD, CD, MD, TAPE), go to Step 5. Press CHANNEL + to go to the next code number. If it doesn't, repeat Steps 3 and 4. 5 Press the ENTER key. When the remote...
Operating Instructions (primary manual)
Page 13
... on and the keys for operating the selected component are displayed. Operating Your Components with the Remote Commander When you operate a non-Sony component, make sure you started searching. If you press the DISPLAY key before the code number is set Press the DISPLAY key in Step 2 and 5. The code number and "ENTER" appear twice. To check which you set...
Operating Instructions (primary manual)
Page 16
... component code number (page 8). Note Some specific remote control signals may not be learned. You can also use the following "learning" procedure to "teach" any of the programmable buttons and keys to operate the functions of the Commander 1 Place the RM-AV2100 head to head with your component about 2 - 4 inches (5 - 10 cm) away RM-AV2100 2 While pressing COMMANDER OFF, press the Component...
Operating Instructions (primary manual)
Page 25
...a consecutive operation steps. In this button. Tips for the series of commands will be programmed to set the entire program from where you let off. • If a SYSTEM CONTROL button has already "learned" a remote control signal (see page 30). Notes • If you interrupt the...• During Setting mode, the RESET key is not displayed and you have programmed all the keys, press COMMANDER OFF. About the interval between operation steps You can change the component code number (page 8) or program a new signal by mistake, start again from Step 1. 3 Press key(s) or button...
Operating Instructions (primary manual)
Page 29
...point for over two minutes, the setting mode ends and the series of commands will be programmed to that has been programmed with the series of commands of its program are cleared, all the component names flash. If you clear the System Control function from where you let...clear the programmed commands on the display.) • You can program a signal for a Component Select button by "learning" (page 32) for which a System Control function has been programmed, but the Power-On function cannot be used . You can not continue from the button, you change the component code number (page 8) or...
Operating Instructions (primary manual)
Page 35
... two CD players, you release the buttons.) To cancel the System Power-Off function Repeat the procedure above. Continued 35 The component code number will be controlled (page 14, 22) even when you use the VCR3 button as the Component Select button for your second CD player. and VOLUME +. 1 While pressing COMMANDER OFF, press CHANNEL -
Operating Instructions (primary manual)
Page 36
... 7: MD 8: TV 9: CBL 0: DVD A: TUNER B: DSP 4 •If the newly assigned component is a Sony component, press COMMANDER OFF to finish this procedure. •If you need to set the component code, follow the steps on pages 16 and 17. and VCR3. 3 Press the ENTER key. The number 0 - 9, "A", "B" and "ENTER" flash. 2 Press one of the keys or buttons...
Operating Instructions (primary manual)
Page 48
... change, add, or clear any of your settings - When the preset lock is on If you can lock the Commander so that you try to set a component code number (page 8) or perform learning for the Component Select buttons (page 32), "NG" will flash on the display. 48 To unlock the preset lock To unlock the...
Operating Instructions (primary manual)
Page 52
... also changed to the same type ("CHANGE 2"). • The number of touch-key displays: the fullfunction display and the basic-function display. and basic-function displays. "CHANGE 1" appears when the fullfunction display is selected. For components that have few keys in the full- You can modify the ... display by setting only the desired keys on it (See "To display only the desired keys."). Changing the TouchKey Display Each Component Select button has two types of keys displayed on the fullfunction display varies according to the component codes preset for the Component Select buttons.
Operating Instructions (primary manual)
Page 55
... the items below. If the code that there are no obstructions between the Commander and the component. • Power on the components first, if necessary. • Make sure you have problems setting up the Commander as described in the supplied "Component Code Numbers". • Some features may interfere with a code number that the component has infrared remote capability. In this case, the...
Operating Instructions (primary manual)
Page 56
...be set a longer interval. 56 Clear the learned signals (page 34, 40) and try placing the components as close to receive commands (page 27). • The component codes are some keys, on the display for that key using the learning function. Clear the learned signals (page... learned keys (page 20), then carry out learning operations. See the supplied "Component Code Numbers" and try setting the component codes again (page 8). • The data have been programmed for the Component Select button of commands is on page 44) and try the learning procedure again (page 16). •...
Operating Instructions (primary manual)
Page 76
..., 34, 40 System Control function 26, 29 Code number 8 Component Select buttons assigning other components 35 copying settings 37 programming a signal 31 programming System Control function 28 receiving data 43 setting Power-On function 31 transferring data 41 COMMANDER OFF button 7 Copying data to another commander 41 settings of Component Select buttons 37 E Erasing See "Clearing/ Changing...