Operating Instructions (primary manual)
Page 6
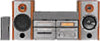
... of the speakers to stabilize the speakers and prevent them from battery leakage. When the remote no longer operates the system, replace both batteries with an adapter). Note If you press 1/u, the system turns on the plug does not fit your local power line voltage. When you do ...into the remote ] } } ] Tip With normal use the remote for models equipped with new ones. VOLTAGE SELECTOR 230 - 240V To attach the speaker pads Attach the supplied speaker pads to the bottom of time, remove the batteries to the super woofer connector. To connect optional components See page ...
... of the speakers to stabilize the speakers and prevent them from battery leakage. When the remote no longer operates the system, replace both batteries with an adapter). Note If you press 1/u, the system turns on the plug does not fit your local power line voltage. When you do ...into the remote ] } } ] Tip With normal use the remote for models equipped with new ones. VOLTAGE SELECTOR 230 - 240V To attach the speaker pads Attach the supplied speaker pads to the bottom of time, remove the batteries to the super woofer connector. To connect optional components See page ...
Operating Instructions (primary manual)
Page 8
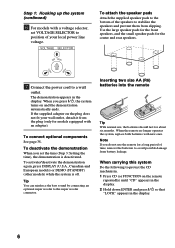
...feature works only for Dolby Pro Logic Surround sound. 8 The test tone is heard from each speaker. TONE on the remote. TONE on the remote to adjust the volume. The test tone turns off automatically, press T. TONE when you turn VOLUME (or press VOLUME +/-... test tone. PRO LOGIC - + 0 ) ≠ + - + g 2,4 1 3 · ª· ª· =+ p 0 ) P V B b v · p n 1 Press PRO LOGIC. on the remote to continue. Tips • If you are done adjusting. Step 2: Setting up your listening position, press CENTER LEVEL (+/-) and REAR LEVEL (+/-) on the...
...feature works only for Dolby Pro Logic Surround sound. 8 The test tone is heard from each speaker. TONE on the remote. TONE on the remote to adjust the volume. The test tone turns off automatically, press T. TONE when you turn VOLUME (or press VOLUME +/-... test tone. PRO LOGIC - + 0 ) ≠ + - + g 2,4 1 3 · ª· ª· =+ p 0 ) P V B b v · p n 1 Press PRO LOGIC. on the remote to continue. Tips • If you are done adjusting. Step 2: Setting up your listening position, press CENTER LEVEL (+/-) and REAR LEVEL (+/-) on the...
Operating Instructions (primary manual)
Page 12
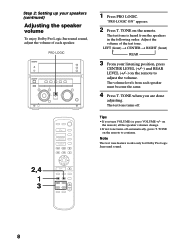
...; § § Press the same button to close the disc tray. If a disc is lit green. When you press · (or CD · on the remote), play up . Basic Operations Playing a CD -
...; § § Press the same button to close the disc tray. If a disc is lit green. When you press · (or CD · on the remote), play up . Basic Operations Playing a CD -
Operating Instructions (primary manual)
Page 13
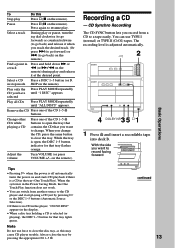
... DISCS" appears. Adjust the volume Turn VOLUME (or press VOLUME +/- Tips • Pressing · when the power is off automatically turns the power on the remote) during play and release it at the desired point. Recording a CD - Select a CD Press a DISC 1~5 button (or D. Play only the CD you... playing a CD just by pressing the appropriate CD 1~5 §. Play all CDs Press PLAY MODE repeatedly until "1 DISC" appears. When the system is open the tray that contains the CD that tray flashes orange. CD Synchro Recording The CD SYNC button lets you reach the desired track...
... DISCS" appears. Adjust the volume Turn VOLUME (or press VOLUME +/- Tips • Pressing · when the power is off automatically turns the power on the remote) during play and release it at the desired point. Recording a CD - Select a CD Press a DISC 1~5 button (or D. Play only the CD you... playing a CD just by pressing the appropriate CD 1~5 §. Play all CDs Press PLAY MODE repeatedly until "1 DISC" appears. When the system is open the tray that contains the CD that tray flashes orange. CD Synchro Recording The CD SYNC button lets you reach the desired track...
Operating Instructions (primary manual)
Page 15
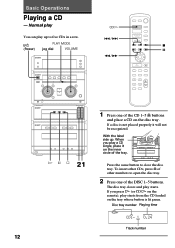
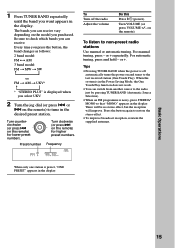
...display. Be sure to check which bands you can receive vary depending on the model you purchased. Turn counterclockwise (or press = ≠ on the remote) for higher preset numbers. There will be no stereo effect, but the reception will improve. Press the button again to non-preset radio stations Use...press - 1 Press TUNER BAND repeatedly until the band you select UKV. 2 Turn the jog dial (or press = or + on the remote) to tune in the desired preset station. When the system is in the Power Saving Mode, the One Touch Play function does not work. • You can switch from another source...
...display. Be sure to check which bands you can receive vary depending on the model you purchased. Turn counterclockwise (or press = ≠ on the remote) for higher preset numbers. There will be no stereo effect, but the reception will improve. Press the button again to non-preset radio stations Use...press - 1 Press TUNER BAND repeatedly until the band you select UKV. 2 Turn the jog dial (or press = or + on the remote) to tune in the desired preset station. When the system is in the Power Saving Mode, the One Touch Play function does not work. • You can switch from another source...

Operating Instructions (primary manual)
Page 17
... repeating the sequence five times. ***Relay play the reverse side. To select either deck A or B, press DECK A ª· or DECK B ª· (on the remote). 0/) * AMS (Automatic Music Sensor) 1/u (Power) VOLUME · ª· ª· =+ p 0 ) P V B b v · p p VOLUME +/- Select ß** to play always follows the following sequence: Deck A (front side...
... repeating the sequence five times. ***Relay play the reverse side. To select either deck A or B, press DECK A ª· or DECK B ª· (on the remote). 0/) * AMS (Automatic Music Sensor) 1/u (Power) VOLUME · ª· ª· =+ p 0 ) P V B b v · p p VOLUME +/- Select ß** to play always follows the following sequence: Deck A (front side...
Operating Instructions (primary manual)
Page 18
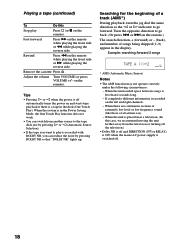
... noise by pressing · or ª (Automatic Source Selection). • If the tape you want to play Press π (or p on the remote). When the system is in the display. When the unrecorded space between songs is recorded on the left and right channels. - Adjust the volume Turn VOLUME (or... press VOLUME +/- Tips • Pressing · or ª when the power is off . 18 on the remote while playing the front side or 0 ...
... noise by pressing · or ª (Automatic Source Selection). • If the tape you want to play Press π (or p on the remote). When the system is in the display. When the unrecorded space between songs is recorded on the left and right channels. - Adjust the volume Turn VOLUME (or... press VOLUME +/- Tips • Pressing · or ª when the power is off . 18 on the remote while playing the front side or 0 ...

Operating Instructions (primary manual)
Page 22
... Play during normal play by pressing PLAY MODE repeatedly to select "SHUFFLE". • To skip a track, turn the jog dial clockwise (or press + on the remote). Programming the CD tracks -- To select a desired CD Press DISC 1~5. Playing the CD tracks in the order you want them to be played. 1/u (power) 4 21...
... Play during normal play by pressing PLAY MODE repeatedly to select "SHUFFLE". • To skip a track, turn the jog dial clockwise (or press + on the remote). Programming the CD tracks -- To select a desired CD Press DISC 1~5. Playing the CD tracks in the order you want them to be played. 1/u (power) 4 21...
Operating Instructions (primary manual)
Page 23
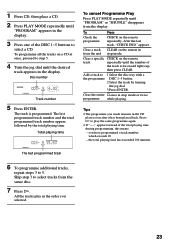
... the jog dial until the desired track appears in the display. After the last track, "CHECK END" appears. Clear a specific track CHECK on the remote in from the display. Clear the entire π once in the order you selected. 23 you made remains in the CD player even after it... until "PROGRAM" appears in the display. 3 Press one of the DISC 1~5 buttons to 5. The track is programmed. Clear a track CLEAR on the remote repeatedly until the number of the track to play in stop mode. Tips • The programme you have programmed a track number which exceeds 20 - To...
... the jog dial until the desired track appears in the display. After the last track, "CHECK END" appears. Clear a specific track CHECK on the remote in from the display. Clear the entire π once in the order you selected. 23 you made remains in the CD player even after it... until "PROGRAM" appears in the display. 3 Press one of the DISC 1~5 buttons to 5. The track is programmed. Clear a track CLEAR on the remote repeatedly until the number of the track to play in stop mode. Tips • The programme you have programmed a track number which exceeds 20 - To...
Operating Instructions (primary manual)
Page 26
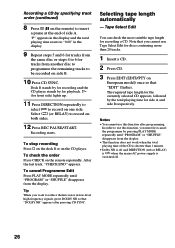
... want to insert a pause at the end of the CD is shorter than 20 tracks. 1 Insert a CD. 2 Press CD. 3 Press EDIT (EDIT/PTY on the remote repeatedly. Deck B stands by for recording and the CD player stands by for playback. · (for tracks from the display. Tip When you cannot use... stop recording Press π on the deck B or on side B. 10 Press CD SYNC. Recording a CD by specifying track order (continued) 8 Press ∏ (P on the remote) to reduce the hiss noise in the display. 9 Repeat steps 5 and 6 for tracks from the same disc or steps 4 to 6 for front side) lights up...
... want to insert a pause at the end of the CD is shorter than 20 tracks. 1 Insert a CD. 2 Press CD. 3 Press EDIT (EDIT/PTY on the remote repeatedly. Deck B stands by for recording and the CD player stands by for playback. · (for tracks from the display. Tip When you cannot use... stop recording Press π on the deck B or on side B. 10 Press CD SYNC. Recording a CD by specifying track order (continued) 8 Press ∏ (P on the remote) to reduce the hiss noise in the display. 9 Repeat steps 5 and 6 for tracks from the same disc or steps 4 to 6 for front side) lights up...
Operating Instructions (primary manual)
Page 28
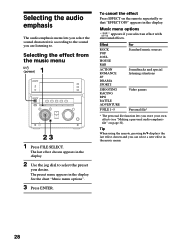
... appears in the display. 2 Use the jog dial to select the preset you store your own effects (see "Making a personal audio emphasis file" on the remote repeatedly so that "EFFECT OFF" appears in the display. To cancel the effect Press EFFECT on page 32). Effect ROCK POP SOUL HOUSE R&B ACTION ROMANCE...". 3 Press ENTER. The preset name appears in the music menu. 28 Music menu options " SUR " appears if you are listening to. Tip When using the remote, pressing V/v displays the last effect chosen and you can select a new effect in the display.
... appears in the display. 2 Use the jog dial to select the preset you store your own effects (see "Making a personal audio emphasis file" on the remote repeatedly so that "EFFECT OFF" appears in the display. To cancel the effect Press EFFECT on page 32). Effect ROCK POP SOUL HOUSE R&B ACTION ROMANCE...". 3 Press ENTER. The preset name appears in the music menu. 28 Music menu options " SUR " appears if you are listening to. Tip When using the remote, pressing V/v displays the last effect chosen and you can select a new effect in the display.
Operating Instructions (primary manual)
Page 29
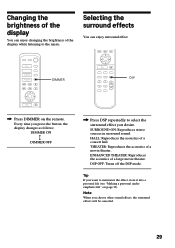
...: DIMMER ON DIMMER OFF ˜ / Press DSP repeatedly to memorize the effect, store it into a personal file (see "Making a personal audio emphasis file" on the remote.
...: DIMMER ON DIMMER OFF ˜ / Press DSP repeatedly to memorize the effect, store it into a personal file (see "Making a personal audio emphasis file" on the remote.

Operating Instructions (primary manual)
Page 35
... 70min n ... SLEEP · ª· / Press SLEEP on the remote. n 10min n OFF n AUTO ... Sleep Timer You can let the system turn off at the preset time, so you can preset the time to be... turned off Select the time you press the button, the minute display (the turn off by pressing SLEEP on the remote.... NONE Any programmeming not defined above. To check the remaining time Press SLEEP on the remote repeatedly until "SLEEP OFF" appears. 35 DOCUMENTARY Investigative features. JAZZ Jazz programmes. You can...
... 70min n ... SLEEP · ª· / Press SLEEP on the remote. n 10min n OFF n AUTO ... Sleep Timer You can let the system turn off at the preset time, so you can preset the time to be... turned off Select the time you press the button, the minute display (the turn off by pressing SLEEP on the remote.... NONE Any programmeming not defined above. To check the remaining time Press SLEEP on the remote repeatedly until "SLEEP OFF" appears. 35 DOCUMENTARY Investigative features. JAZZ Jazz programmes. You can...
Operating Instructions (primary manual)
Page 38
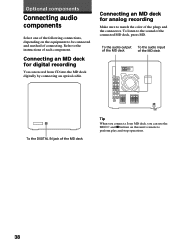
...and p buttons on the equipment to the sound of the connected MD deck, press MD. Optional components Connecting audio components Select one of the following connections, depending on this unit's remote to the instructions of each component. To the audio output To the audio input of the MD deck of the MD deck To... the DIGITAL IN jack of the MD deck Tip When you connect a Sony MD deck, you can record from CD into...
...and p buttons on the equipment to the sound of the connected MD deck, press MD. Optional components Connecting audio components Select one of the following connections, depending on this unit's remote to the instructions of each component. To the audio output To the audio input of the MD deck of the MD deck To... the DIGITAL IN jack of the MD deck Tip When you connect a Sony MD deck, you can record from CD into...
Operating Instructions (primary manual)
Page 44
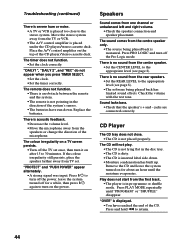
...place the speaker farther away from the centre speaker. •Set the CENTER LEVEL to 30 minutes. Press 1/u to turn off the power, leave the system turned off for about an hour until "PROGRAM" or "SHUFFLE" disappear. There is placed under the CD player/stereo cassette deck. Place the A/V control ...noise. •A TV or VCR is placed too close . •The CD is not placed properly. The remote does not function. •There is an obstacle between the remote and the system. •The remote is not pointing in the disc tray. •The CD is dirty. •The CD is acoustic feedback...
...place the speaker farther away from the centre speaker. •Set the CENTER LEVEL to 30 minutes. Press 1/u to turn off the power, leave the system turned off for about an hour until "PROGRAM" or "SHUFFLE" disappear. There is placed under the CD player/stereo cassette deck. Place the A/V control ...noise. •A TV or VCR is placed too close . •The CD is not placed properly. The remote does not function. •There is an obstacle between the remote and the system. •The remote is not pointing in the disc tray. •The CD is dirty. •The CD is acoustic feedback...
Operating Instructions (primary manual)
Page 48
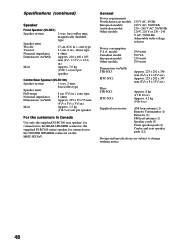
... 240 V AC, 50/60 Hz Adjustable with voltage selector Power consumption U.S.A. Specifications (continued) Speaker Front Speaker (SS-NX1) Speaker system Speaker units Woofer: Tweeter: Nominal impedance Dimensions (w/h/d) Mass 2-way, bass-reflex type, magnetically shielded type 17 cm (63/4 in.),...Supplied accessories: AM loop antenna (1) Remote Commander (1) Batteries (2) FM lead antenna (1) Speaker cords (5) Front speaker pads (8) Center and rear speaker pads (12) Design and specifications are subject to the CENTER SPEAKER connector on the MHC-NX3AV. model: Canadian model: European model...
... 240 V AC, 50/60 Hz Adjustable with voltage selector Power consumption U.S.A. Specifications (continued) Speaker Front Speaker (SS-NX1) Speaker system Speaker units Woofer: Tweeter: Nominal impedance Dimensions (w/h/d) Mass 2-way, bass-reflex type, magnetically shielded type 17 cm (63/4 in.),...Supplied accessories: AM loop antenna (1) Remote Commander (1) Batteries (2) FM lead antenna (1) Speaker cords (5) Front speaker pads (8) Center and rear speaker pads (12) Design and specifications are subject to the CENTER SPEAKER connector on the MHC-NX3AV. model: Canadian model: European model...


