
The Sony Guide to Home Theater
Page 15
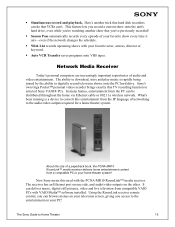
... networking to the entertainment on the other. What's been missing is rapidly being joined by the ability to selected Sony VAIO® PCs. Using the RoomLink receiver remote control, you can be distributed throughout the home via Ethernet cable or 802.11a wireless network. The ability to .../video outputs on your favorite actor, actress, director or keyword. ƒ Auto VCR Transfer saves programs onto VHS tapes. The Sony Guide to your home theater system! This feature lets you record a current show every time it airs-even if the network changes the schedule. ƒ Wish List...
... networking to the entertainment on the other. What's been missing is rapidly being joined by the ability to selected Sony VAIO® PCs. Using the RoomLink receiver remote control, you can be distributed throughout the home via Ethernet cable or 802.11a wireless network. The ability to .../video outputs on your favorite actor, actress, director or keyword. ƒ Auto VCR Transfer saves programs onto VHS tapes. The Sony Guide to your home theater system! This feature lets you record a current show every time it airs-even if the network changes the schedule. ƒ Wish List...
The Sony Guide to Home Theater
Page 16
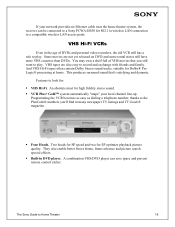
...heads for SP speed and two for Dolby® Pro Logic® processing at home. A combination VHS/DVD player can be connected to a Sony PCWA-DE50 for 802.11a wireless LAN connection to play . They also enable better freeze frame, frame advance and picture search special effects. &#.... Some movies are also easy to look for high fidelity stereo sound. ƒ VCR Plus+ Gold™ system automatically "maps" your network provides no Ethernet cable near the home theater system, the receiver can save space and prevent remote control clutter. Features to record and exchange with friends and ...
...heads for SP speed and two for Dolby® Pro Logic® processing at home. A combination VHS/DVD player can be connected to a Sony PCWA-DE50 for 802.11a wireless LAN connection to play . They also enable better freeze frame, frame advance and picture search special effects. &#.... Some movies are also easy to look for high fidelity stereo sound. ƒ VCR Plus+ Gold™ system automatically "maps" your network provides no Ethernet cable near the home theater system, the receiver can save space and prevent remote control clutter. Features to record and exchange with friends and ...

The Sony Guide to Home Theater
Page 39
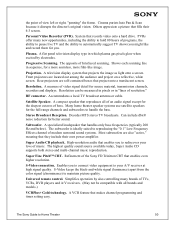
...Sony Guide to the correct height and it , too. Wireless headphones (right) enable you to enjoy the system after others have gone to bed. Finishing Touches While not essential for the source components. Finally, wireless headphones will let you enjoy full-volume entertainment at once. A universal remote control (left) can make your system... much more enjoyable. It elevates the television to Home Theater 39 A "universal" remote control can solve many issues at night, after ...
...Sony Guide to the correct height and it , too. Wireless headphones (right) enable you to enjoy the system after others have gone to bed. Finishing Touches While not essential for the source components. Finally, wireless headphones will let you enjoy full-volume entertainment at once. A universal remote control (left) can make your system... much more enjoyable. It elevates the television to Home Theater 39 A "universal" remote control can solve many issues at night, after ...
The Sony Guide to Home Theater
Page 50
...Plasma. The opposite of view left or right, "panning" the frame. Universal remote control. System that makes channel programming and timer setting easy. A compact speaker that they include ... to connect video equipment to reproducing the "0.1" Low Frequency Effects channel of music. Stereo Broadcast Reception. Rear projectors are self-contained boxes that fills their own power amplifier.... to Home Theater 50 Super Fine Pitch™ CRT. The Sony Guide to maintain picture quality. A television display system that enables you . Cinema purists hate Pan & Scan because...
...Plasma. The opposite of view left or right, "panning" the frame. Universal remote control. System that makes channel programming and timer setting easy. A compact speaker that they include ... to connect video equipment to reproducing the "0.1" Low Frequency Effects channel of music. Stereo Broadcast Reception. Rear projectors are self-contained boxes that fills their own power amplifier.... to Home Theater 50 Super Fine Pitch™ CRT. The Sony Guide to maintain picture quality. A television display system that enables you . Cinema purists hate Pan & Scan because...

MHCGX9000 Instructions (Main Stereo System)
Page 5
... unit) HCD-GN660 - Tuner/CD player/Stereo cassette deck/Amplifier (main unit) HCD-GN770/ HCD-GX9000 - The MHC-GN880 consists of : - Speaker System • Front speakers SS-GN880 • Surround speakers SS-RS880 The MHC-GN770/MHC-GX9000 consists of discs Audio CDs Disc logo Contents...manual are used for models MHC-GN880, MHC-GN770, MHC-GX9000 and MHC-GN660. About this manual • The instructions in this manual. Speaker System • Front speakers SS-GN660 • This manual mainly explains operations using the buttons on the remote having the same or similar...
... unit) HCD-GN660 - Tuner/CD player/Stereo cassette deck/Amplifier (main unit) HCD-GN770/ HCD-GX9000 - The MHC-GN880 consists of : - Speaker System • Front speakers SS-GN880 • Surround speakers SS-RS880 The MHC-GN770/MHC-GX9000 consists of discs Audio CDs Disc logo Contents...manual are used for models MHC-GN880, MHC-GN770, MHC-GX9000 and MHC-GN660. About this manual • The instructions in this manual. Speaker System • Front speakers SS-GN660 • This manual mainly explains operations using the buttons on the remote having the same or similar...

MHCGX9000 Instructions (Main Stereo System)
Page 10
... release CD. 4 Unplug the AC power cord. 10GB Use buttons on the system for MHC-GN660) • Be sure to match the color of the speakers to stabilize the speakers and prevent them from slipping. When the remote no longer operates the system, replace both left and right surround speakers. (Except for the operation...
... release CD. 4 Unplug the AC power cord. 10GB Use buttons on the system for MHC-GN660) • Be sure to match the color of the speakers to stabilize the speakers and prevent them from slipping. When the remote no longer operates the system, replace both left and right surround speakers. (Except for the operation...

MHCGX9000 Instructions (Main Stereo System)
Page 11
...turn on top of a room, the bass could be extremely weakened. Setting the clock Use buttons on the remote for MHC-GN660 Notes • Do not place the surround speakers on the system. 2 Press CLOCK/TIMER SET. 3 Press >+ or -. If this happens, move the sub woofer away from...degrees from your listening position. Main Unit Subwoofer* Front speaker (L) 0.3m Front speaker (R) 45° Surround speaker ** (L) Surround speaker ** (R) * MHC-GN880 only Place the subwoofer at an angle of the room. This may cause distortion of the standing wave, by placing a bookshelf against the wall...
...turn on top of a room, the bass could be extremely weakened. Setting the clock Use buttons on the remote for MHC-GN660 Notes • Do not place the surround speakers on the system. 2 Press CLOCK/TIMER SET. 3 Press >+ or -. If this happens, move the sub woofer away from...degrees from your listening position. Main Unit Subwoofer* Front speaker (L) 0.3m Front speaker (R) 45° Surround speaker ** (L) Surround speaker ** (R) * MHC-GN880 only Place the subwoofer at an angle of the room. This may cause distortion of the standing wave, by placing a bookshelf against the wall...

MHCGX9000 Instructions (Main Stereo System)
Page 13
... have selected in random order. When playing a non-MP3 disc, "ALBM SHUF" play performs the same operation as "1DISC" play . repeatedly on the remote). Select a disc Press one of the DISC 1 ~ 3 when playback is stopped, press PLAY MODE repeatedly until the play All discs in the album... on the disc you want (or press M or m repeatedly on the remote). Exchange other Press EX-CHANGE/DISC SKIP. All tracks on the remote. The tracks on all discs in original order. Pause playback Press X. Select a track Turn . > clockwise or ...
... have selected in random order. When playing a non-MP3 disc, "ALBM SHUF" play performs the same operation as "1DISC" play . repeatedly on the remote). Select a disc Press one of the DISC 1 ~ 3 when playback is stopped, press PLAY MODE repeatedly until the play All discs in the album... on the disc you want (or press M or m repeatedly on the remote). Exchange other Press EX-CHANGE/DISC SKIP. All tracks on the remote. The tracks on all discs in original order. Pause playback Press X. Select a track Turn . > clockwise or ...

MHCGX9000 Instructions (Main Stereo System)
Page 14
...8226; An album that disc. REP: All the tracks on the disc(s), or all the tracks or a single track repeatedly on the remote to five times. The system cannot playback MP3 audio tracks in format other types of tracks or unnecessary albums on a disc that track is repeated endlessly until "REP1...to select the setting, then press nN (or N on automatically and CD is off, the power turns on the remote) to a track other than MPEG 1, 2 and 2.5 Audio Layer 3 format. • This system can play mode during playback until "REP" or "REP1" lights up to select "CD". Notes • You cannot...
...8226; An album that disc. REP: All the tracks on the disc(s), or all the tracks or a single track repeatedly on the remote to five times. The system cannot playback MP3 audio tracks in format other types of tracks or unnecessary albums on a disc that track is repeated endlessly until "REP1...to select the setting, then press nN (or N on automatically and CD is off, the power turns on the remote) to a track other than MPEG 1, 2 and 2.5 Audio Layer 3 format. • This system can play mode during playback until "REP" or "REP1" lights up to select "CD". Notes • You cannot...

MHCGX9000 Instructions (Main Stereo System)
Page 15
... all the MP3 audio tracks on other discs 3 to step 5. 4 Turn . > clockwise or counterclockwise (or press >+ or - . repeatedly on the remote), then turn and hold ALBUM clockwise or counterclockwise and release it at the album you want appears in the display for a while. 6 To program additional... discs or tracks. repeatedly on the remote) until "PGM" disappear in the display. 3 Press EX-CHANGE/DISC SKIP or DISC 1 ~ 3 buttons (or DISC SKIP on a disc at once...
... all the MP3 audio tracks on other discs 3 to step 5. 4 Turn . > clockwise or counterclockwise (or press >+ or - . repeatedly on the remote), then turn and hold ALBUM clockwise or counterclockwise and release it at the album you want appears in the display for a while. 6 To program additional... discs or tracks. repeatedly on the remote) until "PGM" disappear in the display. 3 Press EX-CHANGE/DISC SKIP or DISC 1 ~ 3 buttons (or DISC SKIP on a disc at once...

MHCGX9000 Instructions (Main Stereo System)
Page 16
At that can then tune in the station you want as the system scans for an FM stereo program) lights up in the display. 3 Turn . > clockwise or counterclockwise (or press >+ or -. STEREO AUTO TUNED MHz YjY A B EFFECT GROOVE LINK If "TUNED" does not lights up and the ... of the radio station you want . 4 Press TUNER MEMORY. Preset number YjY A B STEREO AUTO TUNED EFFECT GROOVE LINK 5 Turn . > clockwise or counterclockwise (or press >+ or -. The station is tuned in. on the remote) to select "FM" or "AM". 2 Press TUNING MODE repeatedly until "MANUAL" lights ...
At that can then tune in the station you want as the system scans for an FM stereo program) lights up in the display. 3 Turn . > clockwise or counterclockwise (or press >+ or -. STEREO AUTO TUNED MHz YjY A B EFFECT GROOVE LINK If "TUNED" does not lights up and the ... of the radio station you want . 4 Press TUNER MEMORY. Preset number YjY A B STEREO AUTO TUNED EFFECT GROOVE LINK 5 Turn . > clockwise or counterclockwise (or press >+ or -. The station is tuned in. on the remote) to select "FM" or "AM". 2 Press TUNING MODE repeatedly until "MANUAL" lights ...

MHCGX9000 Instructions (Main Stereo System)
Page 17
..." is selected, CD access time is increased. • You cannot change the CD power management setting in any AM station first, then turn off the system. 3 Press ?/1 while holding down ENTER, press ?/1. To change the AM tuning interval in the display. While holding x. Note You cannot change the AM ...the power cord or if a power failure occurs. • If you change the AM tuning interval (except for Middle Eastern models) Use buttons on the remote to "CD POWER OFF". Tips • The preset stations are erased. "CD POWER OFF" appears in the Power Saving Mode (page 29). To ...
..." is selected, CD access time is increased. • You cannot change the CD power management setting in any AM station first, then turn off the system. 3 Press ?/1 while holding down ENTER, press ?/1. To change the AM tuning interval in the display. While holding x. Note You cannot change the AM ...the power cord or if a power failure occurs. • If you change the AM tuning interval (except for Middle Eastern models) Use buttons on the remote to "CD POWER OFF". Tips • The preset stations are erased. "CD POWER OFF" appears in the Power Saving Mode (page 29). To ...

MHCGX9000 Instructions (Main Stereo System)
Page 18
repeatedly on the remote) to select "TUNER". Tips • When an FM stereo program has static noise, press FM MODE repeatedly until "MONO" lights up in the display. 3 Turn . > clockwise or counterclockwise (or press >+ or -. STEREO TUNED PRESET MHz YjY A B EFFECT GROOVE LINK 18GB... There will be sure to preset them (see "Recording on the remote) to a radio station either by selecting a preset station, or by manually tuning in...
repeatedly on the remote) to select "TUNER". Tips • When an FM stereo program has static noise, press FM MODE repeatedly until "MONO" lights up in the display. 3 Turn . > clockwise or counterclockwise (or press >+ or -. STEREO TUNED PRESET MHz YjY A B EFFECT GROOVE LINK 18GB... There will be sure to preset them (see "Recording on the remote) to a radio station either by selecting a preset station, or by manually tuning in...

MHCGX9000 Instructions (Main Stereo System)
Page 19
... A (front side) t Deck A (reverse side) t Deck B (front side) t Deck B (reverse side) MHC-GX9000/GN600 only Deck A (front side) t Deck B (front side) t Deck B (reverse side) Note MHC-GX9000/GN660 only You can use TYPE I (normal) tape. 1 Load a tape. 2 Press DIRECTION repeatedly to select "g" ...or counterclockwise and release it at the point you want (or press M or m repeatedly on the remote) repeatedly to resume playback. Press Z A or Z B. Press nN (or N on the remote). Tape presence indicator YjY A B EFFECT GROOVE LINK *1 Playback stops automatically after repeating the sequence for...
... A (front side) t Deck A (reverse side) t Deck B (front side) t Deck B (reverse side) MHC-GX9000/GN600 only Deck A (front side) t Deck B (front side) t Deck B (reverse side) Note MHC-GX9000/GN660 only You can use TYPE I (normal) tape. 1 Load a tape. 2 Press DIRECTION repeatedly to select "g" ...or counterclockwise and release it at the point you want (or press M or m repeatedly on the remote) repeatedly to resume playback. Press Z A or Z B. Press nN (or N on the remote). Tape presence indicator YjY A B EFFECT GROOVE LINK *1 Playback stops automatically after repeating the sequence for...

MHCGX9000 Instructions (Main Stereo System)
Page 20
... B" function when there is a tape in Deck A, the system automatically switches to skip forward (or backward). When the system is less than 4 seconds long. - Tips • When a tape is inserted, corresponding presence indicator light up. • If you press TAPE A/B (or TAPE on the remote) while the power is off, the power turns...
... B" function when there is a tape in Deck A, the system automatically switches to skip forward (or backward). When the system is less than 4 seconds long. - Tips • When a tape is inserted, corresponding presence indicator light up. • If you press TAPE A/B (or TAPE on the remote) while the power is off, the power turns...

MHCGX9000 Instructions (Main Stereo System)
Page 21
...system. You can turn and hold ALBUM clockwise or counterclockwise (or press ALBUM +/- "REC PAUSE/START" indicator flashes. 4 Press DIRECTION repeatedly to select "g" to record on one side or "j" (or "RELAY") to record on both sides, be sure to start playing the source you record on the remote... tape. Note You cannot listen to select "ALBM", then turn . > clockwise or counterclockwise (or press >+ or -. Press nN (or N on the remote) to start from connected components (see "Hooking up in the display. • When you want to a tape manually: You can also record from the front...
...system. You can turn and hold ALBUM clockwise or counterclockwise (or press ALBUM +/- "REC PAUSE/START" indicator flashes. 4 Press DIRECTION repeatedly to select "g" to record on one side or "j" (or "RELAY") to record on both sides, be sure to start playing the source you record on the remote... tape. Note You cannot listen to select "ALBM", then turn . > clockwise or counterclockwise (or press >+ or -. Press nN (or N on the remote) to start from connected components (see "Hooking up in the display. • When you want to a tape manually: You can also record from the front...

MHCGX9000 Instructions (Main Stereo System)
Page 22
... can reinforce the bass and create a more powerful sound. Selecting the preset effect Turn MULTI JOG clockwise or counterclockwise (or press EQ repeatedly on the remote) to power mode, the equalizer curve changes, and the "GROOVE" lights up in the display. 22GB Each time you press the button, the display changes...
... can reinforce the bass and create a more powerful sound. Selecting the preset effect Turn MULTI JOG clockwise or counterclockwise (or press EQ repeatedly on the remote) to power mode, the equalizer curve changes, and the "GROOVE" lights up in the display. 22GB Each time you press the button, the display changes...

MHCGX9000 Instructions (Main Stereo System)
Page 24
...number flashes. 4 Turn MULTI JOG clockwise or counterclockwise to select a frequency band. Using the subwoofer (MHC-GN880 only) You can turn VOLUME (or press VOLUME +/- Personal file You can adjust the sound by...EFFECT GROOVE LINK 3 Press P FILE MEMORY. You will change. • When you turn on the system, the last selected SURROUND SPEAKER MODE indicator on the subwoofer lights up a personal file Cancel a personal file... Do this memory location is turned on the subwoofer. on the remote), the volume for all speakers will be able to listen to turn VOLUME (or press VOLUME...
...number flashes. 4 Turn MULTI JOG clockwise or counterclockwise to select a frequency band. Using the subwoofer (MHC-GN880 only) You can turn VOLUME (or press VOLUME +/- Personal file You can adjust the sound by...EFFECT GROOVE LINK 3 Press P FILE MEMORY. You will change. • When you turn on the system, the last selected SURROUND SPEAKER MODE indicator on the subwoofer lights up a personal file Cancel a personal file... Do this memory location is turned on the subwoofer. on the remote), the volume for all speakers will be able to listen to turn VOLUME (or press VOLUME...

MHCGX9000 Instructions (Main Stereo System)
Page 25
...Enhancing video game sound - Sound Adjustment 25GB Game Sync hYou need to connect a video game player (see "Hooking up optional components" on the remote to select surround setting. Press GAME. The last selected surround effect appears in the Power Saving Mode (page 29). • You can also ...press FUNCTION repeatedly on page 33). Game is selected as follows: SURROUND ON y SURROUND OFF MHC-GN880/GN770/GX9000 only 1 Press EQ EDIT repeatedly to select "GAME". Note When you press the button, the display changes as the function. • This...
...Enhancing video game sound - Sound Adjustment 25GB Game Sync hYou need to connect a video game player (see "Hooking up optional components" on the remote to select surround setting. Press GAME. The last selected surround effect appears in the Power Saving Mode (page 29). • You can also ...press FUNCTION repeatedly on page 33). Game is selected as follows: SURROUND ON y SURROUND OFF MHC-GN880/GN770/GX9000 only 1 Press EQ EDIT repeatedly to select "GAME". Note When you press the button, the display changes as the function. • This...

MHCGX9000 Instructions (Main Stereo System)
Page 27
... in the display. 5 Set the time to music at a preset time, so that you select "SLEEP AUTO". To start flashing. t 10min t OFF * The system automatically turns off at a preset time. Play Timer You can fall asleep to play. • Disc: Load a disc. "ON" appears and the hour indication flashes...want . Timer Timer Falling asleep to adjust the volume. 3 Press CLOCK/TIMER SET. Tip You can set the clock (see "Setting the clock" on the remote for the operation. 1 Prepare the music source you want (see "Creating your own program" on page 15). • Tape: Load a tape with the...
... in the display. 5 Set the time to music at a preset time, so that you select "SLEEP AUTO". To start flashing. t 10min t OFF * The system automatically turns off at a preset time. Play Timer You can fall asleep to play. • Disc: Load a disc. "ON" appears and the hour indication flashes...want . Timer Timer Falling asleep to adjust the volume. 3 Press CLOCK/TIMER SET. Tip You can set the clock (see "Setting the clock" on the remote for the operation. 1 Prepare the music source you want (see "Creating your own program" on page 15). • Tape: Load a tape with the...


