
Operating Instructions
Page 2
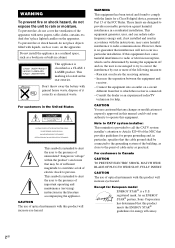
...for European model ENERGY STAR® is located on a circuit different from that this equipment. As an ENERGY STAR® partner, Sony Corporation has determined that to persons. WARNING To prevent fire or shock hazard, do not expose the unit to radio communications. And don...presence of optical instruments with liquids, such as a CLASS 1 LASER product. To prevent fire, do not place objects filled with this manual could void your authority to provide reasonable protection against harmful interference in a particular installation. This appliance is no guarantee that any changes ...
...for European model ENERGY STAR® is located on a circuit different from that this equipment. As an ENERGY STAR® partner, Sony Corporation has determined that to persons. WARNING To prevent fire or shock hazard, do not expose the unit to radio communications. And don...presence of optical instruments with liquids, such as a CLASS 1 LASER product. To prevent fire, do not place objects filled with this manual could void your authority to provide reasonable protection against harmful interference in a particular installation. This appliance is no guarantee that any changes ...
Operating Instructions
Page 3
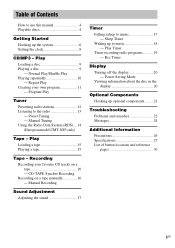
...optional components......... 21 Troubleshooting Problems and remedies 22 Messages 24 Additional Information Precautions 26 Specifications 27 List of Contents How to use this manual 4 Playable discs 4 Getting Started Hooking up to music 18 - Preset Tuning - CD-TAPE Synchro Recording Recording on a tape...12 Listening to music 17 - Play Loading a disc 9 Playing a disc 9 - Repeat Play Creating your favorite CD tracks on a tape manually 16 - Manual Tuning Using the Radio Data System (RDS).... 14 (European model CMT-NE5 only) Tape - Play Loading a tape 15 Playing a tape 15...
...optional components......... 21 Troubleshooting Problems and remedies 22 Messages 24 Additional Information Precautions 26 Specifications 27 List of Contents How to use this manual 4 Playable discs 4 Getting Started Hooking up to music 18 - Preset Tuning - CD-TAPE Synchro Recording Recording on a tape...12 Listening to music 17 - Play Loading a disc 9 Playing a disc 9 - Repeat Play Creating your favorite CD tracks on a tape manually 16 - Manual Tuning Using the Radio Data System (RDS).... 14 (European model CMT-NE5 only) Tape - Play Loading a tape 15 Playing a tape 15...
Operating Instructions
Page 4
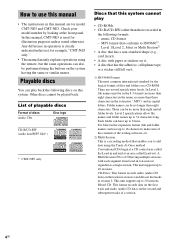
Check your model number by looking at a CD control area called Lead-out. There are for model CMT-NE5 and CMT-NE3. Level 2 specifications allow file names and folder names up to 8 trees. Each folder can have up to 16 characters) make sure of the contents of ... eight characters in the name, no more than three characters in the extension ".MP3") and in the text, for example, "CMT-NE5 only". • This manual mainly explains operations using the Track-At-Once method. For Joliet in session 2. In Level 1, file names must be no more than eight nested folder...
Check your model number by looking at a CD control area called Lead-out. There are for model CMT-NE5 and CMT-NE3. Level 2 specifications allow file names and folder names up to 8 trees. Each folder can have up to 16 characters) make sure of the contents of ... eight characters in the name, no more than three characters in the extension ".MP3") and in the text, for example, "CMT-NE5 only". • This manual mainly explains operations using the Track-At-Once method. For Joliet in session 2. In Level 1, file names must be no more than eight nested folder...
Operating Instructions
Page 10
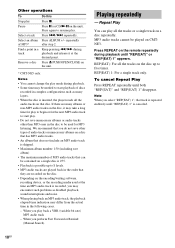
... for MP3 listening. Find a point in a Keep pressing m/M during playback until both "REP(EAT)" and "REP(EAT) 1" disappear. When you perform Fast Forward or Rewind (Manual Search) Playing repeatedly - REP(EAT) 1: For a single track only. Pause Press X (or CD/NX on the unit. * CMT-NE5 only. MP3 audio tracks cannot be...
... for MP3 listening. Find a point in a Keep pressing m/M during playback until both "REP(EAT)" and "REP(EAT) 1" disappear. When you perform Fast Forward or Rewind (Manual Search) Playing repeatedly - REP(EAT) 1: For a single track only. Pause Press X (or CD/NX on the unit. * CMT-NE5 only. MP3 audio tracks cannot be...
Operating Instructions
Page 12
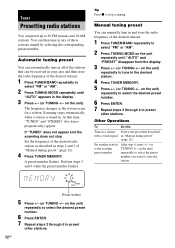
...or TUNING +/- If "TUNED" does not appear and the scanning does not stop scanning. A preset number flashes. Automatic tuning preset You can manually tune in and store the radio frequency of the desired stations. 1 Press TUNER/BAND repeatedly to stop Set the frequency of the desired radio...system scans for stereo program only) appear. Other Operations To Do this Tune in a station Follow the procedure described with a weak signal in . Manual tuning preset You can automatically tune in all of the stations that time, "TUNED" and "STEREO" (for a station. Tip Press x to ...
...or TUNING +/- If "TUNED" does not appear and the scanning does not stop scanning. A preset number flashes. Automatic tuning preset You can manually tune in and store the radio frequency of the desired stations. 1 Press TUNER/BAND repeatedly to stop Set the frequency of the desired radio...system scans for stereo program only) appear. Other Operations To Do this Tune in a station Follow the procedure described with a weak signal in . Manual tuning preset You can automatically tune in all of the stations that time, "TUNED" and "STEREO" (for a station. Tip Press x to ...
Operating Instructions
Page 13
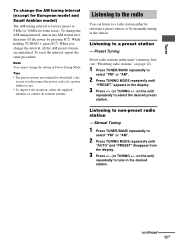
Manual Tuning 1 Press TUNER/BAND repeatedly to select "FM" or "AM". 2 Press TUNING MODE repeatedly until "AUTO" and "PRESET" disappear from the display. 3 Press +/- (or TUNING +/- ... kHz for about half a day even if you change the AM tuning interval, tune in any AM station first, then turn off the power by manually tuning in the desired station. To reset the interval, repeat the same procedure. Listening to tune in the station. Note You cannot change the AM...
Manual Tuning 1 Press TUNER/BAND repeatedly to select "FM" or "AM". 2 Press TUNING MODE repeatedly until "AUTO" and "PRESET" disappear from the display. 3 Press +/- (or TUNING +/- ... kHz for about half a day even if you change the AM tuning interval, tune in any AM station first, then turn off the power by manually tuning in the desired station. To reset the interval, repeat the same procedure. Listening to tune in the station. Note You cannot change the AM...
Operating Instructions
Page 14
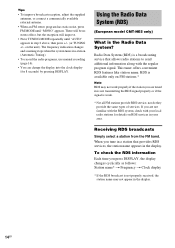
...; When an FM stereo program has static noise, press FM MODE until "AUTO" appears in a station (Automatic Tuning). • To record the radio programs, use manual recording (page 16). • You can change the display into the clock display (for details on RDS services in a station that allows radio stations to...
...; When an FM stereo program has static noise, press FM MODE until "AUTO" appears in a station (Automatic Tuning). • To record the radio programs, use manual recording (page 16). • You can change the display into the clock display (for details on RDS services in a station that allows radio stations to...
Operating Instructions
Page 16
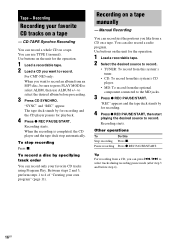
... order You can press ./> to record. • TUNER: To record from this system's tuner. • CD: To record from this Press x. Manual Recording You can record a whole CD on a tape manually - "REC" appears and the tape deck stands by for the operation. 1 Load a recordable tape. 2 Select the desired source to select tracks...
... order You can press ./> to record. • TUNER: To record from this system's tuner. • CD: To record from this Press x. Manual Recording You can record a whole CD on a tape manually - "REC" appears and the tape deck stands by for the operation. 1 Load a recordable tape. 2 Select the desired source to select tracks...
Operating Instructions
Page 21
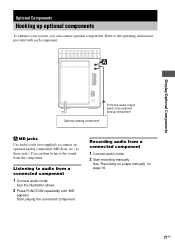
Listening to these jacks. See the illustration above. 2 Press FUNCTION repeatedly until "MD" appears. See "Recording on a tape manually" on page 16. 21GB Recording audio from a connected component 1 Connect audio cords. Optional Components Hooking up optional components To enhance your system, you can then ... jacks Use audio cords (not supplied) to connect an optional analog component (MD deck, etc.) to audio from a connected component 1 Connect audio cords. 2 Start recording manually.
Listening to these jacks. See the illustration above. 2 Press FUNCTION repeatedly until "MD" appears. See "Recording on a tape manually" on page 16. 21GB Recording audio from a connected component 1 Connect audio cords. Optional Components Hooking up optional components To enhance your system, you can then ... jacks Use audio cords (not supplied) to connect an optional analog component (MD deck, etc.) to audio from a connected component 1 Connect audio cords. 2 Start recording manually.

