
Instruction Manual
Page 1
Digital Single Lens Reflex Camera Instruction Manual DSLR-A500/A550 Preparing the camera Before your operation Shooting images Using the shooting function Using the viewing function Changing your setup Viewing images on 70% or more recycled paper using VOC (Volatile Organic Compound)-free vegetable oil based ink. Printed on a computer Printing images Additional information on this product and answers to frequently asked questions can be found at our Customer Support Website.
Digital Single Lens Reflex Camera Instruction Manual DSLR-A500/A550 Preparing the camera Before your operation Shooting images Using the shooting function Using the viewing function Changing your setup Viewing images on 70% or more recycled paper using VOC (Volatile Organic Compound)-free vegetable oil based ink. Printed on a computer Printing images Additional information on this product and answers to frequently asked questions can be found at our Customer Support Website.
Instruction Manual
Page 7
...and/or bright points (white, red, blue or green in color) that may appear in Live View mode, you must place the camera under the following conditions, except as exposure, white balance, or Drange optimizer, depending on copyright Television programs, films, videotapes, and other... medium. If sunlight is manufactured using the "Pixel mapping" function (page 163). When the camera warms up ) data to direct sunlight. These points are not actual images shot using a fully charged battery pack. 7 On the data specifications ...
...and/or bright points (white, red, blue or green in color) that may appear in Live View mode, you must place the camera under the following conditions, except as exposure, white balance, or Drange optimizer, depending on copyright Television programs, films, videotapes, and other... medium. If sunlight is manufactured using the "Pixel mapping" function (page 163). When the camera warms up ) data to direct sunlight. These points are not actual images shot using a fully charged battery pack. 7 On the data specifications ...

Instruction Manual
Page 8
... the accessories supplied 12 Preparing the battery pack 13 Attaching a lens 20 Inserting a memory card 22 Preparing the camera 25 Using the accessories supplied 27 Checking the number of recordable images 29 Cleaning 32 Identifying parts and screen indicators 35 Front side...) button ... 44 The functions selected by the Fn (Function) button ... 45 The functions selected by the MENU button 45 Shooting an image without camera shake 47 Correct posture 47 Using the SteadyShot function 48 Using a tripod 49 / Shooting with the automatic setting 50 Using the Face Detection function 52...
... the accessories supplied 12 Preparing the battery pack 13 Attaching a lens 20 Inserting a memory card 22 Preparing the camera 25 Using the accessories supplied 27 Checking the number of recordable images 29 Cleaning 32 Identifying parts and screen indicators 35 Front side...) button ... 44 The functions selected by the Fn (Function) button ... 45 The functions selected by the MENU button 45 Shooting an image without camera shake 47 Correct posture 47 Using the SteadyShot function 48 Using a tripod 49 / Shooting with the automatic setting 50 Using the Face Detection function 52...

Instruction Manual
Page 11
... reduction setting 132 Changing the function of the AEL button 133 Changing other settings 134 Setting the LCD monitor 135 Confirming the version of the camera 137 Resetting to the default 138 Viewing images Using your computer 140 on a computer Using the software 147 Printing images Specifying DPOF 152 Printing images...
... reduction setting 132 Changing the function of the AEL button 133 Changing other settings 134 Setting the LCD monitor 135 Confirming the version of the camera 137 Resetting to the default 138 Viewing images Using your computer 140 on a computer Using the software 147 Printing images Specifying DPOF 152 Printing images...

Instruction Manual
Page 12
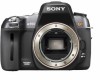
Preparing the camera Checking the accessories supplied The number in parentheses indicates the number of pieces. • BC-VM10 Battery charger (1)/ Power cord (mains lead) (1) • Instruction Manual (This manual) (1) • Rechargeable battery pack NPFM500H (1) • USB cable (1) • Shoulder strap (1) • Eyepiece cover (1) • Body cap (1) (Attached on the camera) • Eyecup (1) (Attached on the camera) • CD-ROM (Application Software for α camera) (1) 12
Preparing the camera Checking the accessories supplied The number in parentheses indicates the number of pieces. • BC-VM10 Battery charger (1)/ Power cord (mains lead) (1) • Instruction Manual (This manual) (1) • Rechargeable battery pack NPFM500H (1) • USB cable (1) • Shoulder strap (1) • Eyepiece cover (1) • Body cap (1) (Attached on the camera) • Eyecup (1) (Attached on the camera) • CD-ROM (Application Software for α camera) (1) 12

Instruction Manual
Page 13
... the battery pack on the battery charger. Push the battery pack until it clicks. 2 Connect the power cord (mains lead). Preparing the camera Preparing the battery pack When using the camera for the first time, be sure to charge a fully depleted battery pack (supplied) at a temperature of the battery back or charging...
... the battery pack on the battery charger. Push the battery pack until it clicks. 2 Connect the power cord (mains lead). Preparing the camera Preparing the battery pack When using the camera for the first time, be sure to charge a fully depleted battery pack (supplied) at a temperature of the battery back or charging...

Instruction Manual
Page 14
... Batteries other than the "InfoLITHIUM" M series battery pack in the battery charger (supplied) with your camera. Check that a battery pack other than the specified kind may cause a malfunction. 14 • We recommend charging the battery pack in any battery pack other than the specified type has ...been installed. To use your camera and the battery charger and the AC-PW10AM AC Adaptor (sold separately)...
... Batteries other than the "InfoLITHIUM" M series battery pack in the battery charger (supplied) with your camera. Check that a battery pack other than the specified kind may cause a malfunction. 14 • We recommend charging the battery pack in any battery pack other than the specified type has ...been installed. To use your camera and the battery charger and the AC-PW10AM AC Adaptor (sold separately)...

Instruction Manual
Page 15
...) 220 60 C Malaysia 240 50 BF Philippines 220/230 60 A/C 15 Depend on an area, Different type of countries/regions around the world. Preparing the camera A Type (American Type) B Type (British Type) BF Type (British Type) B3 Type (British Type) C Type (CEE Type) SE Type (CEE Type) O Type (Ocean Type) The...
...) 220 60 C Malaysia 240 50 BF Philippines 220/230 60 A/C 15 Depend on an area, Different type of countries/regions around the world. Preparing the camera A Type (American Type) B Type (British Type) BF Type (British Type) B3 Type (British Type) C Type (CEE Type) SE Type (CEE Type) O Type (Ocean Type) The...

Instruction Manual
Page 17
Lock lever 17 Lock lever To remove the battery pack Turn off the camera and slide the lock lever in the direction of the battery. 3 Close the battery cover. Be careful not to drop the battery pack. Preparing the camera Inserting the charged battery pack 1 While sliding the battery cover open lever, open the battery cover. 2 Firmly insert the battery pack all the way while pressing the lock lever with the tip of the arrow.
Lock lever 17 Lock lever To remove the battery pack Turn off the camera and slide the lock lever in the direction of the battery. 3 Close the battery cover. Be careful not to drop the battery pack. Preparing the camera Inserting the charged battery pack 1 While sliding the battery cover open lever, open the battery cover. 2 Firmly insert the battery pack all the way while pressing the lock lever with the tip of the arrow.

Instruction Manual
Page 18
... exhausted" Low You cannot shoot any more pictures. Using the "InfoLITHIUM" battery pack, the remaining battery time in the direction of your camera. The battery pack is displayed according to water. To attach the cover, put the knob in the hole, pull down the lever, and...battery pack? Notes • The displayed level may not be used. 18 To check the remaining battery level Check the level with your camera. Note that has functions for exchanging information related to attach the VG-B50AM Vertical Grip (sold separately). Available battery packs Use only an ...
... exhausted" Low You cannot shoot any more pictures. Using the "InfoLITHIUM" battery pack, the remaining battery time in the direction of your camera. The battery pack is displayed according to water. To attach the cover, put the knob in the hole, pull down the lever, and...battery pack? Notes • The displayed level may not be used. 18 To check the remaining battery level Check the level with your camera. Note that has functions for exchanging information related to attach the VG-B50AM Vertical Grip (sold separately). Available battery packs Use only an ...

Instruction Manual
Page 19
... start shooting. • The battery pack will run out quickly if you use the flash frequently, use continuous shooting often, or turn the camera on and off frequently. • The time available in the Live View mode is shorter than that you feel that the battery consumption is too...a long time, fully charge it and then fully use of its life. Battery capacity decreases little by little as you use it in your camera immediately before storing the battery pack in the viewfinder mode. Doing so makes the battery last longer. If the battery operating time seems shortened considerably...
... start shooting. • The battery pack will run out quickly if you use the flash frequently, use continuous shooting often, or turn the camera on and off frequently. • The time available in the Live View mode is shorter than that you feel that the battery consumption is too...a long time, fully charge it and then fully use of its life. Battery capacity decreases little by little as you use it in your camera immediately before storing the battery pack in the viewfinder mode. Doing so makes the battery last longer. If the battery operating time seems shortened considerably...

Instruction Manual
Page 20
Attaching a lens 1 Remove the body cap from the camera and the packaging lid from the rear of the lens. • When changing the lens, quickly change the lens away from dusty locations so as to keep dust or debris from getting inside the camera. 2 Mount the lens by aligning the orange index marks... on the lens and camera. 3 Turn the lens clockwise until it clicks into the locked position. • Be sure to put the lens...
Attaching a lens 1 Remove the body cap from the camera and the packaging lid from the rear of the lens. • When changing the lens, quickly change the lens away from dusty locations so as to keep dust or debris from getting inside the camera. 2 Mount the lens by aligning the orange index marks... on the lens and camera. 3 Turn the lens clockwise until it clicks into the locked position. • Be sure to put the lens...

Instruction Manual
Page 21
... 18-55mm F3.5-5.6 SAM Lens Kit. Lens release button Note on changing the lens When changing the lens, if dust or debris gets inside the camera and lands on the surface of the image sensor (the part that acts as the film), it may appear on the image, depending on the... dust or debris lands on the image sensor Clean the image sensor using [Cleaning mode] in and turn the lens counterclockwise until it to the camera, purchase the Rear Lens Cap ALC-R55. Setup menu 21 However, quickly change the lens away from landing on the shooting environment.
... 18-55mm F3.5-5.6 SAM Lens Kit. Lens release button Note on changing the lens When changing the lens, if dust or debris gets inside the camera and lands on the surface of the image sensor (the part that acts as the film), it may appear on the image, depending on the... dust or debris lands on the image sensor Clean the image sensor using [Cleaning mode] in and turn the lens counterclockwise until it to the camera, purchase the Rear Lens Cap ALC-R55. Setup menu 21 However, quickly change the lens away from landing on the shooting environment.

Instruction Manual
Page 22
A MultiMediaCard cannot be used with this camera. The "Memory Stick PRO Duo" media and "Memory Stick PRO-HG Duo" media are referred to use using the memory card switch. 4 Close the memory ... card Only "Memory Stick PRO Duo" media, "Memory Stick PRO-HG Duo" media, SD memory cards and SDHC memory cards can be used with this camera. Face side (SD memory card) Terminal part Face side ("Memory Stick PRO Duo") Terminal part 3 Select the type of memory card you want to as...
A MultiMediaCard cannot be used with this camera. The "Memory Stick PRO Duo" media and "Memory Stick PRO-HG Duo" media are referred to use using the memory card switch. 4 Close the memory ... card Only "Memory Stick PRO Duo" media, "Memory Stick PRO-HG Duo" media, SD memory cards and SDHC memory cards can be used with this camera. Face side (SD memory card) Terminal part Face side ("Memory Stick PRO Duo") Terminal part 3 Select the type of memory card you want to as...

Instruction Manual
Page 23
... the memory card near stronglymagnetized material or use or store the memory card under the following conditions: - Humid locations or locations with this camera. 23 Preparing the camera To remove the memory card Check that the access lamp is lit, do not remove the memory card or the battery pack, or turn...
... the memory card near stronglymagnetized material or use or store the memory card under the following conditions: - Humid locations or locations with this camera. 23 Preparing the camera To remove the memory card Check that the access lamp is lit, do not remove the memory card or the battery pack, or turn...

Instruction Manual
Page 24
... using a parallel interface. 24 They might accidentally swallow it. MagicGate is equipped with MagicGate function. Be sure to operate with this camera. * Supports high-speed data transfer using the camera. • Data read/write speeds differ depending on the memory cards themselves. • Do not disassemble or modify the memory cards...write down on the memo area. • Do not attach a label on the combination of the memory cards and the equipment used with the camera The types of small children. "Memory Stick PRO Duo" media* "Memory Stick PRO-HG Duo" media* Available with your...
... using a parallel interface. 24 They might accidentally swallow it. MagicGate is equipped with MagicGate function. Be sure to operate with this camera. * Supports high-speed data transfer using the camera. • Data read/write speeds differ depending on the memory cards themselves. • Do not disassemble or modify the memory cards...write down on the memo area. • Do not attach a label on the combination of the memory cards and the equipment used with the camera The types of small children. "Memory Stick PRO Duo" media* "Memory Stick PRO-HG Duo" media* Available with your...

Instruction Manual
Page 25
Preparing the camera Preparing the camera Setting up the date When you turn the camera on for the first time, the date/time setup screen appears. 1 Set the power switch to ON to turn the camera on. • To turn the camera off, set it to OFF. 2 Verify that [OK] is selected on the LCD monitor, then press the center of the controller. 3 Select each item with b/B and set the numeric value with v/V. • When changing the sequence of [YYYY/MM/DD], first select [YYYY/ MM/DD] with b/B, then change it with v/V. 4 Repeat step 3 to set other items, then press the center of the controller. 25
Preparing the camera Preparing the camera Setting up the date When you turn the camera on for the first time, the date/time setup screen appears. 1 Set the power switch to ON to turn the camera on. • To turn the camera off, set it to OFF. 2 Verify that [OK] is selected on the LCD monitor, then press the center of the controller. 3 Select each item with b/B and set the numeric value with v/V. • When changing the sequence of [YYYY/MM/DD], first select [YYYY/ MM/DD] with b/B, then change it with v/V. 4 Repeat step 3 to set other items, then press the center of the controller. 25
Instruction Manual
Page 27
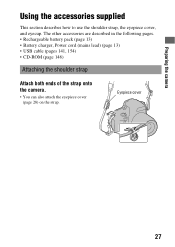
The other accessories are described in the following pages. • Rechargeable battery pack (page 13) • Battery charger, Power cord (mains lead) (page 13) • USB cable (pages 141, 154) • CD-ROM (page 148) Attaching the shoulder strap Attach both ends of the strap onto the camera. • You can also attach the eyepiece cover (page 28) on the strap. Eyepiece cover 27 Preparing the camera Using the accessories supplied This section describes how to use the shoulder strap, the eyepiece cover, and eyecup.
The other accessories are described in the following pages. • Rechargeable battery pack (page 13) • Battery charger, Power cord (mains lead) (page 13) • USB cable (pages 141, 154) • CD-ROM (page 148) Attaching the shoulder strap Attach both ends of the strap onto the camera. • You can also attach the eyepiece cover (page 28) on the strap. Eyepiece cover 27 Preparing the camera Using the accessories supplied This section describes how to use the shoulder strap, the eyepiece cover, and eyecup.

Instruction Manual
Page 28
... such cases, turn off both [Eye-Start AF] (page 71) and [Auto off by pushing on the situation, and the focus may continue to the camera, remove the eyecup as in viewfinder mode, as illustrated and attach them. 3 Slide the eyepiece cover over the viewfinder. When the shutter is released without...
... such cases, turn off both [Eye-Start AF] (page 71) and [Auto off by pushing on the situation, and the focus may continue to the camera, remove the eyecup as in viewfinder mode, as illustrated and attach them. 3 Slide the eyepiece cover over the viewfinder. When the shutter is released without...

Instruction Manual
Page 29
...flashes in yellow, the memory card is displayed on the shooting conditions. Replace the memory card with this camera. Image size: L 14M (DSLR-A550)/L 12M (DSLR-A500) Aspect ratio: 3:2* "Memory Stick PRO Duo" DSLR-A550 (Units: Images) Size Capacity 1GB 2GB 4GB 8GB 16GB Standard 213 451 893 1796 3642 Fine 151 ...inserted. Insert a memory card. The values may vary depending on the LCD monitor. Checking the number of recordable images Preparing the camera Once you continue to ON, the number of images that can be recorded (should you insert a memory card into the...
...flashes in yellow, the memory card is displayed on the shooting conditions. Replace the memory card with this camera. Image size: L 14M (DSLR-A550)/L 12M (DSLR-A500) Aspect ratio: 3:2* "Memory Stick PRO Duo" DSLR-A550 (Units: Images) Size Capacity 1GB 2GB 4GB 8GB 16GB Standard 213 451 893 1796 3642 Fine 151 ...inserted. Insert a memory card. The values may vary depending on the LCD monitor. Checking the number of recordable images Preparing the camera Once you continue to ON, the number of images that can be recorded (should you insert a memory card into the...


