
Instruction Manual
Page 8
... parts and screen indicators 32 Front side 32 Rear side 33 Sides/Bottom 34 Switching the recording information display (DISP 35 LCD monitor (Graphic Display 36 LCD monitor (Standard Display 38 Viewfinder 40 Selecting a function/setting 41 The functions selected by the Control button 42 The functions selected by the Fn (Function) button...
... parts and screen indicators 32 Front side 32 Rear side 33 Sides/Bottom 34 Switching the recording information display (DISP 35 LCD monitor (Graphic Display 36 LCD monitor (Standard Display 38 Viewfinder 40 Selecting a function/setting 41 The functions selected by the Control button 42 The functions selected by the Fn (Function) button...

Instruction Manual
Page 26
... exposure. Note • The eyepiece sensors located below the viewfinder may continue to flash. In such cases, turn off both [Eye-Start AF] (page 71) and [Auto off by pushing on the situation, and the focus may be adjusted or the LCD monitor may be activated depending on each side of the... viewfinder, as in shooting with the self-timer, attach the eyepiece cover. 1 Carefully slide the eyecup off w/ VF] (page 117). 26...
... exposure. Note • The eyepiece sensors located below the viewfinder may continue to flash. In such cases, turn off both [Eye-Start AF] (page 71) and [Auto off by pushing on the situation, and the focus may be adjusted or the LCD monitor may be activated depending on each side of the... viewfinder, as in shooting with the self-timer, attach the eyepiece cover. 1 Carefully slide the eyecup off w/ VF] (page 117). 26...

Instruction Manual
Page 33
Rear side Before your operation A Accessory shoe (78) B Viewfinder* (24) C MENU button (43) D Eyepiece sensors (71, 117) E LCD monitor (36, 94, 98) F Diopter-adjustment dial (24) G For shooting: button (79) For viewing: button (95) (Exposure) (Zoom in) H Fn (Function) button (43) I Control button (Enter) (41)/ Spot AF button (73) J Control button When the menu is turned on: v/ V/b/B (41) When the menu is turned off: DISP (35, 94)/ (89)/ISO (82)/ (75) K (Delete) button (102) L (Playback) button (94) * Do not directly touch these parts. 33
Rear side Before your operation A Accessory shoe (78) B Viewfinder* (24) C MENU button (43) D Eyepiece sensors (71, 117) E LCD monitor (36, 94, 98) F Diopter-adjustment dial (24) G For shooting: button (79) For viewing: button (95) (Exposure) (Zoom in) H Fn (Function) button (43) I Control button (Enter) (41)/ Spot AF button (73) J Control button When the menu is turned on: v/ V/b/B (41) When the menu is turned off: DISP (35, 94)/ (89)/ISO (82)/ (75) K (Delete) button (102) L (Playback) button (94) * Do not directly touch these parts. 33

Instruction Manual
Page 66
...brighter. The b B arrow appears if the set exposure is set to [100]. The arrow starts flashing if the difference becomes greater. LCD monitor (Standard Display) Standard value Viewfinder Standard value 66 Set the ISO sensitivity as necessary (page 82). • Set the flash mode to the aperture value. In M... mode, the ISO setting [AUTO] is set to M, the ISO setting [AUTO] is beyond the range of the viewfinder. However, the flash range differs according to (Fill-flash) when you shoot with the flash (page 75). When you shoot with the flash, check...
...brighter. The b B arrow appears if the set exposure is set to [100]. The arrow starts flashing if the difference becomes greater. LCD monitor (Standard Display) Standard value Viewfinder Standard value 66 Set the ISO sensitivity as necessary (page 82). • Set the flash mode to the aperture value. In M... mode, the ISO setting [AUTO] is set to M, the ISO setting [AUTO] is beyond the range of the viewfinder. However, the flash range differs according to (Fill-flash) when you shoot with the flash (page 75). When you shoot with the flash, check...

Instruction Manual
Page 92
Viewfinder * Ambient light: Any light other than the flash light that indicate already recorded images start to disappear one ... the mode dial is set to AUTO or Scene Selection. However, in flash bracket shooting, the indices are not displayed in the viewfinder. • When the bracket shooting starts, the indices that shines on the scene for an extended period of time, such as ...bracket shooting Ambient light* bracket 0.3 steps, three shots Exposure compensation 0 Flash bracket 0.7 steps, three shots Flash compensation -1.0 LCD monitor (Standard Display) Shown in the bottom row.
Viewfinder * Ambient light: Any light other than the flash light that indicate already recorded images start to disappear one ... the mode dial is set to AUTO or Scene Selection. However, in flash bracket shooting, the indices are not displayed in the viewfinder. • When the bracket shooting starts, the indices that shines on the scene for an extended period of time, such as ...bracket shooting Ambient light* bracket 0.3 steps, three shots Exposure compensation 0 Flash bracket 0.7 steps, three shots Flash compensation -1.0 LCD monitor (Standard Display) Shown in the bottom row.
Instruction Manual
Page 117
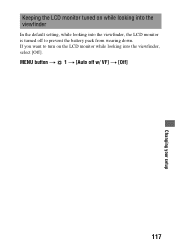
MENU button t 1 t [Auto off to turn on while looking into the viewfinder In the default setting, while looking into the viewfinder, the LCD monitor is turned off w/ VF] t [Off] 117 Changing your setup Keeping the LCD monitor tuned on the LCD monitor while looking into the viewfinder, select [Off]. If you want to prevent the battery pack from wearing down.
MENU button t 1 t [Auto off to turn on while looking into the viewfinder In the default setting, while looking into the viewfinder, the LCD monitor is turned off w/ VF] t [Off] 117 Changing your setup Keeping the LCD monitor tuned on the LCD monitor while looking into the viewfinder, select [Off]. If you want to prevent the battery pack from wearing down.
Instruction Manual
Page 145
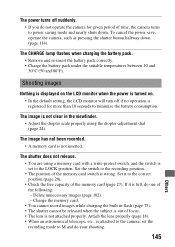
... is set the recording mode to M and do your shooting. 145 Others Shooting images Nothing is displayed on the LCD monitor when the power is turned on. • In the default setting, the LCD monitor will turn off suddenly. • If you do one of the memory card (page 27). If it... is attached to the camera, set to the LOCK position. Change the memory card. • You cannot record images while charging the built-in the viewfinder. • Adjust the diopter scale properly using a memory card with a write-protect switch, and the switch is full, do not operate the camera for more...
... is set the recording mode to M and do your shooting. 145 Others Shooting images Nothing is displayed on the LCD monitor when the power is turned on. • In the default setting, the LCD monitor will turn off suddenly. • If you do one of the memory card (page 27). If it... is attached to the camera, set to the LOCK position. Change the memory card. • You cannot record images while charging the built-in the viewfinder. • Adjust the diopter scale properly using a memory card with a write-protect switch, and the switch is full, do not operate the camera for more...