Operating Instructions
Page 2
... this equipment. Reorient or relocate the receiving antenna. - Connect the equipment into an outlet on , the user is either a registered trademark or trademark of Microsoft Corporation in this manual could void your authority to operate this equipment does cause harmful interference to which can radiate radio frequency energy and, if not installed and used in accordance with the limits for...
... this equipment. Reorient or relocate the receiving antenna. - Connect the equipment into an outlet on , the user is either a registered trademark or trademark of Microsoft Corporation in this manual could void your authority to operate this equipment does cause harmful interference to which can radiate radio frequency energy and, if not installed and used in accordance with the limits for...
Operating Instructions
Page 4
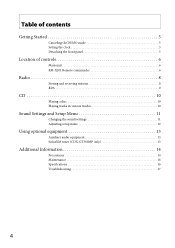
Table of contents Getting Started 5 Canceling the DEMO mode 5 Setting the clock 5 Detaching the front panel 5 Location of controls 6 Main unit 6 RM-X201 Remote commander 6 Radio 8 Storing and receiving stations 8 RDS 9 CD 10 Playing a disc 10 Playing tracks in various modes 10 Sound Settings and Setup Menu 11 Changing the sound settings 11 Adjusting setup items 12 Using optional equipment 13 Auxiliary audio equipment 13 SiriusXM tuner (CDX-GT360MP only 13 Additional Information 14 Precautions 14 Maintenance 16 Specifications 16 Troubleshooting 17 4
Table of contents Getting Started 5 Canceling the DEMO mode 5 Setting the clock 5 Detaching the front panel 5 Location of controls 6 Main unit 6 RM-X201 Remote commander 6 Radio 8 Storing and receiving stations 8 RDS 9 CD 10 Playing a disc 10 Playing tracks in various modes 10 Sound Settings and Setup Menu 11 Changing the sound settings 11 Adjusting setup items 12 Using optional equipment 13 Auxiliary audio equipment 13 SiriusXM tuner (CDX-GT360MP only 13 Additional Information 14 Precautions 14 Maintenance 16 Specifications 16 Troubleshooting 17 4
Operating Instructions
Page 5
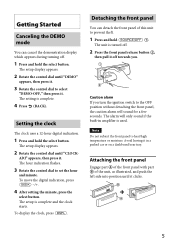
... control dial to select "DEMO-OFF," then press it. Setting the clock The clock uses a 12-hour digital indication. 1 Press and hold the select button. The alarm will sound for a few seconds. ADJ" appears, then press it off . 1 Press and hold the select button. The setup display appears. 2 Rotate the control dial until "CLOCK- To move the digital indication, press 4 After setting the minute, press the select button. To display...
... control dial to select "DEMO-OFF," then press it. Setting the clock The clock uses a 12-hour digital indication. 1 Press and hold the select button. The alarm will sound for a few seconds. ADJ" appears, then press it off . 1 Press and hold the select button. The setup display appears. 2 Rotate the control dial until "CLOCK- To move the digital indication, press 4 After setting the minute, press the select button. To display...
Operating Instructions
Page 6
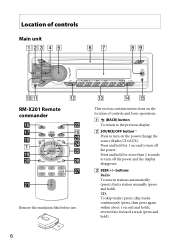
... 2 seconds to turn on the power/change the source (Radio/CD/AUX). buttons Radio: To tune in stations automatically (press); CD: To skip tracks (press); Press and hold ). Location of controls Main unit RM-X201 Remote commander Remove the insulation film before use. 6 This section contains instructions on the location of controls and basic operations. (BACK) button To return to the previous display. SOURCE/OFF button*1 Press to turn off the power. reverse/fast...
... 2 seconds to turn on the power/change the source (Radio/CD/AUX). buttons Radio: To tune in stations automatically (press); CD: To skip tracks (press); Press and hold ). Location of controls Main unit RM-X201 Remote commander Remove the insulation film before use. 6 This section contains instructions on the location of controls and basic operations. (BACK) button To return to the previous display. SOURCE/OFF button*1 Press to turn off the power. reverse/fast...
Operating Instructions
Page 7
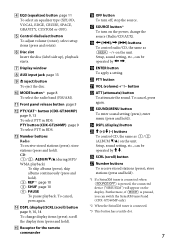
... adjust volume (rotate); store stations (press and hold ). skip albums continuously (press and hold ). Receptor for the remote commander OFF button To turn on the unit. enter menu (press and hold). DSPL (display) button buttons To control CD, the same as on the power; select setup items (press and rotate). Disc slot Insert the disc (label side up), playback starts. Display window AUX input...
... adjust volume (rotate); store stations (press and hold ). skip albums continuously (press and hold ). Receptor for the remote commander OFF button To turn on the unit. enter menu (press and hold). DSPL (display) button buttons To control CD, the same as on the power; select setup items (press and rotate). Disc slot Insert the disc (label side up), playback starts. Display window AUX input...
Operating Instructions
Page 8
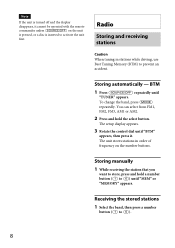
... select button. Radio Storing and receiving stations Caution When tuning in order of frequency on the unit is pressed, or a disc is turned off and the display disappears, it . Storing automatically - BTM 1 Press repeatedly until "BTM" appears, then press it cannot be operated with the remote commander unless on the number buttons. The setup display appears. 3 Rotate the control dial until "TUNER" appears. Note If the unit is inserted to activate...
... select button. Radio Storing and receiving stations Caution When tuning in order of frequency on the unit is pressed, or a disc is turned off and the display disappears, it . Storing automatically - BTM 1 Press repeatedly until "BTM" appears, then press it cannot be operated with the remote commander unless on the number buttons. The setup display appears. 3 Rotate the control dial until "TUNER" appears. Note If the unit is inserted to activate...
Operating Instructions
Page 9
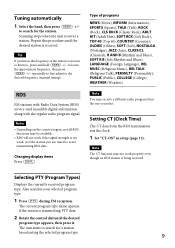
... RDS functions may receive a different radio program from the RDS transmission sets the clock. 1 Set "CT-ON" in setup (page 12). Selecting PTY (Program Types) Displays the currently received program type. Tuning automatically 1 Select the band, then press to search for the station. Setting CT (Clock Time) The CT data from the one you want to listen to, press and hold to locate the approximate frequency, then press repeatedly to fine adjust...
... RDS functions may receive a different radio program from the RDS transmission sets the clock. 1 Set "CT-ON" in setup (page 12). Selecting PTY (Program Types) Displays the currently received program type. Tuning automatically 1 Select the band, then press to search for the station. Setting CT (Clock Time) The CT data from the one you want to listen to, press and hold to locate the approximate frequency, then press repeatedly to fine adjust...
Operating Instructions
Page 11
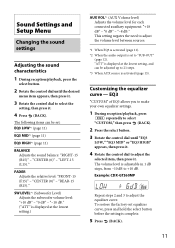
... activated (page 13). "-10 dB." ("ATT" is adjustable in 1 dB steps, from -10 dB to adjust the volume level between sources. *1 When EQ3 is activated (page 11). *2 When the audio output is complete. 5 Press (BACK). 11 "REAR-15 (R15)." "ATT" is displayed at the lowest setting.) AUX VOL*3 (AUX Volume level) Adjusts the volume level for each connected auxiliary equipment: "+18 dB" - Sound Settings and Setup Menu Changing the sound settings Adjusting the sound characteristics 1 During reception/playback, press the select button. 2 Rotate the control...
... activated (page 13). "-10 dB." ("ATT" is adjustable in 1 dB steps, from -10 dB to adjust the volume level between sources. *1 When EQ3 is activated (page 11). *2 When the audio output is complete. 5 Press (BACK). 11 "REAR-15 (R15)." "ATT" is displayed at the lowest setting.) AUX VOL*3 (AUX Volume level) Adjusts the volume level for each connected auxiliary equipment: "+18 dB" - Sound Settings and Setup Menu Changing the sound settings Adjusting the sound characteristics 1 During reception/playback, press the select button. 2 Rotate the control...
Operating Instructions
Page 12
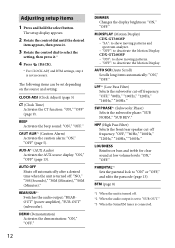
... Reinforces bass and treble for clear sound at low volume levels: "ON," "OFF." PARENTAL*3 Sets the parental lock to deactivate the Motion Display. AUX-A*1 (AUX Audio) Activates the AUX source display: "ON," "OFF" (page 13). DEMO (Demonstration) Activates the demonstration: "ON," "OFF." 12 DIMMER Changes the display brightness: "ON," "OFF." LPF*2 (Low Pass Filter) Selects the subwoofer cut -off : "NO," "30S (Seconds)," "30M (Minutes)," "60M (Minutes)." The setup display appears. 2 Rotate the control dial...
... Reinforces bass and treble for clear sound at low volume levels: "ON," "OFF." PARENTAL*3 Sets the parental lock to deactivate the Motion Display. AUX-A*1 (AUX Audio) Activates the AUX source display: "ON," "OFF" (page 13). DEMO (Demonstration) Activates the demonstration: "ON," "OFF." 12 DIMMER Changes the display brightness: "ON," "OFF." LPF*2 (Low Pass Filter) Selects the subwoofer cut -off : "NO," "30S (Seconds)," "30M (Minutes)," "60M (Minutes)." The setup display appears. 2 Rotate the control dial...
Operating Instructions
Page 13
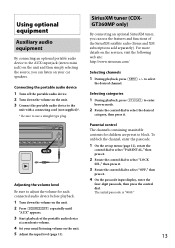
.... 1 Turn down the volume on the unit. 3 Connect the portable audio device to the unit with a connecting cord (not supplied)*. * Be sure to adjust the volume for children are preset to select "OFF," then press it . 3 Rotate the control dial to block. Adjusting the volume level Be sure to use the features and functions of the portable audio device at a moderate volume. 4 Set your car speakers. Connecting the portable audio device 1 Turn off the portable audio device. 2 Turn down the volume on the services...
.... 1 Turn down the volume on the unit. 3 Connect the portable audio device to the unit with a connecting cord (not supplied)*. * Be sure to adjust the volume for children are preset to select "OFF," then press it . 3 Rotate the control dial to block. Adjusting the volume level Be sure to use the features and functions of the portable audio device at a moderate volume. 4 Set your car speakers. Connecting the portable audio device 1 Turn off the portable audio device. 2 Turn down the volume on the services...
Operating Instructions
Page 14
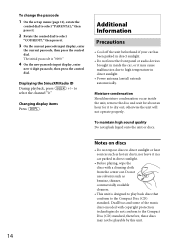
... for it to select "CODEEDIT," then press it. 3 On the current passcode input display, enter the current passcode, then press the control dial. Changing display items Press Additional Information Precautions • Cool off the unit beforehand if your car has been parked in direct sunlight. • Do not leave the front panel or audio devices brought in direct sunlight. • Power antenna (aerial) extends automatically...
... for it to select "CODEEDIT," then press it. 3 On the current passcode input display, enter the current passcode, then press the control dial. Changing display items Press Additional Information Precautions • Cool off the unit beforehand if your car has been parked in direct sunlight. • Do not leave the front panel or audio devices brought in direct sunlight. • Power antenna (aerial) extends automatically...
Operating Instructions
Page 15
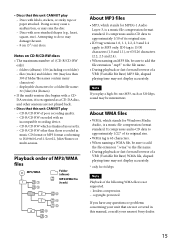
... WMA files is a music file compression format standard. copyright-protected If you play - Discs with an incompatible recording device. - It compresses audio CD data to approximately 1/22* of its original size. • ID3 tag versions 1.0, 1.1, 2.2, 2.3 and 2.4 apply to MP3 only. CD-R/CD-RW which stands for Windows Media Audio, is not supported. - • Discs that this unit CANNOT play a high-bit...
... WMA files is a music file compression format standard. copyright-protected If you play - Discs with an incompatible recording device. - It compresses audio CD data to approximately 1/22* of its original size. • ID3 tag versions 1.0, 1.1, 2.2, 2.3 and 2.4 apply to MP3 only. CD-R/CD-RW which stands for Windows Media Audio, is not supported. - • Discs that this unit CANNOT play a high-bit...
Operating Instructions
Page 16
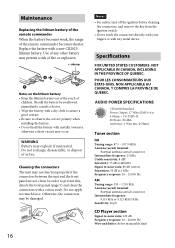
... LES CONSOMMATEURS AUX ÉTATS-UNIS. NON APPLICABLE AU CANADA, Y COMPRIS LA PROVINCE DE QUÉBEC. AUDIO POWER SPECIFICATIONS CEA2006 Standard Power Output: 17 Watts RMS 4 at 4 Ohms < 1% THD+N SN Ratio: 80 dBA (reference: 1 Watt into 4 Ohms) Tuner section FM Tuning range: 87.5 - 107.9 MHz Antenna (aerial) terminal: External antenna (aerial) connector Intermediate frequency: 25 kHz Usable sensitivity: 8 dBf Selectivity: 75 dB...
... LES CONSOMMATEURS AUX ÉTATS-UNIS. NON APPLICABLE AU CANADA, Y COMPRIS LA PROVINCE DE QUÉBEC. AUDIO POWER SPECIFICATIONS CEA2006 Standard Power Output: 17 Watts RMS 4 at 4 Ohms < 1% THD+N SN Ratio: 80 dBA (reference: 1 Watt into 4 Ohms) Tuner section FM Tuning range: 87.5 - 107.9 MHz Antenna (aerial) terminal: External antenna (aerial) connector Intermediate frequency: 25 kHz Usable sensitivity: 8 dBf Selectivity: 75 dB...
Operating Instructions
Page 17
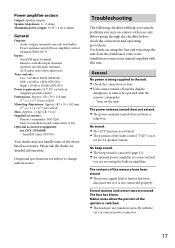
Power amplifier section Output: Speaker outputs Speaker impedance: 4 - 8 ohms Maximum power output: 52 W × 4 (at 4 ohms) General Outputs: Audio outputs terminal (rear/sub switchable) Power antenna (aerial)/Power amplifier control terminal (REM OUT) Inputs: SiriusXM input terminal Remote controller input terminal Antenna (aerial) input terminal AUX input jack (stereo mini jack) Tone controls: Low: ±10 dB at 60 Hz (XPLOD) Mid: ±10 dB at 1 kHz (XPLOD) High: ±10 dB at 10 kHz (XPLOD) Power requirements: 12 V DC car battery (negative ground (earth)) Dimensions...
Power amplifier section Output: Speaker outputs Speaker impedance: 4 - 8 ohms Maximum power output: 52 W × 4 (at 4 ohms) General Outputs: Audio outputs terminal (rear/sub switchable) Power antenna (aerial)/Power amplifier control terminal (REM OUT) Inputs: SiriusXM input terminal Remote controller input terminal Antenna (aerial) input terminal AUX input jack (stereo mini jack) Tone controls: Low: ±10 dB at 60 Hz (XPLOD) Mid: ±10 dB at 1 kHz (XPLOD) High: ±10 dB at 10 kHz (XPLOD) Power requirements: 12 V DC car battery (negative ground (earth)) Dimensions...
Operating Instructions
Page 18
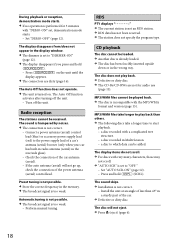
... a complicated tree structure. - The Auto Off function activates after turning off the unit. Check the connection of the car. Defective or dirty disc. Perform manual tuning. MP3/WMA files take a longer time to which data can be played back. The disc is not an RDS station. RDS data has not been received. The station does not specify the program type. Press and hold...
... a complicated tree structure. - The Auto Off function activates after turning off the unit. Check the connection of the car. Defective or dirty disc. Perform manual tuning. MP3/WMA files take a longer time to which data can be played back. The disc is not an RDS station. RDS data has not been received. The station does not specify the program type. Press and hold...
Operating Instructions
Page 19
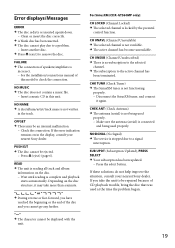
... tuner, and connect it may be repaired because of this unit. SUB UPDT (Subscription Updated), PRESS SELECT Your subscription has been updated. - Error displays/Messages ERROR The disc is no subscription to the selected channel. The subscription to the active channel has been terminated. Press (eject) (page 6). Depending on the disc structure, it again. "" The character cannot be ejected. - NOSIGNAL (No Signal) The service...
... tuner, and connect it may be repaired because of this unit. SUB UPDT (Subscription Updated), PRESS SELECT Your subscription has been updated. - Error displays/Messages ERROR The disc is no subscription to the selected channel. The subscription to the active channel has been terminated. Press (eject) (page 6). Depending on the disc structure, it again. "" The character cannot be ejected. - NOSIGNAL (No Signal) The service...
Marketing Specifications
Page 1
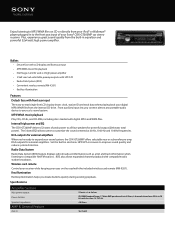
...® player plugged in to -read single line LCD display shows clock, station ID and track data when playing back your digital MP3/WMA files from the internal CD drive. CDX-GT40U CD Receiver with USB input Bullets • Detach face with LCD display and front aux input • MP3/WMA music file playback • EQ3 Stage 2 and 52 watt x 4 high power amplifier • 2 Volt rear/sub selectable preamp outputs with HPF...
...® player plugged in to -read single line LCD display shows clock, station ID and track data when playing back your digital MP3/WMA files from the internal CD drive. CDX-GT40U CD Receiver with USB input Bullets • Detach face with LCD display and front aux input • MP3/WMA music file playback • EQ3 Stage 2 and 52 watt x 4 high power amplifier • 2 Volt rear/sub selectable preamp outputs with HPF...
Marketing Specifications
Page 2
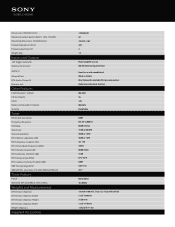
... Pre Out Rear/Sub initial Audio Band Equalizer Format(s) Supported Preout Impedance Preout Voltage S/N Ratio Signal-to-Noise Ratio (dB) Station Preset(s) Tuner Frequency Range Tuner Type Wow and Flutter AUX in Feature Level Adjustment Convenience Tilt Range Convenience Features Dimmer Adjust Key Illumination On-Screen Clock Display Display Color Display Technology Text Displayed Text Lines Display Panel Auto off mode Dimmer Adjust Panel Design Display color (Color Variation/Nega or Posi) Display Device (LCD/FL/OEL/TFT) Key Illumination Panel finish color General CEA2006 output power CEA2006...
... Pre Out Rear/Sub initial Audio Band Equalizer Format(s) Supported Preout Impedance Preout Voltage S/N Ratio Signal-to-Noise Ratio (dB) Station Preset(s) Tuner Frequency Range Tuner Type Wow and Flutter AUX in Feature Level Adjustment Convenience Tilt Range Convenience Features Dimmer Adjust Key Illumination On-Screen Clock Display Display Color Display Technology Text Displayed Text Lines Display Panel Auto off mode Dimmer Adjust Panel Design Display color (Color Variation/Nega or Posi) Display Device (LCD/FL/OEL/TFT) Key Illumination Panel finish color General CEA2006 output power CEA2006...
Marketing Specifications
Page 3
.../LW/SW(uV) Tuner Feature Preset RDS/EON (NA Only:RBDS, Others:RDS) Weights and Measurements Dimensions (Approx.) Dimensions (Approx) Depth Dimensions (Approx) Height Dimensions (Approx) Width Weight (Approx.) Supplied Accessories 178x50x180 52 182 x 53 x 162 220 2 1.2 Power amplifier turn on AM/FM Antenna Input Terminal Front Aux in with variable level Wireless remote Rear/Subwoofer selectable RCA pre-amp outputs Optional wired remote terminal RM-X201...
.../LW/SW(uV) Tuner Feature Preset RDS/EON (NA Only:RBDS, Others:RDS) Weights and Measurements Dimensions (Approx.) Dimensions (Approx) Depth Dimensions (Approx) Height Dimensions (Approx) Width Weight (Approx.) Supplied Accessories 178x50x180 52 182 x 53 x 162 220 2 1.2 Power amplifier turn on AM/FM Antenna Input Terminal Front Aux in with variable level Wireless remote Rear/Subwoofer selectable RCA pre-amp outputs Optional wired remote terminal RM-X201...
Limited Warranty (U.S. Only)
Page 1
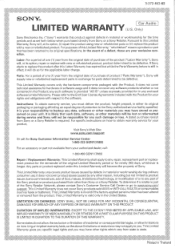
..., or other reason, including but while the Parts Warranty below when purchased directly from Sony or a Sony Retailer. Parts: For a period of one (1) year from your authorized dealer, call: 1-800-488-SONY (7669) Repair / Replacement Warranty: This Limited Warranty shall apply to www sony com/ support. For specific instructions on how to obtain warranty service for any software products whether or not contained...
..., or other reason, including but while the Parts Warranty below when purchased directly from Sony or a Sony Retailer. Parts: For a period of one (1) year from your authorized dealer, call: 1-800-488-SONY (7669) Repair / Replacement Warranty: This Limited Warranty shall apply to www sony com/ support. For specific instructions on how to obtain warranty service for any software products whether or not contained...


