Primary User Manual
Page 5
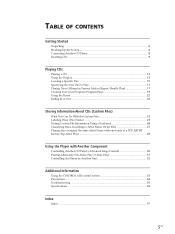
TABLE OF CONTENTS Getting Started Unpacking ...6 Hooking Up the System ...6 Connecting Another CD Player 8 Inserting CDs ...9 Playing CDs Playing a CD ...12 Using the Display ...13 Locating a Specific Disc ...15 Specifying the Next Disc to Play 17 Playing Discs (Album) in Various Modes (Repeat/Shuffle Play 17 Creating Your Own Program (Program Play 19 Using the Timer ...22 Fading In...
TABLE OF CONTENTS Getting Started Unpacking ...6 Hooking Up the System ...6 Connecting Another CD Player 8 Inserting CDs ...9 Playing CDs Playing a CD ...12 Using the Display ...13 Locating a Specific Disc ...15 Specifying the Next Disc to Play 17 Playing Discs (Album) in Various Modes (Repeat/Shuffle Play 17 Creating Your Own Program (Program Play 19 Using the Timer ...22 Fading In...
Primary User Manual
Page 6
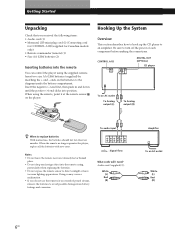
... replacing the batteries. • Do not expose the remote sensor to avoid possible damage from battery leakage and corrosion. CONTROL A1II DIGITAL OUT (OPTICAL) CD player To an AC outlet To Analog output (L) To Analog output (R) z When to an amplifier. Getting Started Unpacking Check that you do not use... the player, replace all the batteries with new ones. To audio input : Signal flow What cords will I need? ends on the player. Hooking Up the System Overview This section describes how to hook up the CD player to replace batteries With normal use the remote for about six months.
... replacing the batteries. • Do not expose the remote sensor to avoid possible damage from battery leakage and corrosion. CONTROL A1II DIGITAL OUT (OPTICAL) CD player To an AC outlet To Analog output (L) To Analog output (R) z When to an amplifier. Getting Started Unpacking Check that you do not use... the player, replace all the batteries with new ones. To audio input : Signal flow What cords will I need? ends on the player. Hooking Up the System Overview This section describes how to hook up the CD player to replace batteries With normal use the remote for about six months.
