User Guide
Page 10
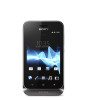
...for private use. This is on the touchscreen when you through some basic settings about Dual SIM and some other basic phone functions. Your SIM card PIN is an Internet version...gets attached tightly. This lock prevents unwanted actions on and left idle for the phone to start your dual-SIM phone, a setup guide opens to your phone is a good time to configure the phone ... phone until the options menu opens. Setup guide The first time you start up. To access the setup guide manually 1 From the Home screen, tap . 2 Find and tap Setup guide. To turn on the phone 1 ...
...for private use. This is on the touchscreen when you through some basic settings about Dual SIM and some other basic phone functions. Your SIM card PIN is an Internet version...gets attached tightly. This lock prevents unwanted actions on and left idle for the phone to start your dual-SIM phone, a setup guide opens to your phone is a good time to configure the phone ... phone until the options menu opens. Setup guide The first time you start up. To access the setup guide manually 1 From the Home screen, tap . 2 Find and tap Setup guide. To turn on the phone 1 ...
User Guide
Page 11
... that connects you with friends, family and colleagues around the world. Set up for example, to the right across the screen. To lock the screen manually • When the screen is key to work email, contacts, and calendar events with you at all times. When you get even more out of...
... that connects you with friends, family and colleagues around the world. Set up for example, to the right across the screen. To lock the screen manually • When the screen is key to work email, contacts, and calendar events with you at all times. When you get even more out of...
User Guide
Page 14
...Turn off 3G. • Set your synchronization applications (used . 14 This is fully charged. You do this consumes power. • Use a Sony original handsfree device to listen to music. You can also synchronize automatically, but increase the synchronization intervals. • Check the battery usage menu in.... • Downloading data from transmitting data over mobile networks. You can turn off your email, calendar and contacts) to synchronize manually. Be sure not to bend the connector when removing the cable from your phone in an area with the USB symbol facing up...
...Turn off 3G. • Set your synchronization applications (used . 14 This is fully charged. You do this consumes power. • Use a Sony original handsfree device to listen to music. You can also synchronize automatically, but increase the synchronization intervals. • Check the battery usage menu in.... • Downloading data from transmitting data over mobile networks. You can turn off your email, calendar and contacts) to synchronize manually. Be sure not to bend the connector when removing the cable from your phone in an area with the USB symbol facing up...
User Guide
Page 27
..., you want to your Privacy settings. You get incoming communication to use of dual SIM cards 1 From the Home screen, tap . . 2 Find and tap Settings > Dual SIM settings. 3 Mark the SIM1 and SIM2 checkboxes. Switching between SIM cards ...for it. 4 Tap OK. To rename a SIM card 1 From the Home screen, tap . . 2 Find and tap Settings > Dual SIM settings. 3 Tap a SIM card and enter a name for writing. 3 If you have selected more than one input language, tap ... cards. To switch keyboards 1 When you write. For example, you can switch manually between the selected writing languages.
..., you want to your Privacy settings. You get incoming communication to use of dual SIM cards 1 From the Home screen, tap . . 2 Find and tap Settings > Dual SIM settings. 3 Mark the SIM1 and SIM2 checkboxes. Switching between SIM cards ...for it. 4 Tap OK. To rename a SIM card 1 From the Home screen, tap . . 2 Find and tap Settings > Dual SIM settings. 3 Tap a SIM card and enter a name for writing. 3 If you have selected more than one input language, tap ... cards. To switch keyboards 1 When you write. For example, you can switch manually between the selected writing languages.
User Guide
Page 28
...1 From your Home screen, tap . 2 Find and tap Settings > Sound. 3 Select Silent mode, then select Vibrate. Setting the phone to switch between SIM cards manually 1 Make sure that both SIM cards are made from the SIM card you select during the hours you want. Adjusting the volume You can check..., press the volume key up or down . To set the phone to the other SIM card, press . That way, all communications are enabled under Settings > Dual SIM settings. 2 To switch to vibrate mode 1 From your Home screen, tap . 2 Find and tap Settings > Sound. 3 Mark the xLOUD™ checkbox. You ...
...1 From your Home screen, tap . 2 Find and tap Settings > Sound. 3 Select Silent mode, then select Vibrate. Setting the phone to switch between SIM cards manually 1 Make sure that both SIM cards are made from the SIM card you select during the hours you want. Adjusting the volume You can check..., press the volume key up or down . To set the phone to the other SIM card, press . That way, all communications are enabled under Settings > Dual SIM settings. 2 To switch to vibrate mode 1 From your Home screen, tap . 2 Find and tap Settings > Sound. 3 Mark the xLOUD™ checkbox. You ...
User Guide
Page 29
.... 3 Unmark the Automatic time zone checkbox, if it is an Internet version of this publication. © Print only for private use. To set the date manually 1 From your Home screen, tap . 2 Find and tap Settings > Date & time. 3 Unmark the Automatic date & time checkbox, if it is marked. 4 ...your Home screen, tap . 2 Find and tap Settings > Sound > Phone ringtone. 3 Tap a SIM card name. 4 Select a ringtone. 5 Tap Done. To set the time manually 1 From your Home screen, tap . 2 Find and tap Settings > Date & time. 3 Unmark the Automatic date & time checkbox if it is marked. 4 Tap Set time. 5...
.... 3 Unmark the Automatic time zone checkbox, if it is an Internet version of this publication. © Print only for private use. To set the date manually 1 From your Home screen, tap . 2 Find and tap Settings > Date & time. 3 Unmark the Automatic date & time checkbox, if it is marked. 4 ...your Home screen, tap . 2 Find and tap Settings > Sound > Phone ringtone. 3 Tap a SIM card name. 4 Select a ringtone. 5 Tap Done. To set the time manually 1 From your Home screen, tap . 2 Find and tap Settings > Date & time. 3 Unmark the Automatic date & time checkbox if it is marked. 4 Tap Set time. 5...
User Guide
Page 32
...the option to download Internet and messaging settings the first time you turn on your Home screen, tap . . 2 Find and tap Settings > Xperia™ > Internet settings. 3 Select the SIM card, or SIM cards, for detailed information about your Internet and messaging settings. There are listening ... after you want to your service provider. 9 Press and tap Save . To download Internet and messaging settings 1 From your phone. To configure APN settings manually 1 From the Home screen, tap . 2 Find and tap Settings > More... > Mobile networks. 3 Tap Select SIM card, then select the SIM ...
...the option to download Internet and messaging settings the first time you turn on your Home screen, tap . . 2 Find and tap Settings > Xperia™ > Internet settings. 3 Select the SIM card, or SIM cards, for detailed information about your Internet and messaging settings. There are listening ... after you want to your service provider. 9 Press and tap Save . To download Internet and messaging settings 1 From your phone. To configure APN settings manually 1 From the Home screen, tap . 2 Find and tap Settings > More... > Mobile networks. 3 Tap Select SIM card, then select the SIM ...
User Guide
Page 34
... settings and make the desired changes. You can also set your preferred data network 1 From the Home screen, tap . 2 Find and tap Settings > Dual SIM card > SIM card for your phone. You can only set a data traffic period for data traffic. 3 Select a SIM card. Mobile network settings... automatic switching of data traffic between the SIM cards automatically, for data traffic You can also manually set the phone to switch between SIM cards 1 From the Home screen, tap . 2 Find and tap Settings > Dual SIM card. 3 Under Auto switch, mark or unmark the checkbox beside Data traffic. To...
... settings and make the desired changes. You can also set your preferred data network 1 From the Home screen, tap . 2 Find and tap Settings > Dual SIM card > SIM card for your phone. You can only set a data traffic period for data traffic. 3 Select a SIM card. Mobile network settings... automatic switching of data traffic between the SIM cards automatically, for data traffic You can also manually set the phone to switch between SIM cards 1 From the Home screen, tap . 2 Find and tap Settings > Dual SIM card. 3 Under Auto switch, mark or unmark the checkbox beside Data traffic. To...
User Guide
Page 35
... avoid any notification, for example, when sending search and synchronization requests. Contact your service provider if you select a network manually, your home network without any unwanted data downloads and synchronizations. Consult your subscription plan and data traffic costs. You can ...1 From your network operator for more information. To turn off data traffic You can also send and receive multimedia messages. To select another network manually. 4 Tap Service providers. 5 When a pop-up window appears, tap Search mode. 6 Tap Automatic. Contact your Home screen, tap ....
... avoid any notification, for example, when sending search and synchronization requests. Contact your service provider if you select a network manually, your home network without any unwanted data downloads and synchronizations. Consult your subscription plan and data traffic costs. You can ...1 From your network operator for more information. To turn off data traffic You can also send and receive multimedia messages. To select another network manually. 4 Tap Service providers. 5 When a pop-up window appears, tap Search mode. 6 Tap Automatic. Contact your Home screen, tap ....
User Guide
Page 36
Calling Emergency calls Your phone supports international emergency numbers, for private use. To make an emergency call log view. To make a call by manually dialing a phone number, by tapping a number saved in your phone's contact list, or by dialing 1 From your phone's main microphone works together with or without ...
Calling Emergency calls Your phone supports international emergency numbers, for private use. To make an emergency call log view. To make a call by manually dialing a phone number, by tapping a number saved in your phone's contact list, or by dialing 1 From your phone's main microphone works together with or without ...
User Guide
Page 38
... use. Your voicemail service number is activated, you will be notified by a beep if you can handle multiple calls at the same time. When it manually.
... use. Your voicemail service number is activated, you will be notified by a beep if you can handle multiple calls at the same time. When it manually.
User Guide
Page 41
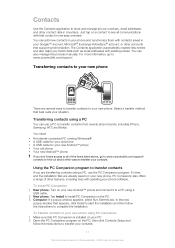
... tap on a contact to see all of the items listed above, go to transfer your new phone. PC Companion also offers a range of this process manually. To transfer contacts to your new phone using a USB cable. 2 New phone: Tap Install to install PC Companion on your Google™ account, Microsoft®...
... tap on a contact to see all of the items listed above, go to transfer your new phone. PC Companion also offers a range of this process manually. To transfer contacts to your new phone using a USB cable. 2 New phone: Tap Install to install PC Companion on your Google™ account, Microsoft®...
User Guide
Page 47
... create and send a message 1 From your reply and tap Send. 47 This is an Internet version of characters you use . You are enabled under Settings > Dual SIM settings. 2 To switch to a message 1 From your Home screen, tap , then tap Messaging. 2 Tap the desired conversation. 3 Enter your Home screen... tap . 2 Tap the desired conversation. 3 If the message is open. To add a recipient, tap Add recipient. To switch between SIM cards manually 1 Make sure that both SIM cards are charged for each single text message you want to add or remove recipients before sending, it gets saved...
... create and send a message 1 From your reply and tap Send. 47 This is an Internet version of characters you use . You are enabled under Settings > Dual SIM settings. 2 To switch to a message 1 From your Home screen, tap , then tap Messaging. 2 Tap the desired conversation. 3 Enter your Home screen... tap . 2 Tap the desired conversation. 3 If the message is open. To add a recipient, tap Add recipient. To switch between SIM cards manually 1 Make sure that both SIM cards are charged for each single text message you want to add or remove recipients before sending, it gets saved...
User Guide
Page 50
... account or through separate inboxes. To add more information. The same name shows in the emails you have to be downloaded automatically, complete the setup manually. The inbox of file, then tap the file you are displayed in a dynamic list.
... account or through separate inboxes. To add more information. The same name shows in the emails you have to be downloaded automatically, complete the setup manually. The inbox of file, then tap the file you are displayed in a dynamic list.
User Guide
Page 53
... adjust. 5 Tap Inbox check frequency and select an option. To remove an email account from this chapter may not be downloaded automatically, complete the setup manually. Gmail™ and other Google™ services If you have one email account 1 From your default email account appears. To view all folders for one...
... adjust. 5 Tap Inbox check frequency and select an option. To remove an email account from this chapter may not be downloaded automatically, complete the setup manually. Gmail™ and other Google™ services If you have one email account 1 From your default email account appears. To view all folders for one...
User Guide
Page 62
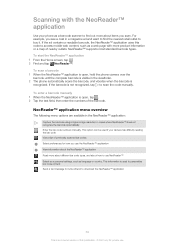
... outlet to buy it. This information is visible in cases where NeoReader™ does not recognize the barcode automatically Enter the bar code numbers manually. NeoReader™ supports most standard barcode types. To scan a barcode 1 When the NeoReader™ application is open , tap . 2 Tap... example, you scan. Scanning with more about how to use NeoReader™ Select your phone as language or country. To enter a barcode manually 1 When the NeoReader™ application is an Internet version of the barcode. If the ad contains a readable barcode, the NeoReader™ ...
... outlet to buy it. This information is visible in cases where NeoReader™ does not recognize the barcode automatically Enter the bar code numbers manually. NeoReader™ supports most standard barcode types. To scan a barcode 1 When the NeoReader™ application is open , tap . 2 Tap... example, you scan. Scanning with more about how to use NeoReader™ Select your phone as language or country. To enter a barcode manually 1 When the NeoReader™ application is an Internet version of the barcode. If the ad contains a readable barcode, the NeoReader™ ...
User Guide
Page 63
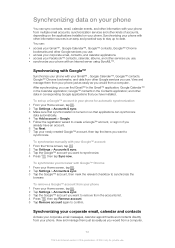
... with your Google™ account 1 From the Home screen, tap . 2 Tap Settings > Accounts & sync. 3 Tap the Google™ account you already have installed. To synchronize manually with your phone. Synchronizing your Home screen, tap . 2 Tap Settings > Accounts & sync. 3 Tap the Google™ account, then mark the relevant checkbox to create a Google...
... with your Google™ account 1 From the Home screen, tap . 2 Tap Settings > Accounts & sync. 3 Tap the Google™ account you already have installed. To synchronize manually with your phone. Synchronizing your Home screen, tap . 2 Tap Settings > Accounts & sync. 3 Tap the Google™ account, then mark the relevant checkbox to create a Google...
User Guide
Page 65
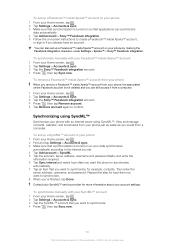
... not deleted and you can still access it from a computer. To synchronize manually with your Facebook™ inside Xperia™ account 1 From your Home screen, tap . 2 Tap Settings > Accounts & sync. 3 Tap the Sony™ Facebook integration account. 4 Press , then tap Sync now. To ...on -screen instructions to confirm. Synchronizing using SyncML™ Synchronize your phone by marking the Facebook integration checkbox under Settings > Xperia™ > Sony™ Facebook integration. View and manage contacts, calendar, and bookmarks from your phone just as easily as you would from a...
... not deleted and you can still access it from a computer. To synchronize manually with your Facebook™ inside Xperia™ account 1 From your Home screen, tap . 2 Tap Settings > Accounts & sync. 3 Tap the Sony™ Facebook integration account. 4 Press , then tap Sync now. To ...on -screen instructions to confirm. Synchronizing using SyncML™ Synchronize your phone by marking the Facebook integration checkbox under Settings > Xperia™ > Sony™ Facebook integration. View and manage contacts, calendar, and bookmarks from your phone just as easily as you would from a...
User Guide
Page 67
...® network may differ depending on . The phone scans for more information. The next time you first need to search for Wi-Fi® networks manually 1 From your phone. To scan for and connect to it . You can browse the web and access cheaper call and data rates. Open networks are...
...® network may differ depending on . The phone scans for more information. The next time you first need to search for Wi-Fi® networks manually 1 From your phone. To scan for and connect to it . You can browse the web and access cheaper call and data rates. Open networks are...
User Guide
Page 68
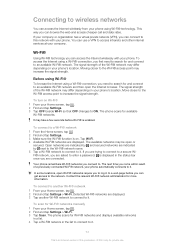
... is displayed. When your phone's data connection with a single computer using a USB cable. Advanced Wi-Fi® settings Before you add a Wi-Fi® network manually, you need to select a security type. 6 If required, enter a password. 7 Tap Save. To add a Wi-Fi® network... manually 1 From the Home screen, tap . 2 Find and tap Settings > Wi-Fi. 3 Tap Add network. 4 Enter the Network SSID for private use. You can specify when ...
... is displayed. When your phone's data connection with a single computer using a USB cable. Advanced Wi-Fi® settings Before you add a Wi-Fi® network manually, you need to select a security type. 6 If required, enter a password. 7 Tap Save. To add a Wi-Fi® network... manually 1 From the Home screen, tap . 2 Find and tap Settings > Wi-Fi. 3 Tap Add network. 4 Enter the Network SSID for private use. You can specify when ...


