Instruction Manual
Page 3
..., Inserting zippers and piping Hand-look quilt stitch 18 Zigzag stitching 19 Adjusting stitch width and length, Satin stitch Placement of software 37 - 38 Operation switches when embroidery unit is attached 39 Operation switches, Thread tension control Troubleshooting 40 - 43 Helpful information... Stitching 25 Continuous patterns 26 Sewing on a button 26 Buttonholes 27 - 29 Using buttonhole foot, Procedure, Corded buttonholes Buttonholing with Futura Multi hoop 44 - 47 Helpful messages when embroidering 48 4. OTHER THINGS YOU SHOULD KNOW Presser foot lifter 49 Feed dog control...
..., Inserting zippers and piping Hand-look quilt stitch 18 Zigzag stitching 19 Adjusting stitch width and length, Satin stitch Placement of software 37 - 38 Operation switches when embroidery unit is attached 39 Operation switches, Thread tension control Troubleshooting 40 - 43 Helpful information... Stitching 25 Continuous patterns 26 Sewing on a button 26 Buttonholes 27 - 29 Using buttonhole foot, Procedure, Corded buttonholes Buttonholing with Futura Multi hoop 44 - 47 Helpful messages when embroidering 48 4. OTHER THINGS YOU SHOULD KNOW Presser foot lifter 49 Feed dog control...

Instruction Manual
Page 5
...used for the majority of your sewing. Embroidery software CD 19 FUTURA embroidery is a "system" in which your computer software communicates designs to the CD insert for needle plate 10. Buttonhole opener/Brush 9. The FUTURA embroidery designs are Class I5 J. 16 FOR EMBROIDERY... 19. Auxiliary spool pin 4. To install the FUTURA software, refer to your computer by installing the FUTURA software. Button sewing foot 1 16. Screwdriver (large) 11...
...used for the majority of your sewing. Embroidery software CD 19 FUTURA embroidery is a "system" in which your computer software communicates designs to the CD insert for needle plate 10. Buttonhole opener/Brush 9. The FUTURA embroidery designs are Class I5 J. 16 FOR EMBROIDERY... 19. Auxiliary spool pin 4. To install the FUTURA software, refer to your computer by installing the FUTURA software. Button sewing foot 1 16. Screwdriver (large) 11...

Instruction Manual
Page 39
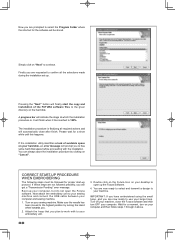
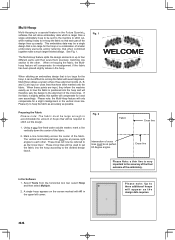
Please follow the below listed instructions in order to successfully install FUTURA on OK. If after a short while, the software doesn't automatically start the installation process, you would have to first install the contents of the CD to your PC. CD-ROM Simply ... move on "Next" to continue. 37 After reading and agreeing with the Welcome window. The FUTURA software comes on Next, and then select the directory where the software should be installed. It is "D:" Please insert the FUTURA CD-ROM into the CD-ROM disc receiver in the License Agreement, please click on "Yes...
Please follow the below listed instructions in order to successfully install FUTURA on OK. If after a short while, the software doesn't automatically start the installation process, you would have to first install the contents of the CD to your PC. CD-ROM Simply ... move on "Next" to continue. 37 After reading and agreeing with the Welcome window. The FUTURA software comes on Next, and then select the directory where the software should be installed. It is "D:" Please insert the FUTURA CD-ROM into the CD-ROM disc receiver in the License Agreement, please click on "Yes...
Instruction Manual
Page 40
... follow steps 1 through 4 above. 38 Wait for a moment, turn OFF your hard disk, an error message will automatically close the Futura software and then turn on your machine. Please wait for a short while until this happens. You can always abort the installation procedure by turning...embroidery unit. 3. Finally you are not followed precisely, you will finish when it has reached to your sewing machine. Boot up the Futura Software. 4. Attach the hoop that you to free some hard disk space before proceeding with to work with the installation. If the installation ...
... follow steps 1 through 4 above. 38 Wait for a moment, turn OFF your hard disk, an error message will automatically close the Futura software and then turn on your machine. Please wait for a short while until this happens. You can always abort the installation procedure by turning...embroidery unit. 3. Finally you are not followed precisely, you will finish when it has reached to your sewing machine. Boot up the Futura Software. 4. Attach the hoop that you to free some hard disk space before proceeding with to work with the installation. If the installation ...

Instruction Manual
Page 41
Note: The embroidery hoop will move as it is recommended to decrease the thread tension toward "0" and activate the "Speed limiter", by the software for Photo Stitch (optional) it is advancing through a design that the machine malfunctions. To advance continuously, press and hold this button. To reverse continuously, ...
Note: The embroidery hoop will move as it is recommended to decrease the thread tension toward "0" and activate the "Speed limiter", by the software for Photo Stitch (optional) it is advancing through a design that the machine malfunctions. To advance continuously, press and hold this button. To reverse continuously, ...
Instruction Manual
Page 44
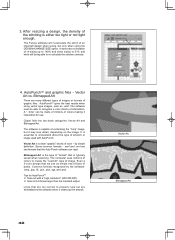
...-sizing up the artwork. Common formats recognized by simple definition. It does have a limitation of information. The software must be made of millions of "format" that is the type of colors making it impractical for AutoPunchTM ...with AutoPunch. It is either too tight or not tight enough. Bitmapped Art There are eliminated by the software when it may lose detail, depending on the image. Bitmapped Art is typically saved when scanning. AutoPunchTM...Bitmapped Art 42 Vector Art is capable of pixels. The Futura software will recalculate the stitch of color - A ".
...-sizing up the artwork. Common formats recognized by simple definition. It does have a limitation of information. The software must be made of millions of "format" that is the type of colors making it impractical for AutoPunchTM ...with AutoPunch. It is either too tight or not tight enough. Bitmapped Art There are eliminated by the software when it may lose detail, depending on the image. Bitmapped Art is typically saved when scanning. AutoPunchTM...Bitmapped Art 42 Vector Art is capable of pixels. The Futura software will recalculate the stitch of color - A ".

Instruction Manual
Page 45
... keyboard. 8. When sizing designs in the hoop on screen and keep the appropriate density. 7. 5. One color block can resize designs from the Library in the Futura software you have brought them into the hoop and exited the text window.
... keyboard. 8. When sizing designs in the hoop on screen and keep the appropriate density. 7. 5. One color block can resize designs from the Library in the Futura software you have brought them into the hoop and exited the text window.
Instruction Manual
Page 46
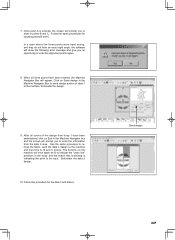
..., the Multihoop feature will compensate for the hoop or a combination of the fabric. 2. These cross lines will appear as possible. In the Software 1. A single hoop appears on cross lines that have been marked onto the fabric. This embroidery data may be a single design that is ... with exact alignment. Mark a line horizontally across the center of the embroidery. Multi-Hoop Multi-Hooping is a special feature in the Futura QuartetTM software that will allow embroidery data which is larger than a single embroidery hoop to be sent to the machine to stitch out, while making...
..., the Multihoop feature will compensate for the hoop or a combination of the fabric. 2. These cross lines will appear as possible. In the Software 1. A single hoop appears on cross lines that have been marked onto the fabric. This embroidery data may be a single design that is ... with exact alignment. Mark a line horizontally across the center of the embroidery. Multi-Hoop Multi-Hooping is a special feature in the Futura QuartetTM software that will allow embroidery data which is larger than a single embroidery hoop to be sent to the machine to stitch out, while making...

Instruction Manual
Page 47
... into the hoop, aligning cross lines of data 1 within the guide line markings of markings on the tool bar. 5. Set fabric and stabilizer into the software. (Additional numbered hoops will appear as the design parts flow out of the first hoop section). 4. These marks are two sets of the hoop. (See...
... into the hoop, aligning cross lines of data 1 within the guide line markings of markings on the tool bar. 5. Set fabric and stabilizer into the software. (Additional numbered hoops will appear as the design parts flow out of the first hoop section). 4. These marks are two sets of the hoop. (See...
Instruction Manual
Page 49
... procedures for the data 3 and data 4. In a case where the three points were input wrong, and they do not form an exact right angle, the software will prompt you an opportunity to the machine and input the A, B and C points. Send design 47 7.
... procedures for the data 3 and data 4. In a case where the three points were input wrong, and they do not form an exact right angle, the software will prompt you an opportunity to the machine and input the A, B and C points. Send design 47 7.


