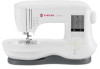
Instruction Manual and Troubleshooting Guide
Page 1
a INSTRUCTION MANUAL C440 C440Q CD (IP O 0 O 0 0 SOCISS SeSOO n SINGER 0
Instruction Manual and Troubleshooting Guide
Page 2
...adjustment in order to the off ("0") when making any air openings blocked. Keep these instructions conveniently near children. • Use this manual. Close attention is necessary when this household sewing machine. See instructions for its intended use as described in this sewing machine only for ...Servicing of electric shock: A sewing machine should always be left unattended when plugged in this manual. • Never operate this sewing machine if it has a damaged cord or plug, if it must be replaced by the manufacturer...
Instruction Manual and Troubleshooting Guide
Page 4
... design our machines for over 160 years. We have the easiest and most successful sewing experience. We're ready to us that you enjoy your SINGER® sewing machine. I1• •%. .0I ..1 SETTING UP THE MACHINE Sewing Preparation 13 Main Parts 6 Touch Panel LCD 13 Accessories 7 ... 12 Threading the Upper Thread 19 Mounting Machine in sewing for sewists of all skill levels so that you have provided an instruction manual with LED Indicator 11 Threading the Machine 17 Start/Stop Button Reverse Button 11 11 Preparing the Bobbin 17 Presser Foot Lifter 12 ...
Instruction Manual and Troubleshooting Guide
Page 13
... buttons and the pattern chart located inside of stitch pattern will display two buttons: A a. You can damage the screen. Sequence Mode Button By pressing this manual. d. Then press the "J" button. SETTING UP THE MACHINE Sewing Preparation TOUCH PANEL LCD When you turn on the stitch selected. NOTE: If the message shown...
Instruction Manual and Troubleshooting Guide
Page 38
...first turning the handwheel toward you desire. NOTE: Twin needle sewing may be sewn with this machine. Thread the first thread as first. 8. Use only SINGERS branded twin needles for this machine. Set the twin needle width to back. 0 7,71(±)3.6 it 2.0 a r=ii-T. Sew the stitches. All-...3. Thread right needle eye by hand from front to "-.-". o co 14. A twin needle is not provided with a twin needle. Thread each needle eye manually. 10. For better sewing results, do not place the thread into the hole. 0 ' 12. A Make sure to the hook from the main screen....
Instruction Manual and Troubleshooting Guide
Page 46
EN Rated voltage Nominal consumption Light Sewing speed Machine dimensions Length (mm) Width (mm) Height (mm) Net weight (kg) Foot Control Model Rated voltage 100-240V -50/60Hz 55W LED 800 rpm maximum 241 512 310 8.4 C-9001 DC 15V, max. 3mA Technical Specification _ • The technical specifications and this Instruction manual can be changed without prior notice. 0