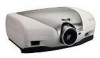
XV Z9000U Lamp Timer Reset - Sharp SharpVision DLP Projector
XV Z9000U Lamp Timer Reset
Related Manual Pages


Similar Questions

Lamp Timer Reset Problems
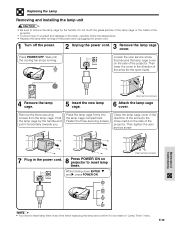
I just purchaced a replacement lamp for the Sharp xvz200 and follow the instructions in the manual t...
I just purchaced a replacement lamp for the Sharp xvz200 and follow the instructions in the manual t...
(Posted by ron81116 10 years ago)

Sharp Pg-f312x Lamp Timer Reset Problem
Replaced the bulb and assembly 5/22/13 with an OEM bulb/generic housing unit from Apex Lamps. The pr...
Replaced the bulb and assembly 5/22/13 with an OEM bulb/generic housing unit from Apex Lamps. The pr...
(Posted by jblynch72 11 years ago)

Bqc-xvz9000/1 Lamp
How can I tell if the lamp is burned out by looking at it
How can I tell if the lamp is burned out by looking at it
(Posted by jkrkemj 12 years ago)

Problems After Lamp Replacement - Sharp Xv-z9000u
Recently changed the lamp (complete assembly) on my projector. After resetting the timer, the unit w...
Recently changed the lamp (complete assembly) on my projector. After resetting the timer, the unit w...
(Posted by jphilsmith 12 years ago)

Lamp Circuit Failure Sharp Xv-z9000u
I just replaced the bulb and it has been working great now it will not work and the manule said Lamp...
I just replaced the bulb and it has been working great now it will not work and the manule said Lamp...
(Posted by rpaddack 12 years ago)