Sharp LL171MU Support and Manuals
Get Help and Manuals for this Sharp item
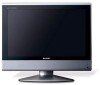
View All Support Options Below
Free Sharp LL171MU manuals!
Problems with Sharp LL171MU?
Ask a Question
Free Sharp LL171MU manuals!
Problems with Sharp LL171MU?
Ask a Question
Popular Sharp LL171MU Manual Pages
Operation Manual - Page 5
...241;ol
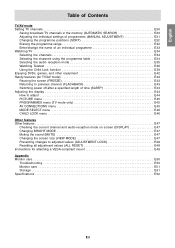
Table of Contents
TV/AV mode Setting TV channels E30
Saving broadcast TV channels in the memory (AUTOMATIC SEARCH E30 Adjusting the individual settings of programmes (MANUAL ADJUSTMENT E31 Changing the ... (ALL RESET E48 Instructions for attaching a VESA-compliant mount E49
Appendix Monitor care E50
Troubleshooting E50 Monitor care E51 Storage E51 Specifications E52
E3
English
Operation Manual - Page 6
... bend it . - Causing the monitor to this could result in unsafe places. Do not damage the power cord nor place heavy
objects on top of Microsoft Corporation. - Use only the power cord supplied with the application of the display. Doing so could lead to fire as "Windows 3.1". Refer the servicing to repair the AC adapter if it...
Operation Manual - Page 7
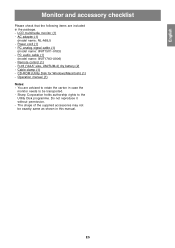
... (1) - Operation manual (1) Notes: - You are included in the package. -
LCD multimedia monitor (1) - Power cord (1) - R-03 ("AAA" size, UM/SUM-4) dry battery (2) - Cable clamp (1) - CD-ROM (Utility Disk for Windows/Macintosh) (1) - Do not reproduce it without permission. - The shape of the supplied accessories may not be transported. - PC analog signal cable (1)
(model name: 0NIT15V1...
Operation Manual - Page 16
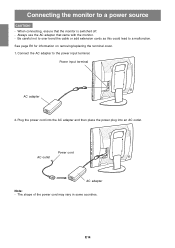
When connecting, ensure that came with the monitor. -
AC outlet
Power cord
AC adapter
Note: - Connect the AC adapter to a malfunction. Power input terminal
AC adapter 2.
Plug the power cord into the AC adapter and then place the power plug into an AC outlet.
See page E6 for information on removing/replacing the terminal cover. 1. Always use the AC...
Operation Manual - Page 17
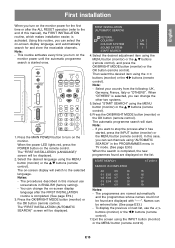
... after the FIRST INSTALLATION routine is started , press the INPUT button (monitor) or
the MENU button (remote control). To display the previous or next list, use screenshots in ENGLISH (factory setting). - Using this manual use the
buttons (monitor) or the buttons (remote control). 7.
INPUT
MENU
/ OK
BRIGHT MODE
CH
POWER
VIEW MODE PIP
PC
TV
AV1 AV2...
Operation Manual - Page 19
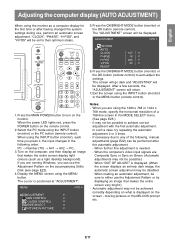
...after having changed the system settings during use the Adjustment ... 768-line screen in the following , manual adjustments (page E22) can use the Adjustment... MODE
CH
/BRIGHT
POWER
VIEW MODE PIP
PC TV AV1 AV2
SUBPAGE REVEAL...monitor) or the OK button (remote control). When the power LED lights red, press the POWER button on the monitor. Select the PC mode using the INPUT button (monitor...
Operation Manual - Page 20
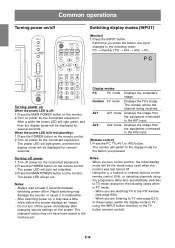
...
OK
BRIGHT
DISPLAY
FREEZE /HOLD
SOUND
Switching display modes (INPUT)
[Monitor] 1. When the power LED is off the power immediately after changing various settings on the monitor, the initial display
mode will switch to TV (see page E20). -
The power LED will go out. Notes: - After switching power on, it to the AV1 input. When you press the...
Operation Manual - Page 28
...95. Click on [Display]. 4. Click on [Display a list of all the drivers in a
specific location, so you can select the driver you would like to install the ICC profile only, please refer to install the monitor set-up information on [Settings], [Advanced Properties], and
[Monitor], then [Change]. 5.
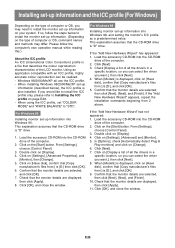
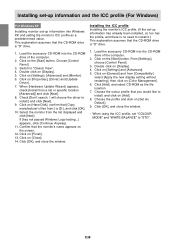
Installing set-up information and the ICC profile (For Windows)
Depending on the type...
Operation Manual - Page 29
... confirm that the CD-ROM drive is [D:], and click [OK]. 5. Select the monitor details from :] is "D" drive. From [Settings], choose [Control Panel].
3. When [Models] is displayed, click on [Properties], [Driver] and [Update
Driver]. 6. Load the accessory CD-ROM into Windows 2000, and setting the monitor's ICC profile as a predetermined value. Double click on [Have disk], confirm that...
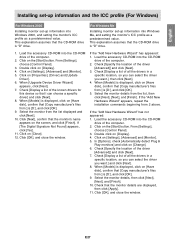
Operation Manual - Page 30
... and click [Next]. This explanation assumes that the monitor's name appears on [Add]. 8. From [Settings], choose [Control Panel].
3. Click on [Properties], [Driver] and [Update
Driver]. 7. Click [Add], and select CD-ROM as a predetermined value. Choose the colour profile that [Copy manufacturer's files from a list or specific location [Advanced]] and click [Next]. 8. E28 When...
Operation Manual - Page 34

...
10
15
01 E02 06
11
16
02 E03 07
12
17
03 E04 08
13
18
04
09
14
19
3. The selected programme will be erased using the
buttons (monitor) or the
buttons (remote control).
All subsequent programmes move up.
6.
SORT
< TV/AV >
Erasing the programme range
The individual programme or programmes...
Operation Manual - Page 36

...11
16
02 E03 07
12
17
03 E04 08
13
18
04
09
14
19
3.
INPUT
MENU
/ OK
BRIGHT MODE
CH
POWER
VIEW MODE PIP
PC TV AV1 AV2
SUBPAGE REVEAL SUBTITLE ...set to 100 channels (0-99). Press the buttons (remote control) when
the cursor is being displayed, you can not display the programme table by the 5 button
within 3 seconds. Watching TV
Selecting the channels
This monitor...
Operation Manual - Page 38
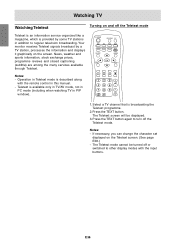
... graphically on the Teletext screen. (See page E38.) - Watching TV
Watching Teletext
Turning on and off the Teletext mode
Teletext is an information service organized like a magazine, which is broadcasting the Teletext programme.
2. Your monitor receives Teletext signals broadcast by some TV stations in this manual. - Press the TEXT button. Press the TEXT button again...
Operation Manual - Page 43

...When the power is turned...Français Deutsch
Italiano
Español
Watching TV
Temporarily cancelling the Child Lock setting By temporarily cancelling the Child Lock setting, you can view the programmes for the
locked programme...screen is cancelled within approximately 20 seconds, the monitor goes to operate the monitor in the PIP window, closing the PIP window using the channel buttons (0-9) ...
Operation Manual - Page 52
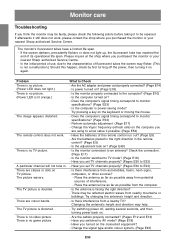
... to monitor
specifications? (Page E53) - Have the batteries of fluorescent tubes the screen may help.
- Have you turned on again. Try changing the antenna's height and direction.
- Have you set TV channels properly? (Pages E30 to E33)
- If afterwards it on the connected equipment? -
There is no game picture. Are the AC adapter and power cord...
Sharp LL171MU Reviews
We have not received any reviews for Sharp yet.