Owner's Manual
Page 3
...Pedals, and Crank Arms closely. Make sure that changes in speed and resistance level can be attentive in use of the product. Moving parts and other features of this equipment. Given the obvious importance of this space when machine is for replacement stickers. • Children must not...• Consult a physician before you start an exercise program. Be sure to this machine. Contact Nautilus® Customer Service for loose parts or signs of the magnets in the assembly, maintenance, and/or use if found in death or serious injury. This machine contains moving...
...Pedals, and Crank Arms closely. Make sure that changes in speed and resistance level can be attentive in use of the product. Moving parts and other features of this equipment. Given the obvious importance of this space when machine is for replacement stickers. • Children must not...• Consult a physician before you start an exercise program. Be sure to this machine. Contact Nautilus® Customer Service for loose parts or signs of the magnets in the assembly, maintenance, and/or use if found in death or serious injury. This machine contains moving...
Owner's Manual
Page 9
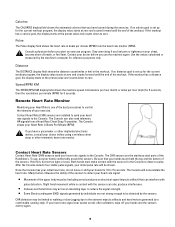
... the best procedures to control the intensity of the workout. Stop exercising if you feel faint. Contact Heart Rate (CHR) sensors are the stainless steel parts of the Handlebars. Contact Heart Rate Sensors Contact Heart Rate (CHR) sensors send your hands for 6 seconds. Hold firm, but not too tight or loose...
... the best procedures to control the intensity of the workout. Stop exercising if you feel faint. Contact Heart Rate (CHR) sensors are the stainless steel parts of the Handlebars. Contact Heart Rate Sensors Contact Heart Rate (CHR) sensors send your hands for 6 seconds. Hold firm, but not too tight or loose...
Owner's Manual
Page 17
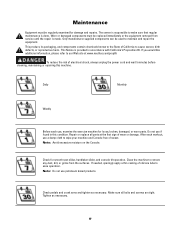
...our Web site at the first sign of sweat. Note: Do not use , examine the exercise machine for loose, broken, damaged, or worn parts. The owner is provided in this machine. Worn or damaged components must be regularly examined for smooth seat slider, handlebar slider, and console tilt .... Clean the machine to remove any dust, dirt, or grime from service until the repair is done. Tighten as necessary. Make sure all parts at www.nautilus.com/prop65 To reduce the risk of electrical shock, always unplug the power cord and wait 5 minutes before cleaning, maintaining or...
...our Web site at the first sign of sweat. Note: Do not use , examine the exercise machine for loose, broken, damaged, or worn parts. The owner is provided in this machine. Worn or damaged components must be regularly examined for smooth seat slider, handlebar slider, and console tilt .... Clean the machine to remove any dust, dirt, or grime from service until the repair is done. Tighten as necessary. Make sure all parts at www.nautilus.com/prop65 To reduce the risk of electrical shock, always unplug the power cord and wait 5 minutes before cleaning, maintaining or...
Warranty
Page 1
... maximum user weights as described in the products Assembly and Owner's manual. trademarks include NAUTILUS®, BOWFLEX®, STAIRMASTER®, SCHWINN® and UNIVERSAL® and respective logos. 1-800-NAUTILUS www.nautilus.com. Warranty Validation Product owners who have other rights,...the original Warranty period. Expirations If the warranty has expired, Nautilus, Inc. Nautilus® does not guarantee availability of spare parts after expiration of this warranty will repair any prior, contrary or additional representations, whether oral or written. Nautilus, Inc. ...
... maximum user weights as described in the products Assembly and Owner's manual. trademarks include NAUTILUS®, BOWFLEX®, STAIRMASTER®, SCHWINN® and UNIVERSAL® and respective logos. 1-800-NAUTILUS www.nautilus.com. Warranty Validation Product owners who have other rights,...the original Warranty period. Expirations If the warranty has expired, Nautilus, Inc. Nautilus® does not guarantee availability of spare parts after expiration of this warranty will repair any prior, contrary or additional representations, whether oral or written. Nautilus, Inc. ...
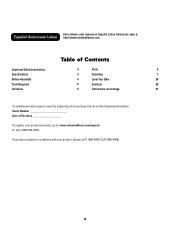
Assembly Manual
Page 2
... with your product warranty , go to: www.schwinnfitness.com/register Or call 1 (800) NAUTILUS (628-8458). 2 Table of Contents Important Safety Instructions 3 Parts 6 Specifications 4 Assembly 7 Before Assembly 4 Level Your Bike 24 Tools Required 5 Contacts 26 Hardware 5 Instructions de montage 27 To validate warranty support, keep the original proof of purchase and record...
... with your product warranty , go to: www.schwinnfitness.com/register Or call 1 (800) NAUTILUS (628-8458). 2 Table of Contents Important Safety Instructions 3 Parts 6 Specifications 4 Assembly 7 Before Assembly 4 Level Your Bike 24 Tools Required 5 Contacts 26 Hardware 5 Instructions de montage 27 To validate warranty support, keep the original proof of purchase and record...
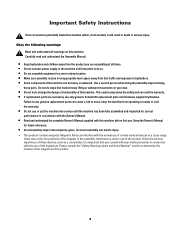
Assembly Manual
Page 3
... death or serious injury. Users may come into service until instructed to do steps that you are necessary use only genuine Schwinn® replacement parts and hardware supplied by Nautilus. Please consult the "Safety Warning Labels and Serial Number" section to determine the location of...users, keep the machine from foot traffic and exposure to bystanders. • Some components of this machine. Failure to use genuine replacement parts can interfere with the use of the machine can lead to injury. • This product contains magnets. Given the obvious importance of this...
... death or serious injury. Users may come into service until instructed to do steps that you are necessary use only genuine Schwinn® replacement parts and hardware supplied by Nautilus. Please consult the "Safety Warning Labels and Serial Number" section to determine the location of...users, keep the machine from foot traffic and exposure to bystanders. • Some components of this machine. Failure to use genuine replacement parts can interfere with the use of the machine can lead to injury. • This product contains magnets. Given the obvious importance of this...
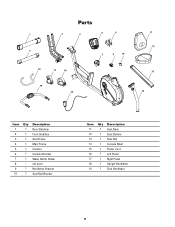
Assembly Manual
Page 6
not used 9 1 Handlebar Bracket 10 1 Seat Rail Bracket Item Qty Description 11 1 Seat Back 12 1 Seat Bottom 13 1 Seat Rail 14 1 Console Mast 15 1 Power Cord 16 1 Left Pedal 17 1 Right Pedal 18 1 Upright Handlebar 19 1 Side Handlebar 6 Parts 1 3 4 5 6 2 18 17 16 19 15 7 9 10 11 12 13 14 Item Qty Description 1 1 Rear Stabilizer 2 1 Front Stabilizer 3 1 Seat Frame 4 1 Main Frame 5 1 Console 6 1 Console Bracket 7 1 Water Bottle Holder 8 -
not used 9 1 Handlebar Bracket 10 1 Seat Rail Bracket Item Qty Description 11 1 Seat Back 12 1 Seat Bottom 13 1 Seat Rail 14 1 Console Mast 15 1 Power Cord 16 1 Left Pedal 17 1 Right Pedal 18 1 Upright Handlebar 19 1 Side Handlebar 6 Parts 1 3 4 5 6 2 18 17 16 19 15 7 9 10 11 12 13 14 Item Qty Description 1 1 Rear Stabilizer 2 1 Front Stabilizer 3 1 Seat Frame 4 1 Main Frame 5 1 Console 6 1 Console Bracket 7 1 Water Bottle Holder 8 -


