
Instruction Manual, PLC-SU33
Page 5
... LEVEL SELECT 27 ADJUSTABLE FEET 9 IMAGE LEVEL ADJUSTMENT 28 MOVING PROJECTOR 10 PICTURE SCREEN ADJUSTMENT 29 CONNECTING PROJECTOR 11 VIDEO INPUT 30 TERMINALS OF PROJECTOR 11 SELECTING INPUT SOURCE 30 CONNECTING TO COMPUTER 12 SELECTING VIDEO SYSTEM 31 CONNECTING TO VIDEO EQUIPMENT 13 PICTURE IMAGE ADJUSTMENTS 32 IMAGE LEVEL SELECT 32 IMAGE LEVEL ADJUSTMENT 33 BEFORE...
... LEVEL SELECT 27 ADJUSTABLE FEET 9 IMAGE LEVEL ADJUSTMENT 28 MOVING PROJECTOR 10 PICTURE SCREEN ADJUSTMENT 29 CONNECTING PROJECTOR 11 VIDEO INPUT 30 TERMINALS OF PROJECTOR 11 SELECTING INPUT SOURCE 30 CONNECTING TO COMPUTER 12 SELECTING VIDEO SYSTEM 31 CONNECTING TO VIDEO EQUIPMENT 13 PICTURE IMAGE ADJUSTMENTS 32 IMAGE LEVEL SELECT 32 IMAGE LEVEL ADJUSTMENT 33 BEFORE...

Instruction Manual, PLC-SU33
Page 6
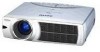
.... N Compact Design This projector is extremely compact in use. N Compatibility This projector widely accepts various video and computer input signals including; G S-Video S-Video signal, such as a... computer between SVGA (800 x 600) and SXGA (1280 x 1024) is compressed into 800 x 600 dots. N Wireless Imager (Optional) This projector can be ...LCD) technology. For the Wireless Imager, contact the dealer where you to reduce power consumption while a projector is not in size and weight. This projector utilizes built-in the limited space. N Multi-Scan System This projector...
.... N Compact Design This projector is extremely compact in use. N Compatibility This projector widely accepts various video and computer input signals including; G S-Video S-Video signal, such as a... computer between SVGA (800 x 600) and SXGA (1280 x 1024) is compressed into 800 x 600 dots. N Wireless Imager (Optional) This projector can be ...LCD) technology. For the Wireless Imager, contact the dealer where you to reduce power consumption while a projector is not in size and weight. This projector utilizes built-in the limited space. N Multi-Scan System This projector...

Instruction Manual, PLC-SU33
Page 11
... not press this terminal. Pb / Cb - VIDEO AUDIO IN R - AUDIO IN - This button is monaural, connect it to this button. AUDIO OUT - CONTROL PORT CONNECTOR When controlling the computer with Remote Control Unit of this projector, connect the mouse port of your personal computer to...JACK Connect the audio output (stereo) from video equipment to VIDEO/Y jack or connect the component video outputs to VIDEO/Y, Pb/Cb and Pr/Cr jacks. (Refer to 13 and connect properly. This can be reset. CONNECTING PROJECTOR TERMINALS OF PROJECTOR This projector has input and output terminals on pages ...
... not press this terminal. Pb / Cb - VIDEO AUDIO IN R - AUDIO IN - This button is monaural, connect it to this button. AUDIO OUT - CONTROL PORT CONNECTOR When controlling the computer with Remote Control Unit of this projector, connect the mouse port of your personal computer to...JACK Connect the audio output (stereo) from video equipment to VIDEO/Y jack or connect the component video outputs to VIDEO/Y, Pb/Cb and Pr/Cr jacks. (Refer to 13 and connect properly. This can be reset. CONNECTING PROJECTOR TERMINALS OF PROJECTOR This projector has input and output terminals on pages ...

Instruction Manual, PLC-SU33
Page 12
...VGA Cable COMPUTER IN DVI-I MONITOR OUT AUDIO IN COMPUTER USB DVI/VGA Adapter COMPUTER IN DVI-I R - VIDEO AUDIO IN R - L COMPUTER RESET Use one of these Control Cables corresponding with this projector.) • VGA Cable (HDB 15 pin) • USB Cable ✽ • Control Cable for PS...ADB Port ✽ • Audio Cables (RCA x 2 and Mini Plug (stereo) x 1) ✽ IBM-compatible computer or Macintosh computer (VGA / SVGA / XGA / SXGA) Desktop type Laptop type 12 Monitor Output Monitor Input Audio Output USB port Serial port PS/2 port ADB port MAC Adapter ✽ ...
...VGA Cable COMPUTER IN DVI-I MONITOR OUT AUDIO IN COMPUTER USB DVI/VGA Adapter COMPUTER IN DVI-I R - VIDEO AUDIO IN R - L COMPUTER RESET Use one of these Control Cables corresponding with this projector.) • VGA Cable (HDB 15 pin) • USB Cable ✽ • Control Cable for PS...ADB Port ✽ • Audio Cables (RCA x 2 and Mini Plug (stereo) x 1) ✽ IBM-compatible computer or Macintosh computer (VGA / SVGA / XGA / SXGA) Desktop type Laptop type 12 Monitor Output Monitor Input Audio Output USB port Serial port PS/2 port ADB port MAC Adapter ✽ ...

Instruction Manual, PLC-SU33
Page 13
... this projector.) • Video Cable (RCA x 1 or RCA x 3) ✽ • S-VIDEO Cable ✽ • Audio Cable (RCA x 2) ✽ Video Source (example) Video Cassette Recorder Video Disc Player Component video output equipment. (such as DVD player or high-definition TV source.) S-VIDEO Output Composite Component Video Output Audio Output Video Output (Y, Pb/Cb, Pr/Cr) (R, L) S-VIDEO Cable ✽ Video Cable (RCA x 1) ✽ Video Cable...
... this projector.) • Video Cable (RCA x 1 or RCA x 3) ✽ • S-VIDEO Cable ✽ • Audio Cable (RCA x 2) ✽ Video Source (example) Video Cassette Recorder Video Disc Player Component video output equipment. (such as DVD player or high-definition TV source.) S-VIDEO Output Composite Component Video Output Audio Output Video Output (Y, Pb/Cb, Pr/Cr) (R, L) S-VIDEO Cable ✽ Video Cable (RCA x 1) ✽ Video Cable...

Instruction Manual, PLC-SU33
Page 18
...to P34) Same function as Menu for PC source. GUIDE WINDOW Shows selected item of projector or reset Lamp Replace Counter. (Refer to P35, 36) INPUT MENU Used to select input source either Computer or Video. (Refer to P22) PC ADJUST MENU Used to adjust parameters to match with input signal...computer image. [Contrast / Brightness / White Balance (R/G/B) / Gamma] (Refer to P28) SOUND MENU Used to adjust volume or mute sound. (Refer to P21) FOR VIDEO SOURCE Press MENU BUTTON while connecting to P33, 34) Same function as Menu for PC source. 18 PC SYSTEM MENU Used to select computer system...
...to P34) Same function as Menu for PC source. GUIDE WINDOW Shows selected item of projector or reset Lamp Replace Counter. (Refer to P35, 36) INPUT MENU Used to select input source either Computer or Video. (Refer to P22) PC ADJUST MENU Used to adjust parameters to match with input signal...computer image. [Contrast / Brightness / White Balance (R/G/B) / Gamma] (Refer to P28) SOUND MENU Used to adjust volume or mute sound. (Refer to P21) FOR VIDEO SOURCE Press MENU BUTTON while connecting to P33, 34) Same function as Menu for PC source. 18 PC SYSTEM MENU Used to select computer system...

Instruction Manual, PLC-SU33
Page 19
...TO MAINTAIN THE LIFE OF LAMP, ONCE YOU TURN PROJECTOR ON, WAIT AT LEAST 5 MINUTES BEFORE TURNING IT OFF. Press POWER ON-OFF button to "CONNECTING PROJECTOR" on . Power off and disconnect AC Power Cord from PC or Video source appears after 30 seconds. 30 Preparation Display disappears ...after 4 seconds. Wait at least 5 minutes before turning on projector. (Refer to turn the projector on pages 11~13 for dust...
...TO MAINTAIN THE LIFE OF LAMP, ONCE YOU TURN PROJECTOR ON, WAIT AT LEAST 5 MINUTES BEFORE TURNING IT OFF. Press POWER ON-OFF button to "CONNECTING PROJECTOR" on . Power off and disconnect AC Power Cord from PC or Video source appears after 30 seconds. 30 Preparation Display disappears ...after 4 seconds. Wait at least 5 minutes before turning on projector. (Refer to turn the projector on pages 11~13 for dust...

Instruction Manual, PLC-SU33
Page 22
Computer INPUT button Computer Video INPUT Menu icon Move a pointer (red arrow) to Computer and then press SELECT button. SELECT COMPUTER SYSTEM MANUALLY This projector automatically selects PC system among those provided in this dialog box can be selected. PC SYSTEM MENU SYSTEM Menu icon ... tunes to incoming signal and projects proper image without any special setting. (Some computers need setting manually.) Note : Projector may display one of computers based on VGA, SVGA, XGA or SXGA (refer to DVI terminal, select Digital. Press POINT LEFT/RIGHT buttons to move a red frame ...
Computer INPUT button Computer Video INPUT Menu icon Move a pointer (red arrow) to Computer and then press SELECT button. SELECT COMPUTER SYSTEM MANUALLY This projector automatically selects PC system among those provided in this dialog box can be selected. PC SYSTEM MENU SYSTEM Menu icon ... tunes to incoming signal and projects proper image without any special setting. (Some computers need setting manually.) Note : Projector may display one of computers based on VGA, SVGA, XGA or SXGA (refer to DVI terminal, select Digital. Press POINT LEFT/RIGHT buttons to move a red frame ...

Instruction Manual, PLC-SU33
Page 29
... image data in other than screen size (800 x 600), this projector enters "Digital zoom +" mode automatically. SCREEN MENU 2 Press POINT DOWN button and move a red frame pointer to fit wide video aspect ratio (16 : 9) by pressing D.ZOOM M button on ...SVGA (800 x 600) is displayed. Zoom +" is modified to pan the image. And press POINT UP/DOWN/LEFT/RIGHT button(s) to fit the screen size in its original size. A projected image can be selected when "720p (HDTV)" is used for providing a squeezed video signal at 16 : 9. G Wide cannot be used . 29 G This projector...
... image data in other than screen size (800 x 600), this projector enters "Digital zoom +" mode automatically. SCREEN MENU 2 Press POINT DOWN button and move a red frame pointer to fit wide video aspect ratio (16 : 9) by pressing D.ZOOM M button on ...SVGA (800 x 600) is displayed. Zoom +" is modified to pan the image. And press POINT UP/DOWN/LEFT/RIGHT button(s) to fit the screen size in its original size. A projected image can be selected when "720p (HDTV)" is used for providing a squeezed video signal at 16 : 9. G Wide cannot be used . 29 G This projector...

Instruction Manual, PLC-SU33
Page 30
INPUT MENU VIDEO Move a pointer to S-VIDEO jack, select S-Video. S-Video When video input signal is connected to Video and press SELECT button. Auto Video Projector automatically detects incoming Video signal, and adjusts itself to Y-Pb/CbPr/Cr jacks, select Y, Pb/Cb, Pr/Cr. Y,Pb/Cb,Pr/Cr When video input signal is connected to select and then press SELECT button...
INPUT MENU VIDEO Move a pointer to S-VIDEO jack, select S-Video. S-Video When video input signal is connected to Video and press SELECT button. Auto Video Projector automatically detects incoming Video signal, and adjusts itself to Y-Pb/CbPr/Cr jacks, select Y, Pb/Cb, Pr/Cr. Y,Pb/Cb,Pr/Cr When video input signal is connected to select and then press SELECT button...

Instruction Manual, PLC-SU33
Page 31
... you want to the system and press SELECT button. VIDEO JACK OR S-VIDEO JACK Auto Projector automatically detects incoming Video system, and adjusts itself to optimize its performance. AV SYSTEM MENU (VIDEO OR S-VIDEO) AV SYSTEM Menu icon This box indicates the system being selected. VIDEO INPUT SELECTING VIDEO SYSTEM 1 Press MENU button and ON-SCREEN MENU will...
... you want to the system and press SELECT button. VIDEO JACK OR S-VIDEO JACK Auto Projector automatically detects incoming Video system, and adjusts itself to optimize its performance. AV SYSTEM MENU (VIDEO OR S-VIDEO) AV SYSTEM Menu icon This box indicates the system being selected. VIDEO INPUT SELECTING VIDEO SYSTEM 1 Press MENU button and ON-SCREEN MENU will...

Instruction Manual, PLC-SU33
Page 32
... Menu icon Cinema Picture level adjusted for the picture with fine tone. IMAGE 1~4 User preset picture adjustment in IMAGE ADJUST Menu (P33, 34). VIDEO INPUT PICTURE IMAGE ADJUSTMENTS IMAGE LEVEL SELECT (DIRECT) Select image level among Standard, Cinema, Image 1, Image 2, Image 3 and Image 4 by pressing... IMAGE button on Top Control or on this projector. Press POINT LEFT/RIGHT button to move a red frame pointer to IMAGE SELECT Menu icon. 2 Press POINT DOWN button to move a red frame...
... Menu icon Cinema Picture level adjusted for the picture with fine tone. IMAGE 1~4 User preset picture adjustment in IMAGE ADJUST Menu (P33, 34). VIDEO INPUT PICTURE IMAGE ADJUSTMENTS IMAGE LEVEL SELECT (DIRECT) Select image level among Standard, Cinema, Image 1, Image 2, Image 3 and Image 4 by pressing... IMAGE button on Top Control or on this projector. Press POINT LEFT/RIGHT button to move a red frame pointer to IMAGE SELECT Menu icon. 2 Press POINT DOWN button to move a red frame...

Instruction Manual, PLC-SU33
Page 33
... button to deeper tone. (From 0 to 63.) Press SELECT button at this icon to display previous items. Press POINT LEFT/RIGHT buttons to adjust value. VIDEO INPUT IMAGE LEVEL ADJUSTMENT 1 Press MENU button and ON-SCREEN MENU will appear. Press POINT LEFT/RIGHT button(s) to move a red frame pointer to IMAGE.... (From 0 to obtain better balance of each level by pressing POINT LEFT/RIGHT button(s). Press SELECT button at this icon to be adjusted when the video system is displayed. Adjust each item is PAL, SECAM, PAL-M or PAL-N.
... button to deeper tone. (From 0 to 63.) Press SELECT button at this icon to display previous items. Press POINT LEFT/RIGHT buttons to adjust value. VIDEO INPUT IMAGE LEVEL ADJUSTMENT 1 Press MENU button and ON-SCREEN MENU will appear. Press POINT LEFT/RIGHT button(s) to move a red frame pointer to IMAGE.... (From 0 to obtain better balance of each level by pressing POINT LEFT/RIGHT button(s). Press SELECT button at this icon to be adjusted when the video system is displayed. Adjust each item is PAL, SECAM, PAL-M or PAL-N.

Instruction Manual, PLC-SU33
Page 34
...(s) to move a red frame pointer to Store icon and press SELECT button. Wide Provides image at a normal video aspect ratio of 16 : 9. PICTURE SCREEN ADJUSTMENT This projector has a picture screen resize function, which enables you want to select and then press SELECT button. SCREEN Menu ...SELECT button. Normal Provides image at a wide screen ratio of 4 : 3. NOTE : SCREEN Menu cannot be set and then press SELECT button. VIDEO INPUT 3 Store To store the adjustment data, move a red frame pointer to SCREEN Menu icon. SCREEN MENU 2 Press POINT DOWN button and move...
...(s) to move a red frame pointer to Store icon and press SELECT button. Wide Provides image at a normal video aspect ratio of 16 : 9. PICTURE SCREEN ADJUSTMENT This projector has a picture screen resize function, which enables you want to select and then press SELECT button. SCREEN Menu ...SELECT button. Normal Provides image at a wide screen ratio of 4 : 3. NOTE : SCREEN Menu cannot be set and then press SELECT button. VIDEO INPUT 3 Store To store the adjustment data, move a red frame pointer to SCREEN Menu icon. SCREEN MENU 2 Press POINT DOWN button and move...

Instruction Manual, PLC-SU33
Page 35
...(s). Blue back When this function is "On," this function is left / right reversed. This function is selectable from a ceiling mounted projector. Display This function decides whether to a rear projection screen. This function is used in ON-SCREEN MENU is used to project the ...source is top / bottom and left / right reversed. message Logo When this projector will appear. SETTING SETTING MENU 1 Press MENU button and ON-SCREEN MENU will produce a blue image instead of the video noise on page 20. SETTING Menu icon Keystone When the image is displayed....
...(s). Blue back When this function is "On," this function is left / right reversed. This function is selectable from a ceiling mounted projector. Display This function decides whether to a rear projection screen. This function is used in ON-SCREEN MENU is used to project the ...source is top / bottom and left / right reversed. message Logo When this projector will appear. SETTING SETTING MENU 1 Press MENU button and ON-SCREEN MENU will produce a blue image instead of the video noise on page 20. SETTING Menu icon Keystone When the image is displayed....

Instruction Manual, PLC-SU33
Page 36
..." and the counting down Projection Lamp about for operation. This switching function prevents remote control operation mixture (jam) when operating several projectors or video equipment together. Refer to "Code 2." When any button is not pressed over 10 seconds. On start When this function is "On...," projector is automatically turned on Remote Control Unit together for 5 minutes, Projection Lamp and READY Indicator are replaced or ALL- SETTING ...
..." and the counting down Projection Lamp about for operation. This switching function prevents remote control operation mixture (jam) when operating several projectors or video equipment together. Refer to "Code 2." When any button is not pressed over 10 seconds. On start When this function is "On...," projector is automatically turned on Remote Control Unit together for 5 minutes, Projection Lamp and READY Indicator are replaced or ALL- SETTING ...

Instruction Manual, PLC-SU33
Page 41
... items below once again. 1. Picture is out of the projector. NOTE : Moving the projector from the projector. G Press MUTE button. 41 Make sure you reconnect the projector, be with your graphics controller rather than with your computer or video equipment and a projector. G Wait 90 seconds after the projector is turned off before you select is Top/Bottom...
... items below once again. 1. Picture is out of the projector. NOTE : Moving the projector from the projector. G Press MUTE button. 41 Make sure you reconnect the projector, be with your graphics controller rather than with your computer or video equipment and a projector. G Wait 90 seconds after the projector is turned off before you select is Top/Bottom...

Instruction Manual, PLC-SU33
Page 43
... Built-in Speaker Feet Adjustment Voltage and Power Consumption Operating Temperature Storage Temperature Remote Control Unit Accessories Multi-media Projector 13.11" x 3.52" x 9.96" (333mm x 89.5mm x 253mm) (not including Adjustable Feet...Video) RCA Type x 2 DVI-I Terminal (Digital/Analog) (VGA) HDB 15 Terminal x 1 Mini Jack (stereo) x 1 Mini DIN 8 pin x 1 USB Series B receptacle x 1 RCA Type x 2 1.0 W RMS 1 speaker, 1.18" x 1.57" (30mm x 40mm) 0˚ to 15.6˚ AC 100 ~ 120 V (3.6 A Max. APPENDIX TECHNICAL SPECIFICATIONS Projector Type Dimensions (W x H x D) Net Weight LCD...
... Built-in Speaker Feet Adjustment Voltage and Power Consumption Operating Temperature Storage Temperature Remote Control Unit Accessories Multi-media Projector 13.11" x 3.52" x 9.96" (333mm x 89.5mm x 253mm) (not including Adjustable Feet...Video) RCA Type x 2 DVI-I Terminal (Digital/Analog) (VGA) HDB 15 Terminal x 1 Mini Jack (stereo) x 1 Mini DIN 8 pin x 1 USB Series B receptacle x 1 RCA Type x 2 1.0 W RMS 1 speaker, 1.18" x 1.57" (30mm x 40mm) 0˚ to 15.6˚ AC 100 ~ 120 V (3.6 A Max. APPENDIX TECHNICAL SPECIFICATIONS Projector Type Dimensions (W x H x D) Net Weight LCD...


