
Print Specs
Page 1
... remote control) Interface board slot x2 Power cord Quick Reference guide VGA cable Owner's manual Remote control Real Color Manager Pro AA battery x 2 Pin code label Lens attachment ...2.6 2.5 2.3-2.8 2.5-2.9 1.7-2.3 2.0-2.3 1.7-2.6 2.0-2.6 2.0-2.9 2.0 2.2-2.5 ©2010 SANYO VARIOUS FEATURES FOR VERSATILE INSTALLATION When blending 2 or more than one projector. QUADRIVE OPTICAL ENGINE ALLOWS RICH COLOR REPRODUCTION...(D.I.O.S.) achieves high contrast and reliability. 15000 LUMENS z REAL 2K z QuaDriveTM PROJECTOR PLC-HF15000L REAL 2K QuaDriveTM PROJECTOR QuaDriveTM Built-in...
... remote control) Interface board slot x2 Power cord Quick Reference guide VGA cable Owner's manual Remote control Real Color Manager Pro AA battery x 2 Pin code label Lens attachment ...2.6 2.5 2.3-2.8 2.5-2.9 1.7-2.3 2.0-2.3 1.7-2.6 2.0-2.6 2.0-2.9 2.0 2.2-2.5 ©2010 SANYO VARIOUS FEATURES FOR VERSATILE INSTALLATION When blending 2 or more than one projector. QUADRIVE OPTICAL ENGINE ALLOWS RICH COLOR REPRODUCTION...(D.I.O.S.) achieves high contrast and reliability. 15000 LUMENS z REAL 2K z QuaDriveTM PROJECTOR PLC-HF15000L REAL 2K QuaDriveTM PROJECTOR QuaDriveTM Built-in...

Owner's Manual
Page 1
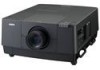
Multimedia Projector MODEL PLC-HF15000L ✽ Projection lens not included. Owner's Manual
Multimedia Projector MODEL PLC-HF15000L ✽ Projection lens not included. Owner's Manual

Owner's Manual
Page 2
... Shutter Function The projector is equipped with the shutter that provides complete blackness for a while the projected image is available in this manual are subject to change without turning off the projector. ◆ Motor-driven Lens Shift Projection lens can also be moved up,...projector remotely via network. PIN code lock function prevents unauthorized use . For optional interface boards, contact sales dealer where you to the owner's manual "Network Set-up and Operation". ◆ Active Maintenance Cleaner (AMC) unit The built-in multimedia features, a palette of 1.07 billion...
... Shutter Function The projector is equipped with the shutter that provides complete blackness for a while the projected image is available in this manual are subject to change without turning off the projector. ◆ Motor-driven Lens Shift Projection lens can also be moved up,...projector remotely via network. PIN code lock function prevents unauthorized use . For optional interface boards, contact sales dealer where you to the owner's manual "Network Set-up and Operation". ◆ Active Maintenance Cleaner (AMC) unit The built-in multimedia features, a palette of 1.07 billion...

Owner's Manual
Page 3
... 33 Direct Operation 33 Computer Input Source Selection 34 Video Input Source Selection 35 Computer Input 36 Computer System Selection 36 Auto PC Adjustment 37 Manual PC Adjustment 38 Image Selection 40 Image Adjustment 41 Screen Size Adjustment 44 Video Input 47 Video System Selection 47 Image Selection 48 Image Adjustment...
... 33 Direct Operation 33 Computer Input Source Selection 34 Video Input Source Selection 35 Computer Input 36 Computer System Selection 36 Auto PC Adjustment 37 Manual PC Adjustment 38 Image Selection 40 Image Adjustment 41 Screen Size Adjustment 44 Video Input 47 Video System Selection 47 Image Selection 48 Image Adjustment...

Owner's Manual
Page 4
...the dealer where you to prevent A Breakdown or a disaster. THIS SYMBOL INDICATES THAT THERE ARE IMPORTANT OPERATING AND MAINTENANCE INSTRUCTIONS IN THE OWNER'S MANUAL WITH THIS UNIT. The symbol mark means that the battery or accumulator contains a heavy metal at a certain concentration. Note: If a chemical...Do not cover the ventilation slots on the top, sides, and rear of the projector cabinet is to operate improperly, read this manual thoroughly. Do not project the same image for used electrical and electronic equipment, batteries and accumulators. CAUTION ON HANGING FROM THE CEILING...
...the dealer where you to prevent A Breakdown or a disaster. THIS SYMBOL INDICATES THAT THERE ARE IMPORTANT OPERATING AND MAINTENANCE INSTRUCTIONS IN THE OWNER'S MANUAL WITH THIS UNIT. The symbol mark means that the battery or accumulator contains a heavy metal at a certain concentration. Note: If a chemical...Do not cover the ventilation slots on the top, sides, and rear of the projector cabinet is to operate improperly, read this manual thoroughly. Do not project the same image for used electrical and electronic equipment, batteries and accumulators. CAUTION ON HANGING FROM THE CEILING...

Owner's Manual
Page 9
... with a moulded plug incorporating a fuse, the value of the plug. GROUND AC Power Cord for the United Kingdom: This cord is marked with the instruction manual, may be used in the instructions. This equipment generates, uses, and can radiate radio frequency energy and, if not installed and used of the Canadian...
... with a moulded plug incorporating a fuse, the value of the plug. GROUND AC Power Cord for the United Kingdom: This cord is marked with the instruction manual, may be used in the instructions. This equipment generates, uses, and can radiate radio frequency energy and, if not installed and used of the Canadian...

Owner's Manual
Page 11
..., Blue, Red, Horiz. e USB CONNECTOR (series B) USB connector is to used to this RS-232C terminal. t LAN PORT Connecting the Ethernet cable See the owner's manual of another projector to G, B, R, H/HV, and V jacks (pp.20-21). HD (HDCP Compatible) signal can be also connected (p.21). 11 u 5 BNC JACK Connects the component...
..., Blue, Red, Horiz. e USB CONNECTOR (series B) USB connector is to used to this RS-232C terminal. t LAN PORT Connecting the Ethernet cable See the owner's manual of another projector to G, B, R, H/HV, and V jacks (pp.20-21). HD (HDCP Compatible) signal can be also connected (p.21). 11 u 5 BNC JACK Connects the component...

Owner's Manual
Page 25
Basic Operation What is suddenly cut off, the fan stops immediately. A PIN code consists of this manual and keep it to operate the projector. Turning Off the Projector 1 Press the ON/STAND-BY button on the side control or the STAND-BY ...
Basic Operation What is suddenly cut off, the fan stops immediately. A PIN code consists of this manual and keep it to operate the projector. Turning Off the Projector 1 Press the ON/STAND-BY button on the side control or the STAND-BY ...

Owner's Manual
Page 26
... On-screen menu MENU button SELECT button POINT buttons MENU button POINT buttons Point 8 The or currently SELECT button set item is highlighted in this manual. Press the Point 8 or the SELECT button to exit the on -screen menu. Press the MENU button to access the submenu items. (The selected item...
... On-screen menu MENU button SELECT button POINT buttons MENU button POINT buttons Point 8 The or currently SELECT button set item is highlighted in this manual. Press the Point 8 or the SELECT button to exit the on -screen menu. Press the MENU button to access the submenu items. (The selected item...

Owner's Manual
Page 27
....54-69). e Image select For computer source, used to select an image level among Dynamic, Standard, Real, and Image 1-10 (p.40). i Network See the owner's manual of each menu, see "Menu Tree" on pages 83-85. u Information Displays the input source information: Input, H-sync freq., V-sync freq., Screen, Lamp mode, Lamp...
....54-69). e Image select For computer source, used to select an image level among Dynamic, Standard, Real, and Image 1-10 (p.40). i Network See the owner's manual of each menu, see "Menu Tree" on pages 83-85. u Information Displays the input source information: Input, H-sync freq., V-sync freq., Screen, Lamp mode, Lamp...

Owner's Manual
Page 35
.../Cr input source, set to the Y, Pb/Cb, Pr/Cr jacks, select Y, Pb/ Cb, Pr/Cr. When analog RGB signal is connected to RGB input manually. Video When the video input signal is connected to video equipment, select the type of Video source in the Source Select Menu. INPUT 1 MENU WHEN...
.../Cr input source, set to the Y, Pb/Cb, Pr/Cr jacks, select Y, Pb/ Cb, Pr/Cr. When analog RGB signal is connected to RGB input manually. Video When the video input signal is connected to video equipment, select the type of Video source in the Source Select Menu. INPUT 1 MENU WHEN...

Owner's Manual
Page 36
... adjust menu. Use the Point ed buttons to select the desired system and then press the SELECT button. If the image is not projected properly, a manual adjustment is no signal input from the computer. There is required (pp.38, 39). Systems in the PC adjust menu (pp.38, 39). Check ...formats provided in this dialog box can also be selected. *Mode 1 and SVGA 1 are shown on pages 89-91) Selecting Computer System Manually PC system can be selected manually. 1 Press the MENU button to display the on the System Menu box and the Auto PC adjustment function works to various types of...
... adjust menu. Use the Point ed buttons to select the desired system and then press the SELECT button. If the image is not projected properly, a manual adjustment is no signal input from the computer. There is required (pp.38, 39). Systems in the PC adjust menu (pp.38, 39). Check ...formats provided in this dialog box can also be selected. *Mode 1 and SVGA 1 are shown on pages 89-91) Selecting Computer System Manually PC system can be selected manually. 1 Press the MENU button to display the on the System Menu box and the Auto PC adjustment function works to various types of...

Owner's Manual
Page 37
...sync, Total dots, Position H and Position V of cables, the signals may not be stored in process. 37 and press the SELECT button. See "Manual PC Adjustment" on the remote control. Use the Point ed buttons to select PC adjust and then press the Point 8 or the SELECT button. 2 .... • Depending on the condition of signals and the type and length of certain computers cannot be fully adjusted with this operation, manual adjustments are stored, the setting can be properly viewed. Computer Input Auto PC Adjustment Auto PC Adjustment function is provided to automatically adjust Fine...
...sync, Total dots, Position H and Position V of cables, the signals may not be stored in process. 37 and press the SELECT button. See "Manual PC Adjustment" on the remote control. Use the Point ed buttons to select PC adjust and then press the Point 8 or the SELECT button. 2 .... • Depending on the condition of signals and the type and length of certain computers cannot be fully adjusted with this operation, manual adjustments are stored, the setting can be properly viewed. Computer Input Auto PC Adjustment Auto PC Adjustment function is provided to automatically adjust Fine...

Owner's Manual
Page 38
...displayed by this projector. and V-sync freq. Display area V Use the Point 7 8 buttons to adjust the horizontal area displayed by this projector. 38 Computer Input Manual PC Adjustment Some computers employ special signal formats which may not be tuned by Multi-Scan system of this adjustment.... Manual PC Adjustment enables you to recall the setting for a specific computer. 1 Press the MENU button to display the adjustment dialog box. Use the Point 7 8 ...
...displayed by this projector. and V-sync freq. Display area V Use the Point 7 8 buttons to adjust the horizontal area displayed by this projector. 38 Computer Input Manual PC Adjustment Some computers employ special signal formats which may not be tuned by Multi-Scan system of this adjustment.... Manual PC Adjustment enables you to recall the setting for a specific computer. 1 Press the MENU button to display the adjustment dialog box. Use the Point 7 8 ...

Owner's Manual
Page 45
... . zoom + appears. The projected image can be operated when Custom is selected. • Digital zoom - To return to adjust. Adjust the screen scale and position manually with the D.ZOOM button. ✔Note: • The panning function may not operate properly if the stored Mode in the PC System Menu (p.36). •...
... . zoom + appears. The projected image can be operated when Custom is selected. • Digital zoom - To return to adjust. Adjust the screen scale and position manually with the D.ZOOM button. ✔Note: • The panning function may not operate properly if the stored Mode in the PC System Menu (p.36). •...

Owner's Manual
Page 47
When Video System is 1035i, 1080i or 1080p, select the system manually. Y, Pb/Cb, Pr/Cr Jacks Auto AV System menu (Y, Pb/Cb, Pr/Cr) The projector automatically detects an incoming video signal, and adjusts itself to ... the MENU button to select the desired system and then press the SELECT button. When the Video System is PAL-M or PAL-N, select the system manually. Y, Pb/Cb, Pr/Cr SIGNAL FORMAT If the projector cannot reproduce proper video image, select a specific component video signal format from among 480i, 575i, 480p...
When Video System is 1035i, 1080i or 1080p, select the system manually. Y, Pb/Cb, Pr/Cr Jacks Auto AV System menu (Y, Pb/Cb, Pr/Cr) The projector automatically detects an incoming video signal, and adjusts itself to ... the MENU button to select the desired system and then press the SELECT button. When the Video System is PAL-M or PAL-N, select the system manually. Y, Pb/Cb, Pr/Cr SIGNAL FORMAT If the projector cannot reproduce proper video image, select a specific component video signal format from among 480i, 575i, 480p...

Owner's Manual
Page 52
... ed buttons to choose the item you want to all adjusted values. Scale H/V Adjusts the Horizontal/Vertical screen scale. Adjusts the screen scale and position manually with this function. Press the SELECT button at Reset to display a confirmation box. Reset Resets the all the inputs. H&V When set automatically and the Aspect...
... ed buttons to choose the item you want to all adjusted values. Scale H/V Adjusts the Horizontal/Vertical screen scale. Adjusts the screen scale and position manually with this function. Press the SELECT button at Reset to display a confirmation box. Reset Resets the all the inputs. H&V When set automatically and the Aspect...

Owner's Manual
Page 60
... set to On, Capture cannot be displayed the next time you cancel the capturing. • When there is no captured image or it to the manual of video equipment vary from among following options. User........... Then the captured image will be selected. • When starting to capture a new image, the previously...
... set to On, Capture cannot be displayed the next time you cancel the capturing. • When there is no captured image or it to the manual of video equipment vary from among following options. User........... Then the captured image will be selected. • When starting to capture a new image, the previously...

Owner's Manual
Page 75
... corresponding lamp is are the examples of on-screen lamp status in 4-lamps mode, if one of life or malfunctions. To change the lamp mode manually, use the Lamp mode function. Yellow Lamp Projection Lamp lights normally. When the LAMP REPLACE indicator lights: Any of the projection lamps is out for...
... corresponding lamp is are the examples of on-screen lamp status in 4-lamps mode, if one of life or malfunctions. To change the lamp mode manually, use the Lamp mode function. Yellow Lamp Projection Lamp lights normally. When the LAMP REPLACE indicator lights: Any of the projection lamps is out for...

Owner's Manual
Page 77
... SHOULD BE TAKEN. No one after the lamps have cooled down. (Follow carefully the instructions in the Lamp Replacement section of this manual.) Continuous use of the lamp with the LAMP REPLACE indicator lighted may increase the risk of lamp explosion. ● Lamp may fail... Lamp can be replaced, i.e., if the LAMP REPLACE indicator lights up carefully. Any broken shards found should be ordered through your projector: PLC-HF15000L ● Replacement Lamp Type No.: POA-LMP147 (Service Parts No. 610 350 9051) LAMP HANDLING PRECAUTIONS This projector uses high-pressure lamps...
... SHOULD BE TAKEN. No one after the lamps have cooled down. (Follow carefully the instructions in the Lamp Replacement section of this manual.) Continuous use of the lamp with the LAMP REPLACE indicator lighted may increase the risk of lamp explosion. ● Lamp may fail... Lamp can be replaced, i.e., if the LAMP REPLACE indicator lights up carefully. Any broken shards found should be ordered through your projector: PLC-HF15000L ● Replacement Lamp Type No.: POA-LMP147 (Service Parts No. 610 350 9051) LAMP HANDLING PRECAUTIONS This projector uses high-pressure lamps...


