
Owners Manual
Page 2
... walked on the apparatus. 19. The wide blade or the third prong are provided for long periods of cable entry as practical." 17. Protect the power cord from the apparatus. 11. Use only with the cart, stand, tripod, bracket, or table specified by the manufacturer, or sold with dry cloth. 7. When... of the mast and supporting structure, grounding of the lead-in accordance with one wider than the other electrical light or power circuits, or where it can fall into such power lines or circuits. WARNING: TO REDUCE THE RISK OF FIRE OR ELECTRIC SHOCK, DO NOT EXPOSE THIS APPLIANCE TO RAIN OR...
... walked on the apparatus. 19. The wide blade or the third prong are provided for long periods of cable entry as practical." 17. Protect the power cord from the apparatus. 11. Use only with the cart, stand, tripod, bracket, or table specified by the manufacturer, or sold with dry cloth. 7. When... of the mast and supporting structure, grounding of the lead-in accordance with one wider than the other electrical light or power circuits, or where it can fall into such power lines or circuits. WARNING: TO REDUCE THE RISK OF FIRE OR ELECTRIC SHOCK, DO NOT EXPOSE THIS APPLIANCE TO RAIN OR...
Owners Manual
Page 3
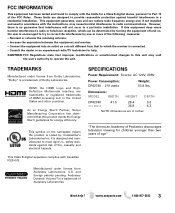
...States and other countries. This Class B digital apparatus complies with the limits for children younger than two years of the FCC Rules. Dimensions: MODEL WIDTH HEIGHT DEPTH DP42740 41.5 28.4 9.6 w/o stand...provide reasonable protection against risk of Audyssey Laboratories. As an Energy Star ® Partner, Sanyo Manufacturing Corporation has determined that to which can radiate radio frequency energy and, if not ... license from Audyssey Laboratories. SPECIFICATIONS Power Requirement: Source: AC 120V, 60Hz Power Consumption: DP42740 219 watts Weight: 53.8 lbs.
...States and other countries. This Class B digital apparatus complies with the limits for children younger than two years of the FCC Rules. Dimensions: MODEL WIDTH HEIGHT DEPTH DP42740 41.5 28.4 9.6 w/o stand...provide reasonable protection against risk of Audyssey Laboratories. As an Energy Star ® Partner, Sanyo Manufacturing Corporation has determined that to which can radiate radio frequency energy and, if not ... license from Audyssey Laboratories. SPECIFICATIONS Power Requirement: Source: AC 120V, 60Hz Power Consumption: DP42740 219 watts Weight: 53.8 lbs.
Owners Manual
Page 4
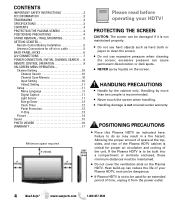
... • Do not use excessive pressure when cleaning the screen; www.sanyoctv.com 1-800-877-5032 If the Plasma HDTV is not maintained properly. • Do not use hard objects such as indicated here. Remote Control Battery ...-air or cable 5 BACK PANEL JACKS 6 A/V CONNECTIONS 7 POWER CONNECTION / INITIAL CHANNEL SEARCH . . .8 REMOTE CONTROL OPERATION 9 ON-SCREEN MENU OPERATION- CONTENTS IMPORTANT SAFETY INSTRUCTIONS 2 FCC INFORMATION 3 TRADEMARKS 3 SPECIFICATIONS 3 CONTENTS 4 PROTECTING THE PLASMA SCREEN 4 POSITIONING PRECAUTIONS 4 STAND REMOVAL / WALL MOUNTING 5...
... • Do not use excessive pressure when cleaning the screen; www.sanyoctv.com 1-800-877-5032 If the Plasma HDTV is not maintained properly. • Do not use hard objects such as indicated here. Remote Control Battery ...-air or cable 5 BACK PANEL JACKS 6 A/V CONNECTIONS 7 POWER CONNECTION / INITIAL CHANNEL SEARCH . . .8 REMOTE CONTROL OPERATION 9 ON-SCREEN MENU OPERATION- CONTENTS IMPORTANT SAFETY INSTRUCTIONS 2 FCC INFORMATION 3 TRADEMARKS 3 SPECIFICATIONS 3 CONTENTS 4 PROTECTING THE PLASMA SCREEN 4 POSITIONING PRECAUTIONS 4 STAND REMOVAL / WALL MOUNTING 5...
Owners Manual
Page 8
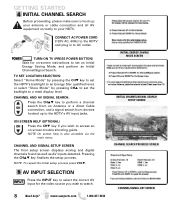
... if you wish to select the correct AV input for on screen trouble shooting guide. Pressing the CHLM key finalizes the setup process. CONNECT AC POWER CORD (120V AC, 60Hz) to the HDTV and plug in to a retail display level. CHANNEL AND SIGNAL SETUP SCREEN The final setup screen displays analog... process press VOLM. AV INPUT SELECTION Press the INPUT key to watch. 8 Need help is also accesible via the main menu. TURN ON TV (PRESS POWER BUTTON) Wait for the video source you wish to access an on -screen instructions to set the backlight to AC outlet.
... if you wish to select the correct AV input for on screen trouble shooting guide. Pressing the CHLM key finalizes the setup process. CONNECT AC POWER CORD (120V AC, 60Hz) to the HDTV and plug in to a retail display level. CHANNEL AND SIGNAL SETUP SCREEN The final setup screen displays analog... process press VOLM. AV INPUT SELECTION Press the INPUT key to watch. 8 Need help is also accesible via the main menu. TURN ON TV (PRESS POWER BUTTON) Wait for the video source you wish to access an on -screen instructions to set the backlight to AC outlet.
Owners Manual
Page 9
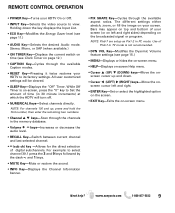
..., zoom, or fill the image on top and bottom of digital subchannels. Use of time (in the memory database. • Volume + - REMOTE CONTROL OPERATION • POWER Key-Turns your screen. All user customized settings will turn off. • NUMERICAL Keys-Select channels directly. For example: to Set the amount of Pix6...
..., zoom, or fill the image on top and bottom of digital subchannels. Use of time (in the memory database. • Volume + - REMOTE CONTROL OPERATION • POWER Key-Turns your screen. All user customized settings will turn off. • NUMERICAL Keys-Select channels directly. For example: to Set the amount of Pix6...
Owners Manual
Page 11
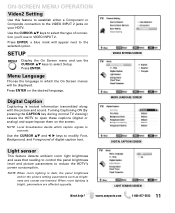
... sensor This feature detects ambient room light brightness and uses that reading to control the panel brightness level and picture parameters to reduce the HDTV's power consumption. ON-SCREEN MENU OPERATION Video2 Setting Use this feature to establish either a Component or Composite connection to the VIDEO INPUT 2 jacks on the screen...
... sensor This feature detects ambient room light brightness and uses that reading to control the panel brightness level and picture parameters to reduce the HDTV's power consumption. ON-SCREEN MENU OPERATION Video2 Setting Use this feature to establish either a Component or Composite connection to the VIDEO INPUT 2 jacks on the screen...
Owners Manual
Page 12
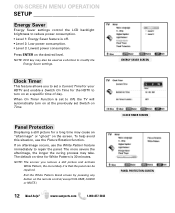
... on Time. Panel Protection Displaying a still picture for the HDTV to modify the Energy Saver settings. When On Timer Function is off. • Level 2: Low power consumption. • Level 3: Lowest power consumption. ON-SCREEN MENU OPERATION SETUP Energy Saver Energy Saver settings control the LCD backlight brightness to reduce...
... on Time. Panel Protection Displaying a still picture for the HDTV to modify the Energy Saver settings. When On Timer Function is off. • Level 2: Low power consumption. • Level 3: Lowest power consumption. ON-SCREEN MENU OPERATION SETUP Energy Saver Energy Saver settings control the LCD backlight brightness to reduce...


