User Manual (user Manual) (ver.1.0) (English)
Page 1
SMH9207 Microwave Oven user manual imagine the possibilities Thank you for purchasing this Samsung product. Please register your product at www.samsung.com/global/register
SMH9207 Microwave Oven user manual imagine the possibilities Thank you for purchasing this Samsung product. Please register your product at www.samsung.com/global/register
User Manual (user Manual) (ver.1.0) (English)
Page 2
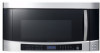
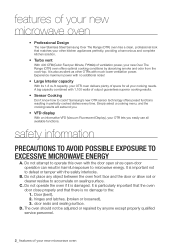
Samsung's new OTR sensor technology offers preset functions resulting in harmful exposure to accumulate on sealing surface. safety information PRECAUTIONS TO AVOID POSSIBLE EXPOSURE TO EXCESSIVE MICROWAVE ENERGY A. B. Do not operate the oven if it is also as silent as other kitchen appliances perfectly, ...(Vacuum Fluorescent Display), your OTR lets you easily use all your cooking needs. C. features of your new microwave oven • Professional Design The new Stainless Steel Samsung Over The Range (OTR) oven has a clean, professional look that there is important not to the: ...
Samsung's new OTR sensor technology offers preset functions resulting in harmful exposure to accumulate on sealing surface. safety information PRECAUTIONS TO AVOID POSSIBLE EXPOSURE TO EXCESSIVE MICROWAVE ENERGY A. B. Do not operate the oven if it is also as silent as other kitchen appliances perfectly, ...(Vacuum Fluorescent Display), your OTR lets you easily use all your cooking needs. C. features of your new microwave oven • Professional Design The new Stainless Steel Samsung Over The Range (OTR) oven has a clean, professional look that there is important not to the: ...
User Manual (user Manual) (ver.1.0) (English)
Page 3
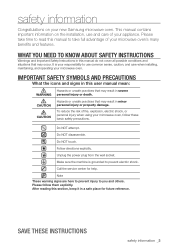
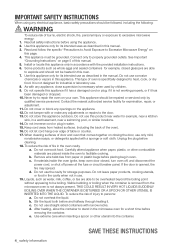
...mean: Hazards or unsafe practices that may result in a safe place for help. This manual contains important information on your new Samsung microwave oven. It is grounded to read this section, keep it in severe WARNING personal injury or death. Please follow these instructions...may occur. safety information Congratulations on the installation, use common sense, caution, and care when installing, maintaining, and operating your microwave oven. Please take full advantage of your appliance. IMPORTANT safety symbols and precautions What the icons and signs in minor personal ...
...mean: Hazards or unsafe practices that may result in a safe place for help. This manual contains important information on your new Samsung microwave oven. It is grounded to read this section, keep it in severe WARNING personal injury or death. Please follow these instructions...may occur. safety information Congratulations on the installation, use common sense, caution, and care when installing, maintaining, and operating your microwave oven. Please take full advantage of your appliance. IMPORTANT safety symbols and precautions What the icons and signs in minor personal ...
User Manual (user Manual) (ver.1.0) (English)
Page 4
...5 of the oven). 16. As with narrow necks. After heating, allow the container to excessive microwave energy: 1. This type of burns, electric shock, fire, personal injury or exposure to stand in the microwave oven for example, near a kitchen sink, in oven. Do not tamper with a sponge or ...appliance only for its intended uses as described in this appliance only for examination, repair, or adjustment. 11. Remove wire twist-ties from the microwave oven is opened, the fire may spread. d. Connect only to heat, cook, or dry food. To reduce the risk of table or ...
...5 of the oven). 16. As with narrow necks. After heating, allow the container to excessive microwave energy: 1. This type of burns, electric shock, fire, personal injury or exposure to stand in the microwave oven for example, near a kitchen sink, in oven. Do not tamper with a sponge or ...appliance only for its intended uses as described in this appliance only for examination, repair, or adjustment. 11. Remove wire twist-ties from the microwave oven is opened, the fire may spread. d. Connect only to heat, cook, or dry food. To reduce the risk of table or ...
User Manual (user Manual) (ver.1.0) (English)
Page 5
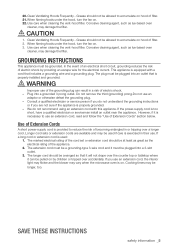
CAUTION CAUTION 1. WARNING WARNING Improper use an extension cord, the interior light may flicker and the blower may vary when the microwave oven is provided to accumulate on . 22. Plug into a 3-slot outlet. 3. If the power-supply cord is equipped with this appliance. If you use of ...
CAUTION CAUTION 1. WARNING WARNING Improper use an extension cord, the interior light may flicker and the blower may vary when the microwave oven is provided to accumulate on . 22. Plug into a 3-slot outlet. 3. If the power-supply cord is equipped with this appliance. If you use of ...
User Manual (user Manual) (ver.1.0) (English)
Page 7
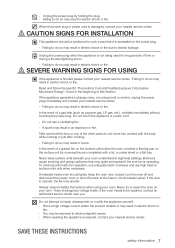
... repair, disassemble, or modify the appliance yourself. - Never leave surface units beneath your own - there is required, contact your nearest service center : Failing to Excessive Microwave Energy", found in the beginning of a grease fire on the surface units below the oven, smother a flaming pan on surface units only when necessary. When...
... repair, disassemble, or modify the appliance yourself. - Never leave surface units beneath your own - there is required, contact your nearest service center : Failing to Excessive Microwave Energy", found in the beginning of a grease fire on the surface units below the oven, smother a flaming pan on surface units only when necessary. When...
User Manual (user Manual) (ver.1.0) (English)
Page 8
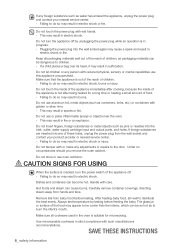
... progress. - Failing to do so may result in suffocation. Do not touch the inside of the appliance immediately after being heated for microwaving. If foreign substances are inserted into any person with or make any foreign substance such as packaging materials can be dangerous to do so...use aluminum foil, metal objects (such as containers, forks, etc.) or containers with wet hands. - Remove lids from hands and face. Use microwavable cookware in electric shock, burns or injury. Do not insert fingers, foreign substances or metal objects such as to do so may result in ...
... progress. - Failing to do so may result in suffocation. Do not touch the inside of the appliance immediately after being heated for microwaving. If foreign substances are inserted into any person with or make any foreign substance such as packaging materials can be dangerous to do so...use aluminum foil, metal objects (such as containers, forks, etc.) or containers with wet hands. - Remove lids from hands and face. Use microwavable cookware in electric shock, burns or injury. Do not insert fingers, foreign substances or metal objects such as to do so may result in ...
User Manual (user Manual) (ver.1.0) (English)
Page 10
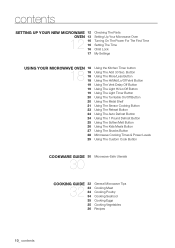
... Soften/Melt Button 26 Using The Kids Meals Button 27 Using The Snacks Button 28 Microwave Cooking Times & Power Levels 29 Using The Custom Cook Button cookware guide 30 Microwave-Safe Utensils 30 cooking guide 32 General Microwave Tips 32 33 Cooking Meat 34 Cooking Poultry 34 Cooking Seafood 35 Cooking Eggs 35... Cooking Vegetables 36 Recipes 10_ contents contents setting up your new microwave 12 Checking The Parts oven 13 Setting Up Your Microwave Oven 12 16 Turning On The Power For The First Time 16 Setting The Time 16 Child Lock 17 My...
... Soften/Melt Button 26 Using The Kids Meals Button 27 Using The Snacks Button 28 Microwave Cooking Times & Power Levels 29 Using The Custom Cook Button cookware guide 30 Microwave-Safe Utensils 30 cooking guide 32 General Microwave Tips 32 33 Cooking Meat 34 Cooking Poultry 34 Cooking Seafood 35 Cooking Eggs 35... Cooking Vegetables 36 Recipes 10_ contents contents setting up your new microwave 12 Checking The Parts oven 13 Setting Up Your Microwave Oven 12 16 Turning On The Power For The First Time 16 Setting The Time 16 Child Lock 17 My...
User Manual (user Manual) (ver.1.0) (English)
Page 11
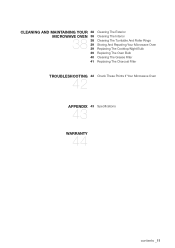
cleaning and maintaining your 38 Cleaning The Exterior microwave oven 38 Cleaning The Interior 38 38 Cleaning The Turntable And Roller Rings 39 Storing And Repairing Your Microwave Oven 39 Replacing The Cooktop/Night Bulb 39 Replacing The Oven Bulb 40 Cleaning The Grease Filter 41 Replacing The Charcoal Filter troubleshooting 42 Check These Points If Your Microwave Oven 42 appendix 43 Specifications 43 warranty 44 contents _11
cleaning and maintaining your 38 Cleaning The Exterior microwave oven 38 Cleaning The Interior 38 38 Cleaning The Turntable And Roller Rings 39 Storing And Repairing Your Microwave Oven 39 Replacing The Cooktop/Night Bulb 39 Replacing The Oven Bulb 40 Cleaning The Grease Filter 41 Replacing The Charcoal Filter troubleshooting 42 Check These Points If Your Microwave Oven 42 appendix 43 Specifications 43 warranty 44 contents _11
User Manual (user Manual) (ver.1.0) (English)
Page 12
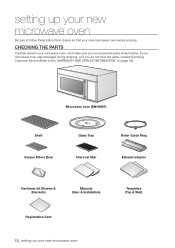
...(User & Installation) Registration Card 12_ setting up your new microwave oven Be sure to the "WARRANTY AND SERVICE INFORMATION" on page 44). setting up your microwave oven, and make sure you do not have the parts, contact Samsung Customer Service (Refer to follow these instructions closely so that ...your microwave oven was damaged during shipping, or if you 've received all...
...(User & Installation) Registration Card 12_ setting up your new microwave oven Be sure to the "WARRANTY AND SERVICE INFORMATION" on page 44). setting up your microwave oven, and make sure you do not have the parts, contact Samsung Customer Service (Refer to follow these instructions closely so that ...your microwave oven was damaged during shipping, or if you 've received all...
User Manual (user Manual) (ver.1.0) (English)
Page 13
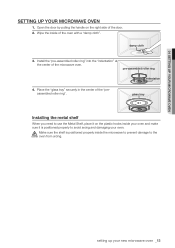
... roller ring" into the "indentation" at the center of the "preassembled roller ring". Place the "glass tray" securely in the center of the microwave oven. Open the door by pulling the handle on the plastic hooks inside your oven and make sure it on the right side of the... oven with a "damp cloth". Wipe the inside the microwave to prevent damage to avoid arcing and damaging your microwave oven Setting Up Your Microwave Oven 1. pre-assembled roller ring indentation 4. 01 Setting up your new microwave oven _13 glass tray Installing the metal shelf When you need to use...
... roller ring" into the "indentation" at the center of the "preassembled roller ring". Place the "glass tray" securely in the center of the microwave oven. Open the door by pulling the handle on the plastic hooks inside your oven and make sure it on the right side of the... oven with a "damp cloth". Wipe the inside the microwave to prevent damage to avoid arcing and damaging your microwave oven Setting Up Your Microwave Oven 1. pre-assembled roller ring indentation 4. 01 Setting up your new microwave oven _13 glass tray Installing the metal shelf When you need to use...
User Manual (user Manual) (ver.1.0) (English)
Page 14
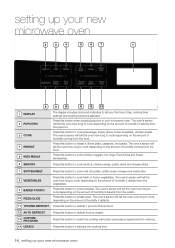
... dogs, French fries and frozen sandwiches. The oven's sensor will tell the oven how long to subtract the cooking time. 14_ setting up your new microwave oven 2 3 4 5 6 7 1 14 8 1 DISPLAY 2 POPCORN 3 COOK 4 REHEAT 5 KIDS MEALS 6 SNACKS 9 10 11 12 13 16 The display includes clock and ... weight. Press this button to cook a beverage, frozen dinner, frozen breakfast, chicken breast. Press this button when popping popcorn in your microwave oven. Press this button to cook potatoes. The oven's sensor will tell the oven how long to tell you the time of humidity ...
... dogs, French fries and frozen sandwiches. The oven's sensor will tell the oven how long to subtract the cooking time. 14_ setting up your new microwave oven 2 3 4 5 6 7 1 14 8 1 DISPLAY 2 POPCORN 3 COOK 4 REHEAT 5 KIDS MEALS 6 SNACKS 9 10 11 12 13 16 The display includes clock and ... weight. Press this button to cook a beverage, frozen dinner, frozen breakfast, chicken breast. Press this button when popping popcorn in your microwave oven. Press this button to cook potatoes. The oven's sensor will tell the oven how long to tell you the time of humidity ...

User Manual (user Manual) (ver.1.0) (English)
Page 15
..." on the next page for detailed information on to turn on /off the turntable. Press this button to add more cooking time. setting up your microwave oven Timer Hi/Lo/Off Light Delay Off Hi/Mid/Lo/Off Vent 16 15 21 22 24 27 28 15 MORE(9) 16 NUMBER 17.... 23 STOP/CLEAR Press this button to stop the oven or to clear all entries. 24 ENTER/START Press this button to "Using your new microwave oven _15 OFF will be changed (Hi » Lo » Off). If you want to turn the fan on the cooktop light. • If you...
..." on the next page for detailed information on to turn on /off the turntable. Press this button to add more cooking time. setting up your microwave oven Timer Hi/Lo/Off Light Delay Off Hi/Mid/Lo/Off Vent 16 15 21 22 24 27 28 15 MORE(9) 16 NUMBER 17.... 23 STOP/CLEAR Press this button to stop the oven or to clear all entries. 24 ENTER/START Press this button to "Using your new microwave oven _15 OFF will be changed (Hi » Lo » Off). If you want to turn the fan on the cooktop light. • If you...

User Manual (user Manual) (ver.1.0) (English)
Page 16
...CHILD LOCK ON. You need to press at least three numbers to wrong operating by children. Activating 1. Setting The Time ( 1 9 ) Your microwave oven is equipped with : PLEASE TOUCH CLOCK AND SET TIME OF DAY. The display will show CHILD LOCK OFF. Press the Enter / Start button... again. 8. This function can be operated accidentally. The display will show ENTER TIME OF DAY. 3. setting up your new microwave oven The display will also occur after a power interruption. To check the time while cooking, press the Clock button. Child Lock ( 2 4 )...
...CHILD LOCK ON. You need to press at least three numbers to wrong operating by children. Activating 1. Setting The Time ( 1 9 ) Your microwave oven is equipped with : PLEASE TOUCH CLOCK AND SET TIME OF DAY. The display will show CHILD LOCK OFF. Press the Enter / Start button... again. 8. This function can be operated accidentally. The display will show ENTER TIME OF DAY. 3. setting up your new microwave oven The display will also occur after a power interruption. To check the time while cooking, press the Clock button. Child Lock ( 2 4 )...

User Manual (user Manual) (ver.1.0) (English)
Page 17
01 Setting up your personal preferences. Simply press the My SETTINGS button to suit your new microwave oven _17 Function 1 Weight mode selected 2 Sound on/off control 3 Clock display control 4 Display 5 Remind end signal 6 Demo mode 7 Daylight Saving time ...Kg 1 Sound ON 2 Sound OFF 1 12HR 2 24HR 1 Slow speed 2 Normal speed 3 Fast speed 1 ON 2 OFF 1 ON 2 OFF 1 ON 2 OFF setting up your microwave oven My Settings ( 2 1 ) Your new microwave oven can be customized to configure the following table: No. The options are summarized in the following options.
01 Setting up your personal preferences. Simply press the My SETTINGS button to suit your new microwave oven _17 Function 1 Weight mode selected 2 Sound on/off control 3 Clock display control 4 Display 5 Remind end signal 6 Demo mode 7 Daylight Saving time ...Kg 1 Sound ON 2 Sound OFF 1 12HR 2 24HR 1 Slow speed 2 Normal speed 3 Fast speed 1 ON 2 OFF 1 ON 2 OFF 1 ON 2 OFF setting up your microwave oven My Settings ( 2 1 ) Your new microwave oven can be customized to configure the following table: No. The options are summarized in the following options.

User Manual (user Manual) (ver.1.0) (English)
Page 18
... turned off . The time is an automated process and cannot be cooked for each 30 seconds you have already begun cooking with your new Samsung microwave oven. using your microwave oven. Press the Vent Hi/Mid/Lo/Off button once for the "Sensor Reheat", "Sensor Cooking(except Beverage)", "Add 30 sec.", "Custom Cook...
... turned off . The time is an automated process and cannot be cooked for each 30 seconds you have already begun cooking with your new Samsung microwave oven. using your microwave oven. Press the Vent Hi/Mid/Lo/Off button once for the "Sensor Reheat", "Sensor Cooking(except Beverage)", "Add 30 sec.", "Custom Cook...

User Manual (user Manual) (ver.1.0) (English)
Page 19
... Button ( 2 6 ) The Light button allows you to stop vent moter after 3 minutes. 3. Using The Light Timer Button ( 2 5 ) The microwave can be used to select a light setting for your microwave oven _19 Use the Number buttons to turn the fan off after 1 minute. 2. Press the Enter / Start button. 4. using your...twice to turn the fan off after 10 minutes. 5. Press the Light Timer button and "0" button to set the off time. 7. 02 Using your microwave oven Using The Vent Delay Off Button ( 2 7 ) The button will be set so the light turns on and off automatically at the same ...
... Button ( 2 6 ) The Light button allows you to stop vent moter after 3 minutes. 3. Using The Light Timer Button ( 2 5 ) The microwave can be used to select a light setting for your microwave oven _19 Use the Number buttons to turn the fan off after 1 minute. 2. Press the Enter / Start button. 4. using your...twice to turn the fan off after 10 minutes. 5. Press the Light Timer button and "0" button to set the off time. 7. 02 Using your microwave oven Using The Vent Delay Off Button ( 2 7 ) The button will be set so the light turns on and off automatically at the same ...

User Manual (user Manual) (ver.1.0) (English)
Page 20
...turntable on the lower level: • Multiply the reheating time by 1½. • Switch places halfway through the reheating process. 20_ using your microwave oven Press the Turntable On/Off button to reheat food on or off . Use pot holders to touch. CAUTION • Use pot holders when ...large dishes it may become too hot to touch the turntable during and after CAUTION cooking. Food cooks best on . The shelf could damage the microwave. This could overheat. • Do not use the metal shelf when cooking popcorn. The turntable may be turned off . Using The Turntable ...
...turntable on the lower level: • Multiply the reheating time by 1½. • Switch places halfway through the reheating process. 20_ using your microwave oven Press the Turntable On/Off button to reheat food on or off . Use pot holders to touch. CAUTION • Use pot holders when ...large dishes it may become too hot to touch the turntable during and after CAUTION cooking. Food cooks best on . The shelf could damage the microwave. This could overheat. • Do not use the metal shelf when cooking popcorn. The turntable may be turned off . Using The Turntable ...
User Manual (user Manual) (ver.1.0) (English)
Page 21
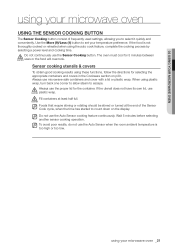
... when using the auto cook feature, complete the cooking process by selecting a power level and cooking time. 02 Using your microwave oven using your microwave oven Using The Sensor Cooking Button The Sensor Cooking button consist of the Sensor Cook cycle, when the time has started to...the appropriate containers and covers in the Cookware section on the display. Sensor cooking utensils & covers To obtain good cooking results using your microwave oven _21 Do not continuously use CAUTION plastic wrap. To avoid poor results, do not use the proper lid for 5 minutes between CAUTION...
... when using the auto cook feature, complete the cooking process by selecting a power level and cooking time. 02 Using your microwave oven using your microwave oven Using The Sensor Cooking Button The Sensor Cooking button consist of the Sensor Cook cycle, when the time has started to...the appropriate containers and covers in the Cookware section on the display. Sensor cooking utensils & covers To obtain good cooking results using your microwave oven _21 Do not continuously use CAUTION plastic wrap. To avoid poor results, do not use the proper lid for 5 minutes between CAUTION...

User Manual (user Manual) (ver.1.0) (English)
Page 22
...again. Let the oven cool for at a time. Place the chicken breasts on the box for at least 5 minutes before using your microwave oven The correct food temperature varies from person to select your personal temperature preference. 22_ using it again. Use the More (9)/Less (1) ... Use a measuring cup or mug and do not cover. Let stand for larger or thicker chicken breasts. Cover with thick crusts. Place on a microwave-safe plate with plastic wrap. Let the oven cool for at least 5 minutes before using it again. Use the More (9) button to 3 slices...
...again. Let the oven cool for at a time. Place the chicken breasts on the box for at least 5 minutes before using your microwave oven The correct food temperature varies from person to select your personal temperature preference. 22_ using it again. Use the More (9)/Less (1) ... Use a measuring cup or mug and do not cover. Let stand for larger or thicker chicken breasts. Cover with thick crusts. Place on a microwave-safe plate with plastic wrap. Let the oven cool for at least 5 minutes before using it again. Use the More (9) button to 3 slices...


