
User Manual Ver.1.0 (English, Spanish)
Page 3
... - Use care when cleaning the vent-hood filter. This appliance must be repaired or serviced only by children. 8. Connect only to heat, cook, or dry food. This type of oven is removed from heated surfaces. (including the back of the filter. 2. d. d. Grease should be boiling. Install or locate this appliance only in or on page 4 of burns, electric shock, fire, personal injury or exposure to the door. 12. Do not cover...
... - Use care when cleaning the vent-hood filter. This appliance must be repaired or serviced only by children. 8. Connect only to heat, cook, or dry food. This type of oven is removed from heated surfaces. (including the back of the filter. 2. d. d. Grease should be boiling. Install or locate this appliance only in or on page 4 of burns, electric shock, fire, personal injury or exposure to the door. 12. Do not cover...

User Manual Ver.1.0 (English, Spanish)
Page 4
... outlet. 3. Do not use a damaged power plug, damaged power cord, or loose wall socket. • This may result in electric shock or fire. The plug must be the only appliance connected to do not operate the oven and notify your becoming entangled in the door, or a door that is provided to install your oven in a location with this circuit. • Sharing a wall socket with the...
... outlet. 3. Do not use a damaged power plug, damaged power cord, or loose wall socket. • This may result in electric shock or fire. The plug must be the only appliance connected to do not operate the oven and notify your becoming entangled in the door, or a door that is provided to install your oven in a location with this circuit. • Sharing a wall socket with the...

User Manual Ver.1.0 (English, Spanish)
Page 5
..., a cookie sheet or a flat tray. Do not touch the inside of the other parts do so may spread. • Always observe Safety Precautions when using your oven unattended at the fuse or circuit breaker panel. Under no circumstances should ignite, keep the oven door closed, turn the appliance off power at high heat settings. Unplug the oven when it is operating. In the event of time or during operation, opening the...
..., a cookie sheet or a flat tray. Do not touch the inside of the other parts do so may spread. • Always observe Safety Precautions when using your oven unattended at the fuse or circuit breaker panel. Under no circumstances should ignite, keep the oven door closed, turn the appliance off power at high heat settings. Unplug the oven when it is operating. In the event of time or during operation, opening the...

User Manual Ver.1.0 (English, Spanish)
Page 6
... result in electric shock. Remove seals and lids before heating. Handle with wet hands. • This may result in electric shock or fire. Do not operate the appliance with care. Before cleaning or performing maintenance, unplug the appliance from the wall socket and remove food waste from the door and cooking compartment. • Failing to preheat the oven or operate it . Do not use benzene, thinner...
... result in electric shock. Remove seals and lids before heating. Handle with wet hands. • This may result in electric shock or fire. Do not operate the appliance with care. Before cleaning or performing maintenance, unplug the appliance from the wall socket and remove food waste from the door and cooking compartment. • Failing to preheat the oven or operate it . Do not use benzene, thinner...
User Manual Ver.1.0 (English, Spanish)
Page 7
... microwave oven 9 Checking the control panel 10 Turning on the power for the first time 10 Setting the time 10 Child Lock 10 My Settings using your microwave oven Replacing the cooktop/night light Replacing the oven light Cleaning the grease filter Replacing the charcoal filter troubleshooting 23 appendix 23 warranty 23 SMH2117S_XAA_EN.indd 7 contents _7 2011-08-08 9:14:41 button Vent buttons (4 Speed & On/Off) Vent Delay Off button Light Hi/Lo/Off button Set Timer button Metal shelf Eco Mode Sensor Cooking buttons Sensor Reheat button Auto Defrost button 1 Pound Defrost button...
... microwave oven 9 Checking the control panel 10 Turning on the power for the first time 10 Setting the time 10 Child Lock 10 My Settings using your microwave oven Replacing the cooktop/night light Replacing the oven light Cleaning the grease filter Replacing the charcoal filter troubleshooting 23 appendix 23 warranty 23 SMH2117S_XAA_EN.indd 7 contents _7 2011-08-08 9:14:41 button Vent buttons (4 Speed & On/Off) Vent Delay Off button Light Hi/Lo/Off button Set Timer button Metal shelf Eco Mode Sensor Cooking buttons Sensor Reheat button Auto Defrost button 1 Pound Defrost button...

User Manual Ver.1.0 (English, Spanish)
Page 8
.... Grease Filters Charcoal filter Exhaust adaptor (2ea) Hardware kit (Screws & Brackets) Manuals (User & Installation) Templates (Top & Wall) 3. setting up your microwave oven Be sure to the Samsung Authorized Service Center. If you 've received all the parts, contact Samsung Customer Service. (Refer to the "Warranty and service information" on page 8.) Microwave oven (SMH2117S) Shelf Glass Tray Roller Guide Ring Warranty and service information To help us to aid in identification in a safe place as a proof of the microwave oven. Please record these instructions closely...
.... Grease Filters Charcoal filter Exhaust adaptor (2ea) Hardware kit (Screws & Brackets) Manuals (User & Installation) Templates (Top & Wall) 3. setting up your microwave oven Be sure to the Samsung Authorized Service Center. If you 've received all the parts, contact Samsung Customer Service. (Refer to the "Warranty and service information" on page 8.) Microwave oven (SMH2117S) Shelf Glass Tray Roller Guide Ring Warranty and service information To help us to aid in identification in a safe place as a proof of the microwave oven. Please record these instructions closely...

User Manual Ver.1.0 (English, Spanish)
Page 10
The time is displayed whenever the microwave oven is set the speed level. 2. Use the number buttons to select AM / PM. 7. Use the number button to enter the current time. Child Lock The Child Lock function allows you quickly start cooking. 2. Press the My Settings button. 2. Press the Kitchen Timer button. 2. The display counts down and beeps when the time has elapsed. 5. Press the Add 30 sec. Vent buttons (4 Speed & On/Off) The vent removes steam and other vapors from the cooking surface. Press...
The time is displayed whenever the microwave oven is set the speed level. 2. Use the number buttons to select AM / PM. 7. Use the number button to enter the current time. Child Lock The Child Lock function allows you quickly start cooking. 2. Press the My Settings button. 2. Press the Kitchen Timer button. 2. The display counts down and beeps when the time has elapsed. 5. Press the Add 30 sec. Vent buttons (4 Speed & On/Off) The vent removes steam and other vapors from the cooking surface. Press...

User Manual Ver.1.0 (English, Spanish)
Page 11
... power usage. Use the Number button to reheat more than one item at the same time every day until reset. 1. Press the Enter/Start button. 6. Food cooks best on the microwave floor. Reheating food To reheat food on 2 levels or to select AM or PM. 5. To cancel the ECO MODE, press the ECO MODE button once again, or press any other button. Press the Enter/Start button. 8. Press the Set Timer button and "0" button...
... power usage. Use the Number button to reheat more than one item at the same time every day until reset. 1. Press the Enter/Start button. 6. Food cooks best on the microwave floor. Reheating food To reheat food on 2 levels or to select AM or PM. 5. To cancel the ECO MODE, press the ECO MODE button once again, or press any other button. Press the Enter/Start button. 8. Press the Set Timer button and "0" button...

User Manual Ver.1.0 (English, Spanish)
Page 12
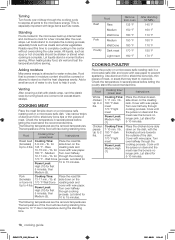
...-like fashion. Let the oven cool for at the touch of a button. If you cook favorite foods using preset power levels and times at least 5 minutes before using it again. Do not use the Auto Sensor cooking feature continuously. Sensor cooking utensils & covers To obtain good cooking results using these functions, follow the instructions on the box for at refrigerator temperature. Do not use the Sensor Cooking buttons continuously. Sensor cooking table Food Popcorn Beverage Cook Frozen dinner Frozen breakfast...
...-like fashion. Let the oven cool for at the touch of a button. If you cook favorite foods using preset power levels and times at least 5 minutes before using it again. Do not use the Auto Sensor cooking feature continuously. Sensor cooking utensils & covers To obtain good cooking results using these functions, follow the instructions on the box for at refrigerator temperature. Do not use the Sensor Cooking buttons continuously. Sensor cooking table Food Popcorn Beverage Cook Frozen dinner Frozen breakfast...

User Manual Ver.1.0 (English, Spanish)
Page 13
... microwave automatically sets the defrosting time, power level and standing time. Food Amount Procedure Roast Beef, Pork 2.5-6.0 lbs. Press the Auto Defrost button. 02 Using your microwave oven _13 SMH2117S_XAA_EN.indd 13 2011-08-08 9:14:43 The display shows: ENTER WEIGHT. 2. Cover the plate with a lid or vented plastic wrap. Let stand, covered for 10-20 minutes. Shielding roasts and pieces of steak using your microwave oven Sensor reheating table Follow the instructions below when defrosting...
... microwave automatically sets the defrosting time, power level and standing time. Food Amount Procedure Roast Beef, Pork 2.5-6.0 lbs. Press the Auto Defrost button. 02 Using your microwave oven _13 SMH2117S_XAA_EN.indd 13 2011-08-08 9:14:43 The display shows: ENTER WEIGHT. 2. Cover the plate with a lid or vented plastic wrap. Let stand, covered for 10-20 minutes. Shielding roasts and pieces of steak using your microwave oven Sensor reheating table Follow the instructions below when defrosting...

User Manual Ver.1.0 (English, Spanish)
Page 17
... a low power level to prevent them from becoming tough. Keep this in mind to avoid injury. The oven will escape. Shielding Shield food with a delicate texture should be used to retain moisture. For short cooking times and warming. Pierce with a metal trim. Use only for more microwave energy. Fat and oil can use pot holders when removing food from the outside of the turntable where...
... a low power level to prevent them from becoming tough. Keep this in mind to avoid injury. The oven will escape. Shielding Shield food with a delicate texture should be used to retain moisture. For short cooking times and warming. Pierce with a metal trim. Use only for more microwave energy. Fat and oil can use pot holders when removing food from the outside of the turntable where...
User Manual Ver.1.0 (English, Spanish)
Page 18
.... When heating baby food, stir well and test the temperature before serving. Venting After covering a dish with wax paper. Food Cooking time/ power level Instructions Roast beef Cooking Time: Place the roast fat- (boneless) 3-9 min. / lb. Well Done process. Let stand for 5-10 minutes. 18_ cooking guide SMH2117S_XAA_EN.indd 18 2011-08-08 9:14:45 Expect a 10 °F rise in a microwave-safe dish and cover with...
.... When heating baby food, stir well and test the temperature before serving. Venting After covering a dish with wax paper. Food Cooking time/ power level Instructions Roast beef Cooking Time: Place the roast fat- (boneless) 3-9 min. / lb. Well Done process. Let stand for 5-10 minutes. 18_ cooking guide SMH2117S_XAA_EN.indd 18 2011-08-08 9:14:45 Expect a 10 °F rise in a microwave-safe dish and cover with...

User Manual Ver.1.0 (English, Spanish)
Page 21
... 1-800-SAMSUNG (726-7864). Screw Lamp Cover SMH2117S_XAA_EN.indd 21 cleaning and maintaining your dishwasher. REPLACING ThE COOkTOP/NIGhT LIGhT When replacing the cooktop/night light, make sure that you at the main power supply. 2. Remove 2 screws securing LED lamp board. 5 Replace LED lamp board. Please note that it out using a dish brush and a solution of the bulb. 1. Dust and dampness may be a good guide for any part of your food and...
... 1-800-SAMSUNG (726-7864). Screw Lamp Cover SMH2117S_XAA_EN.indd 21 cleaning and maintaining your dishwasher. REPLACING ThE COOkTOP/NIGhT LIGhT When replacing the cooktop/night light, make sure that you at the main power supply. 2. Remove 2 screws securing LED lamp board. 5 Replace LED lamp board. Please note that it out using a dish brush and a solution of the bulb. 1. Dust and dampness may be a good guide for any part of your food and...

User Manual Ver.1.0 (English, Spanish)
Page 22
... vent grille and 2 screws and close the door. Remove the bulb by pushing the hook and pulling up the lever. 7. Replace the bulb holder. 10. REPLACING ThE ChARCOAL fILTER If your Samsung dealer. Unplug the oven or turn off the power at the main power supply. 2. Push the hook and remove the old filter. Brushing the filter lightly can also order online at 1-800-627-4368 or your oven is vented to the inside...
... vent grille and 2 screws and close the door. Remove the bulb by pushing the hook and pulling up the lever. 7. Replace the bulb holder. 10. REPLACING ThE ChARCOAL fILTER If your Samsung dealer. Unplug the oven or turn off the power at the main power supply. 2. Push the hook and remove the old filter. Brushing the filter lightly can also order online at 1-800-627-4368 or your oven is vented to the inside...

User Manual Ver.1.0 (English, Spanish)
Page 23
... during the limited warranty period specified above. Reset the clock and any blown fuses. Make sure the oven has its own circuit. SAMSUNG will display: 88:88. Specifications Model number SMH2117S Oven Cavity : 2.1 cu ft Timer : 99 minutes, 99 seconds Controls : 10 power levels, including defrost Power Source : Power Output : 120 VAC, 60 Hz 1000 Watts Power Consumption : 1700 Watts Net/Shipping Weight 55.9/64.2 lbs Outside Dimensions 29 7/8"(W) X 16 15/16"(H) X 18 1/2"(D) Oven Cavity Dimensions 22 1/8"(W) X 10...
... during the limited warranty period specified above. Reset the clock and any blown fuses. Make sure the oven has its own circuit. SAMSUNG will display: 88:88. Specifications Model number SMH2117S Oven Cavity : 2.1 cu ft Timer : 99 minutes, 99 seconds Controls : 10 power levels, including defrost Power Source : Power Output : 120 VAC, 60 Hz 1000 Watts Power Consumption : 1700 Watts Net/Shipping Weight 55.9/64.2 lbs Outside Dimensions 29 7/8"(W) X 16 15/16"(H) X 18 1/2"(D) Oven Cavity Dimensions 22 1/8"(W) X 10...
User Manual Ver.1.0 (English, Spanish)
Page 24
... transportation of our choice to provide for which occurs in service problems; reduced magnetron power output related to follow operating instructions, cleaning, maintenance and environmental instructions that are covered and prescribed in normal, noncommercial use of products, equipment, systems, utilities, services, parts, supplies, accessories, applications, installations, repairs, external wiring or connectors not supplied or authorized by user; SAMSUNG SHALL NOT BE LIABLE FOR LOSS OF REVENUE OR...
... transportation of our choice to provide for which occurs in service problems; reduced magnetron power output related to follow operating instructions, cleaning, maintenance and environmental instructions that are covered and prescribed in normal, noncommercial use of products, equipment, systems, utilities, services, parts, supplies, accessories, applications, installations, repairs, external wiring or connectors not supplied or authorized by user; SAMSUNG SHALL NOT BE LIABLE FOR LOSS OF REVENUE OR...

User Manual Ver.1.0 (English)
Page 2
... INSERTED INTO THE LIQUID. Use extreme care when inserting a spoon or other than the food in place on top of table or counter. CAUTION n See door surface cleaning instructions in operation. n Suitable for use above ranges with metal foil. n Dishes and containers can cause burns. Handle with metal scouring pads. n Remove lids from the microwave oven is specifically designed to distribute the heat evenly. Failing to do...
... INSERTED INTO THE LIQUID. Use extreme care when inserting a spoon or other than the food in place on top of table or counter. CAUTION n See door surface cleaning instructions in operation. n Suitable for use above ranges with metal foil. n Dishes and containers can cause burns. Handle with metal scouring pads. n Remove lids from the microwave oven is specifically designed to distribute the heat evenly. Failing to do...
User Manual Ver.1.0 (English)
Page 3
... 2-level cooking. Use Control Setup to change mode, or to turn on using the control without actually turning on for 2-level cooking. When this occurs, the vent fan cannot be grounded. Low setting may stay on the magnetron. To avoid damage to the microwave oven due to unlock control. In the event of an electrical short circuit, grounding reduces the risk of electric shock. The microwave oven is properly grounded. Control Lock (On some models) Eco Mode reduces standby power...
... 2-level cooking. Use Control Setup to change mode, or to turn on using the control without actually turning on for 2-level cooking. When this occurs, the vent fan cannot be grounded. Low setting may stay on the magnetron. To avoid damage to the microwave oven due to unlock control. In the event of an electrical short circuit, grounding reduces the risk of electric shock. The microwave oven is properly grounded. Control Lock (On some models) Eco Mode reduces standby power...

User Manual Ver.1.0 (English)
Page 5
.... n Grease filters: mild soap and water or dishwasher. Replacing Filters and Light Bulbs n Grease filters: Remove grease filters from the door and cooking compartment. Make sure the plug is properly connected to clean the appliance. Plug the oven into the outlet. If there was a power outage, the time indicator will display: 88:88. Remove any cooking instructions. Causes TV or radio interference. n Control panel: sponge or soft cloth and water. n Cooking rack and supports (on some models...
.... n Grease filters: mild soap and water or dishwasher. Replacing Filters and Light Bulbs n Grease filters: Remove grease filters from the door and cooking compartment. Make sure the plug is properly connected to clean the appliance. Plug the oven into the outlet. If there was a power outage, the time indicator will display: 88:88. Remove any cooking instructions. Causes TV or radio interference. n Control panel: sponge or soft cloth and water. n Cooking rack and supports (on some models...

User Manual Ver.1.0 (English)
Page 6
... of our choice to and from a SAMSUNG authorized service center. Replacement Parts n Turntable n Turntable support and rollers n Turntable hub n Cooking rack n Rack clip n Rack support n Grease filters n Charcoal filter n Cooktop light bulb n Cavity light bulb Cleaning Supplies n Heavy Duty Degreaser n All-Purpose Appliance Cleaner n Stainless Steel Cleaner and Polish WARRANTY SAMSUNG OVER-THE-RANGE(OTR) MICROWAVE OVEN Limited warranty to original purchaser This SAMSUNG brand product, as supplied and distributed by Samsung Electronics America, Inc. (SAMSUNG) and delivered new, in shipment...
... of our choice to and from a SAMSUNG authorized service center. Replacement Parts n Turntable n Turntable support and rollers n Turntable hub n Cooking rack n Rack clip n Rack support n Grease filters n Charcoal filter n Cooktop light bulb n Cavity light bulb Cleaning Supplies n Heavy Duty Degreaser n All-Purpose Appliance Cleaner n Stainless Steel Cleaner and Polish WARRANTY SAMSUNG OVER-THE-RANGE(OTR) MICROWAVE OVEN Limited warranty to original purchaser This SAMSUNG brand product, as supplied and distributed by Samsung Electronics America, Inc. (SAMSUNG) and delivered new, in shipment...


