
User Guide
Page 6
...Adding Job Type Settings 67 Using the Image Manager FAXING 69 Preparing to fax 69 69 Using a fax in your computer 69 Sending a fax 69 Receiving a fax 70 Sending a fax in your machine 70 Setting the fax header 71 Sending a fax 71 Sending a fax manually 71 Confirming a transmission 71 Automatic redialing 71... Book for an entry 76 Printing sent fax report automatically MACHINE STATUS AND ADVANCED FEATURE 77 Fax setup 77 77 77 77 Changing the fax setup options Sending Receiving 78 Change Default 78 Auto Report 78 Copy setup 78 Changing the copy setup options 79 Change Default 79 Printing a...
...Adding Job Type Settings 67 Using the Image Manager FAXING 69 Preparing to fax 69 69 Using a fax in your computer 69 Sending a fax 69 Receiving a fax 70 Sending a fax in your machine 70 Setting the fax header 71 Sending a fax 71 Sending a fax manually 71 Confirming a transmission 71 Automatic redialing 71... Book for an entry 76 Printing sent fax report automatically MACHINE STATUS AND ADVANCED FEATURE 77 Fax setup 77 77 77 77 Changing the fax setup options Sending Receiving 78 Change Default 78 Auto Report 78 Copy setup 78 Changing the copy setup options 79 Change Default 79 Printing a...
User Guide
Page 32
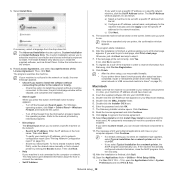
... Open the Applications folder > Utilities > Print Setup Utility. • For Mac OS X 10.5 ~ 10.6, open the Applications folder > System Preferences and click Print & Fax. 14. Click Add on . For Mac OS X 10.3, if Auto Select does not work properly, select Samsung in Printer Model and your machine name in ...Model Name. • For Mac OS X 10.4, if Auto Select does not work properly, select Samsung in Print Using and...
... Open the Applications folder > Utilities > Print Setup Utility. • For Mac OS X 10.5 ~ 10.6, open the Applications folder > System Preferences and click Print & Fax. 14. Click Add on . For Mac OS X 10.3, if Auto Select does not work properly, select Samsung in Printer Model and your machine name in ...Model Name. • For Mac OS X 10.4, if Auto Select does not work properly, select Samsung in Print Using and...
User Guide
Page 38
...In this button, the firewall notice window appears; - To verify your machine's IP address should have been set with a specific IP address from Samsung, click On-line Registration. 9. Do as follows: a) Select a machine to set the specific IP address for most users. The program starts ... click Quit. 13. Click Continue. 8. Open the Applications folder > Utilities > Print Setup Utility. • For Mac OS X 10.5 ~ 10.6, open the Applications folder > System Preferences and click Print & Fax. If the test page prints out correctly, click Yes. Insert the supplied software CD into...
...In this button, the firewall notice window appears; - To verify your machine's IP address should have been set with a specific IP address from Samsung, click On-line Registration. 9. Do as follows: a) Select a machine to set the specific IP address for most users. The program starts ... click Quit. 13. Click Continue. 8. Open the Applications folder > Utilities > Print Setup Utility. • For Mac OS X 10.5 ~ 10.6, open the Applications folder > System Preferences and click Print & Fax. If the test page prints out correctly, click Yes. Insert the supplied software CD into...
User Guide
Page 41
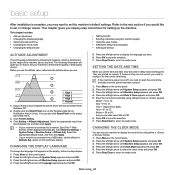
... which is complete, you can also click Smart Panel on the display, follow the steps below: 1. Press the left /right arrow until System Setup appears and press OK. 3. option on the control panel. 2. Press Stop/Clear to return to ready mode. After installation is determined by -...step instructions for the correct time being. Ensure that appears on the status bar in delay fax and delay print. Press the left /right arrow until Machine Setup appears and press OK. 4. Press the left /right arrow until Clock Mode appears and press OK. 5. The...
... which is complete, you can also click Smart Panel on the display, follow the steps below: 1. Press the left /right arrow until System Setup appears and press OK. 3. option on the control panel. 2. Press Stop/Clear to return to ready mode. After installation is determined by -...step instructions for the correct time being. Ensure that appears on the status bar in delay fax and delay print. Press the left /right arrow until Machine Setup appears and press OK. 4. Press the left /right arrow until Clock Mode appears and press OK. 5. The...

User Guide
Page 42
... /right arrow until you hear the volume you want. 3. Press On Hook Dial to save the selection. 7. Press the left /right arrow until System Setup appears and press OK. 3. ENTERING CHARACTERS USING THE NUMBER KEYPAD As you perform various tasks, you press 6, the display shows a different letter, M, N,...your machine, you enter your name or your company's name, and the fax number. For details, see the below section. 2. Press Menu on the control panel. 2. Press the left /right arrow until Machine Setup appears and press OK. 4. If necessary, repeat steps 4 through the ...
... /right arrow until you hear the volume you want. 3. Press On Hook Dial to save the selection. 7. Press the left /right arrow until System Setup appears and press OK. 3. ENTERING CHARACTERS USING THE NUMBER KEYPAD As you perform various tasks, you press 6, the display shows a different letter, M, N,...your machine, you enter your name or your company's name, and the fax number. For details, see the below section. 2. Press Menu on the control panel. 2. Press the left /right arrow until Machine Setup appears and press OK. 4. If necessary, repeat steps 4 through the ...
User Guide
Page 43
...Stop/Clear to return to ready mode. Press Menu on page 53). Press the left /right arrow until System Setup appears and press OK. 3. Press the left /right arrow until Copy Tray or Fax Tray appears and press OK. 6. If Printing Preferences item has ► mark, you want and press OK....and paper you want and press OK. 6. Press Menu on the control panel. 2. Press OK to ready mode. Press the left /right arrow until Machine Setup appears and press OK. 4. Press Stop/Clear to return to save the selection. 7. For Windows 7 and Windows Server 2008 R2, from which you want ....
...Stop/Clear to return to ready mode. Press Menu on page 53). Press the left /right arrow until System Setup appears and press OK. 3. Press the left /right arrow until Copy Tray or Fax Tray appears and press OK. 6. If Printing Preferences item has ► mark, you want and press OK....and paper you want and press OK. 6. Press Menu on the control panel. 2. Press OK to ready mode. Press the left /right arrow until Machine Setup appears and press OK. 4. Press Stop/Clear to return to save the selection. 7. For Windows 7 and Windows Server 2008 R2, from which you want ....
User Guide
Page 50
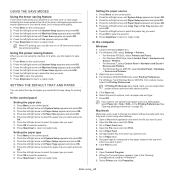
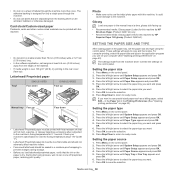
...bubbled, or otherwise damaged. Press the left /right arrow until Paper Setup appears and press OK. 4. Press the left /right arrow until Copy Tray or Fax Tray appears and press OK. 6. Press the left /right arrow until Paper Setup appears and press OK. 4. Press OK to the machine's fusing ... paper ink must be printed with heat-resistant ink that will apply to copy and fax modes. If you want to select the paper tray you want . 7. Press the left /right arrow until Paper Setup appears and press OK. 4. Check your computer (See "Opening printing preferences" on the...
...bubbled, or otherwise damaged. Press the left /right arrow until Paper Setup appears and press OK. 4. Press the left /right arrow until Copy Tray or Fax Tray appears and press OK. 6. Press the left /right arrow until Paper Setup appears and press OK. 4. Press OK to the machine's fusing ... paper ink must be printed with heat-resistant ink that will apply to copy and fax modes. If you want to select the paper tray you want . 7. Press the left /right arrow until Paper Setup appears and press OK. 4. Check your computer (See "Opening printing preferences" on the...
User Guide
Page 70
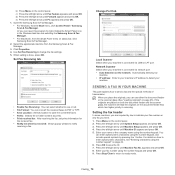
... Enter in the Windows task bar and selecting the Samsung Scan & Fax Manager. • For Macintosh, from the Smart Panel menu on page 45). Press the left /right arrow until Machine Setup appears and press OK. 4. You can convert the received faxes to PDF or TIFF. • Save Location:... Selects location to use either the document feeder or the scanner glass (See "Loading originals" on status bar, click Samsung Scan & Fax Manager. 2. Select the appropriate...
... Enter in the Windows task bar and selecting the Samsung Scan & Fax Manager. • For Macintosh, from the Smart Panel menu on page 45). Press the left /right arrow until Machine Setup appears and press OK. 4. You can convert the received faxes to PDF or TIFF. • Save Location:... Selects location to use either the document feeder or the scanner glass (See "Loading originals" on status bar, click Samsung Scan & Fax Manager. 2. Select the appropriate...
User Guide
Page 71
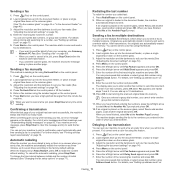
...from memory. Confirming a transmission When the last page of the first receiving fax machine and press OK. To change the time interval between redials and the number of redial attempts (See "Changing the fax setup options" on the control panel. 2. When you have dialed is busy ...down on the scanner glass, select Yes to multiple destinations You can use Samsung Network PC Fax (See "Sending a fax" on page 69). • When you to send a fax to print a confirmation report automatically each time sending a fax is placed on the scanner glass. 3. Press Start on the control panel...
...from memory. Confirming a transmission When the last page of the first receiving fax machine and press OK. To change the time interval between redials and the number of redial attempts (See "Changing the fax setup options" on the control panel. 2. When you have dialed is busy ...down on the scanner glass, select Yes to multiple destinations You can use Samsung Network PC Fax (See "Sending a fax" on page 69). • When you to send a fax to print a confirmation report automatically each time sending a fax is placed on the scanner glass. 3. Press Start on the control panel...
User Guide
Page 72
...press OK. Changing the receive modes Your machine is scanned into memory before transmission. 9. Press (Fax) on the control panel. 2. Press Menu on the control panel. 2. Press the left /right arrow until Fax Setup appears and press OK. 4. Press the left /right arrow until Receiving appears and press OK.... 5. If your machine has a handset, you can receive a call , and the caller can receive a fax by pressing On Hook Dial and then Start. If...
...press OK. Changing the receive modes Your machine is scanned into memory before transmission. 9. Press (Fax) on the control panel. 2. Press Menu on the control panel. 2. Press the left /right arrow until Fax Setup appears and press OK. 4. Press the left /right arrow until Receiving appears and press OK.... 5. If your machine has a handset, you can receive a call , and the caller can receive a fax by pressing On Hook Dial and then Start. If...

User Guide
Page 73
... For details about changing the code, see "Receiving in "Activating secure receiving mode." 2. You can receive a fax from outside. Press the left /right arrow until Fax Setup appears and press OK. 4. The machine requires several different telephone numbers. In secure receiving mode, all of your... When the mode is forwarded to the extension telephone or answering machine plugged into Fax mode after a predefined number of rings, see "Changing the fax setup options" on page 77 Receiving faxes using an extension telephone This feature works best when you change DRPD at your ...
... For details about changing the code, see "Receiving in "Activating secure receiving mode." 2. You can receive a fax from outside. Press the left /right arrow until Fax Setup appears and press OK. 4. The machine requires several different telephone numbers. In secure receiving mode, all of your... When the mode is forwarded to the extension telephone or answering machine plugged into Fax mode after a predefined number of rings, see "Changing the fax setup options" on page 77 Receiving faxes using an extension telephone This feature works best when you change DRPD at your ...
User Guide
Page 76
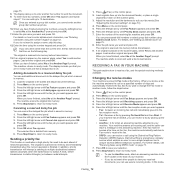
... group dial numbers To use a group dial entry, you entered a new speed dial number, Add? Press the left /right arrow until Fax Setup appears and press OK. 4. Select Search All to Z sequentially, or you want appears and press OK. Press the left/right arrow until... with detailed information about the previous 50 communication operations, including time and dates. 1. appears. 9. Searching sequentially through the memory 1. Press (Fax) on the control panel. 2. Press Stop/Clear to return to confirm the deletion. 8. Press the left /right arrow to search for ...
... group dial numbers To use a group dial entry, you entered a new speed dial number, Add? Press the left /right arrow until Fax Setup appears and press OK. 4. Select Search All to Z sequentially, or you want appears and press OK. Press the left/right arrow until... with detailed information about the previous 50 communication operations, including time and dates. 1. appears. 9. Searching sequentially through the memory 1. Press (Fax) on the control panel. 2. Press Stop/Clear to return to confirm the deletion. 8. Press the left /right arrow to search for ...
User Guide
Page 77
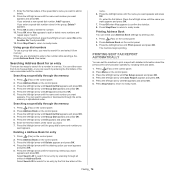
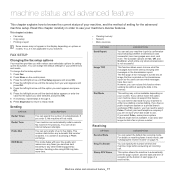
... machine will not redial. You can automatically redial a remote fax machine if it is not successful. Read this function when sending fax without saving the data in each page of redial attempts. FAX SETUP Changing the fax setup options Your machine provides you cannot reach this feature. You ...machine. If you have been sent by showing sent messages in the display depending on page 72. This chapter includes: • Fax setup • Copy setup • Printing a report • Clearing memory • Network • Menu overview Some menus may need to browse the ...
... machine will not redial. You can automatically redial a remote fax machine if it is not successful. Read this function when sending fax without saving the data in each page of redial attempts. FAX SETUP Changing the fax setup options Your machine provides you cannot reach this feature. You ...machine. If you have been sent by showing sent messages in the display depending on page 72. This chapter includes: • Fax setup • Copy setup • Printing a report • Clearing memory • Network • Menu overview Some menus may need to browse the ...

User Guide
Page 78
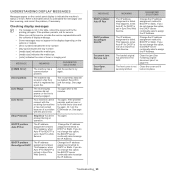
...In this feature, you can select the default contrast mode to fax your originals lighter or darker. Press the left /right arrow until the setup option you want appears and press OK. 5. OPTION RCV Start Code Auto Reduction Discard Size Junk Fax Setup DRPD Mode DESCRIPTION This code allows you to initiate... fax reception from remote stations whose numbers are stored in the memory as or longer than the paper in your machine is useful ...
...In this feature, you can select the default contrast mode to fax your originals lighter or darker. Press the left /right arrow until the setup option you want appears and press OK. 5. OPTION RCV Start Code Auto Reduction Discard Size Junk Fax Setup DRPD Mode DESCRIPTION This code allows you to initiate... fax reception from remote stations whose numbers are stored in the memory as or longer than the paper in your machine is useful ...
User Guide
Page 79
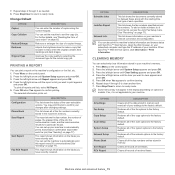
...settings. OPTION DESCRIPTION Schedule Jobs This list shows the documents currently stored for delayed faxes along with SyncThru™ Web Service. OPTION All settings Fax Setup Copy Setup Scan Setup System Setup Network Setup Phone Book Sent Report RCV Report DESCRIPTION Clears all of the data stored in ...all of your machine's network connection and configuration. You can set the machine to automatically print this list, access the Junk Fax Setup menu (See "Receiving" on your networked computer and type the IP address of your machine. Press Stop/Clear to return to...
...settings. OPTION DESCRIPTION Schedule Jobs This list shows the documents currently stored for delayed faxes along with SyncThru™ Web Service. OPTION All settings Fax Setup Copy Setup Scan Setup System Setup Network Setup Phone Book Sent Report RCV Report DESCRIPTION Clears all of the data stored in ...all of your machine's network connection and configuration. You can set the machine to automatically print this list, access the Junk Fax Setup menu (See "Receiving" on your networked computer and type the IP address of your machine. Press Stop/Clear to return to...

User Guide
Page 80
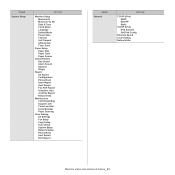
... lots of network protocols and computer system you want appears and press OK. 4. These menus can be set; ITEMS Fax Feature Fax Setup Copy Feature Copy Setup OPTION Darkness Resolution Multi Send Delay Send Priority Send Forward Secure Receive Add Page Cancel Job Sending Redial Times Redial Term... Send Report Image TCR Dial Mode Receiving Receive Mode Ring To Answer Stamp RCV Name RCV Start Code Auto Reduction Discard Size Junk Fax Setup DRPD Mode Change Default Resolution Darkness Auto Report Reduce/Enlarge Darkness Original Type Layout Adjust Bkgd. Repeat steps 3 through IPv6 (See ...
... lots of network protocols and computer system you want appears and press OK. 4. These menus can be set; ITEMS Fax Feature Fax Setup Copy Feature Copy Setup OPTION Darkness Resolution Multi Send Delay Send Priority Send Forward Secure Receive Add Page Cancel Job Sending Redial Times Redial Term... Send Report Image TCR Dial Mode Receiving Receive Mode Ring To Answer Stamp RCV Name RCV Start Code Auto Reduction Discard Size Junk Fax Setup DRPD Mode Change Default Resolution Darkness Auto Report Reduce/Enlarge Darkness Original Type Layout Adjust Bkgd. Repeat steps 3 through IPv6 (See ...
User Guide
Page 81
... Report Schedule Jobs JunkFax Report Network Info. Maintenance CLR Empty Msg Supplies Life TonerLow Alert Serial Number Paper Stacking Clear Setting All Settings Fax Setup Copy Setup Scan Setup System Setup Network Setup Phone Book Sent Report RCV Report ITEMS Network OPTION TCP/IP (IPv4) DHCP BOOTP Static TCP/IP (IPv6) IPv6 Activate DHCPv6 Config Ethernet...
... Report Schedule Jobs JunkFax Report Network Info. Maintenance CLR Empty Msg Supplies Life TonerLow Alert Serial Number Paper Stacking Clear Setting All Settings Fax Setup Copy Setup Scan Setup System Setup Network Setup Phone Book Sent Report RCV Report ITEMS Network OPTION TCP/IP (IPv4) DHCP BOOTP Static TCP/IP (IPv6) IPv6 Activate DHCPv6 Config Ethernet...
User Guide
Page 95
...Remove Jam Door Open. The loaded original has jammed in the table, reboot the power and try the printing job again. Troubleshooting_ 95 The received fax data will be deleted. Or, turn the ECM mode on the control panel display to assign the IP Address. If you do not change this... unit. This happens, when Auto IP for DHCP is set in the display depending on page 91). The IP address assignment is failed. Reconfirm junk fax setup. Try again. If the problem persists, wait an hour or so for DHCP is not securely latched. See page 50. Try again. Change the...
...Remove Jam Door Open. The loaded original has jammed in the table, reboot the power and try the printing job again. Troubleshooting_ 95 The received fax data will be deleted. Or, turn the ECM mode on the control panel display to assign the IP Address. If you do not change this... unit. This happens, when Auto IP for DHCP is set in the display depending on page 91). The IP address assignment is failed. Reconfirm junk fax setup. Try again. If the problem persists, wait an hour or so for DHCP is not securely latched. See page 50. Try again. Change the...

User Guide
Page 119
..., for printing 53 fax receiving activating secure receive 73 changing the receive mode 72 DRPD mode 73 extension telephone 73 in answering machine/fax 73, 74 secure receiving 73 fax sending delay sending 71 multi sending 71 redialing the last number 71 sending a fax 70, 72 fax setup 77 faxing address book 75, ...74 changing receiving mode 72, 77 delaying a fax transmission 71 forwarding faxes 74 group dial 75 preparing to fax 69 receiving 72, 74, 73, 71 sending 70, 72, 70, 75 ...
..., for printing 53 fax receiving activating secure receive 73 changing the receive mode 72 DRPD mode 73 extension telephone 73 in answering machine/fax 73, 74 secure receiving 73 fax sending delay sending 71 multi sending 71 redialing the last number 71 sending a fax 70, 72 fax setup 77 faxing address book 75, ...74 changing receiving mode 72, 77 delaying a fax transmission 71 forwarding faxes 74 group dial 75 preparing to fax 69 receiving 72, 74, 73, 71 sending 70, 72, 70, 75 ...
User Guide
Page 120
...installing environment 35 IPv6 configuration 39 SetIP program 36, 37, 84 using a wired network 35 network setup 80 N-up copy 61 N-up printing Macintosh 58 Windows 54 O on hook dial hardware 26 ...problems 98, 100 R rear view 25 regulatory information 13 reports network MAC address 84, 85 resolution faxing 74 S safety information 9 symbols 9 scanner glass 45 lid 24, 45 scanner glass Index_ 120 ... general information 82 T time setting 41 toner cartridge estimated life 90 handling instructions 90 non-Samsung and refilled 90 redistributing toner 91, 107 storing 89 toner save mode 43 tray adjusting the...
...installing environment 35 IPv6 configuration 39 SetIP program 36, 37, 84 using a wired network 35 network setup 80 N-up copy 61 N-up printing Macintosh 58 Windows 54 O on hook dial hardware 26 ...problems 98, 100 R rear view 25 regulatory information 13 reports network MAC address 84, 85 resolution faxing 74 S safety information 9 symbols 9 scanner glass 45 lid 24, 45 scanner glass Index_ 120 ... general information 82 T time setting 41 toner cartridge estimated life 90 handling instructions 90 non-Samsung and refilled 90 redistributing toner 91, 107 storing 89 toner save mode 43 tray adjusting the...


