

User Manual (ENGLISH)
Page 2
The Laser Facsimile User's Guide (only for SCX-4216F) provides information for using the multi-function application. Samsung SmarThru allows you need for setting up your machine as a printer, a scanner and a copier and information for maintaining and troubleshooting the machine. You ...the automatic text recognition program, AnyPage. All rights reserved. • SCX-4016, SCX-4116, SCX-4216F and Samsung logo are trademarks of this manual. © 2003 Samsung Electronics Co., Ltd. It also provides all of Samsung Electronics Co., Ltd. • Centronics is provided for using your ...
The Laser Facsimile User's Guide (only for SCX-4216F) provides information for using the multi-function application. Samsung SmarThru allows you need for setting up your machine as a printer, a scanner and a copier and information for maintaining and troubleshooting the machine. You ...the automatic text recognition program, AnyPage. All rights reserved. • SCX-4016, SCX-4116, SCX-4216F and Samsung logo are trademarks of this manual. © 2003 Samsung Electronics Co., Ltd. It also provides all of Samsung Electronics Co., Ltd. • Centronics is provided for using your ...
User Manual (ENGLISH)
Page 3
... and Size 1.18 Using the Save Modes 1.19 Toner Save Mode 1.19 Power Save Mode 1.19 CCD Power Save Mode 1.20 Chapter 2: INSTALLING SOFTWARE About Samsung Software 2.2 Printer Driver Features 2.3 System Requirements 2.4 Installing Samsung Software in Windows 2.5 Installing the USB Driver in Windows 98/Me ....... 2.9 Uninstalling...
... and Size 1.18 Using the Save Modes 1.19 Toner Save Mode 1.19 Power Save Mode 1.19 CCD Power Save Mode 1.20 Chapter 2: INSTALLING SOFTWARE About Samsung Software 2.2 Printer Driver Features 2.3 System Requirements 2.4 Installing Samsung Software in Windows 2.5 Installing the USB Driver in Windows 98/Me ....... 2.9 Uninstalling...

User Manual (ENGLISH)
Page 5
... an Overlay 5.16 Creating a New Page Overlay 5.16 Using a Page Overlay 5.18 Deleting a Page Overlay 5.19 Setting Graphic Properties 5.20 Setting Up the Locally Shared Printer 5.22 In Windows 9x/Me 5.22 In Windows NT 4.0/2000/XP 5.23 Chapter 6: SCANNING Scanning Basics 6.2 Scanning Using...
... an Overlay 5.16 Creating a New Page Overlay 5.16 Using a Page Overlay 5.18 Deleting a Page Overlay 5.19 Setting Graphic Properties 5.20 Setting Up the Locally Shared Printer 5.22 In Windows 9x/Me 5.22 In Windows NT 4.0/2000/XP 5.23 Chapter 6: SCANNING Scanning Basics 6.2 Scanning Using...

User Manual (ENGLISH)
Page 7
Chapter A: SPECIFICATIONS General Specifications A.2 Scanner and Copier Specifications A.3 Printer Specifications A.4 Facsimile Specifications (For SCX-4216F A.5 Paper Specifications A.6 Overview A.6 Supported Sizes of Paper A.6 Guidelines for Using Paper A.7 Paper Specifications A.8 Paper Output Capacity A.8 Printer and Paper Storage Environment A.9 vi
Chapter A: SPECIFICATIONS General Specifications A.2 Scanner and Copier Specifications A.3 Printer Specifications A.4 Facsimile Specifications (For SCX-4216F A.5 Paper Specifications A.6 Overview A.6 Supported Sizes of Paper A.6 Guidelines for Using Paper A.7 Paper Specifications A.8 Paper Output Capacity A.8 Printer and Paper Storage Environment A.9 vi

User Manual (ENGLISH)
Page 9
... never any human access to the requirements of other controls may result in the U.S. The laser system and printer are not considered to normal operation. 16. ATTENTION - ATTENZIONE - PRECAUCI N - EVITAR EXPONERSE AL RAYO. RADIA O LASER INVISŒVEL AO ABRIR....DEZE KLEP NIET OPENEN. BETRAKTA EJ STR LEN. viii There may require extensive work by the operating instructions. WARNING Never operate or service the printer with the protective cover removed from lightning. NICHT DEM STRAHL AUSSETZEN. UNDG UDSAETTELSE FOR STR LNING. UNNG EKSPONERING FOR STR LEN. STR LEN R...
... never any human access to the requirements of other controls may result in the U.S. The laser system and printer are not considered to normal operation. 16. ATTENTION - ATTENZIONE - PRECAUCI N - EVITAR EXPONERSE AL RAYO. RADIA O LASER INVISŒVEL AO ABRIR....DEZE KLEP NIET OPENEN. BETRAKTA EJ STR LEN. viii There may require extensive work by the operating instructions. WARNING Never operate or service the printer with the protective cover removed from lightning. NICHT DEM STRAHL AUSSETZEN. UNDG UDSAETTELSE FOR STR LNING. UNNG EKSPONERING FOR STR LEN. STR LEN R...

User Manual (ENGLISH)
Page 21
Clearance Space Front: 482.6 mm (enough space so that the paper tray can be well-ventilated and away from direct sunlight or sources of your desk or table. The area should be removed) Back: 100 mm (enough space for ventilation) Right: 100 mm Left: 100 mm (enough space for ventilation) 674 mm (26.5 in ) Selecting a Location Select a level, stable place with adequate space for opening covers and trays. 482.6 mm (18.8 in.) 1018.6 mm (40.1 in ) 1.4 GETTING STARTED Allow extra space for air circulation. Do not set the printer close to the edge of heat, cold and humidity.
Clearance Space Front: 482.6 mm (enough space so that the paper tray can be well-ventilated and away from direct sunlight or sources of your desk or table. The area should be removed) Back: 100 mm (enough space for ventilation) Right: 100 mm Left: 100 mm (enough space for ventilation) 674 mm (26.5 in ) Selecting a Location Select a level, stable place with adequate space for opening covers and trays. 482.6 mm (18.8 in.) 1018.6 mm (40.1 in ) 1.4 GETTING STARTED Allow extra space for air circulation. Do not set the printer close to the edge of heat, cold and humidity.

User Manual (ENGLISH)
Page 33
.... Push the metal clips down to the USB port of the cables mentioned above. Connect it to the parallel connector on your computer Connecting the printer to fit inside the notches on the cable plug. ➜ To the parallel port on your machine. If this occurs, select the Slow mode to... buy a USB 1.1 compliant cable that is the default mode. Do not use a parallel printer cable, purchase only IEEE-1284 compliant parallel cable and connect it to the USB connector on your machine. ➜ To the USB port on your...
.... Push the metal clips down to the USB port of the cables mentioned above. Connect it to the parallel connector on your computer Connecting the printer to fit inside the notches on the cable plug. ➜ To the parallel port on your machine. If this occurs, select the Slow mode to... buy a USB 1.1 compliant cable that is the default mode. Do not use a parallel printer cable, purchase only IEEE-1284 compliant parallel cable and connect it to the USB connector on your machine. ➜ To the USB port on your...
User Manual (ENGLISH)
Page 36
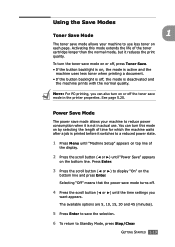
... less toner when printing a document. • If the button backlight is on each page. To turn on or off , the mode is not in the printer properties. Using the Save Modes Toner Save Mode 1 The toner save mode allows your machine to reduce power consumption when it reduces the print quality...
... less toner when printing a document. • If the button backlight is on each page. To turn on or off , the mode is not in the printer properties. Using the Save Modes Toner Save Mode 1 The toner save mode allows your machine to reduce power consumption when it reduces the print quality...

User Manual (ENGLISH)
Page 38
This chapter includes: • About Samsung Software • System Requirements • Installing Samsung Software in Windows • Uninstalling Samsung Software 2 INSTALLING SOFTWARE This chapter gives you information for installing the supplied Samsung software. You must install the Samsung software to use your machine as a printer and a scanner.
This chapter includes: • About Samsung Software • System Requirements • Installing Samsung Software in Windows • Uninstalling Samsung Software 2 INSTALLING SOFTWARE This chapter gives you information for installing the supplied Samsung software. You must install the Samsung software to use your machine as a printer and a scanner.
User Manual (ENGLISH)
Page 39
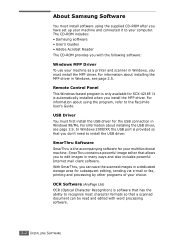
...you can be read and edited with the following software: Windows MFP Driver To use your machine as a printer and scanner in many ways and also includes powerful Internet mail client software. OCR Software (AnyPage Lite) ...USB Driver You must first install the USB driver for the USB connection in a dedicated storage area for SCX-4216F. For information about installing the MFP driver in Windows, see page 2.9. For information about installing the... Windows, you must install the MFP driver. About Samsung Software You must install software using the program, refer to your computer.
...you can be read and edited with the following software: Windows MFP Driver To use your machine as a printer and scanner in many ways and also includes powerful Internet mail client software. OCR Software (AnyPage Lite) ...USB Driver You must first install the USB driver for the USB connection in a dedicated storage area for SCX-4216F. For information about installing the MFP driver in Windows, see page 2.9. For information about installing the... Windows, you must install the MFP driver. About Samsung Software You must install software using the program, refer to your computer.

User Manual (ENGLISH)
Page 40
Printer Driver Features Your printer drivers will support the following standard features: • Paper source selection • Paper size, orientation and media type • number of copies Table below lists a general overview of features supported by your printer drivers. 2 Feature Toner Save Print quality option Poster printing Multiple pages per sheet (N-up) Fit to page printing Scale printing Watermark Overlay Printer Driver Win9x/Me Win2000/XP NT4 .0 Y Y Y Y Y Y Y Y Y Y Y Y Y Y Y Y Y Y Y Y Y Y Y Y INSTALLING SOFTWARE 2.3
Printer Driver Features Your printer drivers will support the following standard features: • Paper source selection • Paper size, orientation and media type • number of copies Table below lists a general overview of features supported by your printer drivers. 2 Feature Toner Save Print quality option Poster printing Multiple pages per sheet (N-up) Fit to page printing Scale printing Watermark Overlay Printer Driver Win9x/Me Win2000/XP NT4 .0 Y Y Y Y Y Y Y Y Y Y Y Y Y Y Y Y Y Y Y Y Y Y Y Y INSTALLING SOFTWARE 2.3

User Manual (ENGLISH)
Page 45
NOTE: When you must shut it down and restart automatically, you install the software, the Digital Signature Not Found window appears in Windows XP. 2.8 INSTALLING SOFTWARE When your computer does not shut down manually and restart it before the changes are saved. If not, remove the check mark and click Next. 11 When the installation is complete, click Finish. Click OK in Windows 2000 and click Continue Anyway in Windows 2000 and Windows XP. You can access the Samsung web site. 9 Click Next. 10 If you want to register yourself as a user of the Samsung printer, click Next.
NOTE: When you must shut it down and restart automatically, you install the software, the Digital Signature Not Found window appears in Windows XP. 2.8 INSTALLING SOFTWARE When your computer does not shut down manually and restart it before the changes are saved. If not, remove the check mark and click Next. 11 When the installation is complete, click Finish. Click OK in Windows 2000 and click Continue Anyway in Windows 2000 and Windows XP. You can access the Samsung web site. 9 Click Next. 10 If you want to register yourself as a user of the Samsung printer, click Next.

User Manual (ENGLISH)
Page 46
... on the window to your device and click Next. 4 Check CD-ROM drive and click Browse. INSTALLING SOFTWARE 2.9 NOTE: If you have already installed the printer software, this window doesn't appear. 8 Follow the instructions on . For further details, see page 1.16. 2 The Add New Hardware Wizard window appears. ...Click Next. 2 3 Place the CD-ROM in Windows 98/ Me 1 Connect the printer to complete the printer software installation. Installing the USB Driver in the CD-ROM drive and check Search for the best driver for the CD-ROM drive) and...
... on the window to your device and click Next. 4 Check CD-ROM drive and click Browse. INSTALLING SOFTWARE 2.9 NOTE: If you have already installed the printer software, this window doesn't appear. 8 Follow the instructions on . For further details, see page 1.16. 2 The Add New Hardware Wizard window appears. ...Click Next. 2 3 Place the CD-ROM in Windows 98/ Me 1 Connect the printer to complete the printer software installation. Installing the USB Driver in the CD-ROM drive and check Search for the best driver for the CD-ROM drive) and...

User Manual (ENGLISH)
Page 47
... remove the USB cable and connect the parallel cable. Uninstalling the MFP Driver 1 From the Start menu, select Programs, and then select Samsung SCX-4x16 Series. 2 You can uninstall all software including SmarThru and MFP driver, using the CD-ROM or uninstall the desired item using the...you want to use your installation fails. You can select a component in the MFP driver to uninstall individually. For SCX-4216F, if you want to uninstall the printer driver, select Printer Driver Uninstall. Then reinstall the MFP driver. • When your machine doesn't work properly, reinstall the MFP ...
... remove the USB cable and connect the parallel cable. Uninstalling the MFP Driver 1 From the Start menu, select Programs, and then select Samsung SCX-4x16 Series. 2 You can uninstall all software including SmarThru and MFP driver, using the CD-ROM or uninstall the desired item using the...you want to use your installation fails. You can select a component in the MFP driver to uninstall individually. For SCX-4216F, if you want to uninstall the printer driver, select Printer Driver Uninstall. Then reinstall the MFP driver. • When your machine doesn't work properly, reinstall the MFP ...

User Manual (ENGLISH)
Page 54
..., or torn paper can cause paper jams and the poor print quality. • Use only high quality copier grade paper. Guidelines for use in laser printers. • To prevent special materials, such as transparencies and label sheets from sticking together, remove them as any plastic container or bag, to prevent dust...
..., or torn paper can cause paper jams and the poor print quality. • Use only high quality copier grade paper. Guidelines for use in laser printers. • To prevent special materials, such as transparencies and label sheets from sticking together, remove them as any plastic container or bag, to prevent dust...

User Manual (ENGLISH)
Page 55
... the front output tray has problems, such as excessive curl, try printing to machine components. • Do not load a sheet of chemicals and damage your printer. Front output tray Rear output slot To use Carbonless paper and Tracing paper. The adhesive backing is designed for one pass through the machine more...
... the front output tray has problems, such as excessive curl, try printing to machine components. • Do not load a sheet of chemicals and damage your printer. Front output tray Rear output slot To use Carbonless paper and Tracing paper. The adhesive backing is designed for one pass through the machine more...

User Manual (ENGLISH)
Page 59
... of paper types or sizes that the print quality is 216 by 356mm(8.5 by 14 in the paper tray. If you experience problems with this printer. Postcards, 3.5 by 5.0 in.) and the maximum size is not guaranteed. NOTES: • If you experience problems with an uncurled edge at the top side. The...
... of paper types or sizes that the print quality is 216 by 356mm(8.5 by 14 in the paper tray. If you experience problems with this printer. Postcards, 3.5 by 5.0 in.) and the maximum size is not guaranteed. NOTES: • If you experience problems with an uncurled edge at the top side. The...

User Manual (ENGLISH)
Page 76
5 PRINTING This chapter explains how to print your documents in Windows and how to a Selected Paper Size • Printing Posters • Using Watermarks • Using Overlays • Setting Graphic Properties • Setting Up the Locally Shared Printer This chapter includes: • Printing a Document • Setting Paper Properties • Printing Multiple Pages on One Sheet of Paper (N-Up Printing) • Printing a Reduced or Enlarged Document • Fitting Your Document to use the print settings.
5 PRINTING This chapter explains how to print your documents in Windows and how to a Selected Paper Size • Printing Posters • Using Watermarks • Using Overlays • Setting Graphic Properties • Setting Up the Locally Shared Printer This chapter includes: • Printing a Document • Setting Paper Properties • Printing Multiple Pages on One Sheet of Paper (N-Up Printing) • Printing a Reduced or Enlarged Document • Fitting Your Document to use the print settings.

User Manual (ENGLISH)
Page 77
Refer to your software application's user's guide for printing from the File menu. These settings include the number of the printer features provided by your application. It may vary depending on your machine, click Properties in the application's print window and go to Step ...steps for printing a document may look slightly different depending on the application program you are selected within the Print window. If you see the Samsung SCX-4x16 Series Properties window, which allows you to access all of information you need when using . The Print window displays. Make sure that ...
Refer to your software application's user's guide for printing from the File menu. These settings include the number of the printer features provided by your application. It may vary depending on your machine, click Properties in the application's print window and go to Step ...steps for printing a document may look slightly different depending on the application program you are selected within the Print window. If you see the Samsung SCX-4x16 Series Properties window, which allows you to access all of information you need when using . The Print window displays. Make sure that ...

User Manual (ENGLISH)
Page 79
...: Your machine prints only the even pages of the document. 7 Click other tabs on the top of the Samsung SCX-4x16 Series Properties window to start printing. Follow these steps: 1. Select the Samsung SCX-4x16 Series printer. 4. 6 If necessary, you finish setting the properties, click OK until the Print window displays. 9 Click OK to access...
...: Your machine prints only the even pages of the document. 7 Click other tabs on the top of the Samsung SCX-4x16 Series Properties window to start printing. Follow these steps: 1. Select the Samsung SCX-4x16 Series printer. 4. 6 If necessary, you finish setting the properties, click OK until the Print window displays. 9 Click OK to access...


