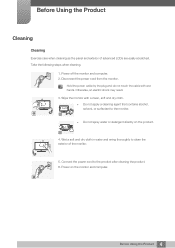
S27A650D Power Cable - Samsung
S27A650D Power Cable

Related Manual Pages


Similar Questions

I Have Ld220g Lcd Monitor. After I Moved, I Only Found The Monitor, Power Cable.
Does this monitor comes with any Monitor Driver CD? I though it is USB Plug and play. I cannot find ...
Does this monitor comes with any Monitor Driver CD? I though it is USB Plug and play. I cannot find ...
(Posted by tonyso2000 11 months ago)

Voltage Drop Down In Psu
monitor samsung 793df output voktage drop on psu
monitor samsung 793df output voktage drop on psu
(Posted by Anonymous-173485 1 year ago)

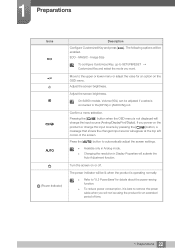
Power Button Does Not Work - Either Manually Or By Remote
(Posted by smartin245 3 years ago)