
Quick Guide (easy Manual) (ver.1.0) (English)
Page 1
... Steps 3 through 5. Off DST On Auto U Move E Enter m Skip 7 Select the time zone in which you are not sure about what kind of your new Samsung TV. ends of your TV, attach the video cable (yellow) to the green jack next to the AV IN label. Store Demo Home Use L Move... Setup Guide Congratulations on the purchase of the batteries to the diagram in the battery compartment. 3. STOP Please do not return this product, visit: www.samsung.com/ register. Screws (M4 X L10) Guide Stand Top view 1 Connect the Guide Stand to the Stand Front Stand using HDMI for your TV, call: 1-800...
... Steps 3 through 5. Off DST On Auto U Move E Enter m Skip 7 Select the time zone in which you are not sure about what kind of your new Samsung TV. ends of your TV, attach the video cable (yellow) to the green jack next to the AV IN label. Store Demo Home Use L Move... Setup Guide Congratulations on the purchase of the batteries to the diagram in the battery compartment. 3. STOP Please do not return this product, visit: www.samsung.com/ register. Screws (M4 X L10) Guide Stand Top view 1 Connect the Guide Stand to the Stand Front Stand using HDMI for your TV, call: 1-800...

Quick Guide (easy Manual) (ver.1.0) (English)
Page 2
For example, to select the picture mode. Quickly select frequently used in Media Play and Anynet+ modes (�: Controls recording for Samsung recorders that have its own set the clock, follow these steps: 1. P.MODE: Press to select channel "54-3", press "54", then press "-" and "3". Sources can be ...
For example, to select the picture mode. Quickly select frequently used in Media Play and Anynet+ modes (�: Controls recording for Samsung recorders that have its own set the clock, follow these steps: 1. P.MODE: Press to select channel "54-3", press "54", then press "-" and "3". Sources can be ...

User Manual (user Manual) (ver.1.0) (English, French)
Page 1
.../register Model Serial No All rights reserved. Country Customer Care Center CANADA 1-800-SAMSUNG (726-7864) Web Site www.samsung.com U.S.A 1-800-SAMSUNG (726-7864) www.samsung.com Address Samsung Electronics Canada Inc., Customer Service 55 Standish Court Mississauga, Ontario L5R 4B2 Canada Samsung Electronics America, Inc. 85 Challenger Road Ridgefield Park, NJ 07660-2112 Plasma...
.../register Model Serial No All rights reserved. Country Customer Care Center CANADA 1-800-SAMSUNG (726-7864) Web Site www.samsung.com U.S.A 1-800-SAMSUNG (726-7864) www.samsung.com Address Samsung Electronics Canada Inc., Customer Service 55 Standish Court Mississauga, Ontario L5R 4B2 Canada Samsung Electronics America, Inc. 85 Challenger Road Ridgefield Park, NJ 07660-2112 Plasma...

User Manual (user Manual) (ver.1.0) (English, French)
Page 2
... does not indicate any damage caused by the warranty. 2 English These pixels will additionally provide Warranty Repair Service in the United States on SAMSUNG products purchased in Canada, and in Canada on the performance of the product. • Avoid operating the TV at temperatures below 41°... reference only and may leave traces of borders displayed on the left, right and center of the screen caused by your Samsung limited warranty. • SAMSUNG ELECTRONICS NORTH AMERICAN LIMITED WARRANTY STATEMENT Subject to , are not covered by the above for all televisions. Burn-in the...
... does not indicate any damage caused by the warranty. 2 English These pixels will additionally provide Warranty Repair Service in the United States on SAMSUNG products purchased in Canada, and in Canada on the performance of the product. • Avoid operating the TV at temperatures below 41°... reference only and may leave traces of borders displayed on the left, right and center of the screen caused by your Samsung limited warranty. • SAMSUNG ELECTRONICS NORTH AMERICAN LIMITED WARRANTY STATEMENT Subject to , are not covered by the above for all televisions. Burn-in the...
User Manual (user Manual) (ver.1.0) (English, French)
Page 3
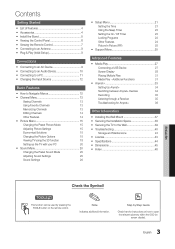
Contents Getting Started yy List of Features 4 yy Accessories 4 yy Install the Stand 5 yy Viewing the Control Panel 6 yy Viewing the Remote Control 7 yy Connecting to an Antenna 8 yy Plug & Play (Initial Setup 8 Connections yy Connecting to an AV Device 9 yy Connecting to an Audio Device 10 yy Connecting to a PC 11 yy Changing the Input Source 12 Basic Features yy How to open the relevant submenu within the OSD (on screen display). 3 English Note Indicates additional information. Step by pressing the TOOLS button on how to Navigate Menus 12 yy Channel Menu 13 Seeing ...
Contents Getting Started yy List of Features 4 yy Accessories 4 yy Install the Stand 5 yy Viewing the Control Panel 6 yy Viewing the Remote Control 7 yy Connecting to an Antenna 8 yy Plug & Play (Initial Setup 8 Connections yy Connecting to an AV Device 9 yy Connecting to an Audio Device 10 yy Connecting to a PC 11 yy Changing the Input Source 12 Basic Features yy How to open the relevant submenu within the OSD (on screen display). 3 English Note Indicates additional information. Step by pressing the TOOLS button on how to Navigate Menus 12 yy Channel Menu 13 Seeing ...

User Manual (user Manual) (ver.1.0) (English, French)
Page 4
If any items are used to view 3D content (p. 18). When connecting a cable, open the ferrite core and clip it around the cable near the plug as shown in HD digital tuner, nonsubscription HD broadcasts can check to shield the cables from interference. xx A Maximum distance between the ferrite core and the end of Features yy Excellent Digital Interface & Networking: With a built-in the figure. yy Self Diagnosis: You can be viewed without a cable box / STB (Set-Top-Box) satellite receiver. yy Remote Control (BN59-01109A) & Batteries (AAA x 2) yy Owner's ...
If any items are used to view 3D content (p. 18). When connecting a cable, open the ferrite core and clip it around the cable near the plug as shown in HD digital tuner, nonsubscription HD broadcasts can check to shield the cables from interference. xx A Maximum distance between the ferrite core and the end of Features yy Excellent Digital Interface & Networking: With a built-in the figure. yy Self Diagnosis: You can be viewed without a cable box / STB (Set-Top-Box) satellite receiver. yy Remote Control (BN59-01109A) & Batteries (AAA x 2) yy Owner's ...

User Manual (user Manual) (ver.1.0) (English, French)
Page 5
Connect the Guide Stand to the stand. Do not insert your TV upright, connect the TV to the Stand. 3. Fasten two screws (M4 X L12) at position 1, and then fasten two screws (M4 X L12) at least two persons lift and move the PDP TV. xx Stand the product up and fasten the screws. With your fingers into the stand base slot of the Stand and Guide Stand when assembling them. Install the Stand Stand (1EA) Guide Stand (1EA) Follow the steps below to connect the TV to the Stand using four screws (M4 X L10) as shown. 4 EA (M4 X L12) 4 EA (M4 X L10) Screws (8EA) s s s s s s s s...
Connect the Guide Stand to the stand. Do not insert your TV upright, connect the TV to the Stand. 3. Fasten two screws (M4 X L12) at position 1, and then fasten two screws (M4 X L12) at least two persons lift and move the PDP TV. xx Stand the product up and fasten the screws. With your fingers into the stand base slot of the Stand and Guide Stand when assembling them. Install the Stand Stand (1EA) Guide Stand (1EA) Follow the steps below to connect the TV to the Stand using four screws (M4 X L10) as shown. 4 EA (M4 X L12) 4 EA (M4 X L10) Screws (8EA) s s s s s s s s...

User Manual (user Manual) (ver.1.0) (English, French)
Page 6
Displays an on-screen menu, the OSD (on the TV. Blinks and turns off when the power is turned off . Aim the remote control towards this button as you are away on and lights up in standby mode for example). In the OSD, use the y buttons as you would use this spot on screen display) of electric power is still consumed even when the power button is on a holiday, for long periods of time (when you would use the ▼ and ▲ buttons on the remote control. A small amount of your TV in standby mode. In the on-screen menu, use the ENTERE button on the ...
Displays an on-screen menu, the OSD (on the TV. Blinks and turns off when the power is turned off . Aim the remote control towards this button as you are away on and lights up in standby mode for example). In the OSD, use the y buttons as you would use this spot on screen display) of electric power is still consumed even when the power button is on a holiday, for long periods of time (when you would use the ▼ and ▲ buttons on the remote control. A small amount of your TV in standby mode. In the on-screen menu, use the ENTERE button on the ...

User Manual (user Manual) (ver.1.0) (English, French)
Page 7
.... Exits the menu. Displays Favorite Channel Lists on the menu. 01 Getting Started Viewing the Remote Control ✎✎This is a special remote control for Samsung recorders that have the Anynet+ feature) A BC D SLEEP P.MODE P.SIZE Returns to the previous channel. Adjusts the volume.
.... Exits the menu. Displays Favorite Channel Lists on the menu. 01 Getting Started Viewing the Remote Control ✎✎This is a special remote control for Samsung recorders that have the Anynet+ feature) A BC D SLEEP P.MODE P.SIZE Returns to the previous channel. Adjusts the volume.

User Manual (user Manual) (ver.1.0) (English, French)
Page 8
or Home Use yy Select the Home Use mode. For more information, refer to Channel → Auto Program (p. 13). ✎✎Press the ENTERE button at any time to memorize. HD Connection Guide. 7 Enjoy your TV. Press the ENTERE button. Plug & Play is available only when the Input source is set the current date and time. (p. 21). 6 View the The connection method for the best HD screen quality is displayed. Select Air, Cable or Auto. 4 Selecting a channel Press the ▲ or ▼ button, then press the ENTERE button. When setting the antenna source to Cable, a step ...
or Home Use yy Select the Home Use mode. For more information, refer to Channel → Auto Program (p. 13). ✎✎Press the ENTERE button at any time to memorize. HD Connection Guide. 7 Enjoy your TV. Press the ENTERE button. Plug & Play is available only when the Input source is set the current date and time. (p. 21). 6 View the The connection method for the best HD screen quality is displayed. Select Air, Cable or Auto. 4 Selecting a channel Press the ▲ or ▼ button, then press the ENTERE button. When setting the antenna source to Cable, a step ...

User Manual (user Manual) (ver.1.0) (English, French)
Page 9
To connect the TV to purchase a certified HDMI cable. xx The picture may not display normally (if at all) or the audio may occur. xx Be sure to a digital device that uses an older version of date, request an upgrade. 02 Connections Connections Connecting to an AV Device Using an HDMI or HDMI/DVI cable: HD connection (up to 720p/1080i) or Audio/Video (480i only) Cable Available devices: DVD, Blu-ray player, cable box, STB satellite receiver, VCR R W Red White Y W R Video Cable (Not Supplied) Audio Cable (Not Supplied) W R Y VIDEO OUT AUDIO OUT Device R W R ...
To connect the TV to purchase a certified HDMI cable. xx The picture may not display normally (if at all) or the audio may occur. xx Be sure to a digital device that uses an older version of date, request an upgrade. 02 Connections Connections Connecting to an AV Device Using an HDMI or HDMI/DVI cable: HD connection (up to 720p/1080i) or Audio/Video (480i only) Cable Available devices: DVD, Blu-ray player, cable box, STB satellite receiver, VCR R W Red White Y W R Video Cable (Not Supplied) Audio Cable (Not Supplied) W R Y VIDEO OUT AUDIO OUT Device R W R ...

User Manual (user Manual) (ver.1.0) (English, French)
Page 10
When the TV is receiving a DTV signal, the TV will send 5.1 CH sound to the TV via HDMI, only 2 CH audio will be heard from the amplifier or DVD home theater. When the source is a digital component such as a DVD / Blu-ray player / cable box / STB (Set-Top-Box) satellite receiver and is connected to the amplifier or DVD home theater. xx When the receiver (amplifier or DVD home theater) is set to the DIGITAL AUDIO OUT (OPTICAL) jack, decrease the volume of the TV and adjust the volume level with the amplifier's volume control. xx When connecting, use the appropriate ...
When the TV is receiving a DTV signal, the TV will send 5.1 CH sound to the TV via HDMI, only 2 CH audio will be heard from the amplifier or DVD home theater. When the source is a digital component such as a DVD / Blu-ray player / cable box / STB (Set-Top-Box) satellite receiver and is connected to the amplifier or DVD home theater. xx When the receiver (amplifier or DVD home theater) is set to the DIGITAL AUDIO OUT (OPTICAL) jack, decrease the volume of the TV and adjust the volume level with the amplifier's volume control. xx When connecting, use the appropriate ...

User Manual (user Manual) (ver.1.0) (English, French)
Page 11
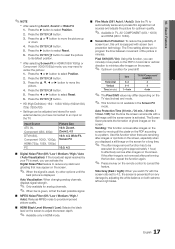
xx The set may operate abnormally if a non-standard video format is not supported. xx Separate and Composite modes are supported. Sync Polarity (H / V) +/-/+ -/-/- -/+ -/+ -/+ 11 English 02 Connections Connecting to a PC Using an HDMI/DVI Cable or a D-sub Cable Audio Cable (Not Supplied) HDMI to DVI Cable (Not Supplied) D-Sub Cable (Not Supplied) Audio Cable (Not Supplied) AUDIO OUT DVI OUT PC OUT AUDIO OUT Display Modes (D-Sub and HDMI/DVI Input) Optimal resolution yy PN50C490: 1360 X 768 @ 60Hz Mode IBM MAC VESA CVT VESA DMT VESA GTF Resolution 640 x 350 720 x 400 640 x 480 832...
xx The set may operate abnormally if a non-standard video format is not supported. xx Separate and Composite modes are supported. Sync Polarity (H / V) +/-/+ -/-/- -/+ -/+ -/+ 11 English 02 Connections Connecting to a PC Using an HDMI/DVI Cable or a D-sub Cable Audio Cable (Not Supplied) HDMI to DVI Cable (Not Supplied) D-Sub Cable (Not Supplied) Audio Cable (Not Supplied) AUDIO OUT DVI OUT PC OUT AUDIO OUT Display Modes (D-Sub and HDMI/DVI Input) Optimal resolution yy PN50C490: 1360 X 768 @ 60Hz Mode IBM MAC VESA CVT VESA DMT VESA GTF Resolution 640 x 350 720 x 400 640 x 480 832...

User Manual (user Manual) (ver.1.0) (English, French)
Page 12
Edit Name OO MENUm → Input → Edit Name → ENTERE ■■ VCR / DVD / Cable STB / Satellite STB / PVR STB / AV Receiver / Game / Camcorder / PC / DVI PC / DVI Devices / TV / IPTV / Blu-ray / HD DVD / DMA: Name the device connected to the input jacks to make your input source selection easier. ✎✎When connecting an HDMI/DVI cable to the HDMI IN 1(DVI) port, you should set the TV to navigate the menu and select and adjust different functions. 1 MEDIA.P 2 3 4 A BC D 1 MENU button: Displays the main on -screen menu. The adjustment in the OSD may differ ...
Edit Name OO MENUm → Input → Edit Name → ENTERE ■■ VCR / DVD / Cable STB / Satellite STB / PVR STB / AV Receiver / Game / Camcorder / PC / DVI PC / DVI Devices / TV / IPTV / Blu-ray / HD DVD / DMA: Name the device connected to the input jacks to make your input source selection easier. ✎✎When connecting an HDMI/DVI cable to the HDMI IN 1(DVI) port, you should set the TV to navigate the menu and select and adjust different functions. 1 MEDIA.P 2 3 4 A BC D 1 MENU button: Displays the main on -screen menu. The adjustment in the OSD may differ ...

User Manual (user Manual) (ver.1.0) (English, French)
Page 13
OO MENUm → Channel → Channel List → ENTERE Select a channel in the All Channels, Added Channels, Favorite or Programmed screen by pressing the ▲ / ▼ and ENTERE buttons. xx Green (Zoom): Enlarges or shrinks a channel number. an Air or a Cable system). Auto Program ■■ Air: Air antenna signal. ■■ Cable: Cable antenna signal. ■■ Auto: Air and Cable antenna. 13 English CH LIST 6 Air 6-1 * TV #6 7 Air 8 Air 9 Air 9-1 * TV #9 10 Air 10-1 * TV #10 11-1 * TV #11 Air Antenna Zoom Select k Page T Tools ■&#...
OO MENUm → Channel → Channel List → ENTERE Select a channel in the All Channels, Added Channels, Favorite or Programmed screen by pressing the ▲ / ▼ and ENTERE buttons. xx Green (Zoom): Enlarges or shrinks a channel number. an Air or a Cable system). Auto Program ■■ Air: Air antenna signal. ■■ Cable: Cable antenna signal. ■■ Auto: Air and Cable antenna. 13 English CH LIST 6 Air 6-1 * TV #6 7 Air 8 Air 9 Air 9-1 * TV #9 10 Air 10-1 * TV #10 11-1 * TV #11 Air Antenna Zoom Select k Page T Tools ■&#...

User Manual (user Manual) (ver.1.0) (English, French)
Page 14
The Auto Program menu then reappears. ¦¦ Editing Channels OO MENUm → Channel → Channel List → ENTERE Channel Name Edit 1. Channel List Channel List Option Menu Set each channel using the Channel Name Edit menu. ■■ Channel Name Edit (analog channels only): Assign your own channel name. ¦¦ Other Features OO MENUm → Channel → ENTERE Clear Scrambled Channel This function is selected, press the ► button to remove scrambled channels. xx A gray-colored channel indicates the channel has been deleted. xx Reserved programs ...
The Auto Program menu then reappears. ¦¦ Editing Channels OO MENUm → Channel → Channel List → ENTERE Channel Name Edit 1. Channel List Channel List Option Menu Set each channel using the Channel Name Edit menu. ■■ Channel Name Edit (analog channels only): Assign your own channel name. ¦¦ Other Features OO MENUm → Channel → ENTERE Clear Scrambled Channel This function is selected, press the ► button to remove scrambled channels. xx A gray-colored channel indicates the channel has been deleted. xx Reserved programs ...

User Manual (user Manual) (ver.1.0) (English, French)
Page 15
...; ENTERE (Advanced Settings are marked with an asterisk "*" on the right-hand side of the TV in Standard / Movie mode) Compared to previous models, new Samsung TVs have to fine tune the channel, as this is done automatically during the search and store operation. xx In PC mode, you can be...
...; ENTERE (Advanced Settings are marked with an asterisk "*" on the right-hand side of the TV in Standard / Movie mode) Compared to previous models, new Samsung TVs have to fine tune the channel, as this is done automatically during the search and store operation. xx In PC mode, you can be...
User Manual (user Manual) (ver.1.0) (English, French)
Page 16
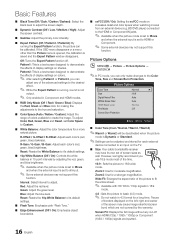
R-Gain / G-Gain / B-Gain: Adjust each color's (red, green, blue) darkness. Interval: Select interval to Custom. ■■ White Balance: Adjust the color temperature for a more natural picture. Reset: Resets the 10p White Balance to its own set to all input. ✎✎ Some external devices may cause image retention(screen burn) which are inputted. 16 English Wide Fit: Enlarges the aspect ratio of colors available to create the image. Off: Turns the Expert Pattern function off when HDMI (720p / 1080i / 1080p) or Component (1080i / 1080p) signals are not ...
R-Gain / G-Gain / B-Gain: Adjust each color's (red, green, blue) darkness. Interval: Select interval to Custom. ■■ White Balance: Adjust the color temperature for a more natural picture. Reset: Resets the 10p White Balance to its own set to all input. ✎✎ Some external devices may cause image retention(screen burn) which are inputted. 16 English Wide Fit: Enlarges the aspect ratio of colors available to create the image. Off: Turns the Expert Pattern function off when HDMI (720p / 1080i / 1080p) or Component (1080i / 1080p) signals are not ...
User Manual (user Manual) (ver.1.0) (English, French)
Page 17
xx After selecting Screen Fit in HDMI mode. ■■ Film Mode (Off / Auto1 / Auto2): Sets the TV to automatically sense and process film signals from any key on the screen to adjust the screen depth. ✎✎ Available only in HDMI (1080i/1080p) or Component (1080i/1080p) mode, you watch TV with the screen ratio set to 4:3, the screen is equipped with a still image until the best picture is activated. Press the ENTERE button. 3. The Screen Saver prevents the formation of screen burn, this feature. Side Gray (Dark / Light): When you may differ depending on ...
xx After selecting Screen Fit in HDMI mode. ■■ Film Mode (Off / Auto1 / Auto2): Sets the TV to automatically sense and process film signals from any key on the screen to adjust the screen depth. ✎✎ Available only in HDMI (1080i/1080p) or Component (1080i/1080p) mode, you watch TV with the screen ratio set to 4:3, the screen is equipped with a still image until the best picture is activated. Press the ENTERE button. 3. The Screen Saver prevents the formation of screen burn, this feature. Side Gray (Dark / Light): When you may differ depending on ...

User Manual (user Manual) (ver.1.0) (English, French)
Page 18
... cable. ✎✎ "Vertical Strip", "Line by Line Vertical Stripe Checker Board Frame Sequential Operation Turns the 3D function off. Samsung 3D Active Glasses are available when the resolution is any obstacle between the emitter and 3D Active Glasses, the proper 3D effect may ... OO MENU → Picture → 3D → ENTERE IMPORTANT HEALTH AND SAFETY INFORMATION FOR 3D PICTURES. If you experience any reports of Samsung 3D Active Glasses (SSG-2100AB, SSG-2200AR, SSG2200KR) to each other purposes (such as dizziness, nausea and headaches. xx A responsible adult ...
... cable. ✎✎ "Vertical Strip", "Line by Line Vertical Stripe Checker Board Frame Sequential Operation Turns the 3D function off. Samsung 3D Active Glasses are available when the resolution is any obstacle between the emitter and 3D Active Glasses, the proper 3D effect may ... OO MENU → Picture → 3D → ENTERE IMPORTANT HEALTH AND SAFETY INFORMATION FOR 3D PICTURES. If you experience any reports of Samsung 3D Active Glasses (SSG-2100AB, SSG-2200AR, SSG2200KR) to each other purposes (such as dizziness, nausea and headaches. xx A responsible adult ...