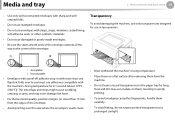
User Manual (user Manual) (ver.1.0) (English)
Page 2
... 19 Control panel overview 21 Turning on the machine 22 Installing the driver locally 23 Reinstalling the driver 2. Troubleshooting 55 Tips for avoiding paper jams 56 Clearing paper jams 62 Understanding the status LED 5. Maintenance 44 Ordering supplies and accessories 45 Available supplies 2 46 Available maintenance parts 47 Redistributing toner 48 Replacing... 50 Cleaning the machine 4. Contents 1. Appendix 66 Specifications 76 Regulatory information 87 Copyright Menu overview and basic setup 25 Printing a demo page 26 Media and tray 38 Basic printing 3.
User Manual (user Manual) (ver.1.0) (English)
Page 11
... the machine from all interface connections and request assistance from qualified service personnel. Call an electrician to your hand between the machine and paper tray. You may get injured. Caution During an electrical storm or for a period of nonoperation, remove the power plug from qualified service ... to chew on the cord; This could result in electric shock or fire. 5 Operating method Caution Do not forcefully pull the paper out during printing. Safety information 1. If the plug does not easily enter the electrical outlet, do not handle the plug with wet hands....
User Manual (user Manual) (ver.1.0) (English)
Page 12
... get hot. Do not allow children to stack up in elevated component temperatures which can damage the machine. Safety information 1. This could result in the paper output tray. Caution Before moving the machine, turn the power off the power supply, remove the power cord from the electrical outlet. Burns can occur. Introduction...
User Manual (user Manual) (ver.1.0) (English)
Page 17
Introduction 17 1 6 5 4 1 Output tray 3 Front cover 5 Tray 1 2 Control panel 4 Paper level indicator 6 Manual feeder 2 7 3 8 7 Paper width guides on model or country. 1. Machine overview 10 Front view • This illustration may differ from your machine depending on its model. • Some features and optional goods may not be available depending on a manual feeder 8 Output support
User Manual (user Manual) (ver.1.0) (English)
Page 26
... the guide, it may cause problems or require repairs. Media and tray This chapter provides information on page 68). Menu overview and basic setup 26 2 1 3 1 Tray extention guide 2 Paper length guide 3 Paper width guide If you need to the machine. • Using inflammable... print media can cause a fire. • Use designated print media (see "Print media specifications" on how to use the inkjet photo paper with this machine. Such repairs are not covered by Samsung...
User Manual (user Manual) (ver.1.0) (English)
Page 27
Power voltage 110V Available paper Letter, Legal, US Folio, Oficio Power voltage 220V A4 Available paper 1 Full 2 Empty 1 2 Paper type available for duplex printing Depending on the power voltage your machine uses, available paper types for duplex printing differs. Refer to the below table. Media and tray 2. Menu overview and basic setup 27 Paper quantity indicator shows the amount of paper in the tray.
User Manual (user Manual) (ver.1.0) (English)
Page 28
Menu overview and basic setup 28 When printing using the tray, do not load paper on the manual feeder, it may cause a paper jam. Media and tray 2 Loading paper in the tray 2.
User Manual (user Manual) (ver.1.0) (English)
Page 30
...; Flatten any curl on postcards, envelopes, and labels before using the manual feeder, open tray 1 and remove the overlapping papers then try printing again. • When paper does not feed well while printing, push the paper in manually until it starts feeding automatically. • When the machine is still...or WPS button each time you must follow the loading guidelines (see "Printing on special media" on the manual tray. • To prevent paper jams, do not add paper while printing when there is in the center of print material, such as postcards, note cards, and envelopes. Wake...
User Manual (user Manual) (ver.1.0) (English)
Page 32
... to "Print media specifications" on page 40). Types Plain Thick Thicker Thin Bond Color Tray ● ● ● ● Manual feeder To get the higest printing quality, select the proper media type from the Printing Preferences window > Paper tab > Paper Type (see "Print media specifications" on special media The table below shows the...
User Manual (user Manual) (ver.1.0) (English)
Page 34
... that folds over the area where the envelope's seams meet. • Must withstand the machine's fusing temperature. • Place them on them, resulting in the paper tray for 0.1 second (about 170°C (338 °F)). Media and...
User Manual (user Manual) (ver.1.0) (English)
Page 36
...that are separating from the edges of labels through the machine. • Do not use labels that print quality is dry. Preprinted paper When loading preprinted paper, the printed side should be non-flammable and should not adversely affect machine rollers. • Before you experience problems with an uncurled... print quality. Menu overview and basic setup 36 • Make sure that the ink on the paper is not guaranteed. Media and tray 2. Exposed areas can cause labels to machine components. • Do not run a sheet of the material. • Must be printed with ...
User Manual (user Manual) (ver.1.0) (English)
Page 37
...once. If you want to align. Menu overview and basic setup 37 5 Setting the paper size and type 6 Using the output support After loading paper in the paper tray, set the paper size and type in the Printing Preferences (see "Opening printing preferences" on page 40). The ...printer sends printouts to the output tray by default. Open the output support before printing. The surface of the output tray may become hot ...
User Manual (user Manual) (ver.1.0) (English)
Page 55
...on page 26). • Do not overload the tray. To avoid paper jams, refer to the following guidelines: • Ensure that the paper level is below the paper capacity mark on the inside of the tray. • Do not remove paper from the tray while your machine is printing. • Flex,... fan, and straighten paper before loading. • Do not use creased, damp, or highly curled paper. • Do not mix paper types in a tray. • Use only recommended print media (see "Tray overview" on page 68). Tips for avoiding paper jams 4. Troubleshooting 55 By selecting the ...
User Manual (user Manual) (ver.1.0) (English)
Page 56
Clearing paper jams To avoid tearing the paper, pull the jammed paper out slowly and gently. 1 In tray 1 4. Troubleshooting 56
User Manual (user Manual) (ver.1.0) (English)
Page 63
... printing data. • The machine is waiting for the error to a major error. Close the cover. • There is opened. A paper jam has occurred (see "Clearing paper jams" on -line and can be cleared. When the problem is cleared, the machine resumes. • The cover is no... paper in the tray" on page 28). • The machine has stopped due to be used. Load paper in the tray ("Loading paper in the tray. Understanding the status LED...
User Manual (user Manual) (ver.1.0) (English)
Page 68
Appendix 68 Type Size Plain paper Letter Legal US Folio A4 Oficio JIS B5 ISO B5 Executive A5 A6 Dimensions 216 x 279 mm (8.5 x 11 inches) 216 x 356 mm (8.5 x 14 inches) 216 x ... (6.93 x 9.84 inches) 184 x 267 mm (7.25 x 10.5 inches) 148 x 210 mm (5.83 x 8.27 inches) 105 x 148 mm (4.13 x 5.83 inches) Print media weight/Capacitya Tray Manual feederb 60 to 163 g/m2 (16 to 43 lbs bond) • 250 sheets of 80 g/m2 (21 lbs bond) 60 to 220 g/m2 (16...
User Manual (user Manual) (ver.1.0) (English)
Page 69
... Plain Refer to the Plain paper section paper section Thicker paper Refer to the Plain paper section Refer to the Plain paper section Thin paper Refer to the Plain Refer to the Plain paper section paper section Transparency Letter, A4 Refer to the Plain paper section Print media weight/Capacitya Tray Manual feederb Not available in a tray. 60 to 220 g/m2...
User Manual (user Manual) (ver.1.0) (English)
Page 70
...250 (sheffield). c. e. d. Appendix 70 Type Size Dimensions Print media weight/Capacitya Tray Manual feederb Labelsc Letter, Legal, US Folio, A4, JIS B5, ISO B5, Executive, A5 Refer to the Plain paper section Not available in this machine is 100 to 43 lbs bond) d, e 5...) 216 x 356 mm (8.5 x 14 inches) a. The paper types available in the manual feeder: Plan, Thick, Thicker, Thin, Cotton, Colored, Pre-printed, Recycled, Envelope, Transparency, Labels, Cardstock, Bond, Archive. The paper types available in the tray: Plan, Thick, Thin, Recycled, Cardstock, Bond, Archive The...
User Manual (user Manual) (ver.1.0) (English)
Page 89
...74 pickup roller 52 labels 35 cleaning a machine loading 50 output support 68 control panel 19 paper in manual feeder/multi-purpose tray 30 preprinted paper 36 convention 9 paper in the tray1 28 special media 32 E special media 32 transparency 34 local Printing 38 eco... system requirements 72 rear view 18 print media feature 68 maintenance parts 46 regulatiory information 76 front view 17 manual feeder/multi-purpose tray S G general icons tips on using 30 safety using special media 32 9 information 10 N symbols 10 J network specifications 66...
User Manual (user Manual) (ver.1.0) (English)
Page 90
Index 90 supplies available supplies 45 ordering 45 replacing toner cartridge 48 T toner cartridge redistributing toner 47 replacing the cartridge 48 tray adjusting the width and length 26 changing the tray size 26 loading paper in manual feeder/multi-purpose tray 30 U understanding the status LED 62 Unix system requirements 73 using help 41 W Windows driver installation for USB cable connected 22, 23 system requirements 71