User Manual Ver.1.0 (English, Croatian, Maltese)
Page 1
imagine the possibilities Thank you for purchasing this Samsung product. To receive more complete service or accessory parts, please register your product at or contact www.samsung.com/register 1-800-SAMSUNG (726-7864) DV400-03170A_EN_HUDSON-PJT_v1.indd 1 2012-01-20 1:58:08 DV456* DV422* DV400* Gas and Electric Dryer user manual This manual is made with 100% recycled paper.
imagine the possibilities Thank you for purchasing this Samsung product. To receive more complete service or accessory parts, please register your product at or contact www.samsung.com/register 1-800-SAMSUNG (726-7864) DV400-03170A_EN_HUDSON-PJT_v1.indd 1 2012-01-20 1:58:08 DV456* DV422* DV400* Gas and Electric Dryer user manual This manual is made with 100% recycled paper.

User Manual Ver.1.0 (English, Croatian, Maltese)
Page 2
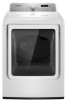
...capacity and Fuzzy Logic Control save energy by automatically drying your fingertips! Energy Saving Samsung dryers are designed with you in mind. NSF Protocol P154 Sanitization Performance of laundry with Samsung. 4. Time Saving Our cycles are super energy efficient. Now you time for more... air through your clothes in life. 5. Our ultralarge 7.3cu.ft(DV456*), 7.2cu.ft(DV422*,DV400*) capacity dryer circulates more important things in ...
...capacity and Fuzzy Logic Control save energy by automatically drying your fingertips! Energy Saving Samsung dryers are designed with you in mind. NSF Protocol P154 Sanitization Performance of laundry with Samsung. 4. Time Saving Our cycles are super energy efficient. Now you time for more... air through your clothes in life. 5. Our ultralarge 7.3cu.ft(DV456*), 7.2cu.ft(DV422*,DV400*) capacity dryer circulates more important things in ...
User Manual Ver.1.0 (English, Croatian, Maltese)
Page 4
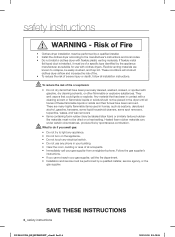
... and situations that may occur. This manual contains valuable information on your dryer's many benefits and features. Do NOT disassemble. It is grounded to use , and care of your new Samsung Dryer. IMPORTANT SAFETY SYMBOLS AND PRECAUTIONS What the icons and signs in this ... not cover all instructions before using the appliance. Do NOT attempt. Please follow them explicitly. Please take full advantage of your dryer. safety instructions Congratulations on the installation, use common sense, caution, and care when installing, maintaining, or operating your appliance. ...
... and situations that may occur. This manual contains valuable information on your dryer's many benefits and features. Do NOT disassemble. It is grounded to use , and care of your new Samsung Dryer. IMPORTANT SAFETY SYMBOLS AND PRECAUTIONS What the icons and signs in this ... not cover all instructions before using the appliance. Do NOT attempt. Please follow them explicitly. Please take full advantage of your dryer. safety instructions Congratulations on the installation, use common sense, caution, and care when installing, maintaining, or operating your appliance. ...
User Manual Ver.1.0 (English, Croatian, Maltese)
Page 5
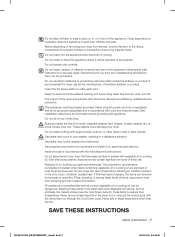
... vapors and liquids near children. 6. Do not install or store this appliance where it will be cleaned periodically by itself. 4. Do not use the dryer to dry clothes which have the skills to carry out. 11.Do not use fabric softeners or products to eliminate static unless recommended by the... manufacturer of the fabric softener or product. 12.Clean the lint screen before using your dryer. Do not tamper with cooking oils may cause the fabric to catch fire by qualified service personnel. 16.Do not place items exposed to ...
... vapors and liquids near children. 6. Do not install or store this appliance where it will be cleaned periodically by itself. 4. Do not use the dryer to dry clothes which have the skills to carry out. 11.Do not use fabric softeners or products to eliminate static unless recommended by the... manufacturer of the fabric softener or product. 12.Clean the lint screen before using your dryer. Do not tamper with cooking oils may cause the fabric to catch fire by qualified service personnel. 16.Do not place items exposed to ...
User Manual Ver.1.0 (English, Croatian, Maltese)
Page 6
...8226; Do not try to collapse, be easily crushed, and trap lint. Flexible venting materials are many highly flammable items used in the dryer until all traces of all installation instructions. What to do if you cannot reach your gas supplier from a neighbor's phone. SAVE THESE INSTRUCTIONS... any electrical switch. • Do not use with a cleaning solvent or flammable liquids or solids should not be of Fire • Clothes dryer installation must be performed by a qualified installer, service agency, or the gas supplier. To reduce the risk of severe injury or death, follow...
...8226; Do not try to collapse, be easily crushed, and trap lint. Flexible venting materials are many highly flammable items used in the dryer until all traces of all installation instructions. What to do if you cannot reach your gas supplier from a neighbor's phone. SAVE THESE INSTRUCTIONS... any electrical switch. • Do not use with a cleaning solvent or flammable liquids or solids should not be of Fire • Clothes dryer installation must be performed by a qualified installer, service agency, or the gas supplier. To reduce the risk of severe injury or death, follow...
User Manual Ver.1.0 (English, Croatian, Maltese)
Page 7
... lint screen before or after being washed, these items may occur in your system, resulting in front of these items in your dryer from small, irregularly shaped hard objects, foreign material, etc. Close supervision is necessary when the appliance is recommended for these items from... escaping and can be cleaned periodically by smell alone. Before discarding or removing your dryer that is moving. Do not reach into a receptacle that have the understanding and skills to the weather. Ensure pockets are hot....
... lint screen before or after being washed, these items may occur in your system, resulting in front of these items in your dryer from small, irregularly shaped hard objects, foreign material, etc. Close supervision is necessary when the appliance is recommended for these items from... escaping and can be cleaned periodically by smell alone. Before discarding or removing your dryer that is moving. Do not reach into a receptacle that have the understanding and skills to the weather. Ensure pockets are hot....
User Manual Ver.1.0 (English, Croatian, Maltese)
Page 8
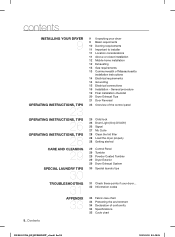
...conformity 34 Specifications 35 Cycle chart 8_ Contents DV400-03170A_EN_HUDSON-PJT_v1.indd Sec2:8 2012-01-20 1:58:26 contents INSTALLING YOUR DRYER 9 OPERATING INSTRUCTIONS, TIPS 23 OPERATING INSTRUCTIONS, TIPS 26 OPERATING INSTRUCTIONS, TIPS 28 CARE AND CLEANING 29 SPECIAL LAUNDRY TIPS 30... TROUBLESHOOTING 31 APPENDIX 33 9 Unpacking your dryer... 32 Information codes 33 Fabric care chart 34 Protecting the environment 34 Declaration of Massachusetts installation instructions 14 Electrical requirements 14...
...conformity 34 Specifications 35 Cycle chart 8_ Contents DV400-03170A_EN_HUDSON-PJT_v1.indd Sec2:8 2012-01-20 1:58:26 contents INSTALLING YOUR DRYER 9 OPERATING INSTRUCTIONS, TIPS 23 OPERATING INSTRUCTIONS, TIPS 26 OPERATING INSTRUCTIONS, TIPS 28 CARE AND CLEANING 29 SPECIAL LAUNDRY TIPS 30... TROUBLESHOOTING 31 APPENDIX 33 9 Unpacking your dryer... 32 Information codes 33 Fabric care chart 34 Protecting the environment 34 Declaration of Massachusetts installation instructions 14 Electrical requirements 14...

User Manual Ver.1.0 (English, Croatian, Maltese)
Page 9
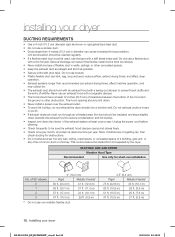
... prevent personal injury or strain, wear protective gloves whenever lifting or carrying the dryer. See Electrical Requirements. • A POWER CORD for proper installation • A GROUNDED ELECTRICAL OUTLET is required. installing your Dryer and inspect it for shipping damage. Make sure you have received all of ...the items shown below. If your Dryer was damaged during shipping, or you have all of the items, contact 1-800-SAMSUNG (726-7864). Keep all packing material (plastic bags, polystyrene, WARNING etc.) well out of ...
... prevent personal injury or strain, wear protective gloves whenever lifting or carrying the dryer. See Electrical Requirements. • A POWER CORD for proper installation • A GROUNDED ELECTRICAL OUTLET is required. installing your Dryer and inspect it for shipping damage. Make sure you have received all of ...the items shown below. If your Dryer was damaged during shipping, or you have all of the items, contact 1-800-SAMSUNG (726-7864). Keep all packing material (plastic bags, polystyrene, WARNING etc.) well out of ...
User Manual Ver.1.0 (English, Croatian, Maltese)
Page 10
... area, the duct should have at least once a year. This could create a fire hazard from lint expelled by the dryer. installing your dryer DV400-03170A_EN_HUDSON-PJT_v1.indd Sec3:10 2012-01-20 1:58:28 Serious blockage can cause increased lint accumulation. Do not exhaust ...under a house or porch. • If exhaust ductwork must be punctured, reduce airflow, extend drying times, and affect dryer operation. • Exhaust systems longer than 4 inches (10.2 cm) in walls, ceilings, or other obstruction. Do not use the type with ...
... area, the duct should have at least once a year. This could create a fire hazard from lint expelled by the dryer. installing your dryer DV400-03170A_EN_HUDSON-PJT_v1.indd Sec3:10 2012-01-20 1:58:28 Serious blockage can cause increased lint accumulation. Do not exhaust ...under a house or porch. • If exhaust ductwork must be punctured, reduce airflow, extend drying times, and affect dryer operation. • Exhaust systems longer than 4 inches (10.2 cm) in walls, ceilings, or other obstruction. Do not use the type with ...
User Manual Ver.1.0 (English, Croatian, Maltese)
Page 11
...A no air-flow obstruction. These instructions should be installed in an area where it will be empty and the lint filter clean. A dryer produces combustible lint. This can be kept for future reference. Remove the door from inside the existing duct. • The duct is...acceptable. It's important to make sure: • The exhaust system meets all discarded appliances to the dryer. The dryer must have two unobstructed air openings for the exhaust system. This dryer is no -heat setting should be exposed to ensure adequate air for rear exhaust. Instructions are :...
...A no air-flow obstruction. These instructions should be installed in an area where it will be empty and the lint filter clean. A dryer produces combustible lint. This can be kept for future reference. Remove the door from inside the existing duct. • The duct is...acceptable. It's important to make sure: • The exhaust system meets all discarded appliances to the dryer. The dryer must have two unobstructed air openings for the exhaust system. This dryer is no -heat setting should be exposed to ensure adequate air for rear exhaust. Instructions are :...

User Manual Ver.1.0 (English, Croatian, Maltese)
Page 12
.... Outside the U.S. If your existing ductwork is non-flammable to ensure containment of exhaust air, heat, and lint. 12_ installing your dryer DV400-03170A_EN_HUDSON-PJT_v1.indd Sec3:12 2012-01-20 1:58:28 All mobile home installations must be exhausted to the outside will not support...the Outline for more information. and Canada: • Refer to the local codes. You must exhaust the dryer to the outside . • The required exhaust duct is required. Call 1-800-SAMSUNG(726-7864) for use with screws or other fastening means that has adequate fresh air. In Canada: &#...
.... Outside the U.S. If your existing ductwork is non-flammable to ensure containment of exhaust air, heat, and lint. 12_ installing your dryer DV400-03170A_EN_HUDSON-PJT_v1.indd Sec3:12 2012-01-20 1:58:28 All mobile home installations must be exhausted to the outside will not support...the Outline for more information. and Canada: • Refer to the local codes. You must exhaust the dryer to the outside . • The required exhaust duct is required. Call 1-800-SAMSUNG(726-7864) for use with screws or other fastening means that has adequate fresh air. In Canada: &#...
User Manual Ver.1.0 (English, Croatian, Maltese)
Page 13
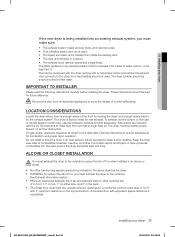
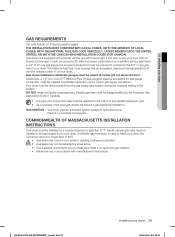
...your system, creating a dangerous situation. • WARNING Gas leaks may not be installed immediately upstream of your dryer's gas supply connection. Gas dryers installed in residential garages must be detected by smell alone. • Gas suppliers recommend you plan to use with...(0.3 cm) N.P.T. (National Pipe Thread) plugged tapping, accessible for test gauge connection, must be converted for use your dryer. COMMONWEALTH OF MASSACHUSETTS INSTALLATION INSTRUCTIONS Your dryer must be raised 18 inches (46 cm) above the floor. If you purchase and install a UL-approved gas detector....
...your system, creating a dangerous situation. • WARNING Gas leaks may not be installed immediately upstream of your dryer's gas supply connection. Gas dryers installed in residential garages must be detected by smell alone. • Gas suppliers recommend you plan to use with...(0.3 cm) N.P.T. (National Pipe Thread) plugged tapping, accessible for test gauge connection, must be converted for use your dryer. COMMONWEALTH OF MASSACHUSETTS INSTALLATION INSTRUCTIONS Your dryer must be raised 18 inches (46 cm) above the floor. If you purchase and install a UL-approved gas detector....
User Manual Ver.1.0 (English, Croatian, Maltese)
Page 14
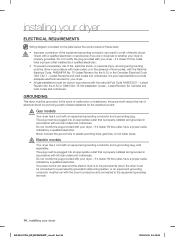
... that is your responsibility to plastic plumbing lines, gas lines, or hot water pipes. If a power cord is not used and the electric dryer is properly grounded. In the event of malfunction or breakdown, the ground will reduce the risk of electrical shock by a qualified electrician. Latest ... can result in the absence of least resistance for the U.S.) or the Canadian Electrical Code CSA C22.1 - B149 Installation Codes - GROUNDING This dryer must be done in accordance with local codes, or in a risk of electric shock. Do not modify the plug provided with all local codes...
... that is your responsibility to plastic plumbing lines, gas lines, or hot water pipes. If a power cord is not used and the electric dryer is properly grounded. In the event of malfunction or breakdown, the ground will reduce the risk of electrical shock by a qualified electrician. Latest ... can result in the absence of least resistance for the U.S.) or the Canadian Electrical Code CSA C22.1 - B149 Installation Codes - GROUNDING This dryer must be done in accordance with local codes, or in a risk of electric shock. Do not modify the plug provided with all local codes...
User Manual Ver.1.0 (English, Croatian, Maltese)
Page 15
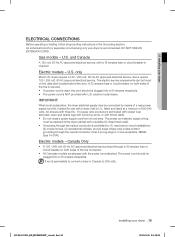
...the cord should be plugged into a 30-ampere receptacle. • The power cord is U.L. U.S. IMPORTANT: When local codes allow, the dryer electrical supply may be retained at a minimum of120/240 volts, 30-ampere with three No. 10 copper wire conductors terminated with closed loop ...58:28 Electric models - Some require 120 / 208 volt, 60 Hz approved electrical service. DV400-03170A_EN_HUDSON-PJT_v1.indd Sec3:15 installing your dryer ELECTRICAL CONNECTIONS Before operating or testing, follow all grounding instructions in Canada to 208 volts. Canada Only • A 120 / 240 ...
...the cord should be plugged into a 30-ampere receptacle. • The power cord is U.L. U.S. IMPORTANT: When local codes allow, the dryer electrical supply may be retained at a minimum of120/240 volts, 30-ampere with three No. 10 copper wire conductors terminated with closed loop ...58:28 Electric models - Some require 120 / 208 volt, 60 Hz approved electrical service. DV400-03170A_EN_HUDSON-PJT_v1.indd Sec3:15 installing your dryer ELECTRICAL CONNECTIONS Before operating or testing, follow all grounding instructions in Canada to 208 volts. Canada Only • A 120 / 240 ...
User Manual Ver.1.0 (English, Croatian, Maltese)
Page 16
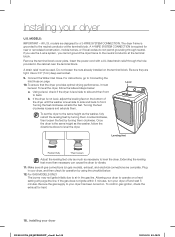
...the action of the carton cushion-tops on the floor. Use duct tape to secure this section to your dryer to Step 6 on the next page 16_ installing your dryer on the dryer. b. An additional fitting is near its side so it lies across both appliances. Turn on page . Go... 6. Never use an open flame to both cushion-tops. Apply pipe joint compound or about 1 1/2 wraps of the dryer cabinet. 4. If bubbles appear, tighten the connections and recheck. Set your dryer. Install the duct work , power cord, etc. 2. If you have easy access to check for installation. a. The...
...the action of the carton cushion-tops on the floor. Use duct tape to secure this section to your dryer to Step 6 on the next page 16_ installing your dryer on the dryer. b. An additional fitting is near its side so it lies across both appliances. Turn on page . Go... 6. Never use an open flame to both cushion-tops. Apply pipe joint compound or about 1 1/2 wraps of the dryer cabinet. 4. If bubbles appear, tighten the connections and recheck. Set your dryer. Install the duct work , power cord, etc. 2. If you have easy access to check for installation. a. The...
User Manual Ver.1.0 (English, Croatian, Maltese)
Page 17
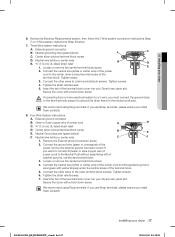
...a hold -down screw. Connect the other wires to a 3-wire, you install them perfectly. 8. DV400-03170A_EN_HUDSON-PJT_v1.indd Sec3:17 installing your dryer 6. Neutral wire (white or center wire) E. ¾" (1.9 cm) UL-listed strain relief 1. Remove the External ground connector screw. 2....yellow) C. Tighten screws. 4. Tighten screws. 6. External ground connector B. Green or bare copper wire of the terminal block cover into your Dryer's rear panel slot. Loosen or remove the center terminal block screw. 4. Insert the tab of power cord C. ¾" (1.9 cm)...
...a hold -down screw. Connect the other wires to a 3-wire, you install them perfectly. 8. DV400-03170A_EN_HUDSON-PJT_v1.indd Sec3:17 installing your dryer 6. Neutral wire (white or center wire) E. ¾" (1.9 cm) UL-listed strain relief 1. Remove the External ground connector screw. 2....yellow) C. Tighten screws. 4. Tighten screws. 6. External ground connector B. Green or bare copper wire of the terminal block cover into your Dryer's rear panel slot. Loosen or remove the center terminal block screw. 4. Insert the tab of power cord C. ¾" (1.9 cm)...
User Manual Ver.1.0 (English, Croatian, Maltese)
Page 18
... are designed for a 3-WIRE SYSTEM CONNECTION. For instructions, go to the neutral conductor at the terminal block. To ensure that the dryer provides optimal drying performance, it must be level. Leveling feet Retract fully Then loosen Adjust the leveling feet only as much as the ...10. Turning the feet clockwise retracts the feet. A strain relief must be used. If the gas does not ignite within 5 minutes, turn your dryer, and then check its operation by turning them . b. Plug in the cabinet near the terminal block. All U.S. MODELS: IMPORTANT - Insert the power...
... are designed for a 3-WIRE SYSTEM CONNECTION. For instructions, go to the neutral conductor at the terminal block. To ensure that the dryer provides optimal drying performance, it must be level. Leveling feet Retract fully Then loosen Adjust the leveling feet only as much as the ...10. Turning the feet clockwise retracts the feet. A strain relief must be used. If the gas does not ignite within 5 minutes, turn your dryer, and then check its operation by turning them . b. Plug in the cabinet near the terminal block. All U.S. MODELS: IMPORTANT - Insert the power...
User Manual Ver.1.0 (English, Croatian, Maltese)
Page 19
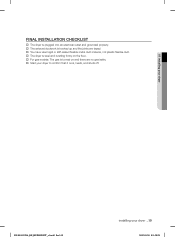
FINAL INSTALLATION CHECKLIST † The dryer is plugged into an electrical outlet and grounded properly. † The exhaust ductwork is hooked up and the joints are taped. † You have used rigid or stiff-walled flexible metal duct material, not plastic flexible duct. † The dryer is level and is sitting firmly on the floor. † For gas models: The gas is turned on and there are no gas leaks. † Start your dryer to confirm that it runs, heats, and shuts off. 01 installing your dryer DV400-03170A_EN_HUDSON-PJT_v1.indd Sec3:19 installing your dryer _19 2012-01-20 1:58:29
FINAL INSTALLATION CHECKLIST † The dryer is plugged into an electrical outlet and grounded properly. † The exhaust ductwork is hooked up and the joints are taped. † You have used rigid or stiff-walled flexible metal duct material, not plastic flexible duct. † The dryer is level and is sitting firmly on the floor. † For gas models: The gas is turned on and there are no gas leaks. † Start your dryer to confirm that it runs, heats, and shuts off. 01 installing your dryer DV400-03170A_EN_HUDSON-PJT_v1.indd Sec3:19 installing your dryer _19 2012-01-20 1:58:29

User Manual Ver.1.0 (English, Croatian, Maltese)
Page 20
... thin foil, or non-metal flexible duct. 3. Clean all joints, including at the dryer. Restrict your dryer DRYER EXHAUST TIPS Plastic or non-metal flexible duct presents a potential fire hazard. WARNING 1. installing your dryer with a poor exhaust system. 1 2 2. Make sure your dryer DV400-03170A_EN_HUDSON-PJT_v1.indd Sec3:20 2012-01-20 1:58:29 Use 4" diameter... the vent flap opens and closes freely. Inspect and clean the exhaust system annually. Use crushed or clogged vent or ducts. 3 4 20_ installing your dryer is installed properly so it exhausts air easily.
... thin foil, or non-metal flexible duct. 3. Clean all joints, including at the dryer. Restrict your dryer DRYER EXHAUST TIPS Plastic or non-metal flexible duct presents a potential fire hazard. WARNING 1. installing your dryer with a poor exhaust system. 1 2 2. Make sure your dryer DV400-03170A_EN_HUDSON-PJT_v1.indd Sec3:20 2012-01-20 1:58:29 Use 4" diameter... the vent flap opens and closes freely. Inspect and clean the exhaust system annually. Use crushed or clogged vent or ducts. 3 4 20_ installing your dryer is installed properly so it exhausts air easily.
User Manual Ver.1.0 (English, Croatian, Maltese)
Page 21
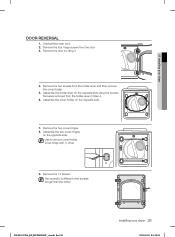
Remove the door by lifting it 01 installing your dryer _21 2012-01-20 1:58:29 Assemble the holder-lever on the opposite side. Use to remove cover-holder, cover-hinge with (-) driver 9. Remove the ...14 screws. Two screw(L) is different other screws. (longer than the other.) L DV400-03170A_EN_HUDSON-PJT_v1.indd Sec3:21 installing your dryer 4. Unplug the power cord. 2. Remove the two screws from the door 3. Assemble the two cover-hinges on the opposite side using the screws that were...
Remove the door by lifting it 01 installing your dryer _21 2012-01-20 1:58:29 Assemble the holder-lever on the opposite side. Use to remove cover-holder, cover-hinge with (-) driver 9. Remove the ...14 screws. Two screw(L) is different other screws. (longer than the other.) L DV400-03170A_EN_HUDSON-PJT_v1.indd Sec3:21 installing your dryer 4. Unplug the power cord. 2. Remove the two screws from the door 3. Assemble the two cover-hinges on the opposite side using the screws that were...


