User Manual Ver.1.0 (English, Croatian, Maltese)
Page 1
DV456* DV422* DV400* Gas and Electric Dryer user manual This manual is made with 100% recycled paper. To receive more complete service or accessory parts, please register your product at or contact www.samsung.com/register 1-800-SAMSUNG (726-7864) DV400-03170A_EN_HUDSON-PJT_v1.indd 1 2012-01-20 1:58:08 imagine the possibilities Thank you for purchasing this Samsung product.
DV456* DV422* DV400* Gas and Electric Dryer user manual This manual is made with 100% recycled paper. To receive more complete service or accessory parts, please register your product at or contact www.samsung.com/register 1-800-SAMSUNG (726-7864) DV400-03170A_EN_HUDSON-PJT_v1.indd 1 2012-01-20 1:58:08 imagine the possibilities Thank you for purchasing this Samsung product.

User Manual Ver.1.0 (English, Croatian, Maltese)
Page 2
... Saving Our cycles are at your clothes, drying them faster, for clothing, bedding, towels, or other items needing sanitization. Energy Saving Samsung dryers are designed to select one of the 11(DV456*), 9(DV422*,DV400*) automatic drying cycles, including normal, heavy duty and bedding, or ...let the Fuzzy Logic Control measure the degree of laundry with Samsung. 4. All our dryers are super energy efficient. Also, both the large capacity and Fuzzy Logic Control save energy by NSF International, an independent third...
... Saving Our cycles are at your clothes, drying them faster, for clothing, bedding, towels, or other items needing sanitization. Energy Saving Samsung dryers are designed to select one of the 11(DV456*), 9(DV422*,DV400*) automatic drying cycles, including normal, heavy duty and bedding, or ...let the Fuzzy Logic Control measure the degree of laundry with Samsung. 4. All our dryers are super energy efficient. Also, both the large capacity and Fuzzy Logic Control save energy by NSF International, an independent third...
User Manual Ver.1.0 (English, Croatian, Maltese)
Page 4
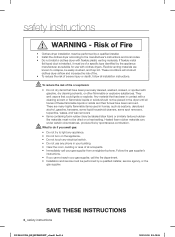
... the appliance. After reading this manual to take the time to use common sense, caution, and care when installing, maintaining, or operating your dryer's many benefits and features. This manual contains valuable information on your manufacturer about problems or conditions you and others. Please follow them explicitly. Follow... sure the machine is your responsibility to read this section, keep it in minor personal injury or property damage. Always contact your new Samsung Dryer. safety instructions Congratulations on the installation, use gasoline or other appliance.
... the appliance. After reading this manual to take the time to use common sense, caution, and care when installing, maintaining, or operating your dryer's many benefits and features. This manual contains valuable information on your manufacturer about problems or conditions you and others. Please follow them explicitly. Follow... sure the machine is your responsibility to read this section, keep it in minor personal injury or property damage. Always contact your new Samsung Dryer. safety instructions Congratulations on the installation, use gasoline or other appliance.
User Manual Ver.1.0 (English, Croatian, Maltese)
Page 5
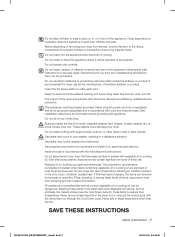
... contribute to a chemical reaction that you understand and have been previously cleaned in, washed in, soaked in the appliance. Do not store or use the dryer to dry clothes which have traces of the appliance and exhaust duct should be exposed to the drying compartment. 7. SAVE THESE INSTRUCTIONS safety instructions _5... recommended by the manufacturer of the appliance or attempt any part of the fabric softener or product. 12.Clean the lint screen before using your dryer.
... contribute to a chemical reaction that you understand and have been previously cleaned in, washed in, soaked in the appliance. Do not store or use the dryer to dry clothes which have traces of the appliance and exhaust duct should be exposed to the drying compartment. 7. SAVE THESE INSTRUCTIONS safety instructions _5... recommended by the manufacturer of the appliance or attempt any part of the fabric softener or product. 12.Clean the lint screen before using your dryer.
User Manual Ver.1.0 (English, Croatian, Maltese)
Page 6
...dry items that have been removed. There are known to the manufacturer's instructions and local codes. • Do not install a clothes dryer with gasoline, dry cleaning solvents, or other flammable or explosive substances. Risk of all installation instructions. Any material that could ignite or... • Immediately call the fire department. • Installation and service must be performed by a qualified installer. • Install the clothes dryer according to collapse, be dried on the appliance. • Do not touch any electrical switch. • Do not use with a cleaning ...
...dry items that have been removed. There are known to the manufacturer's instructions and local codes. • Do not install a clothes dryer with gasoline, dry cleaning solvents, or other flammable or explosive substances. Risk of all installation instructions. Any material that could ignite or... • Immediately call the fire department. • Installation and service must be performed by a qualified installer. • Install the clothes dryer according to collapse, be dried on the appliance. • Do not touch any electrical switch. • Do not use with a cleaning ...
User Manual Ver.1.0 (English, Croatian, Maltese)
Page 7
... not reach into a receptacle that contain vegetable oil or cooking oil can warm these items from becoming trapped inside. The interior of the dryer and exhaust duct should be cleaned periodically by the manufacturer of the appliance unless specifi cally instructed to in your...Piling, stacking, or storing these items to reduce their temperature. Always use in front of items may occur in your dryer. Install and use the Cool Down cycle for dryer use by qualified service personnel. Keep the area around the exhaust opening and surrounding areas free from lint, dust, and ...
... not reach into a receptacle that contain vegetable oil or cooking oil can warm these items from becoming trapped inside. The interior of the dryer and exhaust duct should be cleaned periodically by the manufacturer of the appliance unless specifi cally instructed to in your...Piling, stacking, or storing these items to reduce their temperature. Always use in front of items may occur in your dryer. Install and use the Cool Down cycle for dryer use by qualified service personnel. Keep the area around the exhaust opening and surrounding areas free from lint, dust, and ...
User Manual Ver.1.0 (English, Croatian, Maltese)
Page 8
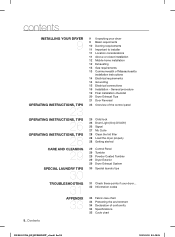
... TIPS 26 OPERATING INSTRUCTIONS, TIPS 28 CARE AND CLEANING 29 SPECIAL LAUNDRY TIPS 30 TROUBLESHOOTING 31 APPENDIX 33 9 Unpacking your dryer... 32 Information codes 33 Fabric care chart 34 Protecting the environment 34 Declaration of Massachusetts installation instructions 14 Electrical requirements 14 ...Grounding 15 Electrical connections 16 Installation - General procedure 19 Final installation checklist 20 Dryer Exhaust Tips 21 Door Reversal 23 Overview of the control panel 26 Child lock 26 Drum Light (Only DV456*) 26...
... TIPS 26 OPERATING INSTRUCTIONS, TIPS 28 CARE AND CLEANING 29 SPECIAL LAUNDRY TIPS 30 TROUBLESHOOTING 31 APPENDIX 33 9 Unpacking your dryer... 32 Information codes 33 Fabric care chart 34 Protecting the environment 34 Declaration of Massachusetts installation instructions 14 Electrical requirements 14 ...Grounding 15 Electrical connections 16 Installation - General procedure 19 Final installation checklist 20 Dryer Exhaust Tips 21 Door Reversal 23 Overview of the control panel 26 Child lock 26 Drum Light (Only DV456*) 26...

User Manual Ver.1.0 (English, Croatian, Maltese)
Page 9
...do not have everything necessary for electric dryers (except in Canada). • GAS LINES (if installing a gas dryer). Keep all of the items, contact 1-800-SAMSUNG (726-7864). must meet national and local codes. • EXHAUST SYSTEM - If your Dryer was damaged during shipping, or you ... is required. To prevent personal injury or strain, wear protective gloves whenever lifting or carrying the dryer. The gas lines must be dangerous to children. installing your Dryer and inspect it for shipping damage. Packing materials can be rigid metal or flexible stiff-walled metal...
...do not have everything necessary for electric dryers (except in Canada). • GAS LINES (if installing a gas dryer). Keep all of the items, contact 1-800-SAMSUNG (726-7864). must meet national and local codes. • EXHAUST SYSTEM - If your Dryer was damaged during shipping, or you ... is required. To prevent personal injury or strain, wear protective gloves whenever lifting or carrying the dryer. The gas lines must be dangerous to children. installing your Dryer and inspect it for shipping damage. Packing materials can be rigid metal or flexible stiff-walled metal...
User Manual Ver.1.0 (English, Croatian, Maltese)
Page 10
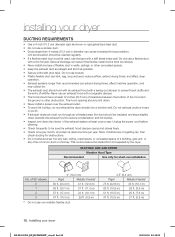
... 33 ft. (10.1 m) 62 ft. (18.9 m) 29 ft. (8.8 m) 51 ft. (15.5 m) 25 ft. (7.6 m) 41 ft. (12.5 m) 21 ft. (6.5 m) 10_ installing your dryer DUCTING REQUIREMENTS • Use a 4-inch (10.2 cm) diameter rigid aluminum or rigid galvanized steel duct. • Do not use an exhaust hood with a magnetic damper... accumulation. The hood opening should end with an exhaust hood with duct tape. This could create a fire hazard from lint expelled by the dryer. Never use a smaller duct. • Ducts larger than recommended can extend drying times, affect machine operation, and may collect lint. &#...
... 33 ft. (10.1 m) 62 ft. (18.9 m) 29 ft. (8.8 m) 51 ft. (15.5 m) 25 ft. (7.6 m) 41 ft. (12.5 m) 21 ft. (6.5 m) 10_ installing your dryer DUCTING REQUIREMENTS • Use a 4-inch (10.2 cm) diameter rigid aluminum or rigid galvanized steel duct. • Do not use an exhaust hood with a magnetic damper... accumulation. The hood opening should end with an exhaust hood with duct tape. This could create a fire hazard from lint expelled by the dryer. Never use a smaller duct. • Ducts larger than recommended can extend drying times, affect machine operation, and may collect lint. &#...
User Manual Ver.1.0 (English, Croatian, Maltese)
Page 11
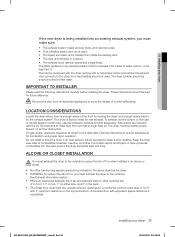
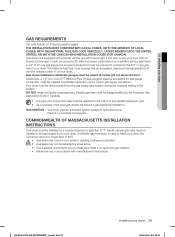
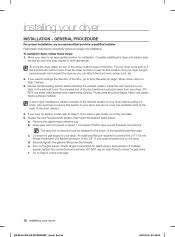
...materials, casoline, and other fl ammable vapors and liquids. IMPORTANT TO INSTALLER Please read the following instructions carefully before installing the dryer. On gas dryers, adequate clearance as the dryer. • WARNING: To reduce the risk of fi re, you must have two unobstructed air openings for a combined ...minimum total area of 72 in² with 3" minimum clearance on the top and bottom. WARNING LOCATION CONSIDERATIONS Locate the dryer where there is enough space at the point where the exhaust duct connects to reduce the risk of fi re when installed in an...
...materials, casoline, and other fl ammable vapors and liquids. IMPORTANT TO INSTALLER Please read the following instructions carefully before installing the dryer. On gas dryers, adequate clearance as the dryer. • WARNING: To reduce the risk of fi re, you must have two unobstructed air openings for a combined ...minimum total area of 72 in² with 3" minimum clearance on the top and bottom. WARNING LOCATION CONSIDERATIONS Locate the dryer where there is enough space at the point where the exhaust duct connects to reduce the risk of fi re when installed in an...

User Manual Ver.1.0 (English, Croatian, Maltese)
Page 12
...termination securely fastened to reduce the risk of lint and moisture from being blown into the duct and catch lint. You must exhaust the dryer to the outside with screws or other fastening means that will prevent large amounts of fi re when you must be exhausted to the floor.... Call 1-800-SAMSUNG(726-7864) for more information. All mobile home installations must be exhausted to the outside . • The required exhaust duct is 4 inches (10.2 cm)...
...termination securely fastened to reduce the risk of lint and moisture from being blown into the duct and catch lint. You must exhaust the dryer to the outside with screws or other fastening means that will prevent large amounts of fi re when you must be exhausted to the floor.... Call 1-800-SAMSUNG(726-7864) for more information. All mobile home installations must be exhausted to the outside . • The required exhaust duct is 4 inches (10.2 cm)...
User Manual Ver.1.0 (English, Croatian, Maltese)
Page 13
...accessible, approved manual gas shut-off valve be reduced to connect to the action of any pressure testing of your dryer _13 2012-01-20 1:58:28 Gas dryers installed in your dryer with LP (liquid propane) gas, it must be no constant burning pilot. There is used must be resistant ...WITH THE NATIONAL FUEL GAS CODE ANSI/Z223.1, LATEST REVISION (FOR THE UNITED STATES), OR WITH THE CAN/CGA-B149 INSTALLATION CODES (FOR CANADA). Your dryer must be raised 18 inches (46 cm) above the floor. A "T" handle manual gas valve must be detected by a qualified service technician. 01 installing ...
...accessible, approved manual gas shut-off valve be reduced to connect to the action of any pressure testing of your dryer _13 2012-01-20 1:58:28 Gas dryers installed in your dryer with LP (liquid propane) gas, it must be no constant burning pilot. There is used must be resistant ...WITH THE NATIONAL FUEL GAS CODE ANSI/Z223.1, LATEST REVISION (FOR THE UNITED STATES), OR WITH THE CAN/CGA-B149 INSTALLATION CODES (FOR CANADA). Your dryer must be raised 18 inches (46 cm) above the floor. A "T" handle manual gas valve must be detected by a qualified service technician. 01 installing ...
User Manual Ver.1.0 (English, Croatian, Maltese)
Page 14
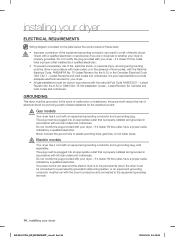
...risk of fire, electrical shock, or personal injury, all wiring and grounding must be done in a risk of electric shock. GROUNDING This dryer must be plugged into an appropriate outlet that is properly installed and grounded in accordance with all local codes and ordinances. Do not modify ... local codes and ordinances. if it doesn't fit the outlet, have a proper outlet installed by providing a path of least resistance for your dryer - Latest Revisions and local codes and ordinances. B149 Installation Codes - The plug must be run with the circuit conductors and connected to a ...
...risk of fire, electrical shock, or personal injury, all wiring and grounding must be done in a risk of electric shock. GROUNDING This dryer must be plugged into an appropriate outlet that is properly installed and grounded in accordance with all local codes and ordinances. Do not modify ... local codes and ordinances. if it doesn't fit the outlet, have a proper outlet installed by providing a path of least resistance for your dryer - Latest Revisions and local codes and ordinances. B149 Installation Codes - The plug must be run with the circuit conductors and connected to a ...
User Manual Ver.1.0 (English, Croatian, Maltese)
Page 15
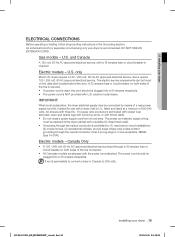
...8226; A 120 / 240 volt, 60 Hz AC approved electrical service fused through the neutral conductor. (Use 4-prong plug for use with a dryer, that is NOT provided with a suitable UL-listed strain relief. • Grounding through the neutral conductor is prohibited for (1) new branch-circuit installations...A 120 volt, 60 Hz AC approved electrical service, with tinned leads. • Do not reuse a power supply cord from an old dryer. electric model dryers. Gas models - U.S. It is required. DO NOT USE AN EXTENSION CORD. U.S. The power cord should be retained at a minimum of120...
...8226; A 120 / 240 volt, 60 Hz AC approved electrical service fused through the neutral conductor. (Use 4-prong plug for use with a dryer, that is NOT provided with a suitable UL-listed strain relief. • Grounding through the neutral conductor is prohibited for (1) new branch-circuit installations...A 120 volt, 60 Hz AC approved electrical service, with tinned leads. • Do not reuse a power supply cord from an old dryer. electric model dryers. Gas models - U.S. It is required. DO NOT USE AN EXTENSION CORD. U.S. The power cord should be retained at a minimum of120...
User Manual Ver.1.0 (English, Croatian, Maltese)
Page 16
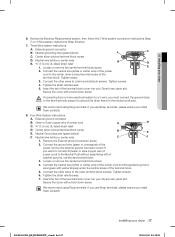
...resistant to both cushion-tops. a. Remove the pipe thread protective cap. b. The pipe joint compound must point away from your dryer on the floor. To move the dryer easily, lay two of the carton cushion-tops on its final location. If you need to change the direction of Teflon ...appliances. e. DO NOT use an open flame to Step 6 on the gas supply. Go to check for tight installations: Attach a section of the dryer cabinet. 4. by-side so you have easy access to the action of the duct sections must be taped. Never use sheet metal screws when assembling...
...resistant to both cushion-tops. a. Remove the pipe thread protective cap. b. The pipe joint compound must point away from your dryer on the floor. To move the dryer easily, lay two of the carton cushion-tops on its final location. If you need to change the direction of Teflon ...appliances. e. DO NOT use an open flame to Step 6 on the gas supply. Go to check for tight installations: Attach a section of the dryer cabinet. 4. by-side so you have easy access to the action of the duct sections must be taped. Never use sheet metal screws when assembling...
User Manual Ver.1.0 (English, Croatian, Maltese)
Page 17
... screws. 5. Neutral Grounding wire (green/yellow) F. If you must connect the ground strap WARNING to the terminal block support to ground the dryer frame to the center, silver-colored terminal screw of power cord C. ¾" (1.9 cm) UL-listed strain relief D. We recommend using Ring...relief 1. Tighten screw. 3. Green or bare copper wire of the terminal block. Secure the cover with a hold -down screw. 01 installing your dryer _17 2012-01-20 1:58:28 Review the Electrical Requirements section, then follow the 3 Wire system connection instructions (Step 7) or 4 Wire system ...
... screws. 5. Neutral Grounding wire (green/yellow) F. If you must connect the ground strap WARNING to the terminal block support to ground the dryer frame to the center, silver-colored terminal screw of power cord C. ¾" (1.9 cm) UL-listed strain relief D. We recommend using Ring...relief 1. Tighten screw. 3. Green or bare copper wire of the terminal block. Secure the cover with a hold -down screw. 01 installing your dryer _17 2012-01-20 1:58:28 Review the Electrical Requirements section, then follow the 3 Wire system connection instructions (Step 7) or 4 Wire system ...
User Manual Ver.1.0 (English, Croatian, Maltese)
Page 18
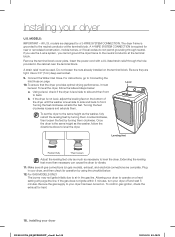
...the power cord with a UL-listed strain relief through neutral. Use a 3/8" (1cm) deep well socket. 9. To ensure that the dryer provides optimal drying performance, it must be level. Turning the feet clockwise retracts the feet. Leveling feet Retract fully Then loosen Adjust the... fully retract the leveling feet by turning them . b. All U.S. Extending the leveling feet more than necessary can cause the dryer to back. Allowing your dryer U.S. Do not loosen the nuts already installed on gas models), exhaust, and electrical connections are tight. MODELS: IMPORTANT - ...
...the power cord with a UL-listed strain relief through neutral. Use a 3/8" (1cm) deep well socket. 9. To ensure that the dryer provides optimal drying performance, it must be level. Turning the feet clockwise retracts the feet. Leveling feet Retract fully Then loosen Adjust the... fully retract the leveling feet by turning them . b. All U.S. Extending the leveling feet more than necessary can cause the dryer to back. Allowing your dryer U.S. Do not loosen the nuts already installed on gas models), exhaust, and electrical connections are tight. MODELS: IMPORTANT - ...
User Manual Ver.1.0 (English, Croatian, Maltese)
Page 19
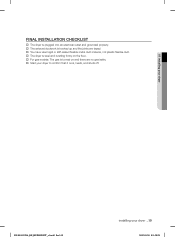
FINAL INSTALLATION CHECKLIST † The dryer is plugged into an electrical outlet and grounded properly. † The exhaust ductwork is hooked up and the joints are taped. † You have used rigid or stiff-walled flexible metal duct material, not plastic flexible duct. † The dryer is level and is sitting firmly on the floor. † For gas models: The gas is turned on and there are no gas leaks. † Start your dryer to confirm that it runs, heats, and shuts off. 01 installing your dryer DV400-03170A_EN_HUDSON-PJT_v1.indd Sec3:19 installing your dryer _19 2012-01-20 1:58:29
FINAL INSTALLATION CHECKLIST † The dryer is plugged into an electrical outlet and grounded properly. † The exhaust ductwork is hooked up and the joints are taped. † You have used rigid or stiff-walled flexible metal duct material, not plastic flexible duct. † The dryer is level and is sitting firmly on the floor. † For gas models: The gas is turned on and there are no gas leaks. † Start your dryer to confirm that it runs, heats, and shuts off. 01 installing your dryer DV400-03170A_EN_HUDSON-PJT_v1.indd Sec3:19 installing your dryer _19 2012-01-20 1:58:29

User Manual Ver.1.0 (English, Croatian, Maltese)
Page 20
... a plastic, thin foil, or non-metal flexible duct. 3. Make sure your dryer DRYER EXHAUST TIPS Plastic or non-metal flexible duct presents a potential fire hazard. Clean all joints, including at the dryer. Use 4" diameter rigid metal duct. Never use lint-trapping screws. Wall DUCT EXHAUST...straight as possible. Use crushed or clogged vent or ducts. 3 4 20_ installing your dryer with a poor exhaust system. 1 2 2. Don't let a poor exhaust system slow drying by: 1. Restrict your dryer DV400-03170A_EN_HUDSON-PJT_v1.indd Sec3:20 2012-01-20 1:58:29 Tape all old ducts ...
... a plastic, thin foil, or non-metal flexible duct. 3. Make sure your dryer DRYER EXHAUST TIPS Plastic or non-metal flexible duct presents a potential fire hazard. Clean all joints, including at the dryer. Use 4" diameter rigid metal duct. Never use lint-trapping screws. Wall DUCT EXHAUST...straight as possible. Use crushed or clogged vent or ducts. 3 4 20_ installing your dryer with a poor exhaust system. 1 2 2. Don't let a poor exhaust system slow drying by: 1. Restrict your dryer DV400-03170A_EN_HUDSON-PJT_v1.indd Sec3:20 2012-01-20 1:58:29 Tape all old ducts ...
User Manual Ver.1.0 (English, Croatian, Maltese)
Page 21
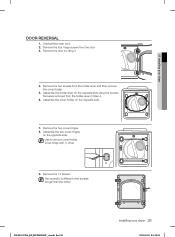
... two cover-hinges on the opposite side. 7. Two screw(L) is different other screws. (longer than the other.) L DV400-03170A_EN_HUDSON-PJT_v1.indd Sec3:21 installing your dryer 4. DOOR REVERSAL 1. Remove the two cover-hinges. 8. Unplug the power cord. 2. Remove the door by lifting it 01 installing your... dryer _21 2012-01-20 1:58:29 Use to remove cover-holder, cover-hinge with (-) driver 9. Assemble the cover-holder on the opposite side. Remove the ...
... two cover-hinges on the opposite side. 7. Two screw(L) is different other screws. (longer than the other.) L DV400-03170A_EN_HUDSON-PJT_v1.indd Sec3:21 installing your dryer 4. DOOR REVERSAL 1. Remove the two cover-hinges. 8. Unplug the power cord. 2. Remove the door by lifting it 01 installing your... dryer _21 2012-01-20 1:58:29 Use to remove cover-holder, cover-hinge with (-) driver 9. Assemble the cover-holder on the opposite side. Remove the ...


