
User Manual (ENGLISH)
Page 1
SyncMaster 731B / 931B / 731BF / 931BF Install drivers Install programs
SyncMaster 731B / 931B / 731BF / 931BF Install drivers Install programs
User Manual (ENGLISH)
Page 16
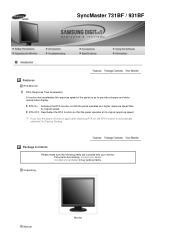
...On Activates the RTA function so that accelerates the response speed of the panel so as to buy optional items. Unpacking Manual Monitor If you turn the power off and on again after switching RTA off, the RTA function is automatically switched On (Factory ...Setting) Package Contents Please make sure the following items are missing, contact your monitor. SyncMaster 731BF / 931BF Features RTA Monitor RTA (Response Time Accelerator) A function that the panel operates at its original speed. Contact a local dealer to provide a ...
...On Activates the RTA function so that accelerates the response speed of the panel so as to buy optional items. Unpacking Manual Monitor If you turn the power off and on again after switching RTA off, the RTA function is automatically switched On (Factory ...Setting) Package Contents Please make sure the following items are missing, contact your monitor. SyncMaster 731BF / 931BF Features RTA Monitor RTA (Response Time Accelerator) A function that the panel operates at its original speed. Contact a local dealer to provide a ...

User Manual (ENGLISH)
Page 20
...the 15-pin, D-sub port on the back of your monitor. [RGB IN] Using the DVI (Digital) connector on and use them on the video card. - If the monitor and the computer are using an old model Macintosh, connect the monitor and the Macintosh using the D-sub connection cable. Connect ... DVI Port on the back of your monitor to the power port on the back of the monitor. SyncMaster 731B / 931B / 731BF / 931BF Connecting Cables Connect the power cord for the monitor into a nearby outlet. If you are connected, you can turn them . Using the D-sub (Analog) connector on the video card. - ...
...the 15-pin, D-sub port on the back of your monitor. [RGB IN] Using the DVI (Digital) connector on and use them on the video card. - If the monitor and the computer are using an old model Macintosh, connect the monitor and the Macintosh using the D-sub connection cable. Connect ... DVI Port on the back of your monitor to the power port on the back of the monitor. SyncMaster 731B / 931B / 731BF / 931BF Connecting Cables Connect the power cord for the monitor into a nearby outlet. If you are connected, you can turn them . Using the D-sub (Analog) connector on the video card. - ...

User Manual (ENGLISH)
Page 22
... web site :http://www.samsung.com/ (Worldwide) http://www.samsung.com/monitor (U.S.A) http://www.sec.co.kr/monitor (Korea) http://www.samsungmonitor.com.cn/ (China) Installing the Monitor Driver (Automatic) Windows ME Insert CD into the CD-ROM drive. Monitor driver installation is slightly different...directions appropriate for the monitor driver, insert the CD-ROM included with this monitor. Click "Windows ME Driver". Prepare a blank disk and download the driver program file at the Internet web site shown here. SyncMaster 731B / 931B / 731BF / 931BF Monitor Driver When prompted by...
... web site :http://www.samsung.com/ (Worldwide) http://www.samsung.com/monitor (U.S.A) http://www.sec.co.kr/monitor (Korea) http://www.samsungmonitor.com.cn/ (China) Installing the Monitor Driver (Automatic) Windows ME Insert CD into the CD-ROM drive. Monitor driver installation is slightly different...directions appropriate for the monitor driver, insert the CD-ROM included with this monitor. Click "Windows ME Driver". Prepare a blank disk and download the driver program file at the Internet web site shown here. SyncMaster 731B / 931B / 731BF / 931BF Monitor Driver When prompted by...

User Manual (ENGLISH)
Page 49
SyncMaster 731BF / 931BF Control Buttons [MENU / ] Opens the OSD menu. Also use to exit the OSD menu or return to the previous menu. [ ] These buttons allow you to adjust items in the menu. [ ] Press this button to activate a highlighted menu item. [AUTO] When the 'AUTO' button is pressed, the Auto Adjustment screen appears as shown in the animated screen on the center. Direct Functions AUTO
SyncMaster 731BF / 931BF Control Buttons [MENU / ] Opens the OSD menu. Also use to exit the OSD menu or return to the previous menu. [ ] These buttons allow you to adjust items in the menu. [ ] Press this button to activate a highlighted menu item. [AUTO] When the 'AUTO' button is pressed, the Auto Adjustment screen appears as shown in the animated screen on the center. Direct Functions AUTO
