Ryobi P2300A Support and Manuals
Get Help and Manuals for this Ryobi item
View All Support Options Below
Free Ryobi P2300A manuals!
Problems with Ryobi P2300A?
Ask a Question
Free Ryobi P2300A manuals!
Problems with Ryobi P2300A?
Ask a Question
Ryobi P2300A Videos

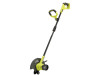
Ryobi P2300A ONE 9 in. 18-Volt Lithium-Ion Cordless Edger – Battery and Charger Not Included
Duration: :52
Total Views: 335
Duration: :52
Total Views: 335
Popular Ryobi P2300A Manual Pages
Operation Manual - Page 4
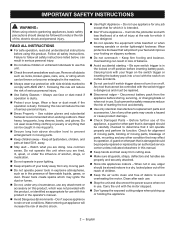
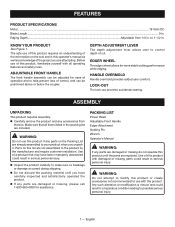
...edger should be stored indoors in moving parts, breakage of parts, mounting and any other parts...replacement parts and accessories. IMPORTANT SAFETY INSTRUCTIONS
WARNING :
When using this manual.
Keep hands and feet away from cutting area.
Make sure all safety instructions.
READ ALL INSTRUCTIONS... be properly repaired or replaced by an authorized service center unless ...
Operation Manual - Page 5
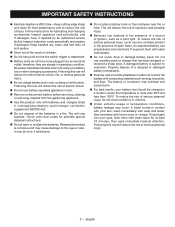
...instructions for possible special disposal instructions... medical attention. Inspect extension cords periodically and replace if damaged. Following this product only with...operating condition. If exposed, flush with local codes for lubricating and changing accessories. If liquid...do not have it repaired by an authorized service facility. Do not use any cordless product in the presence...
Operation Manual - Page 6

...and use the edger on the front handle when the blade is stopped or throttle trigger released. SPECIFIC SAFETY RULES
Replace dull or ...installing attachment, or making any other similar hazardous conditions (example: wire or wire rope which can cause serious injury.
Always stop the unit and disengage the controls quickly.
Do not use them these instructions...
Operation Manual - Page 7
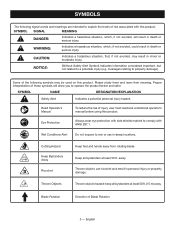
Proper interpretation of injury, user must read and understand operator's manual before using this product. Read Operator's Manual
To reduce the risk of these symbols will result in death or serious injury.
Keep all bystanders at least 50 ft.
Cutting Hazard
Keep Bystanders ...
Operation Manual - Page 9
...EDGER WHEEL
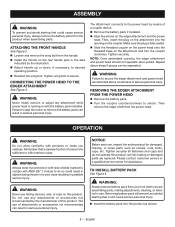
The edger wheel allows for ease of operation and to make sure no breakage or damage occurred during shipping. Parts on the Packing List are not assembled to the product by the manufacturer and require customer installation... injury. PACKING LIST
Power Head Adjustable Front Handle Edger Attachment Holding Pin Wrench Operator's Manual
WARNING:
If any accessories from 1/4 in . ...
Operation Manual - Page 10
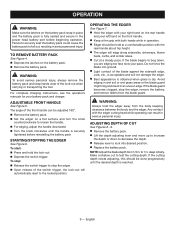
... parts such as screws, nuts, bolts, caps, etc. Removing battery pack will prevent accidental starting that could cause serious personal injury.
Insert the battery pack into the product as instructed above steps if pieces can result in objects being thrown into the opening on the edger attachment and the power
head.
TO INSTALL...
Operation Manual - Page 11
...., is acceptable and will not damage the edger. Best appearance is obtained when grass is reached.
9 -
For complete charging instructions, see the operator's manuals for your pace. The angle of the... between the body and the edger. If the cutting depth needs adjusting, this should be adjusted 180°. Remove the battery pack. Set the edger on a flat surface and ...
Operation Manual - Page 12

... install the cupped washer with the raised center area with the slot in the
gear case ring;
Replace blades when worn down to comply with plastic parts. STORING THE EDGER
Remove the battery pack from the power head before each use only identical replacement parts.
Use of any maintenance. Please contact customer service or a qualified service center...
Operation Manual - Page 13

...com or call the Ryobi Help Line! Charge the battery pack according to the instructions included with your product...model.
Your product has been fully tested prior to shipment to start when switch trigger is depressed. PROBLEM
Motor fails to ensure your complete satisfaction. SOLUTION
To secure the battery pack, make sure the latch (or latches) snap into place.
English
TROUBLESHOOTING...
Parts Diagram - Page 3
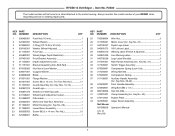
Always mention the model number of your EDGER when requesting service or ordering repair parts. KEY PART NO. NUMBER DESCRIPTION
QTY
1 308483001 2 525397001 3 679995001...
Operator's Manual
3 P2300
The model number will be found on a label attached to the motor housing. Key No. 28 1 Lower Boom Assembly 1 Screw (M3.5 x 14 mm, Pan Hd 15 Baffle 1
KEY PART NO. RYOBI 18 Volt Edger −...
Parts Diagram - Page 4
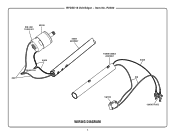
P2300
BOOM ASSEMBLY
POWER HANDLE ASSEMBLY
SWITCH
WIRING DIAGRAM
4
BLACK RED
CONTACT PLATE RED LEAD TO RED DOT
MOTOR
BLACK CONNECTOR RED
RYOBI 18 Volt Edger − Item No.
Ryobi P2300A Reviews
We have not received any reviews for Ryobi yet.