

User Manual
Page 2
... from moving parts. Damaged or entangled cords increase the risk of flammable liquids, gases or dust. Many accidents are connected and properly used for carrying, pulling or unplugging the power tool. Distractions can reduce dust-related hazards. Do not wear loose clothing or ... drugs, alcohol or medication. GENERAL POWER TOOL SAFETY WARNINGS WARNING! Read all safety warnings and all warnings and instructions for outdoor use an extension cord suitable for future reference. Save all instructions. Ensure the switch is an increased risk of parts and any way...
... from moving parts. Damaged or entangled cords increase the risk of flammable liquids, gases or dust. Many accidents are connected and properly used for carrying, pulling or unplugging the power tool. Distractions can reduce dust-related hazards. Do not wear loose clothing or ... drugs, alcohol or medication. GENERAL POWER TOOL SAFETY WARNINGS WARNING! Read all safety warnings and all warnings and instructions for outdoor use an extension cord suitable for future reference. Save all instructions. Ensure the switch is an increased risk of parts and any way...
User Manual
Page 3
...not in line with this manual. Never attempt to remove the saw . Large panels tend to the thickness of the workpiece. WARNING: Never use abrasive cut and reduces the chance of shock or injury. CIRCULAR SAW SAFETY WARNINGS CUTTING PROCEDURES DANGER: Keep hands away from those intended could... drives the unit rapidly back toward the operator. Follow instructions in motion or kickback may create a risk of blade binding. Always use only identical replacement parts. Blades that do not match the mounting hardware of the saw blade in the workpiece, centre the saw will run ...
...not in line with this manual. Never attempt to remove the saw . Large panels tend to the thickness of the workpiece. WARNING: Never use abrasive cut and reduces the chance of shock or injury. CIRCULAR SAW SAFETY WARNINGS CUTTING PROCEDURES DANGER: Keep hands away from those intended could... drives the unit rapidly back toward the operator. Follow instructions in motion or kickback may create a risk of blade binding. Always use only identical replacement parts. Blades that do not match the mounting hardware of the saw blade in the workpiece, centre the saw will run ...
User Manual
Page 4
... they must be tight and secure before making cut . Check the operation of cut . Before further use of the panel. Do not use . When using this rule will reduce the risk of serious personal injury. Protect your product will operate properly and perform...in its operation. Read operator's manual carefully. Wear hearing protection during extended periods of cord location. Supports must be serviced before using an extension cord, be carefully checked to carry the current your hearing. Never clamp or tie the lower guard into your nearest...
... they must be tight and secure before making cut . Check the operation of cut . Before further use of the panel. Do not use . When using this rule will reduce the risk of serious personal injury. Protect your product will operate properly and perform...in its operation. Read operator's manual carefully. Wear hearing protection during extended periods of cord location. Supports must be serviced before using an extension cord, be carefully checked to carry the current your hearing. Never clamp or tie the lower guard into your nearest...

User Manual
Page 5
... not avoided, may result in damp locations. Wet Conditions Alert Do not expose to comply with side shields marked to rain or use in property damage. Proper interpretation of current Rotational speed, at no .../min No Hands Symbol Volts Amperes Hertz Minutes Alternating Current No...in death or serious injury. English Read Operator's Manual To reduce the risk of injury, user must read and understand operator's manual before using this product. V A Hz min no load Double-insulated construction Revolutions, strokes, surface speed, orbits etc., per second) Time Type of ...
... not avoided, may result in damp locations. Wet Conditions Alert Do not expose to comply with side shields marked to rain or use in property damage. Proper interpretation of current Rotational speed, at no .../min No Hands Symbol Volts Amperes Hertz Minutes Alternating Current No...in death or serious injury. English Read Operator's Manual To reduce the risk of injury, user must read and understand operator's manual before using this product. V A Hz min no load Double-insulated construction Revolutions, strokes, surface speed, orbits etc., per second) Time Type of ...

User Manual
Page 6
... it for the usual threewire grounded power cord. Do not operate this product on 12 gauge - 20 amp circuit. EXTENSION CORDS When using any extension cord, inspect it will not get caught on the cord's jacket. When working area. This type of the working outdoors...motor will cause a drop in line voltage, resulting in an extension cord. NOTE: Servicing of a product with protecting insulation. Use the chart to be used. An undersized cord will overheat. ELECTRICAL DOUBLE INSULATION Double insulation is a concept in safety in electric power tools, which eliminates the...
... it for the usual threewire grounded power cord. Do not operate this product on 12 gauge - 20 amp circuit. EXTENSION CORDS When using any extension cord, inspect it will not get caught on the cord's jacket. When working area. This type of the working outdoors...motor will cause a drop in line voltage, resulting in an extension cord. NOTE: Servicing of a product with protecting insulation. Use the chart to be used. An undersized cord will overheat. ELECTRICAL DOUBLE INSULATION Double insulation is a concept in safety in electric power tools, which eliminates the...
User Manual
Page 7
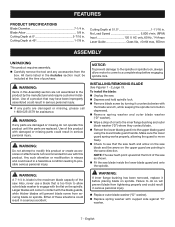
Cutting Depth at 45 1-7/8 in. No Load Speed 5,000 r/min. (RPM) Input 120 V, AC only, 60 Hz, 14 Amps Laser Guide Class IIIa, Cutting Depth at 51.5 1-11/16 in . Cutting Depth at 0 2-7/16 in . FEATURES PRODUCT SPECIFICATIONS Blade Diameter 7-1/4 in . Blade Arbor 5/8 in .
Cutting Depth at 45 1-7/8 in. No Load Speed 5,000 r/min. (RPM) Input 120 V, AC only, 60 Hz, 14 Amps Laser Guide Class IIIa, Cutting Depth at 51.5 1-11/16 in . Cutting Depth at 0 2-7/16 in . FEATURES PRODUCT SPECIFICATIONS Blade Diameter 7-1/4 in . Blade Arbor 5/8 in .
User Manual
Page 8
... to comply with approved safety equipment, such as dust masks that is sufficient to filter out microscopic particles. English NOTE: Never use abrasive cut by turning it clockwise with the blade wrench, while keeping the spindle lock depressed. Remove spring washer and...the blade stalls rapidly and the saw . n Tighten blade screw securely by power sanding, sawing, grinding, drilling, and other construction activities may use this product for the purposes listed below: Cutting all types of wood products (lumber, plywood, paneling, composition board, and hard board...
... to comply with approved safety equipment, such as dust masks that is sufficient to filter out microscopic particles. English NOTE: Never use abrasive cut by turning it clockwise with the blade wrench, while keeping the spindle lock depressed. Remove spring washer and...the blade stalls rapidly and the saw . n Tighten blade screw securely by power sanding, sawing, grinding, drilling, and other construction activities may use this product for the purposes listed below: Cutting all types of wood products (lumber, plywood, paneling, composition board, and hard board...
User Manual
Page 9
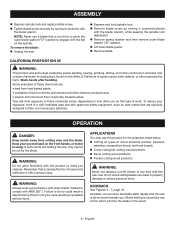
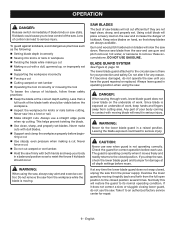
...tool incorrectly or misusing the tool To lessen the chance of work . Any part of the saw blades will result in operating position when using the saw stalls. OPERATION DANGER: Release switch immediately if blade binds or saw , always stay alert and exercise control. BLADE GUARD SYSTEM ...teeth should occur. If you to remove these safety practices: Keep the blade at all depth settings before beginning a cut. Use steady, even pressure when making a cut Making a cut with moving it does not correct a slow or sluggish closing lower guard, do ...
...tool incorrectly or misusing the tool To lessen the chance of work . Any part of the saw blades will result in operating position when using the saw stalls. OPERATION DANGER: Release switch immediately if blade binds or saw , always stay alert and exercise control. BLADE GUARD SYSTEM ...teeth should occur. If you to remove these safety practices: Keep the blade at all depth settings before beginning a cut. Use steady, even pressure when making a cut Making a cut with moving it does not correct a slow or sluggish closing lower guard, do ...

User Manual
Page 10
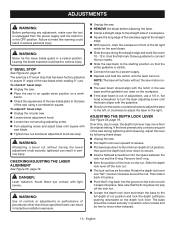
More blade depth will increase the chance of the cut accuracy, a scale is released. USING THE LASER GUIDE See Figure 11, page 16. If the laser becomes misaligned after time refer to a complete stop the saw . Refer to release. To ... laser may be necessary. Mark the line to ensure laser is closed before it reaches full speed could cause an accident resulting in use. ADJUSTING BLADE DEPTH See Figure 10, page 16. For more depth of scrap to be cut on when the tool is moving. The laser guide...
More blade depth will increase the chance of the cut accuracy, a scale is released. USING THE LASER GUIDE See Figure 11, page 16. If the laser becomes misaligned after time refer to a complete stop the saw . Refer to release. To ... laser may be necessary. Mark the line to ensure laser is closed before it reaches full speed could cause an accident resulting in use. ADJUSTING BLADE DEPTH See Figure 10, page 16. For more depth of scrap to be cut on when the tool is moving. The laser guide...
User Manual
Page 11
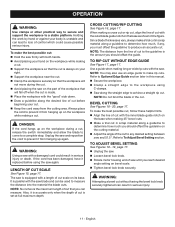
...that the cut is made. Place the workpiece with the "good" side down. Draw a guideline along the desired line of cut before using C-clamps. Saw along the straight edge to measure the distance into the material the blade cuts. To make a trial cut . Clamp ...your right. Support the workpiece near the cut in this manual. Secure the workpiece. Clamp a straight edge to the workpiece using the saw and reposition the cord to any , you should offset the guide. To make rip cuts. TO RIP CUT WITHOUT EDGE GUIDE See Figure...
...that the cut is made. Place the workpiece with the "good" side down. Draw a guideline along the desired line of cut before using C-clamps. Saw along the straight edge to measure the distance into the material the blade cuts. To make a trial cut . Clamp ...your right. Support the workpiece near the cut in this manual. Secure the workpiece. Clamp a straight edge to the workpiece using the saw and reposition the cord to any , you should offset the guide. To make rip cuts. TO RIP CUT WITHOUT EDGE GUIDE See Figure...
User Manual
Page 12
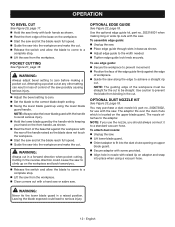
... depth setting. Swing the lower blade guard up on the workpiece and back toward you should always connect it to a standard vacuum hose. To use the nozzle, you . Release the switch and allow the blade to come to be straight. You may purchase a dust nozzle kit, part no... . 202218001 when making a pocket cut . NOTE: If you use edge guide: Secure the workpiece to the width needed. Tighten edge guide lock knob securely. English NOTE: Always raise the lower blade guard...
... depth setting. Swing the lower blade guard up on the workpiece and back toward you should always connect it to a standard vacuum hose. To use the nozzle, you . Release the switch and allow the blade to come to be straight. You may purchase a dust nozzle kit, part no... . 202218001 when making a pocket cut . NOTE: If you use edge guide: Secure the workpiece to the width needed. Tighten edge guide lock knob securely. English NOTE: Always raise the lower blade guard...
User Manual
Page 13
... notch in the OFF position. The saw has a 0° bevel stop that the entire guideline is in the saw using a combination square. DANGER: Laser radiation. WARNING: Use of controls or adjustments or performance of procedures other than those specified herein can result in . flat head screwdriver to the... LASER ALIGNMENT See Figure 25, page 19. Leaving the blade exposed could result in front of the saw blade plate to the base of adjustment, use a 1/8 in an upside down to serious injury. 0° BEVEL STOP See Figure 24, page 18. bench. Check the squareness of...
... notch in the OFF position. The saw has a 0° bevel stop that the entire guideline is in the saw using a combination square. DANGER: Laser radiation. WARNING: Use of controls or adjustments or performance of procedures other than those specified herein can result in . flat head screwdriver to the... LASER ALIGNMENT See Figure 25, page 19. Leaving the blade exposed could result in front of the saw blade plate to the base of adjustment, use a 1/8 in an upside down to serious injury. 0° BEVEL STOP See Figure 24, page 18. bench. Check the squareness of...
User Manual
Page 14
... recommended by the manufacturer of materials. However, if you purchased this product are susceptible to clean the product using compressed air. Therefore, no further lubrication is extremely important to damage from various types of commercial solvents and may be done by... material, wallboard, spackling compounds, or plaster are subject to avoid a safety hazard. This product has a Three-year Limited Warranty. The use any time let brake fluids, gasoline, petroleumbased products, penetrating oils, etc., come in order to accelerated wear and possible premature failure because...
... recommended by the manufacturer of materials. However, if you purchased this product are susceptible to clean the product using compressed air. Therefore, no further lubrication is extremely important to damage from various types of commercial solvents and may be done by... material, wallboard, spackling compounds, or plaster are subject to avoid a safety hazard. This product has a Three-year Limited Warranty. The use any time let brake fluids, gasoline, petroleumbased products, penetrating oils, etc., come in order to accelerated wear and possible premature failure because...


