User Manual (English)
Page 2
You can install a high-speed SATA hard drive into this enclosure and connect it to a computer using either a USB 2.0 or eSATA port. This enclosure also has a built-in USB 2.0 hub and memory card reader. 2 Rocketfish RF-AHD35 3.5" Hard Drive Enclosure Kit Contents Introduction 2 Safety information 3 Features 3 Using the hard drive enclosure 7 Appendix 25 Troubleshooting 28 Specifications 30 Legal notices 31 One-year limited warranty 33 Introduction Congratulations on your purchase of the Rocketfish RF-AHD35 SATA Hard Drive Enclosure Kit.
You can install a high-speed SATA hard drive into this enclosure and connect it to a computer using either a USB 2.0 or eSATA port. This enclosure also has a built-in USB 2.0 hub and memory card reader. 2 Rocketfish RF-AHD35 3.5" Hard Drive Enclosure Kit Contents Introduction 2 Safety information 3 Features 3 Using the hard drive enclosure 7 Appendix 25 Troubleshooting 28 Specifications 30 Legal notices 31 One-year limited warranty 33 Introduction Congratulations on your purchase of the Rocketfish RF-AHD35 SATA Hard Drive Enclosure Kit.
User Manual (English)
Page 3
...drive. • Do not place anything heavy on top of this enclosure. • Do not drop or subject this enclosure to shock. • Do not place this enclosure close to your Windows PC and the enclosure in damp locations. Strong magnetic fields can affect the reliability of 3.0 .... Features • Multi-function storage solution for future reference. • Take precautions to and from the enclosure's hard drive. RF-AHD35 3 Keep this User Guide for your computer. • Supports SATA interface hard drive. • Connects to a computer using either an eSATA or USB 2.0 host port. ...
...drive. • Do not place anything heavy on top of this enclosure. • Do not drop or subject this enclosure to shock. • Do not place this enclosure close to your Windows PC and the enclosure in damp locations. Strong magnetic fields can affect the reliability of 3.0 .... Features • Multi-function storage solution for future reference. • Take precautions to and from the enclosure's hard drive. RF-AHD35 3 Keep this User Guide for your computer. • Supports SATA interface hard drive. • Connects to a computer using either an eSATA or USB 2.0 host port. ...
User Manual (English)
Page 4
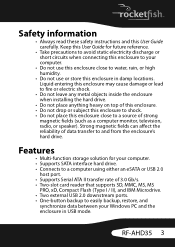
... or lie down while operating. • Supports Plug-and-Play and is hot swappable. • Has one card reader active indicator. Package contents • 3.5" SATA hard drive enclosure • A-B type USB cable • eSATA cable • Two utility CDs • Quick Setup Guide • Desktop dual-voltage power adapter with power cord... or eSATA port • Microsoft Windows 2000, Windows XP, Windows Vista, or Windows 7 operating system or Mac OS X version 10.3.x or higher operating system • 3.5" SATA hard drive 4
... or lie down while operating. • Supports Plug-and-Play and is hot swappable. • Has one card reader active indicator. Package contents • 3.5" SATA hard drive enclosure • A-B type USB cable • eSATA cable • Two utility CDs • Quick Setup Guide • Desktop dual-voltage power adapter with power cord... or eSATA port • Microsoft Windows 2000, Windows XP, Windows Vista, or Windows 7 operating system or Mac OS X version 10.3.x or higher operating system • 3.5" SATA hard drive 4
User Manual (English)
Page 7
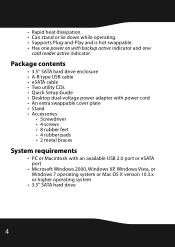
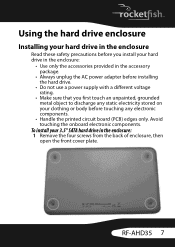
To install your 3.5" SATA hard drive in the accessory package. • Always unplug the AC power adapter before installing the hard drive. • Do not use a power supply with a ... the back of enclosure, then open the front cover plate. Using the hard drive enclosure Installing your hard drive in the enclosure Read these safety precautions before you install your clothing or body before touching any electronic components. • Handle the printed circuit board (PCB) edges only. Avoid touching the onboard electronic components. RF-AHD35 7
To install your 3.5" SATA hard drive in the accessory package. • Always unplug the AC power adapter before installing the hard drive. • Do not use a power supply with a ... the back of enclosure, then open the front cover plate. Using the hard drive enclosure Installing your hard drive in the enclosure Read these safety precautions before you install your clothing or body before touching any electronic components. • Handle the printed circuit board (PCB) edges only. Avoid touching the onboard electronic components. RF-AHD35 7
User Manual (English)
Page 8
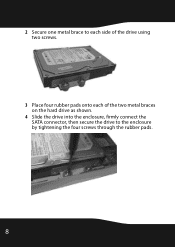
2 Secure one metal brace to each side of the drive using two screws. 3 Place four rubber pads onto each of the two metal braces on the hard drive as shown. 4 Slide the drive into the enclosure, firmly connect the SATA connector, then secure the drive to the enclosure by tightening the four screws through the rubber pads. 8
2 Secure one metal brace to each side of the drive using two screws. 3 Place four rubber pads onto each of the two metal braces on the hard drive as shown. 4 Slide the drive into the enclosure, firmly connect the SATA connector, then secure the drive to the enclosure by tightening the four screws through the rubber pads. 8
User Manual (English)
Page 10
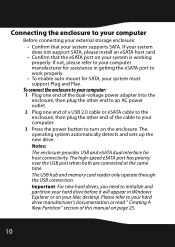
... to an AC power outlet. 2 Plug one end of a USB 2.0 cable or eSATA cable to the enclosure, then plug the other end of this manual on your system does not support SATA, please install an eSATA host card. • Confirm that your system must support Plug and Play. The ...operating system automatically detects and sets up the new drive. Notes: The enclosure provides USB and eSATA dual interface for SATA, your system supports SATA. Important: For new hard drives, you need to initialize and partition your Mac desktop. Please refer to your hard...
... to an AC power outlet. 2 Plug one end of a USB 2.0 cable or eSATA cable to the enclosure, then plug the other end of this manual on your system does not support SATA, please install an eSATA host card. • Confirm that your system must support Plug and Play. The ...operating system automatically detects and sets up the new drive. Notes: The enclosure provides USB and eSATA dual interface for SATA, your system supports SATA. Important: For new hard drives, you need to initialize and partition your Mac desktop. Please refer to your hard...
User Manual (English)
Page 29
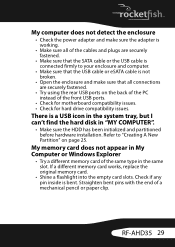
... • Try a different memory card of a mechanical pencil or paper clip. RF-AHD35 29 Refer to your enclosure and computer. • Make sure that the USB cable or eSATA cable is not broken. • Open the enclosure and make sure that the SATA cable or the USB cable is connected firmly to "Creating A New Partition...
... • Try a different memory card of a mechanical pencil or paper clip. RF-AHD35 29 Refer to your enclosure and computer. • Make sure that the USB cable or eSATA cable is not broken. • Open the enclosure and make sure that the SATA cable or the USB cable is connected firmly to "Creating A New Partition...