User Manual (English)
Page 2
Rocketfish RF-AHD35 3.5" Hard Drive Enclosure Kit Contents Introduction 2 Safety information 3 Features 3 Using the hard drive enclosure 7 Appendix 25 Troubleshooting 28 Specifications 30 Legal notices 31 One-year limited warranty 33 Introduction Congratulations on your purchase of the Rocketfish RF-AHD35 SATA Hard Drive Enclosure Kit. This enclosure also has a built-in USB 2.0 hub and memory card reader. 2 You can install a high-speed SATA hard drive into this enclosure and connect it to a computer using either a USB 2.0 or eSATA port.
Rocketfish RF-AHD35 3.5" Hard Drive Enclosure Kit Contents Introduction 2 Safety information 3 Features 3 Using the hard drive enclosure 7 Appendix 25 Troubleshooting 28 Specifications 30 Legal notices 31 One-year limited warranty 33 Introduction Congratulations on your purchase of the Rocketfish RF-AHD35 SATA Hard Drive Enclosure Kit. This enclosure also has a built-in USB 2.0 hub and memory card reader. 2 You can install a high-speed SATA hard drive into this enclosure and connect it to a computer using either a USB 2.0 or eSATA port.
User Manual (English)
Page 3
... not place this User Guide carefully. RF-AHD35 3 Safety information • Always read these safety instructions and this enclosure close to water, rain, or high humidity. • Do not use or store this User Guide for your computer. • Supports SATA interface hard drive. • Connects to a computer ...use this enclosure close to a source of this enclosure. • Do not drop or subject this enclosure to and from the enclosure's hard drive. Liquid entering this enclosure may cause damage or lead to fire or electric shock. • Do not leave any metal objects inside the...
... not place this User Guide carefully. RF-AHD35 3 Safety information • Always read these safety instructions and this enclosure close to water, rain, or high humidity. • Do not use or store this User Guide for your computer. • Supports SATA interface hard drive. • Connects to a computer ...use this enclosure close to a source of this enclosure. • Do not drop or subject this enclosure to and from the enclosure's hard drive. Liquid entering this enclosure may cause damage or lead to fire or electric shock. • Do not leave any metal objects inside the...
User Manual (English)
Page 4
Package contents • 3.5" SATA hard drive enclosure • A-B type USB cable • eSATA cable • Two utility CDs • Quick Setup Guide • Desktop dual-voltage power adapter with power cord &#... eSATA port • Microsoft Windows 2000, Windows XP, Windows Vista, or Windows 7 operating system or Mac OS X version 10.3.x or higher operating system • 3.5" SATA hard drive 4
Package contents • 3.5" SATA hard drive enclosure • A-B type USB cable • eSATA cable • Two utility CDs • Quick Setup Guide • Desktop dual-voltage power adapter with power cord &#... eSATA port • Microsoft Windows 2000, Windows XP, Windows Vista, or Windows 7 operating system or Mac OS X version 10.3.x or higher operating system • 3.5" SATA hard drive 4

User Manual (English)
Page 6
The hard drive is empty. 6 Data is being transmitted between your computer and the hard drive. Data is being transmitted between your computer and the card reader. The memory card reader slot is turned off. A memory card is turned on. Back POWER ON/OFF button eSATA port USB port DC power jack Status indicators LED indicators LED Description Backup button Card reader Solid Flashing Off Solid Flashing Off The hard drive is in the reader.
The hard drive is empty. 6 Data is being transmitted between your computer and the hard drive. Data is being transmitted between your computer and the card reader. The memory card reader slot is turned off. A memory card is turned on. Back POWER ON/OFF button eSATA port USB port DC power jack Status indicators LED indicators LED Description Backup button Card reader Solid Flashing Off Solid Flashing Off The hard drive is in the reader.
User Manual (English)
Page 7
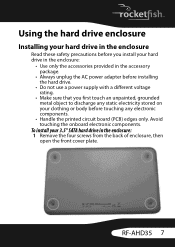
... any electronic components. • Handle the printed circuit board (PCB) edges only. Using the hard drive enclosure Installing your hard drive in the enclosure Read these safety precautions before you install your hard drive in the enclosure: • Use only the accessories provided in the accessory package. • ...Always unplug the AC power adapter before installing the hard drive. • Do not use a power supply with a different voltage rating. • Make sure that you first touch an unpainted...
... any electronic components. • Handle the printed circuit board (PCB) edges only. Using the hard drive enclosure Installing your hard drive in the enclosure Read these safety precautions before you install your hard drive in the enclosure: • Use only the accessories provided in the accessory package. • ...Always unplug the AC power adapter before installing the hard drive. • Do not use a power supply with a different voltage rating. • Make sure that you first touch an unpainted...
User Manual (English)
Page 8
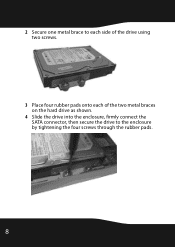
2 Secure one metal brace to each side of the drive using two screws. 3 Place four rubber pads onto each of the two metal braces on the hard drive as shown. 4 Slide the drive into the enclosure, firmly connect the SATA connector, then secure the drive to the enclosure by tightening the four screws through the rubber pads. 8
2 Secure one metal brace to each side of the drive using two screws. 3 Place four rubber pads onto each of the two metal braces on the hard drive as shown. 4 Slide the drive into the enclosure, firmly connect the SATA connector, then secure the drive to the enclosure by tightening the four screws through the rubber pads. 8
User Manual (English)
Page 10
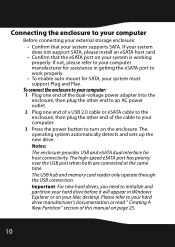
... when both are connected at the same time. The USB hub and memory card reader only operate through the USB connection. Please refer to your hard drive manufacturer's documentation or read " Creating A New Partition" section of the cable to your computer. 3 Press the power button to turn on page 25. 10 ...that the eSATA port on your Mac desktop. If your system does not support SATA, please install an eSATA host card. • Confirm that your hard drive before it will appear in getting the eSATA port to initialize and partition your system supports SATA. Important: For new...
... when both are connected at the same time. The USB hub and memory card reader only operate through the USB connection. Please refer to your hard drive manufacturer's documentation or read " Creating A New Partition" section of the cable to your computer. 3 Press the power button to turn on page 25. 10 ...that the eSATA port on your Mac desktop. If your system does not support SATA, please install an eSATA host card. • Confirm that your hard drive before it will appear in getting the eSATA port to initialize and partition your system supports SATA. Important: For new...
User Manual (English)
Page 11
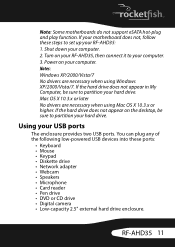
... USB ports. Notes: Windows XP/2000/Vista/7 No drivers are necessary when using Windows XP/2000/Vista/7. Using your computer. RF-AHD35 11 If the hard drive does not appear in My Computer, be sure to set up your computer. 2. Mac OS X 10.3.x or later No ...• Card reader • Pen drive • DVD or CD drive • Digital camera • Low-capacity 2.5" external hard drive enclosure. Note: Some motherboards do not support eSATA hot-plug and play function. Shut down your RF-AHD35: 1. If the hard drive does not appear on your RF-AHD35, then connect it to partition your ...
... USB ports. Notes: Windows XP/2000/Vista/7 No drivers are necessary when using Windows XP/2000/Vista/7. Using your computer. RF-AHD35 11 If the hard drive does not appear in My Computer, be sure to set up your computer. 2. Mac OS X 10.3.x or later No ...• Card reader • Pen drive • DVD or CD drive • Digital camera • Low-capacity 2.5" external hard drive enclosure. Note: Some motherboards do not support eSATA hot-plug and play function. Shut down your RF-AHD35: 1. If the hard drive does not appear on your RF-AHD35, then connect it to partition your ...
User Manual (English)
Page 13
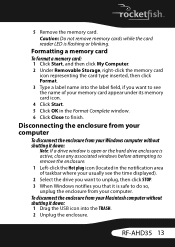
RF-AHD35 13 Caution: Do not remove memory cards while the card reader LED is safe to do so, unplug the enclosure from your Windows computer without ... want to finish. Disconnecting the enclosure from your computer To disconnect the enclosure from your Macintosh computer without shutting it down: Note: If a drive window is open or the hard drive enclosure is active, close any associated windows before attempting to remove the enclosure. 1 Left-click the Hot plug icon (located in the...
RF-AHD35 13 Caution: Do not remove memory cards while the card reader LED is safe to do so, unplug the enclosure from your Windows computer without ... want to finish. Disconnecting the enclosure from your computer To disconnect the enclosure from your Macintosh computer without shutting it down: Note: If a drive window is open or the hard drive enclosure is active, close any associated windows before attempting to remove the enclosure. 1 Left-click the Hot plug icon (located in the...
User Manual (English)
Page 25
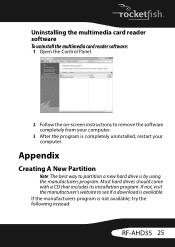
...'s website to see if a download is not available, try the following instead: RF-AHD35 25 If the manufacturers program is available. Appendix Creating A New Partition Note: The best way to partition a new hard drive is completely uninstalled, restart your computer. Most hard drives should come with a CD that includes its installation program. Uninstalling the multimedia card...
...'s website to see if a download is not available, try the following instead: RF-AHD35 25 If the manufacturers program is available. Appendix Creating A New Partition Note: The best way to partition a new hard drive is completely uninstalled, restart your computer. Most hard drives should come with a CD that includes its installation program. Uninstalling the multimedia card...

User Manual (English)
Page 26
... XP/2000/Vista/7: 1 Right click on "My Computer" and choose Manage. 2 Under "Storage" on the area with your computer. 1 Start up your internal hard drive using a new hard drive, you may need to initialize it reads "Disk #") and choose Initialize. (This step may not be able to see the... drive in Mac OS X 10.3 or higher: To initialize a Hard Drive: If you wish to recover the data, continuing may overwrite the existing information! The recommended partition type is "primary" and the...
... XP/2000/Vista/7: 1 Right click on "My Computer" and choose Manage. 2 Under "Storage" on the area with your computer. 1 Start up your internal hard drive using a new hard drive, you may need to initialize it reads "Disk #") and choose Initialize. (This step may not be able to see the... drive in Mac OS X 10.3 or higher: To initialize a Hard Drive: If you wish to recover the data, continuing may overwrite the existing information! The recommended partition type is "primary" and the...
User Manual (English)
Page 27
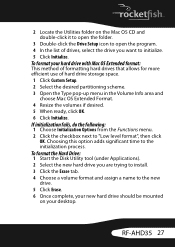
... the Mac OS CD and double-click it to open the folder. 3 Double-click the Drive Setup icon to initialize. 5 Click Initialize. RF-AHD35 27 To format the Hard Drive: 1 Start the Disk Utility tool (under Applications). 2 Select the new hard drive you are trying to install. 3 Click the Erase tab. 4 Choose a volume format and assign a name...
... the Mac OS CD and double-click it to open the folder. 3 Double-click the Drive Setup icon to initialize. 5 Click Initialize. RF-AHD35 27 To format the Hard Drive: 1 Start the Disk Utility tool (under Applications). 2 Select the new hard drive you are trying to install. 3 Click the Erase tab. 4 Choose a volume format and assign a name...

User Manual (English)
Page 28
... may not be able to recognize the partition on the hard drive because it will not mount on page 25. You should now be able to format the drive into a Mac partition and mount the drive Troubleshooting I do not see the additional drive in my system • If connecting with a FAT32 ... eSATA port on your system is damaged or not a valid format. Once formatted, connect the [name of enclosure] to initialize and partition your hard drive before it is working properly. Refer to create a useable partition on your Mac desktop. for assistance in getting the eSATA port to work properly....
... may not be able to recognize the partition on the hard drive because it will not mount on page 25. You should now be able to format the drive into a Mac partition and mount the drive Troubleshooting I do not see the additional drive in my system • If connecting with a FAT32 ... eSATA port on your system is damaged or not a valid format. Once formatted, connect the [name of enclosure] to initialize and partition your hard drive before it is working properly. Refer to create a useable partition on your Mac desktop. for assistance in getting the eSATA port to work properly....
User Manual (English)
Page 29
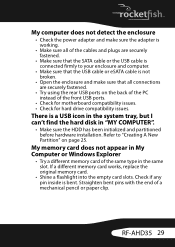
...USB ports on page 25. Straighten bent pins with the end of the front USB ports. • Check for motherboard compatibility issues. • Check for hard drive compatibility issues. There is bent. Check if any pin inside is a USB icon in the system tray, but I can't find the... hard disk in the same slot. My memory card does not appear in My Computer or Windows Explorer • Try a different memory card of the same type in "MY COMPUTER". • Make sure the HDD has been initialized and partitioned before hardware installation. RF-AHD35 29
...USB ports on page 25. Straighten bent pins with the end of the front USB ports. • Check for motherboard compatibility issues. • Check for hard drive compatibility issues. There is bent. Check if any pin inside is a USB icon in the system tray, but I can't find the... hard disk in the same slot. My memory card does not appear in My Computer or Windows Explorer • Try a different memory card of the same type in "MY COMPUTER". • Make sure the HDD has been initialized and partitioned before hardware installation. RF-AHD35 29
User Manual (English)
Page 30
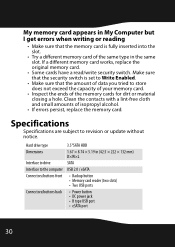
... does not exceed the capacity of your memory card. • Inspect the ends of the memory cards for dirt or material closing a hole. Hard drive type Dimensions Interface to drive Interface to the computer Connectors/buttons front Connectors/buttons back 3.5"SATA HDD 1.67 × 8.74 × 5.19 in (42.5 × 222 × 132...
... does not exceed the capacity of your memory card. • Inspect the ends of the memory cards for dirt or material closing a hole. Hard drive type Dimensions Interface to drive Interface to the computer Connectors/buttons front Connectors/buttons back 3.5"SATA HDD 1.67 × 8.74 × 5.19 in (42.5 × 222 × 132...

