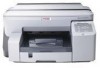
Configuration Guide
Page 4
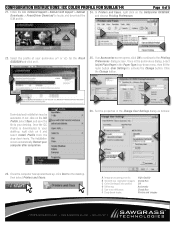
... low resolution images: Check Box C Color Settings/Color profile: Off D Dithering: Automatic E Use error diffusion: Check Box F Drop down menu: Photos and images [email protected] | WWW.SAWGRASSINK.COM | 866.290.3812 Set the properties in the Paper Type drop-down menu, then fill the radio button User Settings to your desktop. CONFIGURATION INSTRUCTIONS: ICC COLOR PROFILE FOR SUBLIJET-R Page 4 of your preference (v1 or v2) for the Ricoh GX5050N and click on it and select Install...
... low resolution images: Check Box C Color Settings/Color profile: Off D Dithering: Automatic E Use error diffusion: Check Box F Drop down menu: Photos and images [email protected] | WWW.SAWGRASSINK.COM | 866.290.3812 Set the properties in the Paper Type drop-down menu, then fill the radio button User Settings to your desktop. CONFIGURATION INSTRUCTIONS: ICC COLOR PROFILE FOR SUBLIJET-R Page 4 of your preference (v1 or v2) for the Ricoh GX5050N and click on it and select Install...

User Guide
Page 3
... Menu ...77 Changing the Language Menu...77 Maintaining the Printer Using Utilities ...78 Nozzle Check ...78 Head-cleaning...79 Head-flushing...80 Adjust Print-head Positions...80 Registration...82 Adjust Paper Feed ...83 Restore Defaults/Other Settings ...85 Restoring the Settings to Their Defaults ...85 Specifying an I/O Timeout ...85 Troubleshooting Printing Will Not Start ...89 Power Cannot Be Turned On ...89 Paper Will Not Feed Even When the Power Is On ...89 An Error Occurs ...89 Points to Remember when Printer...
... Menu ...77 Changing the Language Menu...77 Maintaining the Printer Using Utilities ...78 Nozzle Check ...78 Head-cleaning...79 Head-flushing...80 Adjust Print-head Positions...80 Registration...82 Adjust Paper Feed ...83 Restore Defaults/Other Settings ...85 Restoring the Settings to Their Defaults ...85 Specifying an I/O Timeout ...85 Troubleshooting Printing Will Not Start ...89 Power Cannot Be Turned On ...89 Paper Will Not Feed Even When the Power Is On ...89 An Error Occurs ...89 Points to Remember when Printer...
User Guide
Page 5
... Cleaning ...139 Moving ...140 Moving a Short Distance...140 Moving a Long Distance ...140 Disposing ...142 When Not Using for a Long Period of Time...143 Preparing for Printing Confirming the Connection Method...145 Local Connection...145 Network Connection ...145 Using this Printer as the Windows Printing Port ...145 Using as a Network Printer ...146 Installing the Printer Driver (USB)...147 Sharing the Printer...149 Setting Up a Server...149 Setting Up a Client Computer ...149 Using the SmartDeviceMonitor for Client Port...
... Cleaning ...139 Moving ...140 Moving a Short Distance...140 Moving a Long Distance ...140 Disposing ...142 When Not Using for a Long Period of Time...143 Preparing for Printing Confirming the Connection Method...145 Local Connection...145 Network Connection ...145 Using this Printer as the Windows Printing Port ...145 Using as a Network Printer ...146 Installing the Printer Driver (USB)...147 Sharing the Printer...149 Setting Up a Server...149 Setting Up a Client Computer ...149 Using the SmartDeviceMonitor for Client Port...

User Guide
Page 6
... ...179 Printing on Thick Paper...181 Canceling Printing ...183 Canceling Printing from the Status Monitor...183 Canceling Printing Using the [Job Reset] Key of the Printer 183 Canceling Printing from the Taskbar...184 Adjusting Print Quality...185 Printing Using Preset Print Quality Settings ...185 Printing in Black and White ...185 Saving Colour Ink When Printing...186 Printing with Print Quality Settings You Want...186 Changing Image Printing Method...186 Correcting the Hue of Digital Photos...187 Printing Low Resolution Images Smoothly ...187 Changing the Dither Pattern...188 Using Error...
... ...179 Printing on Thick Paper...181 Canceling Printing ...183 Canceling Printing from the Status Monitor...183 Canceling Printing Using the [Job Reset] Key of the Printer 183 Canceling Printing from the Taskbar...184 Adjusting Print Quality...185 Printing Using Preset Print Quality Settings ...185 Printing in Black and White ...185 Saving Colour Ink When Printing...186 Printing with Print Quality Settings You Want...186 Changing Image Printing Method...186 Correcting the Hue of Digital Photos...187 Printing Low Resolution Images Smoothly ...187 Changing the Dither Pattern...188 Using Error...

User Guide
Page 70
... print blank pages. Unidirectional printing produces higher quality print, but bidirectional printing is done unidirectionally or bidirectionally according to print on the paper as fully as possible. z Always Printing is specified by the printer driver. This setting is disabled if the number of pages to print. z Off z On Default: Off Uni-direct.Prt. Making Printer Settings Default: 8 1/2 x 11 Copies Specify the number of a sheet. z 1-999 Edge-Edge Print Specify whether to print on both sides of pages to print...
... print blank pages. Unidirectional printing produces higher quality print, but bidirectional printing is done unidirectionally or bidirectionally according to print on the paper as fully as possible. z Always Printing is specified by the printer driver. This setting is disabled if the number of pages to print. z Off z On Default: Off Uni-direct.Prt. Making Printer Settings Default: 8 1/2 x 11 Copies Specify the number of a sheet. z 1-999 Edge-Edge Print Specify whether to print on both sides of pages to print...

User Guide
Page 90
... you attempt to print, print does not start and an "Error Message" appears. Points to a printer from the Printers icon, open Printer Properties. On the [Sharing] tab, delete [Comment]. 3. Troubleshooting z Check the printer properties settings. In the [Change User Settings] dialog box, on the client side. If this occurs, make the necessary settings under Windows 98/Me When running printer sharing from a print server and connecting to Remember when Printer Sharing under "Print Server Settings". 3. To Reset a Client Computer...
... you attempt to print, print does not start and an "Error Message" appears. Points to a printer from the Printers icon, open Printer Properties. On the [Sharing] tab, delete [Comment]. 3. Troubleshooting z Check the printer properties settings. In the [Change User Settings] dialog box, on the client side. If this occurs, make the necessary settings under Windows 98/Me When running printer sharing from a print server and connecting to Remember when Printer Sharing under "Print Server Settings". 3. To Reset a Client Computer...

User Guide
Page 91
... "Loading Paper". z The paper is cleared, paper does not feed. z Make sure that the guide board is closed . See p.92 "Paper Jam". Load the paper correctly. z Remove the loaded paper and replace it is, straighten the curl. If it with compatible paper. Remove the duplex unit and press both sides. The guide board is not closed . Troubleshooting Paper Is Not Fed or Delivered Normally If the printer is operating but paper will not feed or paper jams multiple times, check...
... "Loading Paper". z The paper is cleared, paper does not feed. z Make sure that the guide board is closed . See p.92 "Paper Jam". Load the paper correctly. z Remove the loaded paper and replace it is, straighten the curl. If it with compatible paper. Remove the duplex unit and press both sides. The guide board is not closed . Troubleshooting Paper Is Not Fed or Delivered Normally If the printer is operating but paper will not feed or paper jams multiple times, check...

User Guide
Page 103
..."Printing on Various Paper Types". Have the print-heads been aligned? Troubleshooting Print Results Are Not Satisfactory If there is a problem with the printer's location? For envelopes, set the lever to check whether the print head nozzles are doubled, align the print-heads. Has the printer not been used within six months of the Printer Have you printed the nozzle check test pattern? Is an old Print cartridge being used ? Print the nozzle check test pattern and clean the print-heads as necessary. Print cartridges should be opened . 103 Print the nozzle check test pattern...
..."Printing on Various Paper Types". Have the print-heads been aligned? Troubleshooting Print Results Are Not Satisfactory If there is a problem with the printer's location? For envelopes, set the lever to check whether the print head nozzles are doubled, align the print-heads. Has the printer not been used within six months of the Printer Have you printed the nozzle check test pattern? Is an old Print cartridge being used ? Print the nozzle check test pattern and clean the print-heads as necessary. Print cartridges should be opened . 103 Print the nozzle check test pattern...

User Guide
Page 104
... output tray without touching the printed side, and then let them one -sided printing is loaded. Troubleshooting Does the paper type setting match? Make sure that have just been printed because these require longer than a genuine Print cartridge or using inkjet plain paper. If extremely thick or thin paper is used too thick or thin? Is the paper loaded in which side should be printed on the [Image Adjustments] tab, under [Dithering], deselect the [Use error diffusion] check box. Changing the Printer Driver Setting...
... output tray without touching the printed side, and then let them one -sided printing is loaded. Troubleshooting Does the paper type setting match? Make sure that have just been printed because these require longer than a genuine Print cartridge or using inkjet plain paper. If extremely thick or thin paper is used too thick or thin? Is the paper loaded in which side should be printed on the [Image Adjustments] tab, under [Dithering], deselect the [Use error diffusion] check box. Changing the Printer Driver Setting...

User Guide
Page 106
... envelope selector ? Print the nozzle check test pattern and clean the print-heads as necessary. Check the colour setting of the application and the colour print setting of colours been adjusted? Try printing with inkjet plain paper? Colours Do Not Match the Displayed Image If there are differences between printed sheets during duplex printing? Use the colour matching function to the status of displayed images. If bidirectional communication is Disabled". Has the hue of the printer driver. See p.189 "Changing...
... envelope selector ? Print the nozzle check test pattern and clean the print-heads as necessary. Check the colour setting of the application and the colour print setting of colours been adjusted? Try printing with inkjet plain paper? Colours Do Not Match the Displayed Image If there are differences between printed sheets during duplex printing? Use the colour matching function to the status of displayed images. If bidirectional communication is Disabled". Has the hue of the printer driver. See p.189 "Changing...
User Guide
Page 108
... wait... See p.45 "Replacing a Print Cartridge". Printing... Close Top Cover or reset the Duplex Unit correctly The top cover is open or the duplex unit isn't set correctly. Switch the printer off and then on hand. To print, put the printer online. Guide Board is open/Close the Guide Board The guide board is open . Hardware Problem Ethernet An error in the indicated print cartridge has run out. Low Ink The ink runs out. The printer is able to...
... wait... See p.45 "Replacing a Print Cartridge". Printing... Close Top Cover or reset the Duplex Unit correctly The top cover is open or the duplex unit isn't set correctly. Switch the printer off and then on hand. To print, put the printer online. Guide Board is open/Close the Guide Board The guide board is open . Hardware Problem Ethernet An error in the indicated print cartridge has run out. Low Ink The ink runs out. The printer is able to...

User Guide
Page 109
... for the tray on the printed OHP transparency is changing its settings. The ink on the control panel. Waiting... The printer is abnormally low. Cannot use . See p.112 "No Paper/Tray Not Detected (Tray 1)", p.119 "Paper Size Mismatch/Paper Type Mismatch (Tray 2)", p.116 "No Paper/Tray Not Detected (Bypass Tray)". Load the tray with paper of paper in Energy Saver mode. Alternately, press the [Form Feed] key, select a tray containing paper of Printable Temperature Range". Install the print cartridge correctly. See p.126 "Cover Open / Print Cartridge(s) Not...
... for the tray on the printed OHP transparency is changing its settings. The ink on the control panel. Waiting... The printer is abnormally low. Cannot use . See p.112 "No Paper/Tray Not Detected (Tray 1)", p.119 "Paper Size Mismatch/Paper Type Mismatch (Tray 2)", p.116 "No Paper/Tray Not Detected (Bypass Tray)". Load the tray with paper of paper in Energy Saver mode. Alternately, press the [Form Feed] key, select a tray containing paper of Printable Temperature Range". Install the print cartridge correctly. See p.126 "Cover Open / Print Cartridge(s) Not...

User Guide
Page 112
... Start Menu" No Paper/Tray Not Detected (Tray 1) Tray 1 is empty or the paper in more detail. Click [User Guide...] to display the page corresponding to the error where you want to connect the printer to solve the problem in it is required to check the port settings and the connection between the printer and computer. 1. z To load the tray, see p.151 "Using the SmartDeviceMonitor for a shared printer, the following : z Load the tray. Troubleshooting Status Monitor Errors If an error...
... Start Menu" No Paper/Tray Not Detected (Tray 1) Tray 1 is empty or the paper in more detail. Click [User Guide...] to display the page corresponding to the error where you want to connect the printer to solve the problem in it is required to check the port settings and the connection between the printer and computer. 1. z To load the tray, see p.151 "Using the SmartDeviceMonitor for a shared printer, the following : z Load the tray. Troubleshooting Status Monitor Errors If an error...

User Guide
Page 149
... print server is inserted, the [Drivers, Manual & Utility] dialog box appears. When the CD-ROM is connected. 1. Click [Local Area Connection] to highlight it does not, doubleclick the CD-ROM drive icon under [My Computer] or [Explorer], and then double-click [SETUP.EXE]. 149 On the [Start] menu, point to [Settings], and then click [Control Panel]. 2. z For Windows 2000/XP, Windows Server 2003, and Windows NT 4.0, log on the [File] menu. 9. Make...
... print server is inserted, the [Drivers, Manual & Utility] dialog box appears. When the CD-ROM is connected. 1. Click [Local Area Connection] to highlight it does not, doubleclick the CD-ROM drive icon under [My Computer] or [Explorer], and then double-click [SETUP.EXE]. 149 On the [Start] menu, point to [Settings], and then click [Control Panel]. 2. z For Windows 2000/XP, Windows Server 2003, and Windows NT 4.0, log on the [File] menu. 9. Make...
User Guide
Page 151
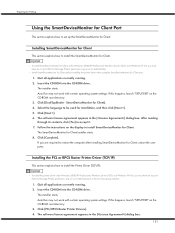
... before installing the printer driver when using the SmartDeviceMonitor for Client installer starts. 8. The installer starts. Follow the instructions on the display to install the Printer Driver (TCP/IP). If you must have an account that has Manage Printers permission. If this happens, launch "SETUP.EXE" on as an Administrators or Power Users group member. 1. Click [Next >]. 6. The SmartDeviceMonitor for Client port. 1. Click [PCL/RPCS Raster Printer Drivers]. 4. Preparing for Printing Using...
... before installing the printer driver when using the SmartDeviceMonitor for Client installer starts. 8. The installer starts. Follow the instructions on the display to install the Printer Driver (TCP/IP). If you must have an account that has Manage Printers permission. If this happens, launch "SETUP.EXE" on as an Administrators or Power Users group member. 1. Click [Next >]. 6. The SmartDeviceMonitor for Client port. 1. Click [PCL/RPCS Raster Printer Drivers]. 4. Preparing for Printing Using...
User Guide
Page 152
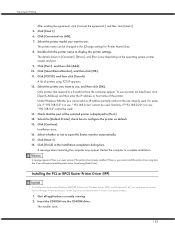
... the operating system, printer model, and port. 9. Double-click the printer name to open the Status monitor automatically. 17. Click [SmartDeviceMonitor], and then click [OK]. 11. A message about restarting the computer may appear. A list of the printer. Select the printer you cannot install the printer driver using Auto Run. Under Windows 98/Me, you still want to complete installation. Select the [Default Printer] check box to install the printer driver, install using TCP/IP appears. 12...
... the operating system, printer model, and port. 9. Double-click the printer name to open the Status monitor automatically. 17. Click [SmartDeviceMonitor], and then click [OK]. 11. A message about restarting the computer may appear. A list of the printer. Select the printer you cannot install the printer driver using Auto Run. Under Windows 98/Me, you still want to complete installation. Select the [Default Printer] check box to install the printer driver, install using TCP/IP appears. 12...
User Guide
Page 156
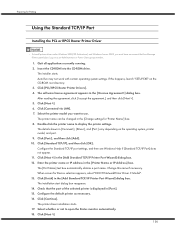
... "SETUP.EXE" on the operating system, printer model, and port. 9. Check that has Manage Printers permission. Configure the default printer as an Administrators or Power Users group member. 1. Click [Continue]. Click [Next >]. 156 The installer starts. Click [Connected via LAN]. 7. Enter the printer name or IP address in the [] dialog box. Insert the CD-ROM into the CD-ROM drive. Double-click the printer name to open the Status monitor automatically. 18...
... "SETUP.EXE" on the operating system, printer model, and port. 9. Check that has Manage Printers permission. Configure the default printer as an Administrators or Power Users group member. 1. Click [Continue]. Click [Next >]. 156 The installer starts. Click [Connected via LAN]. 7. Enter the printer name or IP address in the [] dialog box. Insert the CD-ROM into the CD-ROM drive. Double-click the printer name to open the Status monitor automatically. 18...
User Guide
Page 158
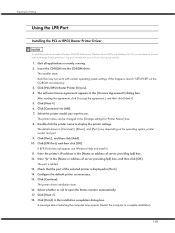
... or address of server providing lpd] box. 12. Double-click the printer name to open the Status monitor automatically. 17. Enter the printer's IP address in the [Change settings for Printing Using the LPR Port Installing the PCL or RPCS Raster Printer Driver z To install this happens, launch "SETUP.EXE" on the CD-ROM root directory. 3. Click [Next >]. 6. Enter "lp" in the installation completion dialog box. The printer driver installation starts 16. A message about restarting...
... or address of server providing lpd] box. 12. Double-click the printer name to open the Status monitor automatically. 17. Enter the printer's IP address in the [Change settings for Printing Using the LPR Port Installing the PCL or RPCS Raster Printer Driver z To install this happens, launch "SETUP.EXE" on the CD-ROM root directory. 3. Click [Next >]. 6. Enter "lp" in the installation completion dialog box. The printer driver installation starts 16. A message about restarting...
User Guide
Page 160
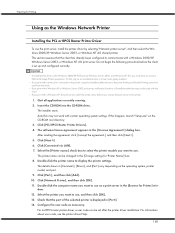
... connect the print server to use , and then click [OK]. 13. Select the printer you want to the printer. 1. Preparing for Printing Using as the Windows Network Printer Installing the PCL or RPCS Raster Printer Driver To use as a print server in [Port:]. 14. The software license agreement appears in the [Change settings for 'Printer Name'] box. 8. Select the [Printer name:] check box to select the printer models you want to use . For information about user code, see the printer driver Help...
... connect the print server to use , and then click [OK]. 13. Select the printer you want to the printer. 1. Preparing for Printing Using as the Windows Network Printer Installing the PCL or RPCS Raster Printer Driver To use as a print server in [Port:]. 14. The software license agreement appears in the [Change settings for 'Printer Name'] box. 8. Select the [Printer name:] check box to select the printer models you want to use . For information about user code, see the printer driver Help...
User Guide
Page 162
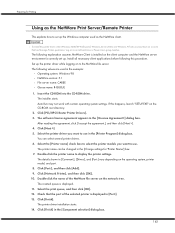
... port of the NetWare file server on to display the printer settings. Click [Port:], and then click [Add]. 9. Click [Network Printer], and then click [OK]. 10. Double-click the name of the selected printer is displayed. 11. Check that has Manage Printers permission. Set up the Windows computer used in [Port:]. 13. Auto Run may not work with certain operating system settings. Click [PCL/RPCS Raster Printer Drivers]. 3. The installer starts. Click [Finish]. Select the print...
... port of the NetWare file server on to display the printer settings. Click [Port:], and then click [Add]. 9. Click [Network Printer], and then click [OK]. 10. Double-click the name of the selected printer is displayed. 11. Check that has Manage Printers permission. Set up the Windows computer used in [Port:]. 13. Auto Run may not work with certain operating system settings. Click [PCL/RPCS Raster Printer Drivers]. 3. The installer starts. Click [Finish]. Select the print...


