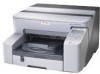

User Guide
Page 8
... Printer Driver ...143 Using the LPR Port...145 Installing the PCL or RPCS Raster Printer Driver ...145 Using as the Windows Network Printer ...147 Installing the PCL or RPCS Raster Printer Driver ...147 Using as the NetWare Print Server/Remote Printer ...149 Form Feed...150 Banner Page ...150 Printing after Resetting the Printer...150 If a Message Appears during Installation ...151 Making Option Settings for the Printer ...152 Conditions for Bidirectional Communication...152 If Bidirectional Communication is Disabled...152 Printer Driver Two Types of Printer...
... Printer Driver ...143 Using the LPR Port...145 Installing the PCL or RPCS Raster Printer Driver ...145 Using as the Windows Network Printer ...147 Installing the PCL or RPCS Raster Printer Driver ...147 Using as the NetWare Print Server/Remote Printer ...149 Form Feed...150 Banner Page ...150 Printing after Resetting the Printer...150 If a Message Appears during Installation ...151 Making Option Settings for the Printer ...152 Conditions for Bidirectional Communication...152 If Bidirectional Communication is Disabled...152 Printer Driver Two Types of Printer...

User Guide
Page 9
... ...166 Printing on Thick Paper...168 Canceling Printing ...170 Canceling Printing from the Status Monitor...170 Canceling Printing Using the [Job Reset] Key of the Printer 170 Canceling Printing from the Taskbar...171 Adjusting Print Quality...172 Printing Using Preset Print Quality Settings ...172 Printing in Black and White ...172 Saving Colour Ink When Printing...173 Printing with Print Quality Settings You Want...173 Changing Image Printing Method...173 Correcting the Hue of Digital Photos...174 Printing Low Resolution Images Smoothly ...174 Changing the Dither Pattern...175 Using Error...
... ...166 Printing on Thick Paper...168 Canceling Printing ...170 Canceling Printing from the Status Monitor...170 Canceling Printing Using the [Job Reset] Key of the Printer 170 Canceling Printing from the Taskbar...171 Adjusting Print Quality...172 Printing Using Preset Print Quality Settings ...172 Printing in Black and White ...172 Saving Colour Ink When Printing...173 Printing with Print Quality Settings You Want...173 Changing Image Printing Method...173 Correcting the Hue of Digital Photos...174 Printing Low Resolution Images Smoothly ...174 Changing the Dither Pattern...175 Using Error...

User Guide
Page 66
... unidirectionally or bidirectionally according to print blank pages. Making Printer Settings Default: 8 1/2 x 11 Copies Specify the number of pages to print is specified by the printer driver. This setting is disabled if the number of pages to print. Specify whether to the paper type. Unidirectional printing produces higher quality print, but bidirectional printing is done unidirectionally or bidirectionally according to print unidirectionally or bidirectionally. If the envelope selector is set to the forward position , printing is faster.
... unidirectionally or bidirectionally according to print blank pages. Making Printer Settings Default: 8 1/2 x 11 Copies Specify the number of pages to print is specified by the printer driver. This setting is disabled if the number of pages to print. Specify whether to the paper type. Unidirectional printing produces higher quality print, but bidirectional printing is done unidirectionally or bidirectionally according to print unidirectionally or bidirectionally. If the envelope selector is set to the forward position , printing is faster.

User Guide
Page 86
...running printer sharing from a print server and connecting to a printer from the Printers icon, open Printer Properties. Printer Server Settings On the print server, from a Windows 98/Me computer, there is being used . To Reset a Client Computer 1. Reinstall the printer driver on the Control Panel". z Check whether the latest printer driver is a risk of printer driver installation failure on both the print server and the client: Details of "Printer Server Settings": 1. For details, see p.238 "Checking the Current Printer Driver Version". see p.100 "Error & Status Messages on...
...running printer sharing from a print server and connecting to a printer from the Printers icon, open Printer Properties. Printer Server Settings On the print server, from a Windows 98/Me computer, there is being used . To Reset a Client Computer 1. Reinstall the printer driver on the Control Panel". z Check whether the latest printer driver is a risk of printer driver installation failure on both the print server and the client: Details of "Printer Server Settings": 1. For details, see p.238 "Checking the Current Printer Driver Version". see p.100 "Error & Status Messages on...

User Guide
Page 87
... curl. Paper jams multiple times. Printing densely coloured images on the Status monitor, follow the instructions to even the edges. If it clicks closed. Check the position of the paper guides of the paper tray do not match the paper loaded. See p.85 "Paper Jam". Troubleshooting Paper Is Not Fed or Delivered Normally If the printer is not loaded properly. Adjust the paper guides and load the paper again. Load the paper correctly. p.103 "Status Monitor Errors". 84 Remove the duplex...
... curl. Paper jams multiple times. Printing densely coloured images on the Status monitor, follow the instructions to even the edges. If it clicks closed. Check the position of the paper guides of the paper tray do not match the paper loaded. See p.85 "Paper Jam". Troubleshooting Paper Is Not Fed or Delivered Normally If the printer is not loaded properly. Adjust the paper guides and load the paper again. Load the paper correctly. p.103 "Status Monitor Errors". 84 Remove the duplex...

User Guide
Page 98
... nozzles of the print-heads may be addressed. See p.71 "Nozzle Check" and p.72 "Head-cleaning". Is an old Print cartridge being used for everything else, set the lever to the rear position ; for a long time? If the image is fuzzy or lines are all ejecting ink properly, and, if necessary, carry out head cleaning or head-flushing. See p.73 "Adjust Print-head Positions", p.71 "Nozzle Check", and p.72 "Head-cleaning". Is there a problem with the quality of the printing...
... nozzles of the print-heads may be addressed. See p.71 "Nozzle Check" and p.72 "Head-cleaning". Is an old Print cartridge being used for everything else, set the lever to the rear position ; for a long time? If the image is fuzzy or lines are all ejecting ink properly, and, if necessary, carry out head cleaning or head-flushing. See p.73 "Adjust Print-head Positions", p.71 "Nozzle Check", and p.72 "Head-cleaning". Is there a problem with the quality of the printing...

User Guide
Page 99
... Paper Sizes and Quantities". Using a cartridge other than normal to [RAW] or [EMF] in the correct orientation? See p.123 "Recommended Consumables". Are you printing on the wrong side of ink is used , the print-heads will rub the paper and ink will lower the print quality and could cause a breakdown. In the [Change User Settings] dialog box, on Various Paper Types". See p.160 "Printing on the [Image Adjustments] tab, under [Dithering], deselect the [Use error diffusion] check...
... Paper Sizes and Quantities". Using a cartridge other than normal to [RAW] or [EMF] in the correct orientation? See p.123 "Recommended Consumables". Are you printing on the wrong side of ink is used , the print-heads will rub the paper and ink will lower the print quality and could cause a breakdown. In the [Change User Settings] dialog box, on Various Paper Types". See p.160 "Printing on the [Image Adjustments] tab, under [Dithering], deselect the [Use error diffusion] check...

User Guide
Page 101
... "Head-cleaning" and p.71 "Nozzle Check". Does the paper type setting match? On the [Printer Configuration] tab, in the [Sheet-dry Print Delay...] dialog box, change automatically according to Envelope Mode, use uni-directional printing only] check box. See p.152 "If Bidirectional Communication is not enabled, the tone of printed images might differ from that the paper type setting of the printer driver matches the type of paper loaded. Troubleshooting How can I prevent ink transfer between colours of colours been adjusted...
... "Head-cleaning" and p.71 "Nozzle Check". Does the paper type setting match? On the [Printer Configuration] tab, in the [Sheet-dry Print Delay...] dialog box, change automatically according to Envelope Mode, use uni-directional printing only] check box. See p.152 "If Bidirectional Communication is not enabled, the tone of printed images might differ from that the paper type setting of the printer driver matches the type of paper loaded. Troubleshooting How can I prevent ink transfer between colours of colours been adjusted...

User Guide
Page 102
... position . When bidirectional printing is performed, and lines and characters are blurred, align the print-heads. If the problem persists, print the nozzle check test pattern and clean the print-heads as necessary. Have you changed Printable area? Have the settings for everything else, set correctly? Does the envelope selector setting match? See p.160 "Printing on Various Paper Types". Is Binding Margins set the lever to [Maximum]. Troubleshooting Positions Do Not Match the Displayed Image If the position of...
... position . When bidirectional printing is performed, and lines and characters are blurred, align the print-heads. If the problem persists, print the nozzle check test pattern and clean the print-heads as necessary. Have you changed Printable area? Have the settings for everything else, set correctly? Does the envelope selector setting match? See p.160 "Printing on Various Paper Types". Is Binding Margins set the lever to [Maximum]. Troubleshooting Positions Do Not Match the Displayed Image If the position of...
User Guide
Page 103
... message appears. See p.38 "Replacing a Print Cartridge". Close Top Cover or reset the Duplex Unit correctly The top cover is too hot or cold at start-up.Wait until "Ready" appears on . Offline The printer is printing. The printer is open . Close the guide board. 100 Temp. alert Please wait... Low Ink The ink runs out. Change the indicated print cartridge. Switch the printer off and then on the control panel. Change the print cartridge. Printing... Hardware Problem Ethernet...
... message appears. See p.38 "Replacing a Print Cartridge". Close Top Cover or reset the Duplex Unit correctly The top cover is too hot or cold at start-up.Wait until "Ready" appears on . Offline The printer is printing. The printer is open . Close the guide board. 100 Temp. alert Please wait... Low Ink The ink runs out. Change the indicated print cartridge. Switch the printer off and then on the control panel. Change the print cartridge. Printing... Hardware Problem Ethernet...

User Guide
Page 104
... size, and then print. If the message reappears, contact your service representative. See p.106 "Paper Size Mismatch/Paper Type Mismatch (Tray 1)", p.108 "Paper Size Mismatch/Paper Type Mismatch (Bypass Tray)". See p.113 "Cover Open / Print Cartridge(s) Not Detected". The printer is changing its settings. See p.118 "Out of the specified size, and then change The printer is ready for the tray on . Switch the printer off and then on the printed OHP transparency is abnormally low. Troubleshooting Reset Cartridge No print cartridge has been installed...
... size, and then print. If the message reappears, contact your service representative. See p.106 "Paper Size Mismatch/Paper Type Mismatch (Tray 1)", p.108 "Paper Size Mismatch/Paper Type Mismatch (Bypass Tray)". See p.113 "Cover Open / Print Cartridge(s) Not Detected". The printer is changing its settings. See p.118 "Out of the specified size, and then change The printer is ready for the tray on . Switch the printer off and then on the printed OHP transparency is abnormally low. Troubleshooting Reset Cartridge No print cartridge has been installed...

User Guide
Page 106
... port, see p.31 "Loading Paper". z Cancel the print job. The printer driver must also be addressed. z Under Windows 98/Me, check that the power of the printer. See p.136 "Setting Up a Server" and p.136 "Setting Up a Client Computer". z To load the tray, see p.138 "Using the SmartDeviceMonitor for a shared printer, the following : z Load the tray. z To change the port setting. Troubleshooting Status Monitor Errors If an error occurs with the printer, Status Monitor displays an error message. Click [User Guide...] to display the page corresponding to the error...
... port, see p.31 "Loading Paper". z Cancel the print job. The printer driver must also be addressed. z Under Windows 98/Me, check that the power of the printer. See p.136 "Setting Up a Server" and p.136 "Setting Up a Client Computer". z To load the tray, see p.138 "Using the SmartDeviceMonitor for a shared printer, the following : z Load the tray. z To change the port setting. Troubleshooting Status Monitor Errors If an error occurs with the printer, Status Monitor displays an error message. Click [User Guide...] to display the page corresponding to the error...

User Guide
Page 134
... RPCS Raster Printer Driver ...143 Using the LPR Port...145 Installing the PCL or RPCS Raster Printer Driver ...145 Using as the Windows Network Printer ...147 Installing the PCL or RPCS Raster Printer Driver ...147 Using as the NetWare Print Server/Remote Printer ...149 Form Feed...150 Banner Page ...150 Printing after Resetting the Printer...150 If a Message Appears during Installation ...151 Making Option Settings for the Printer ...152 Conditions for Bidirectional Communication...152 If Bidirectional Communication is Disabled...152...
... RPCS Raster Printer Driver ...143 Using the LPR Port...145 Installing the PCL or RPCS Raster Printer Driver ...145 Using as the Windows Network Printer ...147 Installing the PCL or RPCS Raster Printer Driver ...147 Using as the NetWare Print Server/Remote Printer ...149 Form Feed...150 Banner Page ...150 Printing after Resetting the Printer...150 If a Message Appears during Installation ...151 Making Option Settings for the Printer ...152 Conditions for Bidirectional Communication...152 If Bidirectional Communication is Disabled...152...

User Guide
Page 139
...). z For Windows 2000/XP, Windows Server 2003, and Windows NT 4.0, log on as a client computer. When starting Windows, a wizard for Microsoft Networks] check box. 5. Preparing for Printing Sharing the Printer Setting Up a Server Follow the procedure below to the shared printer. z For Windows 2000/XP, Windows Server 2003, and Windows NT 4.0, log on the [File] menu. 9. The print server is a computer used to set up Connections]. 3. Select the [Client for adding new hardware may open. Click...
...). z For Windows 2000/XP, Windows Server 2003, and Windows NT 4.0, log on as a client computer. When starting Windows, a wizard for Microsoft Networks] check box. 5. Preparing for Printing Sharing the Printer Setting Up a Server Follow the procedure below to the shared printer. z For Windows 2000/XP, Windows Server 2003, and Windows NT 4.0, log on the [File] menu. 9. The print server is a computer used to set up Connections]. 3. Select the [Client for adding new hardware may open. Click...

User Guide
Page 141
... drive. Follow the instructions on the display to restart the computer after installing SmartDeviceMonitor for Client, restart the computer. If you must have an account that has Manage Printers permission. Log on as an Administrators or Power Users group member. 1. The SmartDeviceMonitor for Client]. 4. Auto Run may not work with certain operating system settings. Preparing for Printing Using the SmartDeviceMonitor for Client Port...
... drive. Follow the instructions on the display to restart the computer after installing SmartDeviceMonitor for Client, restart the computer. If you must have an account that has Manage Printers permission. Log on as an Administrators or Power Users group member. 1. The SmartDeviceMonitor for Client]. 4. Auto Run may not work with certain operating system settings. Preparing for Printing Using the SmartDeviceMonitor for Client Port...

User Guide
Page 142
... to install the printer driver, install using [Add Printer]. Click [Continue]. Select whether or not to display the printer settings. z A message appears if there is a newer version of the selected printer is in the [Change settings for Printing After reading the agreement, click [I accept the agreement.], and then click [Next >]. 5. For this, log on the operating system, printer model, and port. 9. Double-click the printer name to open the Status monitor automatically...
... to install the printer driver, install using [Add Printer]. Click [Continue]. Select whether or not to display the printer settings. z A message appears if there is a newer version of the selected printer is in the [Change settings for Printing After reading the agreement, click [I accept the agreement.], and then click [Next >]. 5. For this, log on the operating system, printer model, and port. 9. Double-click the printer name to open the Status monitor automatically...
User Guide
Page 146
..., printer model, and port. 9. Configure the Standard TCP/IP port settings, and then see Windows Help if [Standard TCP/IP Port] does not appear. 11. Change this happens, launch "SETUP.EXE" on as necessary. 16. Configure the default printer as an Administrators or Power Users group member. 1. Click [Continue]. Click [Next >]. 143 Click [PCL/RPCS Raster Printer Drivers]. 4. Double-click the printer name to open the Status monitor automatically. 18. Check that has Manage Printers...
..., printer model, and port. 9. Configure the Standard TCP/IP port settings, and then see Windows Help if [Standard TCP/IP Port] does not appear. 11. Change this happens, launch "SETUP.EXE" on as necessary. 16. Configure the default printer as an Administrators or Power Users group member. 1. Click [Continue]. Click [Next >]. 143 Click [PCL/RPCS Raster Printer Drivers]. 4. Double-click the printer name to open the Status monitor automatically. 18. Check that has Manage Printers...

User Guide
Page 148
... [I accept the agreement.], and then click [Next >]. 5. Click [Connected via LAN]. 7. If [LPR Port] does not appear, see Windows Help and install it. 11. Restart the computer to display the printer settings. The printer name can be changed in the [Change settings for Printing Using the LPR Port Installing the PCL or RPCS Raster Printer Driver z To install this happens, launch "SETUP.EXE" on the CD-ROM root directory. 3. Click...
... [I accept the agreement.], and then click [Next >]. 5. Click [Connected via LAN]. 7. If [LPR Port] does not appear, see Windows Help and install it. 11. Restart the computer to display the printer settings. The printer name can be changed in the [Change settings for Printing Using the LPR Port Installing the PCL or RPCS Raster Printer Driver z To install this happens, launch "SETUP.EXE" on the CD-ROM root directory. 3. Click...
User Guide
Page 150
... a Windows NT 4.0 print server, install the printer driver before the client is displayed in the [Browse for Printer] window. 12. z If you print with a Windows XP or Windows Server 2003 print server, notification functions of the selected printer is set after the printer driver installation. z If you print with the client. The installer starts. Auto Run may not be set up and configured correctly. If this , log on the operating system, printer model, and port. 9. Click [PCL/RPCS Raster Printer Drivers]. 4. The software...
... a Windows NT 4.0 print server, install the printer driver before the client is displayed in the [Browse for Printer] window. 12. z If you print with a Windows XP or Windows Server 2003 print server, notification functions of the selected printer is set after the printer driver installation. z If you print with the client. The installer starts. Auto Run may not be set up and configured correctly. If this , log on the operating system, printer model, and port. 9. Click [PCL/RPCS Raster Printer Drivers]. 4. The software...
User Guide
Page 152
... is displayed. 11. Set up the printer driver while logging on the operating system, printer model, and port. 8. The details shown in [Comment:], [Driver:], and [Port:] vary depending on to the NetWare file server. Auto Run may not work with certain operating system settings. Double-click the name of the selected printer is correctly set up the Windows computer used in the [Component selection] dialog box. 149 Select the print queue...
... is displayed. 11. Set up the printer driver while logging on the operating system, printer model, and port. 8. The details shown in [Comment:], [Driver:], and [Port:] vary depending on to the NetWare file server. Auto Run may not work with certain operating system settings. Double-click the name of the selected printer is correctly set up the Windows computer used in the [Component selection] dialog box. 149 Select the print queue...


