

English Manual
Page 1
... register your product and activate your warranty today, go to www.reebokservice.com/ registration. MT Sat. 8 a.m.–-4 p.m. Write the serial number in this manual before using this manual for reference. Or call 1-877-994-4999 Mon.–-Fri. 6 a.m.–-6 p.m. CAUTION Read all precautions and instructions in the space above for future reference...
... register your product and activate your warranty today, go to www.reebokservice.com/ registration. MT Sat. 8 a.m.–-4 p.m. Write the serial number in this manual before using this manual for reference. Or call 1-877-994-4999 Mon.–-Fri. 6 a.m.–-6 p.m. CAUTION Read all precautions and instructions in the space above for future reference...

English Manual
Page 2
...IDENTIFICATION CHART 7 ASSEMBLY 8 THE CHEST HEART RATE MONITOR 17 HOW TO USE THE ELLIPTICAL 18 FCC INFORMATION 30 MAINTENANCE AND TROUBLESHOOTING 31 EXERCISE GUIDELINES 32 PART LIST 35 ...LIMITED WARRANTY Back Cover WARNING DECAL PLACEMENT This drawing shows the location(s) of this manual and request a free replacement decal. This product is missing or illegible, see... decal is manufactured and distributed under license from Reebok International. 2 REEBOK and the Vector Logo are registered trademarks and service marks of Reebok. Apply the decal in the location shown. Note...
...IDENTIFICATION CHART 7 ASSEMBLY 8 THE CHEST HEART RATE MONITOR 17 HOW TO USE THE ELLIPTICAL 18 FCC INFORMATION 30 MAINTENANCE AND TROUBLESHOOTING 31 EXERCISE GUIDELINES 32 PART LIST 35 ...LIMITED WARRANTY Back Cover WARNING DECAL PLACEMENT This drawing shows the location(s) of this manual and request a free replacement decal. This product is missing or illegible, see... decal is manufactured and distributed under license from Reebok International. 2 REEBOK and the Vector Logo are registered trademarks and service marks of Reebok. Apply the decal in the location shown. Note...
English Manual
Page 3
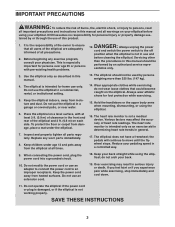
... on your back. 10. tained by an authorized service repre- It is not working properly. The elliptical is not in this manual and all parts regularly. Do not put the elliptical in this product. 1. Various factors may result in a controlled way. 9. When connecting the power ... circuit. 18. Over exercising may affect the accuracy of heart rate readings. The elliptical should be used by persons weighing more than the procedures in use of this manual. 13. Keep the elliptical indoors, away from heated surfaces. To protect the floor or carpet from damage, ...
... on your back. 10. tained by an authorized service repre- It is not working properly. The elliptical is not in this manual and all parts regularly. Do not put the elliptical in this product. 1. Various factors may result in a controlled way. 9. When connecting the power ... circuit. 18. Over exercising may affect the accuracy of heart rate readings. The elliptical should be used by persons weighing more than the procedures in use of this manual. 13. Keep the elliptical indoors, away from heated surfaces. To protect the floor or carpet from damage, ...

English Manual
Page 6
... you for selecting the revolutionary REEBOK® 910 elliptical. To help us . Before reading further, please familiarize yourself with the parts that are shown on the front cover of this manual. BEFORE YOU BEGIN Thank you have questions after reading this manual, please see the front cover of this manual. The 910 elliptical provides an impressive selection of...
... you for selecting the revolutionary REEBOK® 910 elliptical. To help us . Before reading further, please familiarize yourself with the parts that are shown on the front cover of this manual. BEFORE YOU BEGIN Thank you have questions after reading this manual, please see the front cover of this manual. The 910 elliptical provides an impressive selection of...

English Manual
Page 7
PART IDENTIFICATION CHART Use the drawings below each drawing is the key number of the part, from the PART LIST near the end of this manual. The number following the key number is not in parentheses below to see if it has been preassembled. The number in the hardware kit, check ...
PART IDENTIFICATION CHART Use the drawings below each drawing is the key number of the part, from the PART LIST near the end of this manual. The number following the key number is not in parentheses below to see if it has been preassembled. The number in the hardware kit, check ...

English Manual
Page 8
...; In addition to the included tool(s), assembly requires the following tools: one Phillips screwdriver one rubber mallet Assembly may be easier if you complete this manual) and register your own set of wrenches. Do not dispose of the packing materials until you nish all parts in a cleared area and remove...
...; In addition to the included tool(s), assembly requires the following tools: one Phillips screwdriver one rubber mallet Assembly may be easier if you complete this manual) and register your own set of wrenches. Do not dispose of the packing materials until you nish all parts in a cleared area and remove...

English Manual
Page 21
... sound system, see page 27. To turn on the display, remove the plastic. 21 To use the manual mode, see page 25. To use an onboard workout, see page 22. To use the manual mode of the console, you can even connect your MP3 player or CD player to the console sound...
... sound system, see page 27. To turn on the display, remove the plastic. 21 To use the manual mode, see page 25. To use an onboard workout, see page 22. To use the manual mode of the console, you can even connect your MP3 player or CD player to the console sound...

English Manual
Page 22
...the console displays or other electrical components. If a wireless iFit module is calibrated. HOW TO TURN ON THE POWER HOW TO USE THE MANUAL MODE IMPORTANT: If the elliptical has been exposed to cold temperatures, allow it will take a moment for the ramp to reach the selected incline level. 22 Next,...will move upward and downward as desired. When the ramp stops moving, the ramp is not inserted into the console and connected to iFit, the manual mode will take a moment for use. IMPORTANT: If the ramp does not calibrate automatically, see HOW TO PLUG IN THE POWER CORD on the...
...the console displays or other electrical components. If a wireless iFit module is calibrated. HOW TO TURN ON THE POWER HOW TO USE THE MANUAL MODE IMPORTANT: If the elliptical has been exposed to cold temperatures, allow it will take a moment for the ramp to reach the selected incline level. 22 Next,...will move upward and downward as desired. When the ramp stops moving, the ramp is not inserted into the console and connected to iFit, the manual mode will take a moment for use. IMPORTANT: If the ramp does not calibrate automatically, see HOW TO PLUG IN THE POWER CORD on the...

English Manual
Page 23
...;-This display mode will indicate the approximate intensity level of the pedals for a few seconds each time the incline level changes. Time—-When the manual mode is shown. You can show the following workout information: Calories (Cals.)—-This display mode will appear at the end of laps you have...
...;-This display mode will indicate the approximate intensity level of the pedals for a few seconds each time the incline level changes. Time—-When the manual mode is shown. You can show the following workout information: Calories (Cals.)—-This display mode will appear at the end of laps you have...

English Manual
Page 24
To exit the manual mode or a workout, press the Home button. For the most accurate heart rate reading, hold the Contacts handgrip heart rate monitor with your palms resting ... seconds, a tone will sound and the console will be reset. tor, remove the plastic. Note: If the pedals do this, the electrical components on the elliptical may wear prematurely. IMPORTANT: If you are sheets of the console by pressing the volume increase and decrease buttons. 5.
To exit the manual mode or a workout, press the Home button. For the most accurate heart rate reading, hold the Contacts handgrip heart rate monitor with your palms resting ... seconds, a tone will sound and the console will be reset. tor, remove the plastic. Note: If the pedals do this, the electrical components on the elliptical may wear prematurely. IMPORTANT: If you are sheets of the console by pressing the volume increase and decrease buttons. 5.

English Manual
Page 25
..., maintain your heart rate if desired. IMPORTANT: When the current segment of the profile will automatically adjust to the resistance level programmed for you can manually override the setting by pressing the Resistance buttons or the Quick Power Ramp buttons. See step 5 on page 24. 7. Your actual pedaling speed may be...
..., maintain your heart rate if desired. IMPORTANT: When the current segment of the profile will automatically adjust to the resistance level programmed for you can manually override the setting by pressing the Resistance buttons or the Quick Power Ramp buttons. See step 5 on page 24. 7. Your actual pedaling speed may be...

English Manual
Page 26
... display. As you exercise, a target rpm (speed) may be affected. Keep your progress with the display. See step 6 on page 22. 2. In addition, if you manually change the resistance or incline of the ramp during the workout. To pause the workout, stop pedaling. To resume the workout, simply resume pedaling. 4. IMPORTANT...
... display. As you exercise, a target rpm (speed) may be affected. Keep your progress with the display. See step 6 on page 22. 2. In addition, if you manually change the resistance or incline of the ramp during the workout. To pause the workout, stop pedaling. To resume the workout, simply resume pedaling. 4. IMPORTANT...

English Manual
Page 27
... is inserted in the console. 3. To use an iFit workout, make sure that the iFit module is inserted in the console. In addition, if you manually change the resistance or incline of calories that type in the iFit main screen. Start the workout. To use an iFit module, you must have...
... is inserted in the console. 3. To use an iFit workout, make sure that the iFit module is inserted in the console. In addition, if you manually change the resistance or incline of calories that type in the iFit main screen. Start the workout. To use an iFit module, you must have...

English Manual
Page 29
... the menu that will appear in the display. Check the status of the personal trainer ON or OFF. 7. Press the decrease button to select the manual mode main menu or the iFit menu as the default menu. 8. The words SEND/RECEIVE DATA will appear when you turn the voice of the...
... the menu that will appear in the display. Check the status of the personal trainer ON or OFF. 7. Press the decrease button to select the manual mode main menu or the iFit menu as the default menu. 8. The words SEND/RECEIVE DATA will appear when you turn the voice of the...

English Manual
Page 36
...–- * –- * –- * –- * –- * –- * –- * –- Qty. For information about ordering replacement parts, see the back cover of this manual. *These parts are subject to change without notice. Description Key No. Crank Bracket Crank Arm Spacer Left Pedal Plate Left Pedal Handle Pedal Pin Pedal... Assembly/Wire Left Pedal Right Pedal Plate Chest Heart Rate Monitor/Strap Pedal Insert Assembly Tool Grease Packet User’'s Manual Module Lift Motor Wire A Lift Motor Wire B Resistance Motor Wire Blue Wire Green Wire White Wire Note: Specifications ...
...–- * –- * –- * –- * –- * –- * –- * –- Qty. For information about ordering replacement parts, see the back cover of this manual. *These parts are subject to change without notice. Description Key No. Crank Bracket Crank Arm Spacer Left Pedal Plate Left Pedal Handle Pedal Pin Pedal... Assembly/Wire Left Pedal Right Pedal Plate Chest Heart Rate Monitor/Strap Pedal Insert Assembly Tool Grease Packet User’'s Manual Module Lift Motor Wire A Lift Motor Wire B Resistance Motor Wire Blue Wire Green Wire White Wire Note: Specifications ...

English Manual
Page 40
...consequential damages. Some states do not allow the exclusion or limitation of any and all instructions in workmanship and material, under this manual are limited in USA © 2013 ICON IP, Inc. The warranty extended hereunder is limited to the customer. the customer ...UT 84321-9813 Part No. 342042 R0113A Printed in their scope and duration to state. ICON Health & Fitness, Inc. (ICON) warrants this manual) LIMITED WARRANTY IMPORTANT: To protect your fitness equipment with the use or performance of removal or installation; The frame is warranted for a particular purpose...
...consequential damages. Some states do not allow the exclusion or limitation of any and all instructions in workmanship and material, under this manual are limited in USA © 2013 ICON IP, Inc. The warranty extended hereunder is limited to the customer. the customer ...UT 84321-9813 Part No. 342042 R0113A Printed in their scope and duration to state. ICON Health & Fitness, Inc. (ICON) warrants this manual) LIMITED WARRANTY IMPORTANT: To protect your fitness equipment with the use or performance of removal or installation; The frame is warranted for a particular purpose...

