
User Guide
Page 2
... Communications Commission has prepared a helpful booklet, "How To Identify and Resolve Radio TV Interference Problems." Operation is receiving interference. • Plug the unit into a different wall outlet so that may need both the model number and the serial number. Government Printing Office, Washington, DC 20402. In accordance with Part 15 of the following two conditions: (1) This device may not cause harmful interference...
... Communications Commission has prepared a helpful booklet, "How To Identify and Resolve Radio TV Interference Problems." Operation is receiving interference. • Plug the unit into a different wall outlet so that may need both the model number and the serial number. Government Printing Office, Washington, DC 20402. In accordance with Part 15 of the following two conditions: (1) This device may not cause harmful interference...

User Guide
Page 3
NO USERSERVICEABLE PARTS INSIDE. REFER SERVICING TO QUALIFIED SERVICE PERSONNEL. THE EXCLAMATION POINT WITHIN THE TRIANGLE IS A WARNING SIGN ALERTING YOU OF I M P O R TA N T INSTRUCTIONS AC C O M PA N Y I N G T H E P R O D U C T. SEE MARKING ON...RISK OF ELECTRIC SHOCK, DO NOT REMOVE COVER (OR BACK). Contents General controls 2-3 The display 4 Display messages 5 Before you begin 6 Setting the time 7 Basic operation 8 Recording mode 9 Recording quality / condition EN 10 Other functions 11 Erasing file / folder 12 Troubleshooting tips----------13 More information 14 Warranty...
NO USERSERVICEABLE PARTS INSIDE. REFER SERVICING TO QUALIFIED SERVICE PERSONNEL. THE EXCLAMATION POINT WITHIN THE TRIANGLE IS A WARNING SIGN ALERTING YOU OF I M P O R TA N T INSTRUCTIONS AC C O M PA N Y I N G T H E P R O D U C T. SEE MARKING ON...RISK OF ELECTRIC SHOCK, DO NOT REMOVE COVER (OR BACK). Contents General controls 2-3 The display 4 Display messages 5 Before you begin 6 Setting the time 7 Basic operation 8 Recording mode 9 Recording quality / condition EN 10 Other functions 11 Erasing file / folder 12 Troubleshooting tips----------13 More information 14 Warranty...

User Guide
Page 4
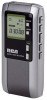
the unit will turn off - General controls EN Recording indicator Built-in microphone ERASE: erases file MENU: Folder, record condition, record quality, AVR, playback mode, key tone, set year/day/12/24/time, key lock on/off AB BEEP ONE ALL DICT CONF REMAIN LP SP HQ AVR ERASE MENU AM PM MM DD VOL DIGITAL VOICE RECORDER VOL UP: volume up VOL DOWN: volume down Note: Auto power off automatically if left idle for 3 minutes. 2
the unit will turn off - General controls EN Recording indicator Built-in microphone ERASE: erases file MENU: Folder, record condition, record quality, AVR, playback mode, key tone, set year/day/12/24/time, key lock on/off AB BEEP ONE ALL DICT CONF REMAIN LP SP HQ AVR ERASE MENU AM PM MM DD VOL DIGITAL VOICE RECORDER VOL UP: volume up VOL DOWN: volume down Note: Auto power off automatically if left idle for 3 minutes. 2

User Guide
Page 5
General controls REC: starts/ pauses recording STOP: stops playback/ recording. Turns off the unit. PLAY: turns the unit on. Starts/ pauses playback. Selects/Browses under menu mode EN external microphone MIC jack EAR Connects headphones 3 Selects/Browses under menu mode REVERSE: skips and searches backward. FORWARD: skips and searches forward.
General controls REC: starts/ pauses recording STOP: stops playback/ recording. Turns off the unit. PLAY: turns the unit on. Starts/ pauses playback. Selects/Browses under menu mode EN external microphone MIC jack EAR Connects headphones 3 Selects/Browses under menu mode REVERSE: skips and searches backward. FORWARD: skips and searches forward.

User Guide
Page 6
The display EN Play Folder (A/B) Key Lock Recording Conditions Total Remaining Time for recording AM/ PM Record AB BEEP ONE ALL DICT CONF REMAIN LP SP HQ AVR AM PM MM DD Playback mode: Play one Play all Automatic Voice Recording Time/ Date/ recorded time Recording Qualities 4
The display EN Play Folder (A/B) Key Lock Recording Conditions Total Remaining Time for recording AM/ PM Record AB BEEP ONE ALL DICT CONF REMAIN LP SP HQ AVR AM PM MM DD Playback mode: Play one Play all Automatic Voice Recording Time/ Date/ recorded time Recording Qualities 4

User Guide
Page 7
You can find the mentioned displays as you set/ operate them. 5 Display messages ALL EN Select all (Introductory Play back & Erasing All Files) FIL:01 File one del:01 Delete (Erasing Selected File) 01 01 Month / day entry mode. 12 Hr 12 hour time display mode. 12:00 Time entry mode OFF Off (Automatic Voice Recording or Beep) ON On (Automatic Voice Recording or Beep) SEN 06 Sensitivity Level (AVR) VOL:13 Volume (Setting Volume) 2003 Year (Setting Year) HOLd key locked * ( )-
You can find the mentioned displays as you set/ operate them. 5 Display messages ALL EN Select all (Introductory Play back & Erasing All Files) FIL:01 File one del:01 Delete (Erasing Selected File) 01 01 Month / day entry mode. 12 Hr 12 hour time display mode. 12:00 Time entry mode OFF Off (Automatic Voice Recording or Beep) ON On (Automatic Voice Recording or Beep) SEN 06 Sensitivity Level (AVR) VOL:13 Volume (Setting Volume) 2003 Year (Setting Year) HOLd key locked * ( )-
User Guide
Page 8
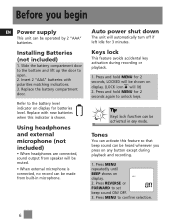
... set beep sound ON/ OFF. 3. Auto power shut down The unit will automatically turn off if left idle for 2 seconds, LOCKED will lit) 2. Using headphones and external microphone (not included) • When headphones are connected, sound output from built-in any button except during recording or playback. 1. Press and hold MENU for 2 seconds again to the battery level indicator on display. (LOCK icon will be activated in microphone. Replace the battery compartment door. Press MENU repeatedly...
... set beep sound ON/ OFF. 3. Auto power shut down The unit will automatically turn off if left idle for 2 seconds, LOCKED will lit) 2. Using headphones and external microphone (not included) • When headphones are connected, sound output from built-in any button except during recording or playback. 1. Press and hold MENU for 2 seconds again to the battery level indicator on display. (LOCK icon will be activated in microphone. Replace the battery compartment door. Press MENU repeatedly...

User Guide
Page 9
.... 6. Turn on the display the recording date and time of your recorded messages and the display will blink (default setting is turned off. 1. Press REVERSE or FORWARD to increase/decrease the number, press MENU to confirm. Once the time is entered, the digits in the hour field will keep flashing when the unit is 12 (12 hour mode) & 0 (24 AM hour mode). When "2003" flashes, press REVERSE or FORWARD to change...
.... 6. Turn on the display the recording date and time of your recorded messages and the display will blink (default setting is turned off. 1. Press REVERSE or FORWARD to increase/decrease the number, press MENU to confirm. Once the time is entered, the digits in the hour field will keep flashing when the unit is 12 (12 hour mode) & 0 (24 AM hour mode). When "2003" flashes, press REVERSE or FORWARD to change...

User Guide
Page 10
... STOP mode, select a folder (A/B). 2. In Stop mode, select a folder (A/B). 2. Press and hold REVERSE or FORWARD to resume. 5. Default is DICT. (Refer to adjust the volume. 6. Folder selection You can select to start recording. (recording time will be displayed once you press RECORD) 3. Press PLAY to play one file at a time (Play one) or play all ). Default is Play one file forward or backward. 8. Press RECORD to skip one . Default is folder A. Press REVERSE or FORWARD once to start playback. 4. To pause recording...
... STOP mode, select a folder (A/B). 2. In Stop mode, select a folder (A/B). 2. Press and hold REVERSE or FORWARD to resume. 5. Default is DICT. (Refer to adjust the volume. 6. Folder selection You can select to start recording. (recording time will be displayed once you press RECORD) 3. Press PLAY to play one file at a time (Play one) or play all ). Default is Play one file forward or backward. 8. Press RECORD to skip one . Default is folder A. Press REVERSE or FORWARD once to start playback. 4. To pause recording...

User Guide
Page 11
... pratice to make some 'sounds' or say a short word to turn on the AVR feature. increase sensitivity value when recording source is far from the unit or the recording envionment is used to activate the AVR before you start again automatically when you are speaking into the microphone. Manual Recording Please refer to enter AVR mode. 6. When dictation stops for de-selection. Press STOP to STOP mode. 5. Repeat step...
... pratice to make some 'sounds' or say a short word to turn on the AVR feature. increase sensitivity value when recording source is far from the unit or the recording envionment is used to activate the AVR before you start again automatically when you are speaking into the microphone. Manual Recording Please refer to enter AVR mode. 6. When dictation stops for de-selection. Press STOP to STOP mode. 5. Repeat step...

User Guide
Page 12
... or FORWARD. 3. allows about 120 min recording on RP5013, 270 min recording on RP5015. • LP (Long Play) - A built-in a more open area and recording source is close as air conditioners or fans. 10 Confirm selection by pressing REVERSE or FORWARD. 3. Toggle between LP SP HQ SP, LP and HQ by pressing MENU. in automatic recording level control will set the optimum record level during manual recording. Definition...
... or FORWARD. 3. allows about 120 min recording on RP5013, 270 min recording on RP5015. • LP (Long Play) - A built-in a more open area and recording source is close as air conditioners or fans. 10 Confirm selection by pressing REVERSE or FORWARD. 3. Toggle between LP SP HQ SP, LP and HQ by pressing MENU. in automatic recording level control will set the optimum record level during manual recording. Definition...

User Guide
Page 13
... display. Default is folder A. 1. Press MENU in stop mode in total. 11 In STOP mode, press MENU repeatedly until ALL shows on display. 2. A 4. Press STOP to start playing desired file. Folder A or B icon will blink on display. Press STOP to exit to stop mode. Note: You can record up to 99 files in one / play a specific file or all files in a folder. 1. Press PLAY to play all You can select a specific folder (A/B) for recording. Select folder EN You can choose to start introductory playback...
... display. Default is folder A. 1. Press MENU in stop mode in total. 11 In STOP mode, press MENU repeatedly until ALL shows on display. 2. A 4. Press STOP to start playing desired file. Folder A or B icon will blink on display. Press STOP to exit to stop mode. Note: You can record up to 99 files in one / play a specific file or all files in a folder. 1. Press PLAY to play all You can select a specific folder (A/B) for recording. Select folder EN You can choose to start introductory playback...

User Guide
Page 14
... hold DICT HQ ERASE for about 2 seconds, all files in the selected folder will show A on A display. 5. Tip: File numbers that come after erased one automatically. 12 Erasing file / folder EN Erasing selected file You can delete all files in a specific folder by one will blink on the screen. 4. Select a file. 3. In Stop mode, press FORWARD continuously until "ALL" appears on the unit. 2. Press ERASE and "del" will be erased completely (or press STOP to cancel. Erasing...
... hold DICT HQ ERASE for about 2 seconds, all files in the selected folder will show A on A display. 5. Tip: File numbers that come after erased one automatically. 12 Erasing file / folder EN Erasing selected file You can delete all files in a specific folder by one will blink on the screen. 4. Select a file. 3. In Stop mode, press FORWARD continuously until "ALL" appears on the unit. 2. Press ERASE and "del" will be erased completely (or press STOP to cancel. Erasing...
User Guide
Page 15
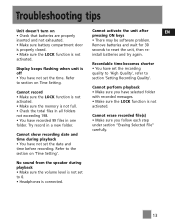
... date and time before recording. Try record in all folders not exceeding 198. under section "Erasing Selected File" carefully. activated. • Make sure the LOCK function is not • Make sure the memory is properly closed. No sound from the speaker during playback • You have not set to reset the unit, then re- • Make sure the LOCK function is connected. 13 activated. seconds to 0. • Headphones is not install batteries...
... date and time before recording. Try record in all folders not exceeding 198. under section "Erasing Selected File" carefully. activated. • Make sure the LOCK function is not • Make sure the memory is properly closed. No sound from the speaker during playback • You have not set to reset the unit, then re- • Make sure the LOCK function is connected. 13 activated. seconds to 0. • Headphones is not install batteries...

User Guide
Page 16
condensation problem may cause personal injury and damage to a warm place; speaker, TV set). • Clean the unit with a soft cloth or a damp chamois leather. Leaking batteries can be recharged. Power Supply • (battery power) 2 x "AAA" 14 Never use the unit immediately after transportation from a cold place to the batteries. • Never mix new batteries with old ones. Recorded data can cause...
condensation problem may cause personal injury and damage to a warm place; speaker, TV set). • Clean the unit with a soft cloth or a damp chamois leather. Leaking batteries can be recharged. Power Supply • (battery power) 2 x "AAA" 14 Never use the unit immediately after transportation from a cold place to the batteries. • Never mix new batteries with old ones. Recorded data can cause...

User Guide
Page 17
... begins with the first rental or 45 days from date of loss or damage. Also print your warranty does not cover: • Customer instruction. (Your Owner's Manual provides information regarding operating Instructions and user controls. Include any charges billed to you by the Exchange Center for service not covered by the warranty. • A new or refurbished unit will do: • Provide you...
... begins with the first rental or 45 days from date of loss or damage. Also print your warranty does not cover: • Customer instruction. (Your Owner's Manual provides information regarding operating Instructions and user controls. Include any charges billed to you by the Exchange Center for service not covered by the warranty. • A new or refurbished unit will do: • Provide you...

User Guide
Page 18
...OR IN ANY WAY INCREASE THE SCOPE OF THIS WARRANTY. • REPAIR OR REPLACEMENT AS PROVIDED UNDER THIS WARRANTY IS THE EXCLUSIVE REMEDY OF THE CONSUMER.... PARTICULAR PURPOSE ON THIS PRODUCT IS LIMITED TO THE APPLICABLE WARRANTY PERIOD SET FORTH ABOVE. THIS DISCLAIMER OF WARRANTIES AND LIMITED WARRANTY ARE GOVERNED BY... NOT BE LIABLE FOR INCIDENTAL OR CONSEQUENTIAL DAMAGES RESULTING FROM THE USE OF THIS PRODUCT OR ARISING OUT OF ANY BREACH OF ANY ... how long an implied warranty lasts, so the above limitations or exclusions may not apply to you. • This warranty gives you specific legal rights...
...OR IN ANY WAY INCREASE THE SCOPE OF THIS WARRANTY. • REPAIR OR REPLACEMENT AS PROVIDED UNDER THIS WARRANTY IS THE EXCLUSIVE REMEDY OF THE CONSUMER.... PARTICULAR PURPOSE ON THIS PRODUCT IS LIMITED TO THE APPLICABLE WARRANTY PERIOD SET FORTH ABOVE. THIS DISCLAIMER OF WARRANTIES AND LIMITED WARRANTY ARE GOVERNED BY... NOT BE LIABLE FOR INCIDENTAL OR CONSEQUENTIAL DAMAGES RESULTING FROM THE USE OF THIS PRODUCT OR ARISING OUT OF ANY BREACH OF ANY ... how long an implied warranty lasts, so the above limitations or exclusions may not apply to you. • This warranty gives you specific legal rights...

User Guide
Page 19
... to be replaced free of purchase for future reference. PURCHASE DATE NAME OF STORE 17 This warranty does not include damage to the product resulting from the statutory warranties and other rights and remedies, such provisions shall be deemed to : Thomson Inc. Remove the batteries (where applicable), and pack product complete with proof of charge, including...
... to be replaced free of purchase for future reference. PURCHASE DATE NAME OF STORE 17 This warranty does not include damage to the product resulting from the statutory warranties and other rights and remedies, such provisions shall be deemed to : Thomson Inc. Remove the batteries (where applicable), and pack product complete with proof of charge, including...


