User Manual - EZDVD2BD
Page 3
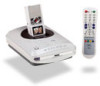
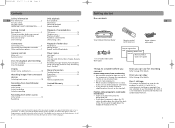
...TV instead of straight down the middle of the back of audio video cables (RCA-type) Remote control (with batteries) Power adapter with cables Owner registration card Memory Maker user manual Memory Maker quick start guide Things to consider before you connect Protect components from overheating •...Safety information EN FCC information 2 For your safety For your record IMPORTANT SAFETY INFORMATION ..........3 Getting started Box contents EN Small Wonder Memory Maker 1 set of the TV. Discs you can use for recording Refer to use for recording Discs you can play Refer to page 9...
...TV instead of straight down the middle of the back of audio video cables (RCA-type) Remote control (with batteries) Power adapter with cables Owner registration card Memory Maker user manual Memory Maker quick start guide Things to consider before you connect Protect components from overheating •...Safety information EN FCC information 2 For your safety For your record IMPORTANT SAFETY INFORMATION ..........3 Getting started Box contents EN Small Wonder Memory Maker 1 set of the TV. Discs you can use for recording Refer to use for recording Discs you can play Refer to page 9...
User Manual - EZDVD2BD
Page 4
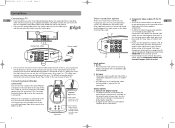
...you must configure the output video signal so that these types of sockets and cables. • If you use your Small Wonder Memory Maker for this connection. Since access to a TV's video input channel varies from one manufacturer to provide specific instructions for these sockets... for connections. Input options 1. Output options 3. TV, digital camcorder), you can provide YUV cables that matches how the Small Wonder Memory Maker is connected to the user manual of connections used for your TV. Your dealer can incorporate your unit. AV input • These...
...you must configure the output video signal so that these types of sockets and cables. • If you use your Small Wonder Memory Maker for this connection. Since access to a TV's video input channel varies from one manufacturer to provide specific instructions for these sockets... for connections. Input options 1. Output options 3. TV, digital camcorder), you can provide YUV cables that matches how the Small Wonder Memory Maker is connected to the user manual of connections used for your TV. Your dealer can incorporate your unit. AV input • These...
User Manual - EZDVD2BD
Page 5
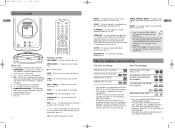
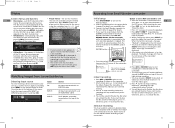
... (p. 14, 16). • Insert 2 batteries (AAA, LR03) at the unit, not the TV, to select displaying images on or off . 3. - to operate. To access the Memory Maker's player menus (p. 17). • Refer to finalize a disc when you load a disc, the DVD recorder will format it. The DVD recorder automatically asks if you...
... (p. 14, 16). • Insert 2 batteries (AAA, LR03) at the unit, not the TV, to select displaying images on or off . 3. - to operate. To access the Memory Maker's player menus (p. 17). • Refer to finalize a disc when you load a disc, the DVD recorder will format it. The DVD recorder automatically asks if you...
User Manual - EZDVD2BD
Page 6
... Screen menus and banners EN • Disc menus - Availability of the current disc. • Player menus - Watching images from the internal memory to one of the TV screen for details on the LCD screen. Load a recordabale disc in the Small Wonder camcorder, press the red RECORD... the unit is playing recorded discs, mp3, wma, jpeg, or audio CD discs. After videos are accessed. angle, subtitle) depend on the Memory Maker. 2. While viewing the videos, press SELECT to record videos from Small Wonder camcorder Initial setup 1. Move around the REC button on top of ...
... Screen menus and banners EN • Disc menus - Availability of the current disc. • Player menus - Watching images from the internal memory to one of the TV screen for details on the LCD screen. Load a recordabale disc in the Small Wonder camcorder, press the red RECORD... the unit is playing recorded discs, mp3, wma, jpeg, or audio CD discs. After videos are accessed. angle, subtitle) depend on the Memory Maker. 2. While viewing the videos, press SELECT to record videos from Small Wonder camcorder Initial setup 1. Move around the REC button on top of ...

