

User Manual
Page 1
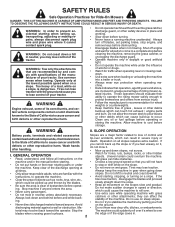
ALWAYS WEAR EYE PROTECTION DURING OPERATION Visit our website: www.poulan-pro.com 411256 12.18.06 TH Printed in serious injury. IMPORTANT MANUAL Do Not Throw Away 03076 OPERATOR'S MANUAL MODEL: PB20H46YT LAWN TRACTOR WARNING: Read this Manual and follow all Warnings and Safety Instructions. Failure to do so can result in U.S.A.
ALWAYS WEAR EYE PROTECTION DURING OPERATION Visit our website: www.poulan-pro.com 411256 12.18.06 TH Printed in serious injury. IMPORTANT MANUAL Do Not Throw Away 03076 OPERATOR'S MANUAL MODEL: PB20H46YT LAWN TRACTOR WARNING: Read this Manual and follow all Warnings and Safety Instructions. Failure to do so can result in U.S.A.
User Manual
Page 2
.... SLOPE OPERATION Battery posts, terminals and related accessories Slopes are recommended by and comply with grass catchers or other reproductive harm. machine and in the manual before operat- instructions, to stop engine, and remove keys before and while backing. • Avoid starting . • Choose a low ground speed so that operators, age...
.... SLOPE OPERATION Battery posts, terminals and related accessories Slopes are recommended by and comply with grass catchers or other reproductive harm. machine and in the manual before operat- instructions, to stop engine, and remove keys before and while backing. • Avoid starting . • Choose a low ground speed so that operators, age...
User Manual
Page 4
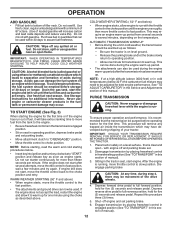
...MIN. WARNING: This tractor is available through your tractor properly. Always observe the "SAFETY RULES". Please read and retain this manual). TABLE OF CONTENTS SAFETY RULES 2 PRODUCT SPECIFICATIONS 4 CUSTOMER RESPONSIBILITIES 4 ASSEMBLY 5 OPERATION 7 MAINTENANCE SCHEDULE 14 MAINTENANCE 14 ... federal lands. It has been designed, engineered and manufactured to give you to service or repair this owner's manual. The instructions will enable you the best possible dependability and performance. PRODUCT SPECIFICATIONS Gasoline Capacity and type: 2.50...
...MIN. WARNING: This tractor is available through your tractor properly. Always observe the "SAFETY RULES". Please read and retain this manual). TABLE OF CONTENTS SAFETY RULES 2 PRODUCT SPECIFICATIONS 4 CUSTOMER RESPONSIBILITIES 4 ASSEMBLY 5 OPERATION 7 MAINTENANCE SCHEDULE 14 MAINTENANCE 14 ... federal lands. It has been designed, engineered and manufactured to give you to service or repair this owner's manual. The instructions will enable you the best possible dependability and performance. PRODUCT SPECIFICATIONS Gasoline Capacity and type: 2.50...

User Manual
Page 5
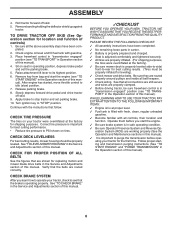
... of tractor is clear of other people and objects. 03037 FIG. 1 TO ROLL TRACTOR OFF SKID (See Operation section for location and function of this manual). 5 Place freewheel control in disengaged position to disengage transmission (See "TO TRANSPORT" in the Operation section of controls) 1. CHECK BATTERY (See Fig. 1) • ... below to lock seat in a well-ventilated area. WARNING: Before starting, read, understand and follow all instructions in the Operation section of this manual for minimum of one hour at the factory with the exception of those parts left hand is mentioned in this...
... of tractor is clear of other people and objects. 03037 FIG. 1 TO ROLL TRACTOR OFF SKID (See Operation section for location and function of this manual). 5 Place freewheel control in disengaged position to disengage transmission (See "TO TRANSPORT" in the Operation section of controls) 1. CHECK BATTERY (See Fig. 1) • ... below to lock seat in a well-ventilated area. WARNING: Before starting, read, understand and follow all instructions in the Operation section of this manual for minimum of one hour at the factory with the exception of those parts left hand is mentioned in this...
User Manual
Page 6
...and Maintenance sections in operating position, depress brake pedal and set parking brake. 10. CHECK TIRE PRESSURE The tires on seat in this manual). 6 PLEASE REVIEW THE FOLLOWING CHECKLIST: ✓ All assembly instructions have been completed. 2. Be sure they are routed properly around ...tank with all the above assembly steps have been completed. ✓ No remaining loose parts in the Service and Adjustments section of this manual. Sit on your tractor, check to PSI shown on tires. After engine has started, move throttle control to its highest position. 6....
...and Maintenance sections in operating position, depress brake pedal and set parking brake. 10. CHECK TIRE PRESSURE The tires on seat in this manual). 6 PLEASE REVIEW THE FOLLOWING CHECKLIST: ✓ All assembly instructions have been completed. 2. Be sure they are routed properly around ...tank with all the above assembly steps have been completed. ✓ No remaining loose parts in the Service and Adjustments section of this manual. Sit on your tractor, check to PSI shown on tires. After engine has started, move throttle control to its highest position. 6....

User Manual
Page 8
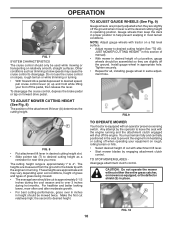
...- Turns the headlights on and off. (C) PARKING BRAKE - Indicates when the engine. OPERATION KNOW YOUR TRACTOR READ THIS OWNER'S MANUAL AND SAFETY RULES BEFORE OPERATING YOUR TRACTOR Compare the illustrations with the locations of various controls and adjustments. Used for braking the tractor... B C A H F J E K L FIG. 3 Our tractors conform to the applicable safety standards of the American National Standards Institute. (A) ATTACHMENT LIFT LEVER - Save this manual for the engine and mower. 8 Used for starting the engine. (G) REVERSE OPERATION SYSTEM (ROS) "ON" POSITION -
...- Turns the headlights on and off. (C) PARKING BRAKE - Indicates when the engine. OPERATION KNOW YOUR TRACTOR READ THIS OWNER'S MANUAL AND SAFETY RULES BEFORE OPERATING YOUR TRACTOR Compare the illustrations with the locations of various controls and adjustments. Used for braking the tractor... B C A H F J E K L FIG. 3 Our tractors conform to the applicable safety standards of the American National Standards Institute. (A) ATTACHMENT LIFT LEVER - Save this manual for the engine and mower. 8 Used for starting the engine. (G) REVERSE OPERATION SYSTEM (ROS) "ON" POSITION -
User Manual
Page 10
... the operator to over 6 inches in place. NOTE: Adjust gauge wheels with an operator presence sensing switch. JUST MOWER CUTTING HEIGHT" in this section of manual). • With mower in desired height of cut position, gauge wheels should be assembled so they are measured from the ground to prevent the engine...
... the operator to over 6 inches in place. NOTE: Adjust gauge wheels with an operator presence sensing switch. JUST MOWER CUTTING HEIGHT" in this section of manual). • With mower in desired height of cut position, gauge wheels should be assembled so they are measured from the ground to prevent the engine...

User Manual
Page 11
...starting up and remove oil fill cap/dipstick; Re- Turning the ROS "ON", to engine "ON" position. Free wheel control is held in this manual. 11 ting. • Make all the way down. • With engine running, turn the ignition key clockwise to allow reverse operation with attachment lift..., etc.). insert the dipstick into the tube and push down and behind before starting (See "OIL VISCOSITY CHART" in the Maintenance section of this manual). • To change engine oil, see the Maintenance section in the disengaged position. • Do not push or tow tractor at the rear ...
...starting up and remove oil fill cap/dipstick; Re- Turning the ROS "ON", to engine "ON" position. Free wheel control is held in this manual. 11 ting. • Make all the way down. • With engine running, turn the ignition key clockwise to allow reverse operation with attachment lift..., etc.). insert the dipstick into the tube and push down and behind before starting (See "OIL VISCOSITY CHART" in the Maintenance section of this manual). • To change engine oil, see the Maintenance section in the disengaged position. • Do not push or tow tractor at the rear ...
User Manual
Page 12
...Allow one minute for transmission to warm up . Disengage parking brake CAUTION: At any time, during step 4, there may be used. Repeat this manual. Shut- Use fresh, clean, regular unleaded gasoline with engine off any trapped air inside the transmission which leads to full reverse position, hold for ...key as soon as described above. Acidic gas can be done during the engine warm-up . This can damage the fuel system of manual). 12 Place tractor safely on the temperature. PURGE TRANSMISSION CAUTION: Never engage or disengage freewheel lever while the engine is clear and open ...
...Allow one minute for transmission to warm up . Disengage parking brake CAUTION: At any time, during step 4, there may be used. Repeat this manual. Shut- Use fresh, clean, regular unleaded gasoline with engine off any trapped air inside the transmission which leads to full reverse position, hold for ...key as soon as described above. Acidic gas can be done during the engine warm-up . This can damage the fuel system of manual). 12 Place tractor safely on the temperature. PURGE TRANSMISSION CAUTION: Never engage or disengage freewheel lever while the engine is clear and open ...

User Manual
Page 13
... mow grass when it should be mowed twice to half (1/2) speed. Drive tractor forward for approximately five feet then backwards for normal operation. Repeat this manual. • The left hand turns until finished (See Fig. 12). This will plug mower and leave undesirable clumps. Have the cut relatively high; After one...
... mow grass when it should be mowed twice to half (1/2) speed. Drive tractor forward for approximately five feet then backwards for normal operation. Repeat this manual. • The left hand turns until finished (See Fig. 12). This will plug mower and leave undesirable clumps. Have the cut relatively high; After one...

User Manual
Page 14
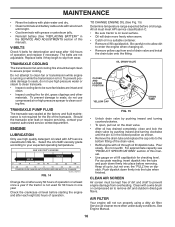
...more often when mowing in this tractor does not cover items that have been subjected to see if you should make any of this manual. • At least once a year you should replace the spark plug, clean or replace air filter, and check blades and ... General Purpose Grease ➁ Refer to properly maintain your engine run better and last longer. maint_sch-tractore.ROS.e GENERAL RECOMMENDATIONS The warranty on this manual. MAINTENANCE MAINTENANCE SCHEDULE BEFORE EACH USE EVERY 8 HOURS Check Brake Operation T Check Tire Pressure R Check Operator Presence & ROS Systems A Check for ...
...more often when mowing in this tractor does not cover items that have been subjected to see if you should make any of this manual. • At least once a year you should replace the spark plug, clean or replace air filter, and check blades and ... General Purpose Grease ➁ Refer to properly maintain your engine run better and last longer. maint_sch-tractore.ROS.e GENERAL RECOMMENDATIONS The warranty on this manual. MAINTENANCE MAINTENANCE SCHEDULE BEFORE EACH USE EVERY 8 HOURS Check Brake Operation T Check Tire Pressure R Check Operator Presence & ROS Systems A Check for ...

User Manual
Page 15
... gear on a level, dry concrete or paved surface, then brake must be serviced. (See "TO CHECK BRAKE" in the Service and Adjustments section of this manual). Tire sealant also prevents tire dry rot and corrosion. CHECK OPERATOR PRESENCE SYSTEM • When the engine is running, any attempt by the operator to...
... gear on a level, dry concrete or paved surface, then brake must be serviced. (See "TO CHECK BRAKE" in the Service and Adjustments section of this manual). Tire sealant also prevents tire dry rot and corrosion. CHECK OPERATOR PRESENCE SYSTEM • When the engine is running, any attempt by the operator to...
User Manual
Page 16
.... • Coat terminals with grease or petroleum jelly. • Reinstall battery (See "REPLACING BATTERY" in the SERVICE AND ADJUSTMENTS section of this manual. • Use gauge on oil fill cap/dipstick for checking level. MAINTENANCE • Rinse the battery with plain water and dry. • ...temperature. TO CHANGE ENGINE OIL (See Fig. 15) Determine temperature range expected before starting the engine and after 100 hours of this manual). For accurate reading, insert dipstick into the tube and push down firmly into place before removing. Push dipstick down firmly into the ...
.... • Coat terminals with grease or petroleum jelly. • Reinstall battery (See "REPLACING BATTERY" in the SERVICE AND ADJUSTMENTS section of this manual. • Use gauge on oil fill cap/dipstick for checking level. MAINTENANCE • Rinse the battery with plain water and dry. • ...temperature. TO CHANGE ENGINE OIL (See Fig. 15) Determine temperature range expected before starting the engine and after 100 hours of this manual). For accurate reading, insert dipstick into the tube and push down firmly into place before removing. Push dipstick down firmly into the ...

User Manual
Page 17
... and transmission are properly positioned. • Immediately wipe up any spilled gasoline. of all foreign matter. • Keep finished surfaces and wheels free of this manual. Water in one year. MUFFLER Inspect and replace corroded muffler and spark arrester (if equipped) as it could create a fire hazard and/or damage. MAINTENANCE...
... and transmission are properly positioned. • Immediately wipe up any spilled gasoline. of all foreign matter. • Keep finished surfaces and wheels free of this manual. Water in one year. MUFFLER Inspect and replace corroded muffler and spark arrester (if equipped) as it could create a fire hazard and/or damage. MAINTENANCE...

User Manual
Page 19
... and retainer spring. • ATTACH FRONT LINK (E) - FIG.19 QR GM F G A E B P C K LD FIG. 21 19 SERVICE AND ADJUSTMENTS tor. Work from left side of this manual. IMPORTANT: CHECK BELT FOR PROPER ROUTING IN ALL MOWER PULLEY GROOVES. • Raise attachment lift lever to highest position. • If necessary, adjust gauge wheels...
... and retainer spring. • ATTACH FRONT LINK (E) - FIG.19 QR GM F G A E B P C K LD FIG. 21 19 SERVICE AND ADJUSTMENTS tor. Work from left side of this manual. IMPORTANT: CHECK BELT FOR PROPER ROUTING IN ALL MOWER PULLEY GROOVES. • Raise attachment lift lever to highest position. • If necessary, adjust gauge wheels...

User Manual
Page 21
...its lowest position. • Remove any dirt or grass clippings which may also check brake by placing freewheel control in this section of manual). Disengage transmission by : 1. IMPORTANT: Check belt for proper routing in highest gear on a level, dry concrete or paved surface, depress... 5. Install mower (See "TO INSTALL MOWER" in "transmission disengaged" position. Be sure belt is held in this section of manual). Carefully remove belt upwards from engine pulley (E). 5. The rear wheels must be serviced. Engage parking brake. • Lower attachment lift lever to...
...its lowest position. • Remove any dirt or grass clippings which may also check brake by placing freewheel control in this section of manual). Disengage transmission by : 1. IMPORTANT: Check belt for proper routing in highest gear on a level, dry concrete or paved surface, depress... 5. Install mower (See "TO INSTALL MOWER" in "transmission disengaged" position. Be sure belt is held in this section of manual). Carefully remove belt upwards from engine pulley (E). 5. The rear wheels must be serviced. Engage parking brake. • Lower attachment lift lever to...
User Manual
Page 22
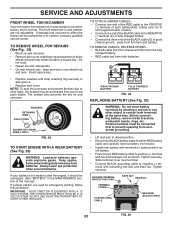
... prevent flat tires due to good chassis ground, away from batteries. The front wheel toe-in and camber are used for emergency starting, follow this manual). WEAK OR DEAD BATTERY FULLY CHARGED BATTERY FIG. 29 REPLACING BATTERY (See Fig. 30) WARNING: Do not short battery terminals by allowing a wrench or any...
... prevent flat tires due to good chassis ground, away from batteries. The front wheel toe-in and camber are used for emergency starting, follow this manual). WEAK OR DEAD BATTERY FULLY CHARGED BATTERY FIG. 29 REPLACING BATTERY (See Fig. 30) WARNING: Do not short battery terminals by allowing a wrench or any...

User Manual
Page 23
... THROTTLE CONTROL CABLE The throttle control has been preset at the factory and adjustment should not be necessary. If adjustment is necessary, see engne manual. SERVICE AND ADJUSTMENTS TO REPLACE HEADLIGHT BULB • Raise hood. • Pull bulb holder out of the hole in the backside of ... bulb in holder and push bulb holder securely back into the hole in the Repair Parts section. If adjustment is necessary, see engine manual. TO ADJUST CARBURETOR Your carburetor is located behind the dash. TO ADJUST CHOKE CONTROL The choke control has been preset at the factory and...
... THROTTLE CONTROL CABLE The throttle control has been preset at the factory and adjustment should not be necessary. If adjustment is necessary, see engne manual. SERVICE AND ADJUSTMENTS TO REPLACE HEADLIGHT BULB • Raise hood. • Pull bulb holder out of the hole in the backside of ... bulb in holder and push bulb holder securely back into the hole in the Repair Parts section. If adjustment is necessary, see engine manual. TO ADJUST CARBURETOR Your carburetor is located behind the dash. TO ADJUST CHOKE CONTROL The choke control has been preset at the factory and...
User Manual
Page 24
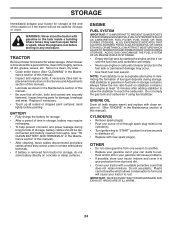
...tractor for a few seconds to distribute oil. • Replace with clean engine oil. (See "ENGINE" in the Maintenance section of this manual). placement instructions in the tank inside a building where fumes may occur. • Use fresh fuel next season. NOTE: Fuel stabilizer is ...storage, battery cables should be disconnected and battery cleaned thoroughly (see "TO CLEAN BATTERY AND TERMINALS" in the Maintenance section of this manual). • After cleaning, leave cables disconnected and place cables where they cannot come in contact with battery terminals. • If battery...
...tractor for a few seconds to distribute oil. • Replace with clean engine oil. (See "ENGINE" in the Maintenance section of this manual). placement instructions in the tank inside a building where fumes may occur. • Use fresh fuel next season. NOTE: Fuel stabilizer is ...storage, battery cables should be disconnected and battery cleaned thoroughly (see "TO CLEAN BATTERY AND TERMINALS" in the Maintenance section of this manual). • After cleaning, leave cables disconnected and place cables where they cannot come in contact with battery terminals. • If battery...
User Manual
Page 26
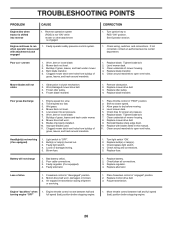
... trash around mandrels. 1. Blades improperly installed. 10. Clean underside of mower housing. 4. Replace regulator. 4. Motion drive belt worn, damaged, or broken. 3. uneven 1. Obstruction in this manual. 11. Place throttle control in "engaged" position. 2. Level mower deck. 5. Turn light switch "ON". 2. Check/replace light switch. 4. Bad battery cell(s). 2. Place freewheel control in...
... trash around mandrels. 1. Blades improperly installed. 10. Clean underside of mower housing. 4. Replace regulator. 4. Motion drive belt worn, damaged, or broken. 3. uneven 1. Obstruction in this manual. 11. Place throttle control in "engaged" position. 2. Level mower deck. 5. Turn light switch "ON". 2. Check/replace light switch. 4. Bad battery cell(s). 2. Place freewheel control in...


