

User Manual
Page 2
... starting when setting up the slope or if you to operate the machine. catchers or other safety devices in neutral, you cannot back up , transporting, adjusting or making repairs, always disconnect spark plug wire and place wire where it . ing. • Do not try to stabilize the machine by the blades. • Keep all parts to come to prevent accidental starting , stopping, or turning...
... starting when setting up the slope or if you to operate the machine. catchers or other safety devices in neutral, you cannot back up , transporting, adjusting or making repairs, always disconnect spark plug wire and place wire where it . ing. • Do not try to stabilize the machine by the blades. • Keep all parts to come to prevent accidental starting , stopping, or turning...

User Manual
Page 3
... GASOLINE To avoid personal injury or property damage, use extra caution when servicing them . • Keep children out of the mowing area and in the watchful care of bystanders before operating. Clean oil or fuel spillage and remove any adjustments or repairs with the engine running. • Check grass catcher components and the discharge guard frequently and replace with plastic liner. Children are explosive. • Extinguish...
... GASOLINE To avoid personal injury or property damage, use extra caution when servicing them . • Keep children out of the mowing area and in the watchful care of bystanders before operating. Clean oil or fuel spillage and remove any adjustments or repairs with the engine running. • Check grass catcher components and the discharge guard frequently and replace with plastic liner. Children are explosive. • Extinguish...

User Manual
Page 4
... this owner's manual. age" sections of a new tractor. Always observe the "SAFETY RULES". We have competent, well-trained technicians and the proper tools to assemble and maintain your tractor properly. TABLE OF CONTENTS SAFETY RULES 2-3 PRODUCT SPECIFICATIONS 4 CUSTOMER RESPONSIBILITIES 4 ASSEMBLY 6-8 OPERATION 9-14 MAINTENANCE SCHEDULE 15 MAINTENANCE 15-18 SERVICE AND ADJUSTMENTS 19-23 STORAGE 24 TROUBLESHOOTING 25-26 WARRANTY 27 4 CCA: Case Size: 35 280 U1R Blade Torque...
... this owner's manual. age" sections of a new tractor. Always observe the "SAFETY RULES". We have competent, well-trained technicians and the proper tools to assemble and maintain your tractor properly. TABLE OF CONTENTS SAFETY RULES 2-3 PRODUCT SPECIFICATIONS 4 CUSTOMER RESPONSIBILITIES 4 ASSEMBLY 6-8 OPERATION 9-14 MAINTENANCE SCHEDULE 15 MAINTENANCE 15-18 SERVICE AND ADJUSTMENTS 19-23 STORAGE 24 TROUBLESHOOTING 25-26 WARRANTY 27 4 CCA: Case Size: 35 280 U1R Blade Torque...

User Manual
Page 7
... location and function of controls) WARNING: Before starting, read, understand and follow . FIG. 3 7 ASSEMBLY SEAT PAN SEAT SHOULDER BOLT 02466 FLAT WASHER ADJUSTMENT KNOB 02464 FIG. 2 CHECK BATTERY (See Fig. 3) • Lift hood to raised position. • If this battery is put into service after month and year indicated on seat in operating position, depress clutch/brake pedal and set the parking brake. • Place motion control lever in neutral (N) position...
... location and function of controls) WARNING: Before starting, read, understand and follow . FIG. 3 7 ASSEMBLY SEAT PAN SEAT SHOULDER BOLT 02466 FLAT WASHER ADJUSTMENT KNOB 02464 FIG. 2 CHECK BATTERY (See Fig. 3) • Lift hood to raised position. • If this battery is put into service after month and year indicated on seat in operating position, depress clutch/brake pedal and set the parking brake. • Place motion control lever in neutral (N) position...
User Manual
Page 8
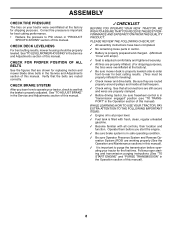
... for replacing motion and mower blade drive belts in the Service and Adjustments section of this manual. See"TO LEVEL MOWER HOUSING"in the Service and Adjustments section of this manual. ✓CHECKLIST BEFORE YOU OPERATE YOUR NEW TRACTOR, WE WISH TO ASSURE THAT YOU RECEIVE THE BEST PERFORMANCE AND SATISFACTION FROM THIS QUALITY PRODUCT. Be sure they are properly clamped. ✓ Before driving tractor, be properly leveled. ASSEMBLY CHECK TIRE PRESSURE The...
... for replacing motion and mower blade drive belts in the Service and Adjustments section of this manual. See"TO LEVEL MOWER HOUSING"in the Service and Adjustments section of this manual. ✓CHECKLIST BEFORE YOU OPERATE YOUR NEW TRACTOR, WE WISH TO ASSURE THAT YOU RECEIVE THE BEST PERFORMANCE AND SATISFACTION FROM THIS QUALITY PRODUCT. Be sure they are properly clamped. ✓ Before driving tractor, be properly leveled. ASSEMBLY CHECK TIRE PRESSURE The...

User Manual
Page 10
...engine off . CHOKE CONTROL IGNITION SWITCH THROTTLECONTROL CLUTCH/BRAKE PEDAL ROS "ON" POSITION ATTACHMENT CLUTCH LEVER LIFT LEVER PLUNGER ATTACHMENT LIFT LEVER FREE WHEEL CONTROL PARKING BRAKE LIGHT SWITCH HEIGHT ADJUSTMENT KNOB 02884 FIG. 4 MOTION CONTROL LEVER Our tractors conform to the safety standards of tractor. Used to your tractor. Used to engage the mower blades or other attachments mounted to control engine speed. CHOKE CONTROL - Locks clutch/brake pedal into the brake position. Used to your tractor. CLUTCH/BRAKE PEDAL - HEIGHT ADJUSTMENT KNOB - LIFT LEVER...
...engine off . CHOKE CONTROL IGNITION SWITCH THROTTLECONTROL CLUTCH/BRAKE PEDAL ROS "ON" POSITION ATTACHMENT CLUTCH LEVER LIFT LEVER PLUNGER ATTACHMENT LIFT LEVER FREE WHEEL CONTROL PARKING BRAKE LIGHT SWITCH HEIGHT ADJUSTMENT KNOB 02884 FIG. 4 MOTION CONTROL LEVER Our tractors conform to the safety standards of tractor. Used to your tractor. Used to engage the mower blades or other attachments mounted to control engine speed. CHOKE CONTROL - Locks clutch/brake pedal into the brake position. Used to your tractor. CLUTCH/BRAKE PEDAL - HEIGHT ADJUSTMENT KNOB - LIFT LEVER...

User Manual
Page 12
... the engine. Any attempt by engaging attachment clutch control. • TO STOP MOWER BLADES - WARNING: Do not drive up or down hills. 12 NOTE:Adjust gauge wheels with slopes greater than 15° and do not drive across any slope. • Choose the slowest speed before backing. • Slowly move motion control lever to reverse (R) position to start movement. • When use of cut position, gauge wheels should only be assembled so...
... the engine. Any attempt by engaging attachment clutch control. • TO STOP MOWER BLADES - WARNING: Do not drive up or down hills. 12 NOTE:Adjust gauge wheels with slopes greater than 15° and do not drive across any slope. • Choose the slowest speed before backing. • Slowly move motion control lever to reverse (R) position to start movement. • When use of cut position, gauge wheels should only be assembled so...

User Manual
Page 13
..., already filled with summer weight oil. • Check engine oil with a minimum of 87 octane. (Use of your tractor. Do not mix oil with the ground and cause you should be needed. If necessary, add oil until the fuel lines and carburetor are recommended by placing freewheel control in neutral (N) position. • Move attachment clutch to "DISENGAGED" position. • Move throttle control to tractor. Tires can be sure hood is...
..., already filled with summer weight oil. • Check engine oil with a minimum of 87 octane. (Use of your tractor. Do not mix oil with the ground and cause you should be needed. If necessary, add oil until the fuel lines and carburetor are recommended by placing freewheel control in neutral (N) position. • Move attachment clutch to "DISENGAGED" position. • Move throttle control to tractor. Tires can be sure hood is...
User Manual
Page 14
... control lever to dry before operating tractor for best engine performance. NOTE: If at full throttle when mowing to reduce load and possible fire hazard from shrubs, fences, driveways, etc. See "TO LEVEL MOWER HOUSING" in cold temperatures (below ) • When engine starts, slowly push choke control in slowly. Shutoff engine and set . • Disengage transmission by turning to run - Repeat this procedure three (3) times. 14 FIG. 9 If grass...
... control lever to dry before operating tractor for best engine performance. NOTE: If at full throttle when mowing to reduce load and possible fire hazard from shrubs, fences, driveways, etc. See "TO LEVEL MOWER HOUSING" in cold temperatures (below ) • When engine starts, slowly push choke control in slowly. Shutoff engine and set . • Disengage transmission by turning to run - Repeat this procedure three (3) times. 14 FIG. 9 If grass...

User Manual
Page 15
... Fins Replace Spark Plug Replace Air Filter Paper Cartridge Replace Fuel Filter 1 - LUBRICATION CHART ➀SPINDLE ZERK ➀SPINDLE ZERK ➀FRONT WHEEL BEARING ZERK ➀FRONT WHEEL BEARING ZERK ➁ENGINE BEFORE EACH USE • Check engine oil level. • Check brake operation. • Check tire pressure. • Check operator presence and ROS systems for proper operation. • Check for Loose Fasteners A Sharpen/Replace Mower Blades C T Lubrication Chart 0 Check Battery Level R Clean Battery and Terminals Check Transaxle Cooling Check V-Belts...
... Fins Replace Spark Plug Replace Air Filter Paper Cartridge Replace Fuel Filter 1 - LUBRICATION CHART ➀SPINDLE ZERK ➀SPINDLE ZERK ➀FRONT WHEEL BEARING ZERK ➀FRONT WHEEL BEARING ZERK ➁ENGINE BEFORE EACH USE • Check engine oil level. • Check brake operation. • Check tire pressure. • Check operator presence and ROS systems for proper operation. • Check for Loose Fasteners A Sharpen/Replace Mower Blades C T Lubrication Chart 0 Check Battery Level R Clean Battery and Terminals Check Transaxle Cooling Check V-Belts...

User Manual
Page 16
... proper air pressure in the Service and Adjustments section of this manual). • Keep tires free of gasoline, oil, or insect control chemicals which can be taken to be kept sharp. ROS "ON" POSITION ENGINE "ON" POSITION (NORMAL OPERATING) BLADE CARE For best results mower blades must be checked and adjusted. (See "TO ADJUST BRAKE" in all tires (See"PRODUCT SPECIFICATIONS" section of your local parts dealer. CAUTION: Use only a replacement blade approved by...
... proper air pressure in the Service and Adjustments section of this manual). • Keep tires free of gasoline, oil, or insect control chemicals which can be taken to be kept sharp. ROS "ON" POSITION ENGINE "ON" POSITION (NORMAL OPERATING) BLADE CARE For best results mower blades must be checked and adjusted. (See "TO ADJUST BRAKE" in all tires (See"PRODUCT SPECIFICATIONS" section of your local parts dealer. CAUTION: Use only a replacement blade approved by...

User Manual
Page 17
... service classification SG-SL. ENGINE 5/8" BOLT OR PIN BLADE LUBRICATION Only use compressed air or high pressure sprayer to clean cool- To prevent damage to seals, do not use . However, periodic charging of the battery with the ground. If blade is maintenance free. TO CLEAN BATTERY AND TERMINALS Corrosion and dirt on the battery and terminals can cause the battery to "leak" power. • Remove terminal guard. • Disconnect BLACK battery cable...
... service classification SG-SL. ENGINE 5/8" BOLT OR PIN BLADE LUBRICATION Only use compressed air or high pressure sprayer to clean cool- To prevent damage to seals, do not use . However, periodic charging of the battery with the ground. If blade is maintenance free. TO CLEAN BATTERY AND TERMINALS Corrosion and dirt on the battery and terminals can cause the battery to "leak" power. • Remove terminal guard. • Disconnect BLACK battery cable...

User Manual
Page 18
.... See Engine Manual. Be sure dipstick cap is used more often under dusty conditions. SPARK PLUGS Replace spark plugs at "FULL" line on oil fill cap/dipstick for accurate reading. If fuel filter becomes clogged, obstructing fuel flow to prevent engine damage from tractor and mower. 18 CLAMP CLAMP FUEL FILTER FIG. 14 CLEANING • Clean engine, battery, seat, finish, etc. MAINTENANCE • Unlock drain valve by pushing inward and turning counterclockwise. •...
.... See Engine Manual. Be sure dipstick cap is used more often under dusty conditions. SPARK PLUGS Replace spark plugs at "FULL" line on oil fill cap/dipstick for accurate reading. If fuel filter becomes clogged, obstructing fuel flow to prevent engine damage from tractor and mower. 18 CLAMP CLAMP FUEL FILTER FIG. 14 CLEANING • Clean engine, battery, seat, finish, etc. MAINTENANCE • Unlock drain valve by pushing inward and turning counterclockwise. •...

User Manual
Page 19
... clutch spring on idler pulley bolt and secure with plug. SERVICE AND ADJUSTMENTS WARNING: TO AVOID SERIOUS INJURY, BEFORE PERFORMING ANY SERVICE OR ADJUSTMENTS: • Depress clutch/brake pedal fully and set parking brake. • Place motion control lever in neutral (N) position. • Place attachment clutch in "DISENGAGED" position. • Turn ignition key to "STOP" and remove key. • Make sure the blades and all moving parts have completely stopped. • Disconnect spark plug wire from under tractor...
... clutch spring on idler pulley bolt and secure with plug. SERVICE AND ADJUSTMENTS WARNING: TO AVOID SERIOUS INJURY, BEFORE PERFORMING ANY SERVICE OR ADJUSTMENTS: • Depress clutch/brake pedal fully and set parking brake. • Place motion control lever in neutral (N) position. • Place attachment clutch in "DISENGAGED" position. • Turn ignition key to "STOP" and remove key. • Make sure the blades and all moving parts have completely stopped. • Disconnect spark plug wire from under tractor...

User Manual
Page 20
... tractor on both front links an equal number of this manual). tions. Tighten nut "E" on level surface. SIDE-TO-SIDE ADJUSTMENT (See Figs. 16 and 17) • Raise mower to ground. MANDREL "D" "D" FIG. 18 BOTH FRONT LINKS MUST BE EQUAL IN LENGTH NUT "F" TRUNNION NUT "E" "A" GROUND LINE "A" FIG. 16 SUSPENSION ARM FRONT LINKS FIG. 19 TO REPLACE MOWER BLADE DRIVE BELT (See Fig. 20) The mower blade drive belt...
... tractor on both front links an equal number of this manual). tions. Tighten nut "E" on level surface. SIDE-TO-SIDE ADJUSTMENT (See Figs. 16 and 17) • Raise mower to ground. MANDREL "D" "D" FIG. 18 BOTH FRONT LINKS MUST BE EQUAL IN LENGTH NUT "F" TRUNNION NUT "E" "A" GROUND LINE "A" FIG. 16 SUSPENSION ARM FRONT LINKS FIG. 19 TO REPLACE MOWER BLADE DRIVE BELT (See Fig. 20) The mower blade drive belt...

User Manual
Page 21
... "transmission disengaged" position. TO ADJUST BRAKE • Depress clutch/brake pedal all the way down and engage parking brake. • Disengage transmission by placing freewheel control in highest gear, further maintenance is necessary. gage parking brake. • Measure distance between brake operating arm and nut "A" on brake rod. • If distance is in this section of tractor. BELT INSTALLATION • Carefully work new belt down and en- The rear wheels must be replaced...
... "transmission disengaged" position. TO ADJUST BRAKE • Depress clutch/brake pedal all the way down and engage parking brake. • Disengage transmission by placing freewheel control in highest gear, further maintenance is necessary. gage parking brake. • Measure distance between brake operating arm and nut "A" on brake rod. • If distance is in this section of tractor. BELT INSTALLATION • Carefully work new belt down and en- The rear wheels must be replaced...

User Manual
Page 23
... grounding. TO ADJUST CARBURETOR Your carburetor is necessary, see engine manual. Positive terminal must be connected first to prevent sparking from starting. • Check wiring. TO REPLACE HEADLIGHT BULB • Raise hood. • Pull bulb holder out of the hole in the backside of the grill. • Close hood. If adjustment is located behind the dash. SERVICE AND ADJUSTMENTS WEAK OR DEAD BATTERY FULLY CHARGED BATTERY FIG. 25 REPLACING BATTERY (See...
... grounding. TO ADJUST CARBURETOR Your carburetor is necessary, see engine manual. Positive terminal must be connected first to prevent sparking from starting. • Check wiring. TO REPLACE HEADLIGHT BULB • Raise hood. • Pull bulb holder out of the hole in the backside of the grill. • Close hood. If adjustment is located behind the dash. SERVICE AND ADJUSTMENTS WEAK OR DEAD BATTERY FULLY CHARGED BATTERY FIG. 25 REPLACING BATTERY (See...
User Manual
Page 24
... PARTS SUCH AS CARBURETOR, FUEL FILTER, FUEL HOSE, OR TANK DURING STORAGE. OTHER • Do not store gasoline from tractor for winter storage. Do not use engine or carburetor cleaner products in the Maintenance section of this manual). When mower is removed from dust and dirt. • Cover your tractor with battery terminals. • If battery is to be used for 30 days or more. placement instructions in the Service and Adjustments...
... PARTS SUCH AS CARBURETOR, FUEL FILTER, FUEL HOSE, OR TANK DURING STORAGE. OTHER • Do not store gasoline from tractor for winter storage. Do not use engine or carburetor cleaner products in the Maintenance section of this manual). When mower is removed from dust and dirt. • Cover your tractor with battery terminals. • If battery is to be used for 30 days or more. placement instructions in the Service and Adjustments...

User Manual
Page 25
... START ENGINE" in Service Adjustments section. 8. Replace spark plug. 5. Contact an authorized service center/department. Weak or dead battery. 4. Replace fuel filter. 5. Check all wiring. 7. Check/replace ignition switch. 8. Loose or damaged wiring. 4. Faulty solenoid or starter. 1. Dirty air filter. 5. Engine valves out of mower housing. 4. Clean underside of adjustment. 1. Check oil level/change spark plug. 7. Replace fuel filter. 8. Bent blade mandrel. 3. Replace damaged parts. 25 Engine not "CHOKED" properly. 3. Hard to start...
... START ENGINE" in Service Adjustments section. 8. Replace spark plug. 5. Contact an authorized service center/department. Weak or dead battery. 4. Replace fuel filter. 5. Check all wiring. 7. Check/replace ignition switch. 8. Loose or damaged wiring. 4. Faulty solenoid or starter. 1. Dirty air filter. 5. Engine valves out of mower housing. 4. Clean underside of adjustment. 1. Check oil level/change spark plug. 7. Replace fuel filter. 8. Bent blade mandrel. 3. Replace damaged parts. 25 Engine not "CHOKED" properly. 3. Hard to start...

User Manual
Page 26
... mower deck. 3. Mower deck not level. 5. Worn, bent or loose blade. 7. Faulty alternator. 1. Replace motion drive belt. 3. Purge transmission. Improper blades used. 11. Tighten blade bolt. 7. Replace with attachment clutch engaged 1. Bad battery cell(s). 2. Loss of mower housing. 8. Engine continues to open vent holes. Turn ignition key to open vent holes. Poor cut - Worn, bent or loose blade. 2. Place throttle control in transmission during shipment or servicing. 1. Check tires for proper air pressure. 6. Replace bulb(s) or lamp(s). 3. Faulty operator...
... mower deck. 3. Mower deck not level. 5. Worn, bent or loose blade. 7. Faulty alternator. 1. Replace motion drive belt. 3. Purge transmission. Improper blades used. 11. Tighten blade bolt. 7. Replace with attachment clutch engaged 1. Bad battery cell(s). 2. Loss of mower housing. 8. Engine continues to open vent holes. Turn ignition key to open vent holes. Poor cut - Worn, bent or loose blade. 2. Place throttle control in transmission during shipment or servicing. 1. Check tires for proper air pressure. 6. Replace bulb(s) or lamp(s). 3. Faulty operator...


