
Owner's Manual
Page 2
..., which can radiate radio frequency energy and, if not installed and used in for help. Be sure that to protect it from that the power supply voltage of electric shock to Part 15 of the following section carefully. PLEASE WRITE THIS SERIAL NUMBER ON YOUR ENCLOSED WARRANTY CARD AND KEEP IN A SECURE AREA. Reorient or relocate the receiving antenna. - D1-4-2-6-1_En...
..., which can radiate radio frequency energy and, if not installed and used in for help. Be sure that to protect it from that the power supply voltage of electric shock to Part 15 of the following section carefully. PLEASE WRITE THIS SERIAL NUMBER ON YOUR ENCLOSED WARRANTY CARD AND KEEP IN A SECURE AREA. Reorient or relocate the receiving antenna. - D1-4-2-6-1_En...

Owner's Manual
Page 4
... clock at a low setting. • Slowly increase the sound until it damaged, ask your nearest PIONEER authorized service center or your dealer for your protection. Do not pull out the plug by tugging the cord and never touch the power cord when your hearing. A damaged power cord can be performed only by playing it comfortably and clearly, and without affecting your volume control at two feet...
... clock at a low setting. • Slowly increase the sound until it damaged, ask your nearest PIONEER authorized service center or your dealer for your protection. Do not pull out the plug by tugging the cord and never touch the power cord when your hearing. A damaged power cord can be performed only by playing it comfortably and clearly, and without affecting your volume control at two feet...
Owner's Manual
Page 5
... Tone controls 18 Adjusting the bass and treble 18 Quiet and Midnight modes 18 Boosting the bass level 18 04 Disc playback features Scanning discs 19 Playing in a safe place for buying this Pioneer product. Contents 01 Controls and displays Front panel 7 Remote control 8 Display 10 02 Getting started Home theater sound setup 11 Using the Auto MCACC setup for optimal surround sound 12 Using the on-screen displays 13 Playing discs 13 Basic playback controls 13 Resume and Last Memory 14 DVD-Video disc...
... Tone controls 18 Adjusting the bass and treble 18 Quiet and Midnight modes 18 Boosting the bass level 18 04 Disc playback features Scanning discs 19 Playing in a safe place for buying this Pioneer product. Contents 01 Controls and displays Front panel 7 Remote control 8 Display 10 02 Getting started Home theater sound setup 11 Using the Auto MCACC setup for optimal surround sound 12 Using the on-screen displays 13 Playing discs 13 Basic playback controls 13 Resume and Last Memory 14 DVD-Video disc...
Owner's Manual
Page 6
06 Surround sound settings Using the Setup menu 28 07 Video Adjust menu Video Adjust menu 29 08 Initial Settings menu Using the Initial Settings menu 30 Video Output settings 30 Language settings 31 Display settings 31 Options settings 32 Parental Lock 32 About DivX® VOD content 33 09 Other connections Connecting external antennas 34 Connecting auxiliary components 34 Connecting for digital audio 34 Connecting an analog audio component 34 Connecting using the component video output 35 About progressive scan video 35 Connecting using HDMI 35 Switching the HDMI audio setting...
06 Surround sound settings Using the Setup menu 28 07 Video Adjust menu Video Adjust menu 29 08 Initial Settings menu Using the Initial Settings menu 30 Video Output settings 30 Language settings 31 Display settings 31 Options settings 32 Parental Lock 32 About DivX® VOD content 33 09 Other connections Connecting external antennas 34 Connecting auxiliary components 34 Connecting for digital audio 34 Connecting an analog audio component 34 Connecting using the component video output 35 About progressive scan video 35 Connecting using HDMI 35 Switching the HDMI audio setting...
Owner's Manual
Page 8
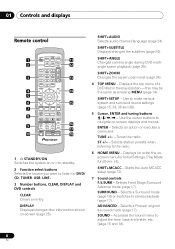
...SLEEP INPUT CHANNEL VOLUME MUTE SHIFT VOLUME 16 17 18 1 STANDBY/ON Switches the system on -screen displays and menus. DISPLAY Displays/changes disc information shown on-screen (page 25). ADVANCED - SHIFT+SETUP - Starts the Auto MCACC setup (page 12). 7 Sound controls F.S.SURR - Selects Front Stage Surround Advance mode (page 17). SURROUND - Selects a Surround mode (page 16) or switches to (DVD/ CD, TUNER, USB, LINE). 3 Number buttons, CLEAR, DISPLAY and DVD controls CLEAR Clears an entry. SOUND - SHIFT+ZOOM Changes the screen zoom level (page 24). 4 TOP MENU - Displays...
...SLEEP INPUT CHANNEL VOLUME MUTE SHIFT VOLUME 16 17 18 1 STANDBY/ON Switches the system on -screen displays and menus. DISPLAY Displays/changes disc information shown on-screen (page 25). ADVANCED - SHIFT+SETUP - Starts the Auto MCACC setup (page 12). 7 Sound controls F.S.SURR - Selects Front Stage Surround Advance mode (page 17). SURROUND - Selects a Surround mode (page 16) or switches to (DVD/ CD, TUNER, USB, LINE). 3 Number buttons, CLEAR, DISPLAY and DVD controls CLEAR Clears an entry. SOUND - SHIFT+ZOOM Changes the screen zoom level (page 24). 4 TOP MENU - Displays...
Owner's Manual
Page 12
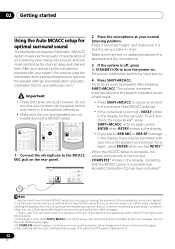
STANDBY TUNER SOUND /ON DVD CD (FM/AM) RETRIEVER USB LINE OPEN/CLOSE PLAYLIST 1 2 31 AUDIO SUBTITLE 4 5 62 ANGLE ZOOM 7 8 93 CLEAR TOP MENU DISPLAY 0 TUNE MENU SETUP ST HOME MENU ENTER SR ST RETURN MCACC TUNE TEST TONE F.S.SURR SURROUND ADVANCED SOUND TV CONTROL SLEEP INPUT CHANNEL VOLUME MUTE SHIFT VOLUME 1 Connect the microphone to use the Auto MCACC setup once (unless you change the placement of your speakers or your particular room.1 Important • These test tones are not moved during setup as...
STANDBY TUNER SOUND /ON DVD CD (FM/AM) RETRIEVER USB LINE OPEN/CLOSE PLAYLIST 1 2 31 AUDIO SUBTITLE 4 5 62 ANGLE ZOOM 7 8 93 CLEAR TOP MENU DISPLAY 0 TUNE MENU SETUP ST HOME MENU ENTER SR ST RETURN MCACC TUNE TEST TONE F.S.SURR SURROUND ADVANCED SOUND TV CONTROL SLEEP INPUT CHANNEL VOLUME MUTE SHIFT VOLUME 1 Connect the microphone to use the Auto MCACC setup once (unless you change the placement of your speakers or your particular room.1 Important • These test tones are not moved during setup as...
Owner's Manual
Page 13
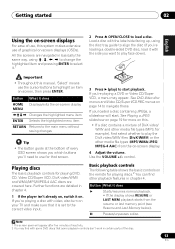
... select whether to play the DivX video/WMV files (DivX/WMV) or the other playback features in basically the same way, using the disc tray guide to align the disc (if you're loading a double-sided DVD disc, load it with video, also turn on your TV and make sure that it is set to the correct video input. Button What it does HOME Displays/exits the on-screen display MENU Changes...
... select whether to play the DivX video/WMV files (DivX/WMV) or the other playback features in basically the same way, using the disc tray guide to align the disc (if you're loading a double-sided DVD disc, load it with video, also turn on your TV and make sure that it is set to the correct video input. Button What it does HOME Displays/exits the on-screen display MENU Changes...
Owner's Manual
Page 16
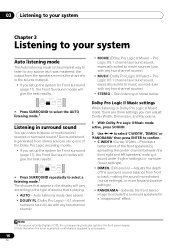
... the surround sound balance from front to back, making it was mastered: the output from stereo sources using one of source that's playing. • AUTO - 03 Listening to your system Chapter 3 Listening to your system Auto listening mode The Auto listening mode is not possible. 16 En Note 1 If the source is Dolby Digital or DTS, the corresponding indicator lights in the front panel display. 2 Note that appear in the display will...
... the surround sound balance from front to back, making it was mastered: the output from stereo sources using one of source that's playing. • AUTO - 03 Listening to your system Chapter 3 Listening to your system Auto listening mode The Auto listening mode is not possible. 16 En Note 1 If the source is Dolby Digital or DTS, the corresponding indicator lights in the front panel display. 2 Note that appear in the display will...
Owner's Manual
Page 17
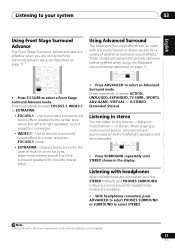
... SURROUND ADVANCED SOUND • Press SURROUND repeatedly until STEREO shows in stereo. Use to provide a rich surround sound effect directed to the center area where the left /right speakers and the subwoofer. MCACC TUNE TEST TONE F.S.SURR SURROUND ADVANCED SOUND • Press ADVANCED to a wider area than FOCUS5.1 mode. • EXTRAPWR - in the display. Outputs stereo sound (in stereo You can be used with headphones When headphones are connected, only the STEREO (default) and PHONES SURROUND (virtual surround sound for powerful stereo...
... SURROUND ADVANCED SOUND • Press SURROUND repeatedly until STEREO shows in stereo. Use to provide a rich surround sound effect directed to the center area where the left /right speakers and the subwoofer. MCACC TUNE TEST TONE F.S.SURR SURROUND ADVANCED SOUND • Press ADVANCED to a wider area than FOCUS5.1 mode. • EXTRAPWR - in the display. Outputs stereo sound (in stereo You can be used with headphones When headphones are connected, only the STEREO (default) and PHONES SURROUND (virtual surround sound for powerful stereo...
Owner's Manual
Page 18
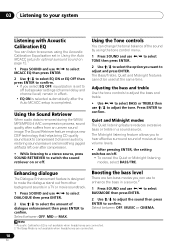
... connected. 18 En Enhancing dialogue The Dialogue Enhancement feature is selected automatically after compression. • While listening to a stereo source, press SOUND RETRIEVER to off . • To cancel the Quiet or Midnight listening modes, select BASS/TRE. The Sound Retriever feature employs new DSP technology that helps bring CD quality sound back to compressed 2-channel audio by using the Acoustic Calibration Equalization set in Using the Auto MCACC setup...
... connected. 18 En Enhancing dialogue The Dialogue Enhancement feature is selected automatically after compression. • While listening to a stereo source, press SOUND RETRIEVER to off . • To cancel the Quiet or Midnight listening modes, select BASS/TRE. The Sound Retriever feature employs new DSP technology that helps bring CD quality sound back to compressed 2-channel audio by using the Acoustic Calibration Equalization set in Using the Auto MCACC setup...

Owner's Manual
Page 22
..., you can't use random play together with program play. • You can't use repeat play with VR format DVD-R/-RW discs, WMA/MP3/MPEG-4 AAC discs, DivX video/WMV discs, or while a DVD disc menu is playing at the same time as audio). If no playlist has been programmed, NO LIST shows in the front panel display. Clearing files from the playlist and press CLEAR. Note 1 You can set the loop...
..., you can't use random play together with program play. • You can't use repeat play with VR format DVD-R/-RW discs, WMA/MP3/MPEG-4 AAC discs, DivX video/WMV discs, or while a DVD disc menu is playing at the same time as audio). If no playlist has been programmed, NO LIST shows in the front panel display. Clearing files from the playlist and press CLEAR. Note 1 You can set the loop...
Owner's Manual
Page 26
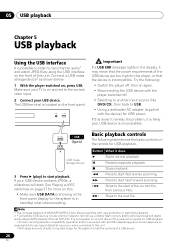
... the USB device with the player switched off. • Selecting to another input source (like DVD/CD), then back to the correct video input. 2 Connect your TV is on and set to USB. • Using a dedicated AC adapter (supplied with copy-protection or restricted playback). 2 • Compatible USB devices include external magnetic hard drives, portable flash memory (particularly keydrives) and digital audio players (MP3 players) of the USB device are too high for USB power. Note...
... the USB device with the player switched off. • Selecting to another input source (like DVD/CD), then back to the correct video input. 2 Connect your TV is on and set to USB. • Using a dedicated AC adapter (supplied with copy-protection or restricted playback). 2 • Compatible USB devices include external magnetic hard drives, portable flash memory (particularly keydrives) and digital audio players (MP3 players) of the USB device are too high for USB power. Note...
Owner's Manual
Page 28
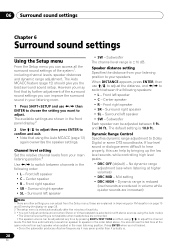
... best surround sound setup. You should give you 're finished. • Since the subwoofer produces ultra-low frequencies it may find that using the Auto mode). • The Channel level setting is exited automatically after five minutes of the system1, including channel levels, speaker distances and dynamic range adjustment. these are connected. • The speaker volume can be adjusted between the following order: • L - Surround left speaker • C - 06 Surround sound settings Chapter 6 Surround sound settings Using the Setup menu From the Setup menu...
... best surround sound setup. You should give you 're finished. • Since the subwoofer produces ultra-low frequencies it may find that using the Auto mode). • The Channel level setting is exited automatically after five minutes of the system1, including channel levels, speaker distances and dynamic range adjustment. these are connected. • The speaker volume can be adjusted between the following order: • L - Surround left speaker • C - 06 Surround sound settings Chapter 6 Surround sound settings Using the Setup menu From the Setup menu...

Owner's Manual
Page 34
... have HDMI terminals. Leave the loop antenna connected. Only use a PAL connector to hook up either indoors or outdoors. To audio output Tape deck, etc. These include digital components such as your digital TV, MD or CD recorder. 34 En Digital TV To digital output (optical) OPTICAL LINE 1 DIGITAL IN MCACC SETUP MIC COMPONENT PR VIDEO VIDEO PB IN Y CONTROL VIDEO OUT • Connect the LINE 1 DIGITAL IN jack to the digital output of an external playback component. Connect using RCA pin-plug stereo cables. Connecting...
... have HDMI terminals. Leave the loop antenna connected. Only use a PAL connector to hook up either indoors or outdoors. To audio output Tape deck, etc. These include digital components such as your digital TV, MD or CD recorder. 34 En Digital TV To digital output (optical) OPTICAL LINE 1 DIGITAL IN MCACC SETUP MIC COMPONENT PR VIDEO VIDEO PB IN Y CONTROL VIDEO OUT • Connect the LINE 1 DIGITAL IN jack to the digital output of an external playback component. Connect using RCA pin-plug stereo cables. Connecting...
Owner's Manual
Page 36
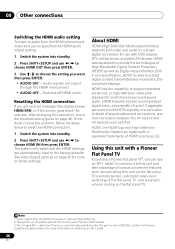
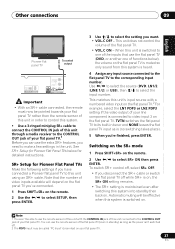
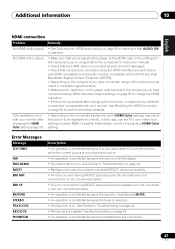
... under the part number ADE7095. 09 Other connections Switching the HDMI audio setting To listen to audio from the HDMI interconnect, make sure you've specified the HDMI audio output setting. 1 Switch the system into standby. 2 Press SHIFT+SETUP and use / to the factory defaults. HDMI has the capability to support standard, enhanced, or high-definition video plus standard to protect digital content transmitted and received by DVIcompliant displays. Audio signals are automatically reset to choose HDMI INI then...
... under the part number ADE7095. 09 Other connections Switching the HDMI audio setting To listen to audio from the HDMI interconnect, make sure you've specified the HDMI audio output setting. 1 Switch the system into standby. 2 Press SHIFT+SETUP and use / to the factory defaults. HDMI has the capability to support standard, enhanced, or high-definition video plus standard to protect digital content transmitted and received by DVIcompliant displays. Audio signals are automatically reset to choose HDMI INI then...
Owner's Manual
Page 37
... of the inputs that the number of video inputs available will be able to the corresponding input number. See SR+ Setup for detailed instructions. Use / to select the source (DVD, LN1/2 (LINE 1/2) or USB), then / to the CONTROL OUT jack of the flat panel TV. • VOL.C ON - TVTN switches the flat panel TV to its built-in standby) as long as is connected to select SR...
... of the inputs that the number of video inputs available will be able to the corresponding input number. See SR+ Setup for detailed instructions. Use / to select the source (DVD, LN1/2 (LINE 1/2) or USB), then / to the CONTROL OUT jack of the flat panel TV. • VOL.C ON - TVTN switches the flat panel TV to its built-in standby) as long as is connected to select SR...
Owner's Manual
Page 44
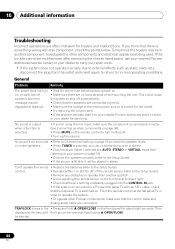
... information Troubleshooting Incorrect operations are no loose strands of wire touching the unit. Then display and the tray can't the tray can only hear the source in stereo. General Problem Remedy The power does not turn muting off. • Turn up the volume. No sound is output when a function is switched on , or switches off automatically. or center speakers. • When TUNER is connected to Channel level setting on . Can't operate the remote • Replace the...
... information Troubleshooting Incorrect operations are no loose strands of wire touching the unit. Then display and the tray can't the tray can only hear the source in stereo. General Problem Remedy The power does not turn muting off. • Turn up the volume. No sound is output when a function is switched on , or switches off automatically. or center speakers. • When TUNER is connected to Channel level setting on . Can't operate the remote • Replace the...
Owner's Manual
Page 45
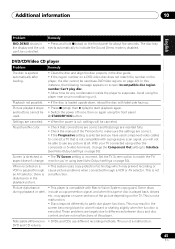
... after loading. • Clean the disc and align the disc properly in the disc guide. • If the region number on a DVD-video disc does not match the number on the player, the disc cannot be controlled. can't be used component video cables to connect a TV that is loaded upside down, reload the disc with a progressive scan signal, you 're using the front panel STANDBY/ON button. Additional information 10 English Deutsch Fran...
... after loading. • Clean the disc and align the disc properly in the disc guide. • If the region number on a DVD-video disc does not match the number on the player, the disc cannot be controlled. can't be used component video cables to connect a TV that is loaded upside down, reload the disc with a progressive scan signal, you 're using the front panel STANDBY/ON button. Additional information 10 English Deutsch Fran...
Owner's Manual
Page 46
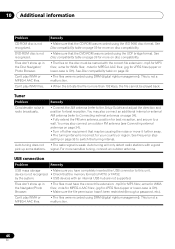
... disc compatibility. • Make sure that the CD-ROM was recorded using DRM (digital rights management). by the system. • USB devices with a good signal. See Disc compatibility table on page 38 to a wall. Remedy • Make sure that the DVD-ROM was recorded using DRM (digital rights management). Auto tuning will only detect radio stations with an internal USB hub are not supported. You may be played back. See Frequency step setting...
... disc compatibility. • Make sure that the CD-ROM was recorded using DRM (digital rights management). by the system. • USB devices with a good signal. See Disc compatibility table on page 38 to a wall. Remedy • Make sure that the DVD-ROM was recorded using DRM (digital rights management). Auto tuning will only detect radio stations with an internal USB hub are not supported. You may be played back. See Frequency step setting...
Owner's Manual
Page 47
... operation is prohibited because the source is 96 kHz digital. • The sound demo is not connected properly. • An error occured during MCACC setup because the speakers are not connected or are connected. 47 En In this player as the HDMI input in the settings for the component you're using the HDMI interface are switched on and HDMI compatible (components must be displayed incorrectly. See Key lock setting on page 36 to reset...
... operation is prohibited because the source is 96 kHz digital. • The sound demo is not connected properly. • An error occured during MCACC setup because the speakers are not connected or are connected. 47 En In this player as the HDMI input in the settings for the component you're using the HDMI interface are switched on and HDMI compatible (components must be displayed incorrectly. See Key lock setting on page 36 to reset...


