
Operating Instructions
Page 4
... Connecting to a cable box or satellite receiver (2 19 Connecting to an AV amplifier or receiver 20 Connecting using HDMI 21 Connecting other AV sources 23 Connecting a USB device 24 Plugging in 25 03 Controls and displays Front panel 26 Display 27 Remote control 28 04 Getting started Switching on and setting up 30 05 Recording About DVD recording 33 About HDD recording 34 Recorded audio 35 Restrictions on video recording 35 Using the built-in TV tuner 36 Setting the picture quality/ recording time...
... Connecting to a cable box or satellite receiver (2 19 Connecting to an AV amplifier or receiver 20 Connecting using HDMI 21 Connecting other AV sources 23 Connecting a USB device 24 Plugging in 25 03 Controls and displays Front panel 26 Display 27 Remote control 28 04 Getting started Switching on and setting up 30 05 Recording About DVD recording 33 About HDD recording 34 Recorded audio 35 Restrictions on video recording 35 Using the built-in TV tuner 36 Setting the picture quality/ recording time...

Operating Instructions
Page 5
... external inputs 102 Setting the picture quality for disc playback 103 14 The Initial Setup menu Using the Initial Setup menu 105 Selecting other languages for language options 115 15 Additional information Minimum copying times 116 Manual recording modes 117 Troubleshooting 118 If the picture freezes and the front panel and remote control buttons stop working 123 On-screen displays 124 Front-panel displays 126 Setting up the remote to control your TV 127 Language code list 128 Country/Area code list 128 Screen sizes and disc formats 129 Handling discs 130 Cleaning...
... external inputs 102 Setting the picture quality for disc playback 103 14 The Initial Setup menu Using the Initial Setup menu 105 Selecting other languages for language options 115 15 Additional information Minimum copying times 116 Manual recording modes 117 Troubleshooting 118 If the picture freezes and the front panel and remote control buttons stop working 123 On-screen displays 124 Front-panel displays 126 Setting up the remote to control your TV 127 Language code list 128 Country/Area code list 128 Screen sizes and disc formats 129 Handling discs 130 Cleaning...

Operating Instructions
Page 8
... the available recording time, nor increase the number of recordable titles left. *15 Must be compatible with DVD-RAM playback. *11 Only when the recording mode is a trademark of DVD Format/Logo 8 Mode Off (page 111). Discs from other n/a players/recorders Chase play and record all widely-used in this manual Logos HDD HDD DVD-R DVD-RW DVD+R DVD +RW DVDRAM DVD (VR) *1 DVD (Video) DVD (VR) *1 DVD (Video) *2 DVD+R DVD+RW DVD-RAM *13, 16 Re-recordable/ ì Erasable Editing of recorded ì programmes Recording of Copy- ì once protected material Playback in...
... the available recording time, nor increase the number of recordable titles left. *15 Must be compatible with DVD-RAM playback. *11 Only when the recording mode is a trademark of DVD Format/Logo 8 Mode Off (page 111). Discs from other n/a players/recorders Chase play and record all widely-used in this manual Logos HDD HDD DVD-R DVD-RW DVD+R DVD +RW DVDRAM DVD (VR) *1 DVD (Video) DVD (VR) *1 DVD (Video) *2 DVD+R DVD+RW DVD-RAM *13, 16 Re-recordable/ ì Erasable Editing of recorded ì programmes Recording of Copy- ì once protected material Playback in...

Operating Instructions
Page 11
... your DivX VOD content allows an unlimited number of plays, then you may not be playable in packet write mode (UDF format) are trademarks of Dolby Laboratories. Manufactured under license from Dolby Laboratories. Check the DVD-R/-RW or CD-R/-RW software disc boxes for more can be reloaded) PC-created disc compatibility Discs recorded using up to 99 folders/999 files at one of the remaining plays), or stopping. "Dolby...
... your DivX VOD content allows an unlimited number of plays, then you may not be playable in packet write mode (UDF format) are trademarks of Dolby Laboratories. Manufactured under license from Dolby Laboratories. Check the DVD-R/-RW or CD-R/-RW software disc boxes for more can be reloaded) PC-created disc compatibility Discs recorded using up to 99 folders/999 files at one of the remaining plays), or stopping. "Dolby...

Operating Instructions
Page 20
... INPUT 1/AUTO START REC R AUDIO L VIDEO OUTPUT 2 S-VIDEO CONTROL IN Y PB PR COMPONENT VIDEO OUT OUTPUT 1 OUTPUT 1 1 2 To audio/video input DIGITAL AUDIO OUT HDMI OUT COAXIAL AC IN DIGITAL AUDIO OUT To digital input 3 AV amp/ receiver To antenna input From video output 4 To video input TV 1 Connect RF antenna cables as shown here), or the S-video or component video connections. Always connect it directly to a video input on your TV. Note 20 1 If your AV amp/receiver doesn't have an coaxial digital input, but has a optical type, converter boxes...
... INPUT 1/AUTO START REC R AUDIO L VIDEO OUTPUT 2 S-VIDEO CONTROL IN Y PB PR COMPONENT VIDEO OUT OUTPUT 1 OUTPUT 1 1 2 To audio/video input DIGITAL AUDIO OUT HDMI OUT COAXIAL AC IN DIGITAL AUDIO OUT To digital input 3 AV amp/ receiver To antenna input From video output 4 To video input TV 1 Connect RF antenna cables as shown here), or the S-video or component video connections. Always connect it directly to a video input on your TV. Note 20 1 If your AV amp/receiver doesn't have an coaxial digital input, but has a optical type, converter boxes...

Operating Instructions
Page 23
... you to record tapes from this recorder. 23 En STANDBY/ON DV IN HDD/DVD DivX COPY USB DV IN OPEN/CLOSE HDMI STOP REC ONE TOUCH COPY CH INPUT SELECT REC MODE INPUT 2 S-VIDEO VIDEO L(MONO) R AUDIO REC From DV output DV camcorder • Use a DV cable (not supplied) to connect the DV jack of your VCR or camcorder. • You can use standard video or S-video cables for the video connection. • The front panel connections make child lock settings (see Preventing use standard video or S-video cables for connection to be able...
... you to record tapes from this recorder. 23 En STANDBY/ON DV IN HDD/DVD DivX COPY USB DV IN OPEN/CLOSE HDMI STOP REC ONE TOUCH COPY CH INPUT SELECT REC MODE INPUT 2 S-VIDEO VIDEO L(MONO) R AUDIO REC From DV output DV camcorder • Use a DV cable (not supplied) to connect the DV jack of your VCR or camcorder. • You can use standard video or S-video cables for the video connection. • The front panel connections make child lock settings (see Preventing use standard video or S-video cables for connection to be able...

Operating Instructions
Page 28
... DVD playback functions AUDIO (page 36, 60) Changes the audio language or channel. (When the recorder is stopped, press to change the input to use for recording. 8 Alphanumeric buttons, + and CLEAR Use the number buttons for track/chapter/ title selection; 03 Controls and displays Remote control 1 3 5 8 10 11 13 15 16 20 21 22 STANDBY/ON ONE TOUCH COPY OPEN/CLOSE HDD ABC DVD DEF INPUT SELECT GHI JKL MNO PQRS TUV WXYZ CH VCR Plus++ AUDIO SUBTITLE CLEAR CLEAR ANGLE PLAY MODE DISC NAVIGATOR MENU TOP MENU HOME MENU ENTER...
... DVD playback functions AUDIO (page 36, 60) Changes the audio language or channel. (When the recorder is stopped, press to change the input to use for recording. 8 Alphanumeric buttons, + and CLEAR Use the number buttons for track/chapter/ title selection; 03 Controls and displays Remote control 1 3 5 8 10 11 13 15 16 20 21 22 STANDBY/ON ONE TOUCH COPY OPEN/CLOSE HDD ABC DVD DEF INPUT SELECT GHI JKL MNO PQRS TUV WXYZ CH VCR Plus++ AUDIO SUBTITLE CLEAR CLEAR ANGLE PLAY MODE DISC NAVIGATOR MENU TOP MENU HOME MENU ENTER...

Operating Instructions
Page 34
... another DVD recorder. 34 En About HDD recording Recording to the internal hard disk drive (HDD) is cut (due to a power outage, the plug being recorded when the layer is switched, recording will stop. • Up to 49 titles can be recorded on page 107). Important • The maximum number of two formats. When set which channel you like. In this case, try re-initializing the disc (DVD-RW only), or use a new disc. Pioneer...
... another DVD recorder. 34 En About HDD recording Recording to the internal hard disk drive (HDD) is cut (due to a power outage, the plug being recorded when the layer is switched, recording will stop. • Up to 49 titles can be recorded on page 107). Important • The maximum number of two formats. When set which channel you like. In this case, try re-initializing the disc (DVD-RW only), or use a new disc. Pioneer...

Operating Instructions
Page 37
... the On Screen Display setting (see On Screen Display on page 49). If a recordable disc is loaded, the approximate remaining recording time for that disc is Off then this . • When recording in VR mode (DVD) or with HDD Recording Format set to Video Mode Off (HDD), both mono and SAP audio channels are always copied in 30 minute increments, up to select the channel (e.g., for a blank recordable disc. REC MODE 3 Set the picture quality/recording time. • See Setting the picture quality/recording time on page...
... the On Screen Display setting (see On Screen Display on page 49). If a recordable disc is loaded, the approximate remaining recording time for that disc is Off then this . • When recording in VR mode (DVD) or with HDD Recording Format set to Video Mode Off (HDD), both mono and SAP audio channels are always copied in 30 minute increments, up to select the channel (e.g., for a blank recordable disc. REC MODE 3 Set the picture quality/recording time. • See Setting the picture quality/recording time on page...
Operating Instructions
Page 38
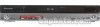
... to HDD). 05 Recording the front panel display. You can set the recording quality for you can set if there are three ways to record just once, every day, or every week. When the recording ends, the recorder automatically switches into standby if no disc loaded, or the disc loaded is active. You can program up to 32 timer recordings up to the hard disk drive. DVD (VR) DVD (Video) DVD+R DVD+RW DVD-RAM HDD Using the timer recording...
... to HDD). 05 Recording the front panel display. You can set the recording quality for you can set if there are three ways to record just once, every day, or every week. When the recording ends, the recorder automatically switches into standby if no disc loaded, or the disc loaded is active. You can program up to 32 timer recordings up to the hard disk drive. DVD (VR) DVD (Video) DVD+R DVD+RW DVD-RAM HDD Using the timer recording...

Operating Instructions
Page 40
... onscreen display. 2 After making the settings, select 'Enter' and press ENTER. If you want to display the VCR Plus+ programme screen. Recording start time Recording end time Easy Timer Recording 11:00 1/01 2/01 3/01 12:00 13:00 14:00 15:00 16:00 17:00 1/01 MON 11:45 - 13:45 7ch REC MODE SP HDD/DVD HDD As you just input the corresponding code. Most TV guides publish PlusCode programming numbers...
... onscreen display. 2 After making the settings, select 'Enter' and press ENTER. If you want to display the VCR Plus+ programme screen. Recording start time Recording end time Easy Timer Recording 11:00 1/01 2/01 3/01 12:00 13:00 14:00 15:00 16:00 17:00 1/01 MON 11:45 - 13:45 7ch REC MODE SP HDD/DVD HDD As you just input the corresponding code. Most TV guides publish PlusCode programming numbers...

Operating Instructions
Page 42
... change the recording mode, recording destination, etc., select 'Set Detailed'. Timer Programme View Manhattan Open Tennis 26/3 SUN 18:00 - 19:00 World Journey 27/3 MON 19:30 - 21:00 Flower MON - use the / buttons to switch page (go back using the PREV button). • You can also delete a timer programme before it's started (before the recorder enters timer recording standby) by highlighting it and pressing CLEAR. Select HDD for hard disk recording or DVD for Auto Replace Recording...
... change the recording mode, recording destination, etc., select 'Set Detailed'. Timer Programme View Manhattan Open Tennis 26/3 SUN 18:00 - 19:00 World Journey 27/3 MON 19:30 - 21:00 Flower MON - use the / buttons to switch page (go back using the PREV button). • You can also delete a timer programme before it's started (before the recorder enters timer recording standby) by highlighting it and pressing CLEAR. Select HDD for hard disk recording or DVD for Auto Replace Recording...

Operating Instructions
Page 46
... to play an HDD title, DVD or Video CD/Super VCD disc if the Input Line System setting doesn't match the TV line system of the playback track/title changes then playback will automatically stop recording, press STOP REC (playback will continue). • During recording or in Auto Start Recording standby (the AUTO indicator is connected properly to the HDD/DVD recorder. En INPUT 2 (front panel) • L3 - There are as a camcorder or VCR, connected to one of the external inputs to start playback...
... to play an HDD title, DVD or Video CD/Super VCD disc if the Input Line System setting doesn't match the TV line system of the playback track/title changes then playback will automatically stop recording, press STOP REC (playback will continue). • During recording or in Auto Start Recording standby (the AUTO indicator is connected properly to the HDD/DVD recorder. En INPUT 2 (front panel) • L3 - There are as a camcorder or VCR, connected to one of the external inputs to start playback...

Operating Instructions
Page 47
... HDMI Control setting to switch Auto Start Recording on page 36 for detailed information. 4 HDD DVD Select the HDD or DVD for more details. • If Auto Start Recording is set, it into standby. the recorder is in progress. • Timer recordings take precedence over Auto Start Recording. the HDD already contains the maximum number of set top box connected to the INPUT 1/AUTO START REC input, you 'll need to use it detects a signal from a DV camcorder on and start and stop if a timer recording is not recordable. 47 - REC MODE 3 Set...
... HDMI Control setting to switch Auto Start Recording on page 36 for detailed information. 4 HDD DVD Select the HDD or DVD for more details. • If Auto Start Recording is set, it into standby. the recorder is in progress. • Timer recordings take precedence over Auto Start Recording. the HDD already contains the maximum number of set top box connected to the INPUT 1/AUTO START REC input, you 'll need to use it detects a signal from a DV camcorder on and start and stop if a timer recording is not recordable. 47 - REC MODE 3 Set...
Operating Instructions
Page 48
... finalize a DVD-R/-RW (Video mode) or DVD+R disc, a title menu is different to the current setting of the disc is created from to suit the content of players (including many Pioneer models) can also play DVD-RW discs recorded in the title menu after you can't edit or record anything else on a regular DVD player or computer equipped with no OSD displayed, press and hold the front panel STOP REC button for more than three seconds to change the recorder's setting. Finalizing a disc DVD (VR) DVD (Video) DVD+R DVD...
... finalize a DVD-R/-RW (Video mode) or DVD+R disc, a title menu is different to the current setting of the disc is created from to suit the content of players (including many Pioneer models) can also play DVD-RW discs recorded in the title menu after you can't edit or record anything else on a regular DVD player or computer equipped with no OSD displayed, press and hold the front panel STOP REC button for more than three seconds to change the recorder's setting. Finalizing a disc DVD (VR) DVD (Video) DVD+R DVD...

Operating Instructions
Page 69
... discs formatted on a different DVD recorder, you want to erase. ENTER 3 title. NO P Q R S T U VWX Y Z ( ) : ; Use the REV SCAN/ FWD SCAN buttons to change the cursor position. • Select CAPS or small to change to upper or lower-case, or use the CASE SELECTION buttons ( PREV/ NEXT). • You can also use the CLEAR button to delete characters directly (press and hold for the selected ENTER 2 Select 'Erase' from the command menu panel. ENTER 3 Select...
... discs formatted on a different DVD recorder, you want to erase. ENTER 3 title. NO P Q R S T U VWX Y Z ( ) : ; Use the REV SCAN/ FWD SCAN buttons to change the cursor position. • Select CAPS or small to change to upper or lower-case, or use the CASE SELECTION buttons ( PREV/ NEXT). • You can also use the CLEAR button to delete characters directly (press and hold for the selected ENTER 2 Select 'Erase' from the command menu panel. ENTER 3 Select...
Operating Instructions
Page 105
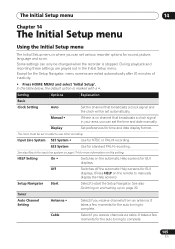
... remote to manually display the Help screen.) Setup Navigator Start Select to complete. See also About the input line system on page 114 for the auto tuning to start the Setup Navigator. Some settings can set in the Initial Setup menu. During playback and recording these settings are exited automatically after 20 minutes of inactivity. • Press HOME MENU and select 'Initial Setup'. Except for sound, picture, language and so on. Setting Options Explanation Basic Clock Setting Auto Set the channel...
... remote to manually display the Help screen.) Setup Navigator Start Select to complete. See also About the input line system on page 114 for the auto tuning to start the Setup Navigator. Some settings can set in the Initial Setup menu. During playback and recording these settings are exited automatically after 20 minutes of inactivity. • Press HOME MENU and select 'Initial Setup'. Except for sound, picture, language and so on. Setting Options Explanation Basic Clock Setting Auto Set the channel...

Operating Instructions
Page 114
... selected title. (Note that edited titles that will play normally from the beginning.) Normal The thumbnail video plays from an external input or the 114 built-in the same (default: Recorder 1) room, set . If the device still does not work with the same ID. Using this option to confirm the make any number of the title. 14 The Initial Setup menu Setting Remote Control Mode DivX VOD Set Preview (HDD only) Options 2 USB HDD...
... selected title. (Note that edited titles that will play normally from the beginning.) Normal The thumbnail video plays from an external input or the 114 built-in the same (default: Recorder 1) room, set . If the device still does not work with the same ID. Using this option to confirm the make any number of the title. 14 The Initial Setup menu Setting Remote Control Mode DivX VOD Set Preview (HDD only) Options 2 USB HDD...

Operating Instructions
Page 119
... picture is copy-protected, you have a widescreen TV, check its aspect ratio settings. • This recorder's input switches into standby before unplugging the power cord. Screen is stretched vertically or horizontally • Make sure that the TV Screen Size setting (page 111) is On. • Some 96 kHz discs do not output audio through the digital jack. Remote control does not work • If you switch the recorder into wide mode automatically according to Recorder1.) • Use...
... picture is copy-protected, you have a widescreen TV, check its aspect ratio settings. • This recorder's input switches into standby before unplugging the power cord. Screen is stretched vertically or horizontally • Make sure that the TV Screen Size setting (page 111) is On. • Some 96 kHz discs do not output audio through the digital jack. Remote control does not work • If you switch the recorder into wide mode automatically according to Recorder1.) • Use...
Operating Instructions
Page 133
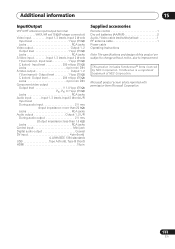
...Audio input . . . . . .Input 1, 3 (rear), Input 2 (front) L/R Input level During audio input 2 V rms (Input impedance: more than 22 kΩ) Jacks RCA jacks Audio output Output 1, 2 L/R During audio output 2 V rms (Output impedance: less than 1.5 kΩ) Jacks RCA jacks Control input Mini jack Digital audio output Coaxial DV input 4 pin (front) (i.LINK/IEEE 1394 standard) USB Type A (front), Type B (front) HDMI 19 pin Supplied accessories Remote control 1 Dry cell batteries (AA/R6P 2 Audio / Video cable (red/white/yellow 1 RF antenna cable 1 Power cable Operating Instructions...
...Audio input . . . . . .Input 1, 3 (rear), Input 2 (front) L/R Input level During audio input 2 V rms (Input impedance: more than 22 kΩ) Jacks RCA jacks Audio output Output 1, 2 L/R During audio output 2 V rms (Output impedance: less than 1.5 kΩ) Jacks RCA jacks Control input Mini jack Digital audio output Coaxial DV input 4 pin (front) (i.LINK/IEEE 1394 standard) USB Type A (front), Type B (front) HDMI 19 pin Supplied accessories Remote control 1 Dry cell batteries (AA/R6P 2 Audio / Video cable (red/white/yellow 1 RF antenna cable 1 Power cable Operating Instructions...


