Owner's Manual
Page 2
... Additional Information Understanding built-in CD player error messages 17 CD player and care 17 CD-R/CD-RW discs 17 Specifications 19 Before You Start Information to the radio 8 Storing and recalling broadcast frequencies 8 Tuning in strong signals 9 Storing the strongest broadcast frequencies 9 Built-in CD Player Playing a CD 10 Playing tracks in a safe place for Pioneer products 4 Product registration 5 Precautions...
... Additional Information Understanding built-in CD player error messages 17 CD player and care 17 CD-R/CD-RW discs 17 Specifications 19 Before You Start Information to the radio 8 Storing and recalling broadcast frequencies 8 Tuning in strong signals 9 Storing the strongest broadcast frequencies 9 Built-in CD Player Playing a CD 10 Playing tracks in a safe place for Pioneer products 4 Product registration 5 Precautions...
Owner's Manual
Page 5
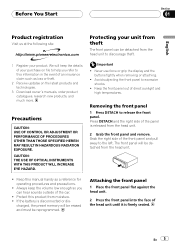
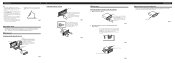
... this product from moisture. ! Important ! En 5 If the battery is released from the head unit. 2 Grab the front panel and remove. Attaching the front panel 1 Place the front panel flat against the head unit. 2 Press the front panel into the face of direct ... and high temperatures. Keep the front panel out of the head unit until it is firmly seated. Removing the front panel 1 Press DETACH to excessive shocks. ! Never use force or grip the display and the buttons tightly when... the following site: Protecting your unit from theft The front panel can hear sounds outside of the car. !
... this product from moisture. ! Important ! En 5 If the battery is released from the head unit. 2 Grab the front panel and remove. Attaching the front panel 1 Place the front panel flat against the head unit. 2 Press the front panel into the face of direct ... and high temperatures. Keep the front panel out of the head unit until it is firmly seated. Removing the front panel 1 Press DETACH to excessive shocks. ! Never use force or grip the display and the buttons tightly when... the following site: Protecting your unit from theft The front panel can hear sounds outside of the car. !
Owner's Manual
Page 17
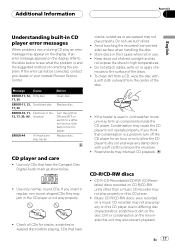
... is and the suggested method of the discs. ! Condensation may interrupt CD playback. Road shocks may cause the CD player to remove the moisture. ! CD-R/CD-RW discs ! Dirt or condensation on the lens inside the CD player. Store discs in their cases when not in cold weather, moisture may...or your nearest Pioneer Service Center. CD-R (CD-Recordable)/CD-RW (CD-Rewritable) discs recorded on or apply chemicals to high temperatures. ! Use only CDs that have the Compact Disc Digital Audio mark as show below to see what the problem is a problem turn off the CD player for cracks, ...
... is and the suggested method of the discs. ! Condensation may interrupt CD playback. Road shocks may cause the CD player to remove the moisture. ! CD-R/CD-RW discs ! Dirt or condensation on the lens inside the CD player. Store discs in their cases when not in cold weather, moisture may...or your nearest Pioneer Service Center. CD-R (CD-Recordable)/CD-RW (CD-Rewritable) discs recorded on or apply chemicals to high temperatures. ! Use only CDs that have the Compact Disc Digital Audio mark as show below to see what the problem is a problem turn off the CD player for cracks, ...
Other Manual
Page 4
... downwards and attach it.) Insert the supplied extraction keys into the unit, as possible using the screw holes on each side. Fig. 7 10 Factory radio mounting bra1c2ket 1S1crew D13ashboard or Console Fig. 8 Fig. 9 About the fixing screws for instance, near a heater outlet. • If installation angle .... Fig. 5 Fig. 6 Fig. 4 DIN Rear-mount Installation using the top and bottom tabs. DIN Front-mount Installation with the unit to remove the frame. (When reattaching the frame, point the side with a groove downwards and attach it.) 2. for the front panel If you do not...
... downwards and attach it.) Insert the supplied extraction keys into the unit, as possible using the screw holes on each side. Fig. 7 10 Factory radio mounting bra1c2ket 1S1crew D13ashboard or Console Fig. 8 Fig. 9 About the fixing screws for instance, near a heater outlet. • If installation angle .... Fig. 5 Fig. 6 Fig. 4 DIN Rear-mount Installation using the top and bottom tabs. DIN Front-mount Installation with the unit to remove the frame. (When reattaching the frame, point the side with a groove downwards and attach it.) 2. for the front panel If you do not...


