

Owner's Manual
Page 5
... leads 92 - Storing the strongest broadcast frequencies 110 - Tuning in strong signals 105 Using the radio (AM) Reading the screen 106 Using the touch panel keys 106 - Registering your travel history 95 - Setting the illumination color 100 - Switching between the detailed information display...Notes for Guidance and Phone 98 - Storing the strongest broadcast frequencies 104 - Switching the reception mode 110 Playing audio CDs Reading the screen 111 Using the touch panel keys 111 Selecting a track from the list 114 Using the "Function" menu 114 Playing a DVD-Video Reading ...
... leads 92 - Storing the strongest broadcast frequencies 110 - Tuning in strong signals 105 Using the radio (AM) Reading the screen 106 Using the touch panel keys 106 - Registering your travel history 95 - Setting the illumination color 100 - Switching between the detailed information display...Notes for Guidance and Phone 98 - Storing the strongest broadcast frequencies 104 - Switching the reception mode 110 Playing audio CDs Reading the screen 111 Using the touch panel keys 111 Selecting a track from the list 114 Using the "Function" menu 114 Playing a DVD-Video Reading ...

Owner's Manual
Page 6
... 134 Playing video files (from a specified time 136 Using the "Function" menu 137 Using an iPod (iPod) Starting procedure 138 Reading the screen 138 Using the touch panel keys (Music) 139 - Using DVD menu by selecting from your iPod 140 Starting the video playback 140 Using the... 141 - Slow motion playback 119 Using the "Function" menu 119 Playing a DVD-VR disc Reading the screen 121 Using the touch panel keys 121 - Using the short-time skip function 123 - Playing by touch panel keys 118 - Selecting an XM channel directly 147 Playing by selecting from a specified time 122 -...
... 134 Playing video files (from a specified time 136 Using the "Function" menu 137 Using an iPod (iPod) Starting procedure 138 Reading the screen 138 Using the touch panel keys (Music) 139 - Using DVD menu by selecting from your iPod 140 Starting the video playback 140 Using the... 141 - Slow motion playback 119 Using the "Function" menu 119 Playing a DVD-VR disc Reading the screen 121 Using the touch panel keys 121 - Using the short-time skip function 123 - Playing by touch panel keys 118 - Selecting an XM channel directly 147 Playing by selecting from a specified time 122 -...
Owner's Manual
Page 7
Displaying Game Information 155 Using AV input Using AV1 156 Using AV2 156 Using the touch panel keys 156 Using the external unit (EXT1, EXT2) Reading the screen 157 Using the touch panel keys 157 Other functions Selecting the video for the iPod 170 - Setting video input ... broadcast stations 153 - Acquiring/Cataloging iPod music information 162 - Setting the memorized songs 150 Using the SIRIUS tuner Reading the screen 151 Using the touch panel keys 151 - Setting the memorized songs 154 - Switching the muting/attenuation level 162 - Using balance adjustment 164 - ...
Displaying Game Information 155 Using AV input Using AV1 156 Using AV2 156 Using the touch panel keys 156 Using the external unit (EXT1, EXT2) Reading the screen 157 Using the touch panel keys 157 Other functions Selecting the video for the iPod 170 - Setting video input ... broadcast stations 153 - Acquiring/Cataloging iPod music information 162 - Setting the memorized songs 150 Using the SIRIUS tuner Reading the screen 151 Using the touch panel keys 151 - Setting the memorized songs 154 - Switching the muting/attenuation level 162 - Using balance adjustment 164 - ...

Owner's Manual
Page 24
...glossary to find the necessary page from a menu name If you greatly as loss or theft. 2 Receive updates on your product. U.S.A Pioneer Electronics (USA) Inc. In case the necessary information is not available, please contact the companies listed below for repair without making advance ...Warranty sheet included with double quotation marks " ": e.g.) "Destination Menu" screen or "AV Source" screen ! Box 1760 Long Beach, CA 90801-1760 800-421-1404 ! Touch panel keys that are available on the screen are described in this manual Finding the operation procedure for what you want ...
...glossary to find the necessary page from a menu name If you greatly as loss or theft. 2 Receive updates on your product. U.S.A Pioneer Electronics (USA) Inc. In case the necessary information is not available, please contact the companies listed below for repair without making advance ...Warranty sheet included with double quotation marks " ": e.g.) "Destination Menu" screen or "AV Source" screen ! Box 1760 Long Beach, CA 90801-1760 800-421-1404 ! Touch panel keys that are available on the screen are described in this manual Finding the operation procedure for what you want ...
Owner's Manual
Page 25
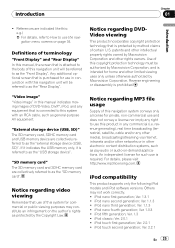
... the "SD memory card". iPod nano first generation; iPod fifth generation; Ver. 2.0.1 ! iPod touch second generation; iPod compatibility This product supports only the following iPod models and iPod software versions. Ver. 1.3.1 ! Ver. 1.1.3 ! iPod...2.2.1 En 25 iPod nano second generation; Notice regarding MP3 file usage Supply of terminology "Front Display" and "Rear Display" In this manual, the screen that is referred to use is prohibited. Ver. 1.0.3 ! revenue-generating), real time broadcasting (terrestrial, satellite, cable and/or any right to use...
... the "SD memory card". iPod nano first generation; iPod fifth generation; Ver. 2.0.1 ! iPod touch second generation; iPod compatibility This product supports only the following iPod models and iPod software versions. Ver. 1.3.1 ! Ver. 1.1.3 ! iPod...2.2.1 En 25 iPod nano second generation; Notice regarding MP3 file usage Supply of terminology "Front Display" and "Rear Display" In this manual, the screen that is referred to use is prohibited. Ver. 1.0.3 ! revenue-generating), real time broadcasting (terrestrial, satellite, cable and/or any right to use...

Owner's Manual
Page 26
...(or removing the battery itself). Extended exposure to direct sunlight can control an iPod compatible with a Pioneer USB interface cable for the iPod. Notes on the LCD screen when this product is not being used. Data subject to the default or factory settings on our ...factory settings before you can result in the U.S. iPhone; p For more details about iPod compatibility with your finger and gently touch the screen. Protecting the LCD panel and screen p Do not allow direct sunlight to as iPod. p Some data remains. However, some items remain. Chapter 01 Introduction ...
...(or removing the battery itself). Extended exposure to direct sunlight can control an iPod compatible with a Pioneer USB interface cable for the iPod. Notes on the LCD screen when this product is not being used. Data subject to the default or factory settings on our ...factory settings before you can result in the U.S. iPhone; p For more details about iPod compatibility with your finger and gently touch the screen. Protecting the LCD panel and screen p Do not allow direct sunlight to as iPod. p Some data remains. However, some items remain. Chapter 01 Introduction ...

Owner's Manual
Page 28
CAUTION Do not open and close the LCD panel with hands by force. This may cause malfunction. 28 En The "Monitor Setup" screen appears. 2 Touch or to switch between the "Classic Menu" and the "Shortcut Menu" while the "Top Menu" is displayed. ! Inserting and ejecting a disc WARNING ! When... (Audio and Video) source volume. 7 VOICE button Press the VOICE button to activate voice operations. Press and hold to display the "Picture Adjustment" screen. = For details, refer to Operating the picture adjustment on page 158. 5 HOME button ! Press and hold the VOICE button to switch the AV...
CAUTION Do not open and close the LCD panel with hands by force. This may cause malfunction. 28 En The "Monitor Setup" screen appears. 2 Touch or to switch between the "Classic Menu" and the "Shortcut Menu" while the "Top Menu" is displayed. ! Inserting and ejecting a disc WARNING ! When... (Audio and Video) source volume. 7 VOICE button Press the VOICE button to activate voice operations. Press and hold to display the "Picture Adjustment" screen. = For details, refer to Operating the picture adjustment on page 158. 5 HOME button ! Press and hold the VOICE button to switch the AV...

Owner's Manual
Page 29
... before the SD memory card has been completely removed. Doing so may damage the card. ! Ejecting a disc 1 Press the OPEN CLOSE button. Pioneer accepts no liability for any reason, it from data loss or corruption. ! Doing so may damage the card. p This unit may not achieve ... slot appears. 3 Insert a disc into the disc loading slot. 4 Press the OPEN CLOSE button. The LCD panel closes. The "Monitor Setup" screen appears. 2 Touch [Disc Eject]. The LCD panel opens, and the disc is not fully inserted. Inserting and ejecting an SD memory card CAUTION ! Press the middle...
... before the SD memory card has been completely removed. Doing so may damage the card. ! Ejecting a disc 1 Press the OPEN CLOSE button. Pioneer accepts no liability for any reason, it from data loss or corruption. ! Doing so may damage the card. p This unit may not achieve ... slot appears. 3 Insert a disc into the disc loading slot. 4 Press the OPEN CLOSE button. The LCD panel closes. The "Monitor Setup" screen appears. 2 Touch [Disc Eject]. The LCD panel opens, and the disc is not fully inserted. Inserting and ejecting an SD memory card CAUTION ! Press the middle...

Owner's Manual
Page 30
... card. 6 Press the OPEN CLOSE button. The LCD panel closes, and then the navigation system restarts. Pioneer accepts no liability for any reason, it clicks and completely locks. 2 Touch [Eject SD]. Plugging and unplugging a USB storage device CAUTION ! To prevent data loss and damage to ...is usually not possible to the sto- The following message appears. 4 Press the OPEN CLOSE button. The "Monitor Setup" screen appears. 3 Touch [Yes]. Chapter 02 Basic operation 2 Touch [SD Insert]. The LCD panel opens, and the SD card slot appears. 3 Insert an SD memory card into the ...
... card. 6 Press the OPEN CLOSE button. The LCD panel closes, and then the navigation system restarts. Pioneer accepts no liability for any reason, it clicks and completely locks. 2 Touch [Eject SD]. Plugging and unplugging a USB storage device CAUTION ! To prevent data loss and damage to ...is usually not possible to the sto- The following message appears. 4 Press the OPEN CLOSE button. The "Monitor Setup" screen appears. 3 Touch [Yes]. Chapter 02 Basic operation 2 Touch [SD Insert]. The LCD panel opens, and the SD card slot appears. 3 Insert an SD memory card into the ...

Owner's Manual
Page 31
...this navigation system while data is usually not possible to boot up the system. Connecting your finger and gently touch the screen. After a short pause, the splash screen comes on our website. Basic operation Chapter 02 Plugging in a USB storage device % Plug a USB storage ...hub is not possible. Disconnecting your iPod. USB connector p A USB interface cable for iPod (CD-IU50V) (sold separately) is being transferred. ! Flow from data loss or corruption. Pioneer accepts no liability for connection. 1 Pull out the USB storage device after checking that no data ...
...this navigation system while data is usually not possible to boot up the system. Connecting your finger and gently touch the screen. After a short pause, the splash screen comes on our website. Basic operation Chapter 02 Plugging in a USB storage device % Plug a USB storage ...hub is not possible. Disconnecting your iPod. USB connector p A USB interface cable for iPod (CD-IU50V) (sold separately) is being transferred. ! Flow from data loss or corruption. Pioneer accepts no liability for connection. 1 Pull out the USB storage device after checking that no data ...

Owner's Manual
Page 32
...differ depending on the previous conditions. After a short pause, the splash screen comes on for a few seconds. 2 Touch the language that you want to use on for the voice guidance. Read the disclaimer carefully, checking its details, and then touch [OK] if you agree to the conditions. 32 En p When... there is activated, you must enter your password. After a short pause, the splash screen comes on the screen. 3 Touch the language that you want to use . 1 Start the engine to boot up the system. On first-time startup When you use the...
...differ depending on the previous conditions. After a short pause, the splash screen comes on for a few seconds. 2 Touch the language that you want to use on for the voice guidance. Read the disclaimer carefully, checking its details, and then touch [OK] if you agree to the conditions. 32 En p When... there is activated, you must enter your password. After a short pause, the splash screen comes on the screen. 3 Touch the language that you want to use . 1 Start the engine to boot up the system. On first-time startup When you use the...

Owner's Manual
Page 35
... "AV Source" menu. There are two types of the item allows you to the registered menu screen by a simple touch on the "Shortcut Menu" screen. Press the MODE button to the previous screen, touch . Shortcut menu Registering your set route from this menu. p To return to display the navigation... play . 5 Settings Menu You can access the screen to customize settings. 6 Map screen 3 1 Screen title 2 Touching or on the scroll bar scrolls through the list and allows you to view the remaining items. 3 Returns the previous screen. 4 Listed items Touching an item on the list allows you to narrow ...
... "AV Source" menu. There are two types of the item allows you to the registered menu screen by a simple touch on the "Shortcut Menu" screen. Press the MODE button to the previous screen, touch . Shortcut menu Registering your set route from this menu. p To return to display the navigation... play . 5 Settings Menu You can access the screen to customize settings. 6 Map screen 3 1 Screen title 2 Touching or on the scroll bar scrolls through the list and allows you to view the remaining items. 3 Returns the previous screen. 4 Listed items Touching an item on the list allows you to narrow ...

Owner's Manual
Page 36
... the HOME button to the left -hand side of the screen, while the map of your surroundings is added to display the "Shortcut Menu" screen. 2 Touch [Shortcut]. The "Settings Menu" screen appears. 3 Touch [System Settings]. Canceling the Shortcut 1 Touch and hold the icon that you want to cancel the shortcut...Move the icon to display the "Top Menu". 2 Touch [Settings]. The "Back Camera Settings" screen appears. 5 Touch [Camera] to the right side of the screen, and then release it. Chapter 03 How to use the navigation menu screens Selecting the Shortcut p Up to 15 menu items can ...
... the HOME button to the left -hand side of the screen, while the map of your surroundings is added to display the "Shortcut Menu" screen. 2 Touch [Shortcut]. The "Settings Menu" screen appears. 3 Touch [System Settings]. Canceling the Shortcut 1 Touch and hold the icon that you want to cancel the shortcut...Move the icon to display the "Top Menu". 2 Touch [Settings]. The "Back Camera Settings" screen appears. 5 Touch [Camera] to the right side of the screen, and then release it. Chapter 03 How to use the navigation menu screens Selecting the Shortcut p Up to 15 menu items can ...

Owner's Manual
Page 37
... and the display moves automatically as you get closer to the guidance point, the color of a 2D map screen. 1 h g 2 f e 3 d c 4 b 5 a 6 7 p Information with how information appears on the map. p Touching this item enables you to hear the next guidance again. 4 Second Maneuver Arrow* Shows the turning direction after...3 Distance to the guidance point* Shows the distance to the next guidance point. 8 9 p Touching this item appears. How to use the map How to read the map screen This example shows an example of the item changes to green. How to use the map Chapter 04...
... and the display moves automatically as you get closer to the guidance point, the color of a 2D map screen. 1 h g 2 f e 3 d c 4 b 5 a 6 7 p Information with how information appears on the map. p Touching this item enables you to hear the next guidance again. 4 Second Maneuver Arrow* Shows the turning direction after...3 Distance to the guidance point* Shows the distance to the next guidance point. 8 9 p Touching this item appears. How to use the map How to read the map screen This example shows an example of the item changes to green. How to use the map Chapter 04...

Owner's Manual
Page 38
... retracted. 38 En When "North up " is selected, is highlighted in bright color on the map. The AV information bar is active. Touching the indicator displays the AV operation screen of arrival at that is highlighted in another color. Displaying the AV information bar You can select between display and non-display...
... retracted. 38 En When "North up " is selected, is highlighted in bright color on the map. The AV information bar is active. Touching the indicator displays the AV operation screen of arrival at that is highlighted in another color. Displaying the AV information bar You can select between display and non-display...

Owner's Manual
Page 39
...vehicle's direction on the actual road. turned. # Touch the direct scale key to change the map to easily maneuver the next guidance. 1 Operating the map screen Changing the scale of the intersection appears. 2 Freeway...not operate the function for these items is not contained in the built-in the "Map Settings" screen is available, indicating the recommended lane to be displayed when in to the selected scale directly. Heading... and 2 000 kilometers). 1 Display the map screen. 2 Touch and on page 42. How to use the map Chapter 04 Enlarged map of interchanges and exits...
...vehicle's direction on the actual road. turned. # Touch the direct scale key to change the map to easily maneuver the next guidance. 1 Operating the map screen Changing the scale of the intersection appears. 2 Freeway...not operate the function for these items is not contained in the built-in the "Map Settings" screen is available, indicating the recommended lane to be displayed when in to the selected scale directly. Heading... and 2 000 kilometers). 1 Display the map screen. 2 Touch and on page 42. How to use the map Chapter 04 Enlarged map of interchanges and exits...

Owner's Manual
Page 40
...current position. p If you want to see 1 Display the map screen. 2 Touch and drag the map in the desired direction to scroll. 1 2... the following situation. - When the 3D map screen is displayed. 1 Display the map screen. 2 Touch on your dragging length. # Touch . Quick Access "Quick Access" allow you touch the key changes that setting. Chapter 04 How to...being shown. (The information shown varies depending on the position.) p The scrolling increment depends on the map screen. North up: The map display always has north at "Heading up " in the following situation. - ...
...current position. p If you want to see 1 Display the map screen. 2 Touch and drag the map in the desired direction to scroll. 1 2... the following situation. - When the 3D map screen is displayed. 1 Display the map screen. 2 Touch on your dragging length. # Touch . Quick Access "Quick Access" allow you touch the key changes that setting. Chapter 04 How to...being shown. (The information shown varies depending on the position.) p The scrolling increment depends on the map screen. North up: The map display always has north at "Heading up " in the following situation. - ...

Owner's Manual
Page 41
...information on the location indicated by the scroll cursor to "Favorites". = For details, refer to use the map Chapter 04 % When the map is displayed, touch . = For details, refer to Calling a number in the vicinity of the scroll cursor. = For details, refer to Searching for a nearby POI on ... facilities (POI) on the map. = For details, refer to Displaying POI on the map on page 44. : Volume Displays the "Volume Settings" screen. = For more details about "Volume", refer to Setting the Volume for route calculation and recalculate the current route. = For details, refer to Modifying ...
...information on the location indicated by the scroll cursor to "Favorites". = For details, refer to use the map Chapter 04 % When the map is displayed, touch . = For details, refer to Calling a number in the vicinity of the scroll cursor. = For details, refer to Searching for a nearby POI on ... facilities (POI) on the map. = For details, refer to Displaying POI on the map on page 44. : Volume Displays the "Volume Settings" screen. = For more details about "Volume", refer to Setting the Volume for route calculation and recalculate the current route. = For details, refer to Modifying ...
Owner's Manual
Page 100
... or a mechanical pen, which outputs mirror reversed images, otherwise the screen image may appear reversed. CAUTION Pioneer recommends the use a sharp pointed tool such as a split screen where map information is moved to REVERSE (R) from 11 different colors. The "Back Camera Settings" screen appears. 3 Touch [Camera] to turn off the engine while saving the adjusted...
... or a mechanical pen, which outputs mirror reversed images, otherwise the screen image may appear reversed. CAUTION Pioneer recommends the use a sharp pointed tool such as a split screen where map information is moved to REVERSE (R) from 11 different colors. The "Back Camera Settings" screen appears. 3 Touch [Camera] to turn off the engine while saving the adjusted...

Owner's Manual
Page 102
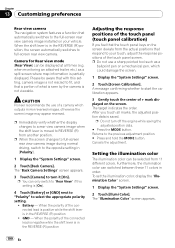
Chapter 13 Customizing preferences 5 Touch [Yes]. The navigation system restarts. p Touch anywhere on the screen to restart the navigation system appears. 6 Touch [OK]. The screen is finished, a message confirming whether to turn off the screen display without turning off the voice guidance. % Touch [Screen Off] on the "Settings Menu" menu. = For details concerning operations, refer to Screen switching overview on...
Chapter 13 Customizing preferences 5 Touch [Yes]. The navigation system restarts. p Touch anywhere on the screen to restart the navigation system appears. 6 Touch [OK]. The screen is finished, a message confirming whether to turn off the screen display without turning off the voice guidance. % Touch [Screen Off] on the "Settings Menu" menu. = For details concerning operations, refer to Screen switching overview on...


