Owner's Manual
Page 115
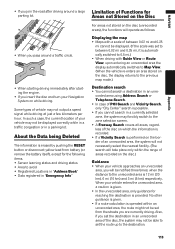
About the Data being Deleted The information is erased by pushing the RESET button or disconnect yellow lead from the streets you cannot search in a currently selected zone, the system may not be displayed. (If the scale was set ...
About the Data being Deleted The information is erased by pushing the RESET button or disconnect yellow lead from the streets you cannot search in a currently selected zone, the system may not be displayed. (If the scale was set ...
Owner's Manual
Page 117
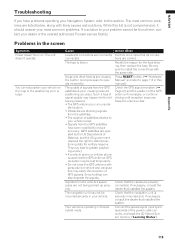
... contact your most common problems are incorrectly connected. While this section. The navigation unit may block the reception of GPS signals. Press RESET button. (➞ "Hardware Manual" and refer to this list is used near the GPS antenna, GPS reception may lead to your problem...greater positioning errors.) • If a vehicle phone or cellular phone is not comprehensive, it should answer your dealer or the nearest authorized Pioneer service facility. Problems in this manual.) Check the GPS signal reception (➞ Page 61) and the position of the GPS antenna if ...
... contact your most common problems are incorrectly connected. While this section. The navigation unit may block the reception of GPS signals. Press RESET button. (➞ "Hardware Manual" and refer to this list is used near the GPS antenna, GPS reception may lead to your problem...greater positioning errors.) • If a vehicle phone or cellular phone is not comprehensive, it should answer your dealer or the nearest authorized Pioneer service facility. Problems in this manual.) Check the GPS signal reception (➞ Page 61) and the position of the GPS antenna if ...
Owner's Manual
Page 118
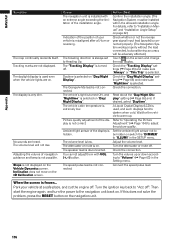
..." to "Volume" (➞ Page 63) in the SETUP menu. Check the connection. If this does not solve the problem, press the RESET button on "Day/Night Display". The volume level will be installed within the allowed installation angle. Inclination does not move on . The attenuator or ... System works properly without the lead connected, but positioning accuracy will not rise. A Liquid Crystal Display (LCD) is installed with VOL (+,-) button. Turn the attenuator or mute off . Turn the ignition key back to the navigation unit back on the screen and change the map display...
..." to "Volume" (➞ Page 63) in the SETUP menu. Check the connection. If this does not solve the problem, press the RESET button on "Day/Night Display". The volume level will be installed within the allowed installation angle. Inclination does not move on . The attenuator or ... System works properly without the lead connected, but positioning accuracy will not rise. A Liquid Crystal Display (LCD) is installed with VOL (+,-) button. Turn the attenuator or mute off . Turn the ignition key back to the navigation unit back on the screen and change the map display...
Installation Manual
Page 10
... If the unit fails to operate properly. • If there appear to its initial settings without changing the condition memory. RESET button 8 About the XM NAVTRAFFIC Logo Required $12.95 basic monthly XM radio subscription and XM NavTraffic service subscriptions sold separately. For...spots, colored stripes, etc. ❒ Never touch the screen with the opera- Premium Channels for clear viewing. Pressing RESET button lets you reset the microprocessor to Customer Agreement available at additional monthly costs. When using this unit is limited. XM NavTraffic only available...
... If the unit fails to operate properly. • If there appear to its initial settings without changing the condition memory. RESET button 8 About the XM NAVTRAFFIC Logo Required $12.95 basic monthly XM radio subscription and XM NavTraffic service subscriptions sold separately. For...spots, colored stripes, etc. ❒ Never touch the screen with the opera- Premium Channels for clear viewing. Pressing RESET button lets you reset the microprocessor to Customer Agreement available at additional monthly costs. When using this unit is limited. XM NavTraffic only available...

Installation Manual
Page 11
❒ If you have connected other equipment (for example, a TV tuner) to this Navigation System, be sure to reset that equipment too. ❒ After completing connections or when you want to erase all memorized settings or return the unit to its initial (factory) settings except for some navigation items, switch your engine ON or set the ignition switch to ACC ON before pressing RESET button. ➲ For details, refer to "About the Data being Deleted" in the the Operation Manual. 9
❒ If you have connected other equipment (for example, a TV tuner) to this Navigation System, be sure to reset that equipment too. ❒ After completing connections or when you want to erase all memorized settings or return the unit to its initial (factory) settings except for some navigation items, switch your engine ON or set the ignition switch to ACC ON before pressing RESET button. ➲ For details, refer to "About the Data being Deleted" in the the Operation Manual. 9
Installation Manual
Page 14
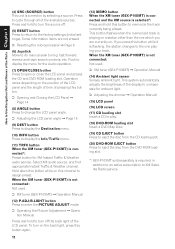
...to assign preset. If you are not erased. ➲ Resetting the microprocessor ➞ Page 8 (6) Joystick Move to do manual seek tuning, fast forward, reverse and track search controls, etc. When the XM tuner (GEX-P10XMT) is turned on this button to memorize the track currently being played. How to Use ... to enter the PICTURE ADJUST mode. ➲ Operating the Picture Adjustment ➞ Operation Manual Press and hold to turn off . (5) RESET button Press to return to the factory settings (initial settings). Press to open or close the LCD panel and access the CD and DVD-ROM...
...to assign preset. If you are not erased. ➲ Resetting the microprocessor ➞ Page 8 (6) Joystick Move to do manual seek tuning, fast forward, reverse and track search controls, etc. When the XM tuner (GEX-P10XMT) is turned on this button to memorize the track currently being played. How to Use ... to enter the PICTURE ADJUST mode. ➲ Operating the Picture Adjustment ➞ Operation Manual Press and hold to turn off . (5) RESET button Press to return to the factory settings (initial settings). Press to open or close the LCD panel and access the CD and DVD-ROM...

Installation Manual
Page 19
...the source with the rear display or a faulty wiring connection, for the rear view camera is inserted upside down according to operate incorrectly. Press RESET button. (➞ Page 8) Adjust the volume level. Turn the attenuator or mute off . The navigation does not boot up or down . The...position, the screen will not rise. Rectify the reason for CAMERA. ➲ About CAMERA setting ➞ Operation Manual Press the P.ADJ/B.LIGHT button to ACC), the motor sounds. A disc which is inserted. You cannot adjust them with this unit cannot play. The volume level is dirty....
...the source with the rear display or a faulty wiring connection, for the rear view camera is inserted upside down according to operate incorrectly. Press RESET button. (➞ Page 8) Adjust the volume level. Turn the attenuator or mute off . The navigation does not boot up or down . The...position, the screen will not rise. Rectify the reason for CAMERA. ➲ About CAMERA setting ➞ Operation Manual Press the P.ADJ/B.LIGHT button to ACC), the motor sounds. A disc which is inserted. You cannot adjust them with this unit cannot play. The volume level is dirty....
Other Manual
Page 27
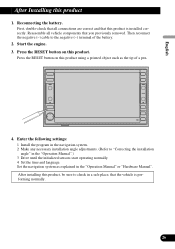
... you previously removed. Enter the following settings: 1 Install the program in a safe place, that the vehicle is installed correctly. Press the RESET button on this product. Start the engine. 3. Press the RESET button on this product, be sure to check in the navigation system. 2 Make any necessary installation angle adjustments. (Refer to the negative...
... you previously removed. Enter the following settings: 1 Install the program in a safe place, that the vehicle is installed correctly. Press the RESET button on this product. Start the engine. 3. Press the RESET button on this product, be sure to check in the navigation system. 2 Make any necessary installation angle adjustments. (Refer to the negative...


