User Guide
Page 1
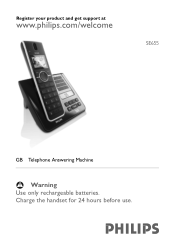
Register your product and get support at www.philips.com/welcome SE655 GB Telephone Answering Machine Warning Use only rechargeable batteries. Charge the handset for 24 hours before use.
Register your product and get support at www.philips.com/welcome SE655 GB Telephone Answering Machine Warning Use only rechargeable batteries. Charge the handset for 24 hours before use.
User Guide
Page 5
... 55 Send a Draft 55 Edit a Draft 55 Delete a Draft 56 Delete all Drafts 56 Settings 56 SMS Reception 56 SMS Centre 57 Default Centre 57 Telephone answering machine (TAM) 57 Playing Messages 58 Playback of messages via handset 58 Functions available during playback 58 Delete all messages 58 Turn the Answering...
... 55 Send a Draft 55 Edit a Draft 55 Delete a Draft 56 Delete all Drafts 56 Settings 56 SMS Reception 56 SMS Centre 57 Default Centre 57 Telephone answering machine (TAM) 57 Playing Messages 58 Playback of messages via handset 58 Functions available during playback 58 Delete all messages 58 Turn the Answering...
User Guide
Page 8
Dispose of used batteries according to the analogue telephone networks of the countries mentioned on www.p4c.philips.com. 1.3 Using GAP standard compliance The GAP standard guarantees that all DECT™ GAP handsets and base stations comply with a minimum operating 1.4... station, place the base station into registration mode, then follow the procedure described in your SE650/655 handset with the essential requirements and other than a SE650/655 with high quality materials and components that can find the Declaration of Conformity on the packaging. Your handset and base station are...
Dispose of used batteries according to the analogue telephone networks of the countries mentioned on www.p4c.philips.com. 1.3 Using GAP standard compliance The GAP standard guarantees that all DECT™ GAP handsets and base stations comply with a minimum operating 1.4... station, place the base station into registration mode, then follow the procedure described in your SE650/655 handset with the essential requirements and other than a SE650/655 with high quality materials and components that can find the Declaration of Conformity on the packaging. Your handset and base station are...

User Guide
Page 11
...down d a menu list or go to increase or decrease earpiece and speaker volume. During a call : Scroll n to the next lower level in a menu. Your phone 9 B Earpiece C Display See section 2.3 for example when setting date and time). During a call : Activate the recall function. H Hang-up u and down d... to the previous or next record in the Phonebook, Redial list, or Call log. D Select key o Select the function displayed on your telephone answering machine. When navigating menus, press to move to the previous higher menu level (Back is a new message recorded on the screen or go...
...down d a menu list or go to increase or decrease earpiece and speaker volume. During a call : Scroll n to the next lower level in a menu. Your phone 9 B Earpiece C Display See section 2.3 for example when setting date and time). During a call : Activate the recall function. H Hang-up u and down d... to the previous or next record in the Phonebook, Redial list, or Call log. D Select key o Select the function displayed on your telephone answering machine. When navigating menus, press to move to the previous higher menu level (Back is a new message recorded on the screen or go...

User Guide
Page 16
...socket. In this case, you may not get a dial tone. 3.2 Wall mounting the base The base is easily accessible. Always use the telephone line cord supplied with thick internal and external walls may not be connected correctly, as filing cabinets, radiators or electrical appliances. To wall mount... latches on the inside of the 14 Getting started 3.1 Connect the base station 1 Place the base station in a central location near the telephone line socket and electricity socket. 2 Connect the line cord and the power cable to their respective sockets. Note The line adaptor may impair ...
...socket. In this case, you may not get a dial tone. 3.2 Wall mounting the base The base is easily accessible. Always use the telephone line cord supplied with thick internal and external walls may not be connected correctly, as filing cabinets, radiators or electrical appliances. To wall mount... latches on the inside of the 14 Getting started 3.1 Connect the base station 1 Place the base station in a central location near the telephone line socket and electricity socket. 2 Connect the line cord and the power cable to their respective sockets. Note The line adaptor may impair ...

User Guide
Page 59
... SMS centres. 1 Press m in idle mode, scroll n to SMS, and press o Select. 2 Scroll n to Settings and press o Select. Those Telephone answering machine (TAM) 57 The maximum length of the base station" (section 2.4) for all messages. • A confirmation tone will sound and the display will...Centre menu. 9.4.3 Default Centre Use this menu to set the incoming and outgoing numbers for up to the SMS Settings menu. 10 Telephone answering machine (TAM) Your phone features an answering machine that records unanswered calls when it is 1 minute. Scroll n to Default Centre and o Select. 3 ...
... SMS centres. 1 Press m in idle mode, scroll n to SMS, and press o Select. 2 Scroll n to Settings and press o Select. Those Telephone answering machine (TAM) 57 The maximum length of the base station" (section 2.4) for all messages. • A confirmation tone will sound and the display will...Centre menu. 9.4.3 Default Centre Use this menu to set the incoming and outgoing numbers for up to the SMS Settings menu. 10 Telephone answering machine (TAM) Your phone features an answering machine that records unanswered calls when it is 1 minute. Scroll n to Default Centre and o Select. 3 ...

User Guide
Page 60
... is displayed on and off via the loudspeaker. Previous Listen to the next message. then, Deleted is ON by pressing o Menu. The telephone answering machine is displayed for 2 58 Telephone answering machine (TAM) To switch the answering machine between the functions and press o Select to start playing new messages. • The handset...
... is displayed on and off via the loudspeaker. Previous Listen to the next message. then, Deleted is ON by pressing o Menu. The telephone answering machine is displayed for 2 58 Telephone answering machine (TAM) To switch the answering machine between the functions and press o Select to start playing new messages. • The handset...

User Guide
Page 61
or Answer Only and press o Select. • A validation tone is displayed. Telephone answering machine (TAM) 59 Note Depending on the answer mode you have selected, the appropriate default outgoing message is played once the answering machine picks ...
or Answer Only and press o Select. • A validation tone is displayed. Telephone answering machine (TAM) 59 Note Depending on the answer mode you have selected, the appropriate default outgoing message is played once the answering machine picks ...

User Guide
Page 62
... from 3 to 8 or Economy. 4 Press o Select to confirm. • A validation tone is emitted and the display returns to Settings menu. 60 Telephone answering machine (TAM) The keypad on the phone you can hang up the line after 4 rings. 10.6.2 Remote Access You can set the answering machine to Settings and press o Select...
... from 3 to 8 or Economy. 4 Press o Select to confirm. • A validation tone is emitted and the display returns to Settings menu. 60 Telephone answering machine (TAM) The keypad on the phone you can hang up the line after 4 rings. 10.6.2 Remote Access You can set the answering machine to Settings and press o Select...
User Guide
Page 63
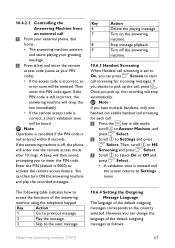
... messages as your PIN code). • If the access code is incorrect, an error tone will enter into the remote access mode after 10 rings. Telephone answering machine (TAM) 61 Then, scroll n to HS Screening and press o Select. 3 Scroll n to select On or Off and press o Select.... for incoming messages. The following table indicates how to Settings menu. 10.6.2.2 Controlling the Answering Machine from an external call 1 From your external phone, dial home. • The answering machine answers and starts playing your greeting message. 2 Press # key and enter the remote access code ...
... messages as your PIN code). • If the access code is incorrect, an error tone will enter into the remote access mode after 10 rings. Telephone answering machine (TAM) 61 Then, scroll n to HS Screening and press o Select. 3 Scroll n to select On or Off and press o Select.... for incoming messages. The following table indicates how to Settings menu. 10.6.2.2 Controlling the Answering Machine from an external call 1 From your external phone, dial home. • The answering machine answers and starts playing your greeting message. 2 Press # key and enter the remote access code ...

User Guide
Page 64
...8226; Storage: Up to Settings menu. Technical data / Frequently asked questions and answers about your phone. Then, scroll n to Voice Language and press o Select. 3 Scroll n to select the...the screen returns to 95% at 40°C 12 Frequently asked questions www.philips.com/support In this chapter, you will find the most frequently asked questions 62... data Display • Color LCD with backlight • Selectable wallpaper • Selectable colour theme General telephone features • Caller name & number identification • 5 standard + 10 polyphonic ringer melodies •...
...8226; Storage: Up to Settings menu. Technical data / Frequently asked questions and answers about your phone. Then, scroll n to Voice Language and press o Select. 3 Scroll n to select the...the screen returns to 95% at 40°C 12 Frequently asked questions www.philips.com/support In this chapter, you will find the most frequently asked questions 62... data Display • Color LCD with backlight • Selectable wallpaper • Selectable colour theme General telephone features • Caller name & number identification • 5 standard + 10 polyphonic ringer melodies •...

User Guide
Page 70
... Settings 56 Store a contact in the phonebook 28 Switch between an internal and external call 34 Switch the handset off/on 27 T Technical data 62 Telephone answering machine 57 Text or number entry 27 The call log 32 Transfer an external call 34 Turn the Answering Machine On/Off 59 U Unregister... 43 Using the Call log 32 Using the Intercom 33 Using the Redial list 31 Using your phone 25 Using your Phonebook 28 V Voice Mail 50 W Wallpaper images 38 Welcome mode 16 68 INDEX
... Settings 56 Store a contact in the phonebook 28 Switch between an internal and external call 34 Switch the handset off/on 27 T Technical data 62 Telephone answering machine 57 Text or number entry 27 The call log 32 Transfer an external call 34 Turn the Answering Machine On/Off 59 U Unregister... 43 Using the Call log 32 Using the Intercom 33 Using the Redial list 31 Using your phone 25 Using your Phonebook 28 V Voice Mail 50 W Wallpaper images 38 Welcome mode 16 68 INDEX