

Owner's Manual
Page 13
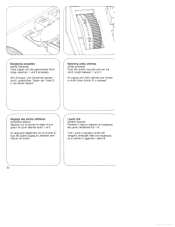
...free-arm cover 119. Chiudere be pied presseur. Untertaden herautholen: Obertaden fest halten. Far salire it fib inferiore: Tenere fermo 1 fib superiore. Porre i fill superiore ed inferiore sotto II piedino, (circa 10 cm). 4 Verschbub3klappe 119 schlieb3en. Mit dem Ober faden den Uriterfaden nach oben ziehen. Pull out the bobbin thread by means of the needle thread... the sewing foot, (approx 10 cm). Place both threads towards you and sew a stitch until both needle and take-up lever are up the bobbin thread: Hold the needle thread taut. Handrad nach vorn drehen und einen Stich nä...
...free-arm cover 119. Chiudere be pied presseur. Untertaden herautholen: Obertaden fest halten. Far salire it fib inferiore: Tenere fermo 1 fib superiore. Porre i fill superiore ed inferiore sotto II piedino, (circa 10 cm). 4 Verschbub3klappe 119 schlieb3en. Mit dem Ober faden den Uriterfaden nach oben ziehen. Pull out the bobbin thread by means of the needle thread... the sewing foot, (approx 10 cm). Place both threads towards you and sew a stitch until both needle and take-up lever are up the bobbin thread: Hold the needle thread taut. Handrad nach vorn drehen und einen Stich nä...

Owner's Manual
Page 18
Finchè II tasto rimane premuto Ia macchina cuce indietro. As long as you hold this button the machine sews back wards. Reverse sewing Press button 123. RUckwärtsnähen Die Taste 123 niederdrücken. Couture en marche arrière Abaisser Ia touche 123. La machine coud en arrière aussi longtemps que a touche est maintenue en bas. J 15 La cucitura indietro Premere ii tasto 123. Solange die Taste gedrückt wird, näht die Maschine rückwärts.
Finchè II tasto rimane premuto Ia macchina cuce indietro. As long as you hold this button the machine sews back wards. Reverse sewing Press button 123. RUckwärtsnähen Die Taste 123 niederdrücken. Couture en marche arrière Abaisser Ia touche 123. La machine coud en arrière aussi longtemps que a touche est maintenue en bas. J 15 La cucitura indietro Premere ii tasto 123. Solange die Taste gedrückt wird, näht die Maschine rückwärts.

Owner's Manual
Page 23
... that can be sewn. D Elastic triple zigzag stitch, 2 mm 2-mm zigzag stitch E Elastic triple zigzag stitch, 3.5 mm 3.5-mm zigzag stitch F Elastic triple zigzag stitch, 5 mm 5-mm zigzag stitch G Elastic triple straight stitch Straight stitch H Pullover stitch Blindstitch I K L M llNP A B C D E F 4 Finger-tip controls (models with stretch stitches) The various models have differing num bers of the buttons on pages 80-81. Buttons for buttonholing Button B is also used as clearing button for releasing the pushed buttons and for setting the left needle position (see page 25).
... that can be sewn. D Elastic triple zigzag stitch, 2 mm 2-mm zigzag stitch E Elastic triple zigzag stitch, 3.5 mm 3.5-mm zigzag stitch F Elastic triple zigzag stitch, 5 mm 5-mm zigzag stitch G Elastic triple straight stitch Straight stitch H Pullover stitch Blindstitch I K L M llNP A B C D E F 4 Finger-tip controls (models with stretch stitches) The various models have differing num bers of the buttons on pages 80-81. Buttons for buttonholing Button B is also used as clearing button for releasing the pushed buttons and for setting the left needle position (see page 25).
Owner's Manual
Page 25
.... Alle Zickzack- All zigzag and utility stitches are halved in aggiunta II tasto G. 22 und Nutzstiche werden durch zusätzliches Tippen der Taste G in der Breite halbiert. 4 Selecting utility stitches (white symbols) Push the button required and set the stitch length between 1 and 6. \\\ \\ \\\ \\ \\\\ \\' 11 4 Nutzstiche einstellen (weiBe Symbole) Taste tippen und die gewunschte Stich lange zwischen 1 und...
.... Alle Zickzack- All zigzag and utility stitches are halved in aggiunta II tasto G. 22 und Nutzstiche werden durch zusätzliches Tippen der Taste G in der Breite halbiert. 4 Selecting utility stitches (white symbols) Push the button required and set the stitch length between 1 and 6. \\\ \\ \\\ \\ \\\\ \\' 11 4 Nutzstiche einstellen (weiBe Symbole) Taste tippen und die gewunschte Stich lange zwischen 1 und...

Owner's Manual
Page 27
...conseils de couture correspondants. and stretch-stitch combinations In case of this Instruction Book. Combinalsons de points elastlques et utilitaires Pour combiner plusieurs types de point, appuyer simultan&#...233;ment sur plusieurs de ces touches. Combinazioni di punti utili e di punti flexl Per ottenere combinazioni di punti diversi, si premono contemporaneament piü tasti. Utility- The stitch combinations, together with some useful sewing...
...conseils de couture correspondants. and stretch-stitch combinations In case of this Instruction Book. Combinalsons de points elastlques et utilitaires Pour combiner plusieurs types de point, appuyer simultan&#...233;ment sur plusieurs de ces touches. Combinazioni di punti utili e di punti flexl Per ottenere combinazioni di punti diversi, si premono contemporaneament piü tasti. Utility- The stitch combinations, together with some useful sewing...
Owner's Manual
Page 31
...ée; Take out the needle. Inserire ago nuovo (parte piatta del fusto verso dietro) completamente in sU. le déplacer vers P pour Ia couture. Dropping the feed dog Open free arm cover 119. Nadel herausnehmen Neue Nadel (flache Kolbenseite nach hinten) ganz nach oben schieben. Changing the needle (System • 130/705 H): Switch off master switch 125, Loosen screw N. Nadel auswechseln (System...
...ée; Take out the needle. Inserire ago nuovo (parte piatta del fusto verso dietro) completamente in sU. le déplacer vers P pour Ia couture. Dropping the feed dog Open free arm cover 119. Nadel herausnehmen Neue Nadel (flache Kolbenseite nach hinten) ganz nach oben schieben. Changing the needle (System • 130/705 H): Switch off master switch 125, Loosen screw N. Nadel auswechseln (System...

Owner's Manual
Page 39
Please note: When a 13-ampere plug is used, a 3-ampere fuse has to be connected to the terminal which is marked with the letter L or coloured red. / Some safety rules valid for United Kingdom only The wires in this mains lead are coloured according to the following code: Blue: Neutral Brown: Live As the... colours of the wires in the mains lead of this appliance may not correspond with the colour coding of the terminals in your plug, proceed as follows: the wire which is coloured blue must be connected to the terminal which is marked with ...
Please note: When a 13-ampere plug is used, a 3-ampere fuse has to be connected to the terminal which is marked with the letter L or coloured red. / Some safety rules valid for United Kingdom only The wires in this mains lead are coloured according to the following code: Blue: Neutral Brown: Live As the... colours of the wires in the mains lead of this appliance may not correspond with the colour coding of the terminals in your plug, proceed as follows: the wire which is coloured blue must be connected to the terminal which is marked with ...

Owner's Manual
Page 40
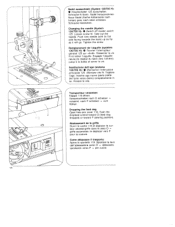
... und n der vorderen Nocke P ernklemmen. Insert a gimp thread in the sewing foot as shown in the illu stration: Place the thread over the back ridge 0, and pull it taut so that it tasto C. For sewing buttonholes use light sewing thread. Cucendo, Ia freccia 0 scorre lungo Ia scala R. J 37 Set the needle thread tension at range N. Set the stitch density at range 3 for buttonhole sewing. Reglage de Ia boutonniere Appuyer...
... und n der vorderen Nocke P ernklemmen. Insert a gimp thread in the sewing foot as shown in the illu stration: Place the thread over the back ridge 0, and pull it taut so that it tasto C. For sewing buttonholes use light sewing thread. Cucendo, Ia freccia 0 scorre lungo Ia scala R. J 37 Set the needle thread tension at range N. Set the stitch density at range 3 for buttonhole sewing. Reglage de Ia boutonniere Appuyer...

Owner's Manual
Page 56
...cken und nach P drehen. 4 Changing the bulb • Pull Out the mains plug. Insert the new bulb so that the pins enter slots 0, push the bulb upwards and turn it fast. Placer le guide-bord de façon oblique dans l'ouverture N sur Ia tête de Ia machine. Premere Ia lampadina in sü...brancher Ia machine du secteur. Pousser l'ampoule vers le haut, Ia tourner vers 0 et 'enle ver. Placer I'ampoule neuve de maniêre que ses tenons sengagent dans les ten tes Q. Push the bulb upwards, then in giü il porta lampade e tenerlo fermo. Premere in direction 0 and...
...cken und nach P drehen. 4 Changing the bulb • Pull Out the mains plug. Insert the new bulb so that the pins enter slots 0, push the bulb upwards and turn it fast. Placer le guide-bord de façon oblique dans l'ouverture N sur Ia tête de Ia machine. Premere Ia lampadina in sü...brancher Ia machine du secteur. Pousser l'ampoule vers le haut, Ia tourner vers 0 et 'enle ver. Placer I'ampoule neuve de maniêre que ses tenons sengagent dans les ten tes Q. Push the bulb upwards, then in giü il porta lampade e tenerlo fermo. Premere in direction 0 and...

Owner's Manual
Page 59
...130/705H-SUK 70, 110 - medium Needle size; 80, 90 Fabric weight; C - Profile Point & eye Suitable for Pfaff. Needle chart Using the adequate needle guarantees a better working up of the material. light Needle size; 60, 70, 75 Fabric weight; Seams topstitched with left-twist groove Light ball point, long eye Imitation leathers, ...linen, blue jeans and light canvas. 130/705 H-LR 70-120 Narrow twist point Leather, suede, calf and goatskin leathers. 130/705 H-PCI.. 80-110 130 H-N 70-110 Narrow wedge point with buttonhole silk or No. 30/3 synthetic thread. 130/705 H-WING...
...130/705H-SUK 70, 110 - medium Needle size; 80, 90 Fabric weight; C - Profile Point & eye Suitable for Pfaff. Needle chart Using the adequate needle guarantees a better working up of the material. light Needle size; 60, 70, 75 Fabric weight; Seams topstitched with left-twist groove Light ball point, long eye Imitation leathers, ...linen, blue jeans and light canvas. 130/705 H-LR 70-120 Narrow twist point Leather, suede, calf and goatskin leathers. 130/705 H-PCI.. 80-110 130 H-N 70-110 Narrow wedge point with buttonhole silk or No. 30/3 synthetic thread. 130/705 H-WING...

Owner's Manual
Page 60
needles stitch into the Decorative and zigzag patterns 80 80 80 - 0.5-1.5 mm 0.5-1.5mm 0.5-1.5mm - -- - Special hemstitching twin needle 130/705 H-ZWI-Ho 80 100 2.0-3.0 mm 2.0-3.0mm wide narrow narrow 1.6 mm 2.0mm 2.5mm - - -r - r Stitch length 130/705H-ZWI 80 130/705 H-ZWI 80 90 100 2.5 mm 2.5 mm - 2.5 mm 2.5 mm 3.0mm Stitch width - - Ornamentations Ornamentations Ornamentations -- __1 i Decorative hem stitching effect Heavily dressed fabrics are...
needles stitch into the Decorative and zigzag patterns 80 80 80 - 0.5-1.5 mm 0.5-1.5mm 0.5-1.5mm - -- - Special hemstitching twin needle 130/705 H-ZWI-Ho 80 100 2.0-3.0 mm 2.0-3.0mm wide narrow narrow 1.6 mm 2.0mm 2.5mm - - -r - r Stitch length 130/705H-ZWI 80 130/705 H-ZWI 80 90 100 2.5 mm 2.5 mm - 2.5 mm 2.5 mm 3.0mm Stitch width - - Ornamentations Ornamentations Ornamentations -- __1 i Decorative hem stitching effect Heavily dressed fabrics are...
Owner's Manual
Page 67
... for thread used , or thread that has become too dry by excessive storage. 3. Thread tension too strong. Poor-quality or knotty thread used . 2. Bobbin case improperly inserted. 4. Refer to needle table. Check upper and lower tensions. During bobbin winding, do not hold thread in as far as it will go . Thread machine properly and check both tensions. Needle bent or blunt. Let machine feed the work is not uniform Tension out of adjustment. Use first-class thread only. Needle breaks Needle not...
... for thread used , or thread that has become too dry by excessive storage. 3. Thread tension too strong. Poor-quality or knotty thread used . 2. Bobbin case improperly inserted. 4. Refer to needle table. Check upper and lower tensions. During bobbin winding, do not hold thread in as far as it will go . Thread machine properly and check both tensions. Needle bent or blunt. Let machine feed the work is not uniform Tension out of adjustment. Use first-class thread only. Needle breaks Needle not...
Owner's Manual
Page 68
... at right.) Flick drop-feed control to leave the machine, even for the master switch. Feed dog dropped. (Drop-teed control is a foot. Fundamental rules Before exchanging either sewing foot or needle, Never run a threaded machine unless there is at all Lint has accumulated between tooth Remove needle plate and clean out lint. Machine runs with difficulty Thread ends in hook raceway. Remove thread ends and put a drop of feed dog. Cause: Remedy: 5. rows of oil into hook raceway. 7.
... at right.) Flick drop-feed control to leave the machine, even for the master switch. Feed dog dropped. (Drop-teed control is a foot. Fundamental rules Before exchanging either sewing foot or needle, Never run a threaded machine unless there is at all Lint has accumulated between tooth Remove needle plate and clean out lint. Machine runs with difficulty Thread ends in hook raceway. Remove thread ends and put a drop of feed dog. Cause: Remedy: 5. rows of oil into hook raceway. 7.

Owner's Manual
Page 75
... cording work (needle size 80, tor tine cording needle size 70) 93-035943-91 For sewing fringes and for basting Straight-stitch toot Needle plate with zigzag stitches Hemmer foot, 3 mm 98-694401-00 For hemming edges Darning foot 93-035960-91 Darning fabric and wool Knitted edge toot 93-035957-91 For sewing knitted materials Teflon foot 98-694 801 -00 For sewing plastic materials Faicy-stitch toot 98-694 879-00 For sewing fancy patterns Use...
... cording work (needle size 80, tor tine cording needle size 70) 93-035943-91 For sewing fringes and for basting Straight-stitch toot Needle plate with zigzag stitches Hemmer foot, 3 mm 98-694401-00 For hemming edges Darning foot 93-035960-91 Darning fabric and wool Knitted edge toot 93-035957-91 For sewing knitted materials Teflon foot 98-694 801 -00 For sewing plastic materials Faicy-stitch toot 98-694 879-00 For sewing fancy patterns Use...

Owner's Manual
Page 76
...how to remedy them Finger-tip Finger-tip controls controls (models (models with with utility utility stitches) and stretch stitches) Inserting the bobbin Inserting the bobbin case Needle chart Needle thread tension Operating the foot control Presser bar lifter Program table Reverse sewing Safety rules Seam-like zipper closure Setting stretch stitches Setting the needle position for straight stitch Setting the stitch length Setting the utility stitches Sewing buttonholes Sewing feet Sewing in zippers Sewing on buttons Thread cutter Thumb wheel for ladies' slacks 34, 35...
...how to remedy them Finger-tip Finger-tip controls controls (models (models with with utility utility stitches) and stretch stitches) Inserting the bobbin Inserting the bobbin case Needle chart Needle thread tension Operating the foot control Presser bar lifter Program table Reverse sewing Safety rules Seam-like zipper closure Setting stretch stitches Setting the needle position for straight stitch Setting the stitch length Setting the utility stitches Sewing buttonholes Sewing feet Sewing in zippers Sewing on buttons Thread cutter Thumb wheel for ladies' slacks 34, 35...

Owner's Manual
Page 83
... It - Elastic triple zgzag stich 06 Elastic stitch 07 Honeycomb stitch 08 Blindstitch Application Buttonholes v;thout turrnng the fabnc. Inserting patches and darning rips on jersey fabrics. cD - Hemming heavier fabrics with invisible stitches. 09 L 10 Pullover strtch Shell-edge stitch Elastic edges finishing seams on elastic fabrics. Au rrorar'y sewing operations and 6-mm fancy stitchng oorations Edge finishing, appliqué work, inserting lace, button sewing and satin stitching, embroidering darning etc Seams exposed to great stress which stretch under...
... It - Elastic triple zgzag stich 06 Elastic stitch 07 Honeycomb stitch 08 Blindstitch Application Buttonholes v;thout turrnng the fabnc. Inserting patches and darning rips on jersey fabrics. cD - Hemming heavier fabrics with invisible stitches. 09 L 10 Pullover strtch Shell-edge stitch Elastic edges finishing seams on elastic fabrics. Au rrorar'y sewing operations and 6-mm fancy stitchng oorations Edge finishing, appliqué work, inserting lace, button sewing and satin stitching, embroidering darning etc Seams exposed to great stress which stretch under...

Owner's Manual
Page 84
... Feather stitch Application Elastic assembly and edge finishing seams on elastic fabrics. for country-look , modern dresses. 20 Triangular stitch ' Ornamental seam, e. RI Inserting patches and darning rips on elastic materials or sewing ornamental seams on knitted fabrics. g. C) C) 0 0 £P. 0 I0KSoM l . Ii \/\ - -I j I-I T ii . g. Decorative cover seams, e. For all plain fabrics. 16 I i'% ii i%. I Closed overlock stitch, wide Covering folded fabric edges with a fancy seam. 17 Lampshade stitch, narrow Classical ornamental seam on light...
... Feather stitch Application Elastic assembly and edge finishing seams on elastic fabrics. for country-look , modern dresses. 20 Triangular stitch ' Ornamental seam, e. RI Inserting patches and darning rips on elastic materials or sewing ornamental seams on knitted fabrics. g. C) C) 0 0 £P. 0 I0KSoM l . Ii \/\ - -I j I-I T ii . g. Decorative cover seams, e. For all plain fabrics. 16 I i'% ii i%. I Closed overlock stitch, wide Covering folded fabric edges with a fancy seam. 17 Lampshade stitch, narrow Classical ornamental seam on light...


