

User Manual
Page 4
...is the risk of low temperature burns when holding such portions for long periods. • Do not place your finger over or cover the flash with regard to smoke. 2 Caution • Do not short the batteries or dispose of the batteries in explosion or leakage. Do not ... Service Network that is provided with a molded-on male attachment plug cap (with a specified NEMA configuration), and the other is included in this camera. Care to burn yourself during use the specified batteries with a specified IEC nonindustrial type configuration) or the equivalent. Do not mix battery brands,...
...is the risk of low temperature burns when holding such portions for long periods. • Do not place your finger over or cover the flash with regard to smoke. 2 Caution • Do not short the batteries or dispose of the batteries in explosion or leakage. Do not ... Service Network that is provided with a molded-on male attachment plug cap (with a specified NEMA configuration), and the other is included in this camera. Care to burn yourself during use the specified batteries with a specified IEC nonindustrial type configuration) or the equivalent. Do not mix battery brands,...

User Manual
Page 8
...Selecting the Focusing Area (AF Point 105 Fixing the Focus (Focus Lock 107 Adjusting the Focus Manually (Manual Focus 109 Shooting in Catch-in Flash 62 Taking Pictures Using the Shake Reduction Function 67 Turning On the Shake Reduction Function 68 Setting the Shake Reduction Function 69 Playing Back Still...Deleting a Single Image 72 Shooting Functions 73 How to Operate the Shooting Menus 74 [A Rec. 6 Basic Operations 55 Basic Shooting Operation 56 Holding the Camera 56 Letting the Camera Choose the Optimal Settings 57 Using a Zoom Lens 61 Using the Built-in Focus Mode 111
...Selecting the Focusing Area (AF Point 105 Fixing the Focus (Focus Lock 107 Adjusting the Focus Manually (Manual Focus 109 Shooting in Catch-in Flash 62 Taking Pictures Using the Shake Reduction Function 67 Turning On the Shake Reduction Function 68 Setting the Shake Reduction Function 69 Playing Back Still...Deleting a Single Image 72 Shooting Functions 73 How to Operate the Shooting Menus 74 [A Rec. 6 Basic Operations 55 Basic Shooting Operation 56 Holding the Camera 56 Letting the Camera Choose the Optimal Settings 57 Using a Zoom Lens 61 Using the Built-in Focus Mode 111

User Manual
Page 9
... Control Shooting (Remote Control F: Sold Separately 120 Using Mirror Up Function to Prevent Camera Shake 123 Changing the Shooting Conditions Automatically when Shooting (Auto Bracket 124 Using the Flash 127 Compensating Flash Output 128 Allowing Shooting while Charging the Flash 129 Flash Characteristics in Each Exposure Mode 130 Distance and Aperture when Using the Built...
... Control Shooting (Remote Control F: Sold Separately 120 Using Mirror Up Function to Prevent Camera Shake 123 Changing the Shooting Conditions Automatically when Shooting (Auto Bracket 124 Using the Flash 127 Compensating Flash Output 128 Allowing Shooting while Charging the Flash 129 Flash Characteristics in Each Exposure Mode 130 Distance and Aperture when Using the Built...
User Manual
Page 13
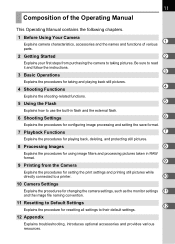
...Functions Explains the shooting-related functions. 5 Using the Flash 5 Explains how to use the built-in flash and the external flash. 6 Shooting Settings 6 Explains the procedures for ...configuring image processing and setting the save format. 7 Playback Functions 7 Explains the procedures for playing back, deleting, and protecting still pictures. 8 Processing Images 8 Explains the procedures for using image filters and processing pictures taken in RAW format. 9 9 Printing from purchasing the camera...
...Functions Explains the shooting-related functions. 5 Using the Flash 5 Explains how to use the built-in flash and the external flash. 6 Shooting Settings 6 Explains the procedures for ...configuring image processing and setting the save format. 7 Playback Functions 7 Explains the procedures for playing back, deleting, and protecting still pictures. 8 Processing Images 8 Explains the procedures for using image filters and processing pictures taken in RAW format. 9 9 Printing from purchasing the camera...

User Manual
Page 19
Names and Functions of Working 17 Parts Before Using Your Camera Camera Self-Timer lamp/ Remote control receiver Card cover Lens mount index (red dot) Lens unlock button Diopter adjustment lever Built-in Flash Cable switch terminal USB/Video terminal DC input terminal Terminal cover 1 Hot shoe Mirror Strap lug AF coupler Lens information contacts LCD panel Viewfinder Card access lamp Monitor Tripod socket Battery grip connector terminal Battery cover unlock lever Battery cover * In the illustrations above, the back and bottom sides of the camera are shown with the Eyecup FP removed.
Names and Functions of Working 17 Parts Before Using Your Camera Camera Self-Timer lamp/ Remote control receiver Card cover Lens mount index (red dot) Lens unlock button Diopter adjustment lever Built-in Flash Cable switch terminal USB/Video terminal DC input terminal Terminal cover 1 Hot shoe Mirror Strap lug AF coupler Lens information contacts LCD panel Viewfinder Card access lamp Monitor Tripod socket Battery grip connector terminal Battery cover unlock lever Battery cover * In the illustrations above, the back and bottom sides of the camera are shown with the Eyecup FP removed.

User Manual
Page 21
...-way controller (5) to pop up ] menu (p.202) and [A Custom Setting] menu (p.75, p.158). f 4 button Saves the setting you selected in flash. (p.62) 0 3 button Displays the [A Rec. g Shake Reduction switch Turns the Shake Reduction function on the monitor. (p.23) 19 b Q button ... a M button Press to show shooting information on or off. (p.68) h { button Press to the Playback mode. (p.70, p.158) Before Using Your Camera c e-dial Sets the shutter speed, 1 aperture, sensitivity and EV compensation values. 5 mc button Sets the EV compensation and aperture value. (p.87, p.94...
...-way controller (5) to pop up ] menu (p.202) and [A Custom Setting] menu (p.75, p.158). f 4 button Saves the setting you selected in flash. (p.62) 0 3 button Displays the [A Rec. g Shake Reduction switch Turns the Shake Reduction function on the monitor. (p.23) 19 b Q button ... a M button Press to show shooting information on or off. (p.68) h { button Press to the Playback mode. (p.70, p.158) Before Using Your Camera c e-dial Sets the shutter speed, 1 aperture, sensitivity and EV compensation values. 5 mc button Sets the EV compensation and aperture value. (p.87, p.94...

User Manual
Page 24
... Off for [Guide display] in [R Set-up or when Operating the Mode Dial Guides appear on the monitor for 3 seconds (default setting) when the camera is On. Monitor At Start-up ] menu to not show indicators. (p.202) 1 2345 6 7 AF.C 1600 8 P Program Automatic Exposure 9 RAW... RAW+ OK Show Sensitivity P LINE P SHIFT 10 02 / 02 / 2008 10: 39AM 13 12 11 1 Flash mode (Active mode appears) (p.63) 2 Drive mode (p.77) 3 AE metering (p.98) 4 Focus mode (p.102) 5 AF point position (p.105) 6 White balance (p.150) 7 Sensitivity...
... Off for [Guide display] in [R Set-up or when Operating the Mode Dial Guides appear on the monitor for 3 seconds (default setting) when the camera is On. Monitor At Start-up ] menu to not show indicators. (p.202) 1 2345 6 7 AF.C 1600 8 P Program Automatic Exposure 9 RAW... RAW+ OK Show Sensitivity P LINE P SHIFT 10 02 / 02 / 2008 10: 39AM 13 12 11 1 Flash mode (Active mode appears) (p.63) 2 Drive mode (p.77) 3 AE metering (p.98) 4 Focus mode (p.102) 5 AF point position (p.105) 6 White balance (p.150) 7 Sensitivity...

User Manual
Page 25
... for 30 seconds. Press the four-way controller (23) while displayed to switch to explanation of set Shooting mode. 1 Detailed information display Before Using Your Camera SCN 1/2000 F2.8 +1.3 AF.C - 1.0 400 mm ISO AUTO 200-1600 ±0 G2 A1 AdobeRGB ± 0 RAW+ 10 +1 +1 02 / ...8 AF point position (p.105) 9 Lens focal length (p.69) 10 Shutter speed (p.81) 11 Aperture (p.82) 12 EV compensation (p.100) 13 Flash exposure compensation (p.128) 14 Sensitivity (p.83) 15 ISO correction in Capture mode to explain the detailed information display, a screenshot with all the information ...
... for 30 seconds. Press the four-way controller (23) while displayed to switch to explanation of set Shooting mode. 1 Detailed information display Before Using Your Camera SCN 1/2000 F2.8 +1.3 AF.C - 1.0 400 mm ISO AUTO 200-1600 ±0 G2 A1 AdobeRGB ± 0 RAW+ 10 +1 +1 02 / ...8 AF point position (p.105) 9 Lens focal length (p.69) 10 Shutter speed (p.81) 11 Aperture (p.82) 12 EV compensation (p.100) 13 Flash exposure compensation (p.128) 14 Sensitivity (p.83) 15 ISO correction in Capture mode to explain the detailed information display, a screenshot with all the information ...

User Manual
Page 27
25 Playback Mode Every time you press the M button during playback, the camera switches screen displays in which the flash was discharged. Before Using Your Camera Detailed information display P 100-0001 AF.S 24 mm 1/2000 F2.8 +1.5 -0.5 ±0 ISO 200 G2 A1 ±0 JPEG 10 AdobeRGB ± 0 02... 22 1 Rotation information 2 Captured image 3 Protect 4 Capture mode 5 AE metering 6 Flash mode 7 Shutter speed 8 Shake Reduction 9 Drive mode 10 Exposure bracket 11 Aperture 12 EV compensation 13 Flash exposure compensation 14 Folder No./File No. 15 Focus mode 16 AF point position 17 Lens...
25 Playback Mode Every time you press the M button during playback, the camera switches screen displays in which the flash was discharged. Before Using Your Camera Detailed information display P 100-0001 AF.S 24 mm 1/2000 F2.8 +1.5 -0.5 ±0 ISO 200 G2 A1 ±0 JPEG 10 AdobeRGB ± 0 02... 22 1 Rotation information 2 Captured image 3 Protect 4 Capture mode 5 AE metering 6 Flash mode 7 Shutter speed 8 Shake Reduction 9 Drive mode 10 Exposure bracket 11 Aperture 12 EV compensation 13 Flash exposure compensation 14 Folder No./File No. 15 Focus mode 16 AF point position 17 Lens...

User Manual
Page 29
...appears in I), . (Night Scene Portrait), s (Landscape), H (Scene) 7 Shutter speed (p.81) Shutter speed when capturing or adjusting. Blinks: when flash is recommended but not set to k (Continuous mode) or \. 6 Picture/Scene mode icon (p.78) Icon for Picture mode or Scene mode in use ...(Macro), = (Portrait), U (Normal mode in the viewfinder. 23 1 Before Using Your Camera 1 1 45 6 7 8 9 10 11 12 13 1 AF frame (p.47) 2 Spot metering frame (p.98) 3 AF point (p.105) 4 Flash status (p.62) Lit: when flash is set . 5 Focus mode (p.102) Appears when AF Mode is available. Underlined when...
...appears in I), . (Night Scene Portrait), s (Landscape), H (Scene) 7 Shutter speed (p.81) Shutter speed when capturing or adjusting. Blinks: when flash is recommended but not set to k (Continuous mode) or \. 6 Picture/Scene mode icon (p.78) Icon for Picture mode or Scene mode in use ...(Macro), = (Portrait), U (Normal mode in the viewfinder. 23 1 Before Using Your Camera 1 1 45 6 7 8 9 10 11 12 13 1 AF frame (p.47) 2 Spot metering frame (p.98) 3 AF point (p.105) 4 Flash status (p.62) Lit: when flash is set . 5 Focus mode (p.102) Appears when AF Mode is available. Underlined when...

User Manual
Page 31
...Camera 1 2 3 4 5 10 6 78 9 1 Shutter speed (p.81) 7 Focusing area (p.105) 2 Aperture (p.82) No indicator: Auto 3 White balance (p.150) V : Select (Not displayed when set to Auto) M : Center O : White balance correction 8 AE metering (p.98) 4 Battery level No indicator: Multi-segment 5 Flash mode (p.62) metering b : Built-in flash is ready M : Center-weighted (when blinking, flash... should metering be used) N : Spot metering a : Flash off E : Auto...
...Camera 1 2 3 4 5 10 6 78 9 1 Shutter speed (p.81) 7 Focusing area (p.105) 2 Aperture (p.82) No indicator: Auto 3 White balance (p.150) V : Select (Not displayed when set to Auto) M : Center O : White balance correction 8 AE metering (p.98) 4 Battery level No indicator: Multi-segment 5 Flash mode (p.62) metering b : Built-in flash is ready M : Center-weighted (when blinking, flash... should metering be used) N : Spot metering a : Flash off E : Auto...

User Manual
Page 34
.... q (Macro) Lets you take vibrant pictures of flowers or other small subjects at dusk. To prevent camera shake, either use the Shake Reduction function or mount the camera on the mode dial to the dial indicator. s (Landscape) Deepens the focus range, emphasizes contour and saturation...bright image. Mode Characteristics I . 32 Using the Mode Dial Dial indicator 1 Before Using Your Camera You can switch the Capture mode by setting the icons on a tripod. a (Flash OFF) The built-in flash is used. Page p.78 p.79 For . (Night Scene Portrait), the shutter speed becomes slower...
.... q (Macro) Lets you take vibrant pictures of flowers or other small subjects at dusk. To prevent camera shake, either use the Shake Reduction function or mount the camera on the mode dial to the dial indicator. s (Landscape) Deepens the focus range, emphasizes contour and saturation...bright image. Mode Characteristics I . 32 Using the Mode Dial Dial indicator 1 Before Using Your Camera You can switch the Capture mode by setting the icons on a tripod. a (Flash OFF) The built-in flash is used. Page p.78 p.79 For . (Night Scene Portrait), the shutter speed becomes slower...

User Manual
Page 35
.... Picture mode H (Scene) mode Exposure mode I (Auto Picture)/ = (Portrait)/ s (Landscape)/ q (Macro)/ \ (Moving Object)/ . (Night Scene Portrait)/ a (Flash OFF) A (Night Scene)/ i (Surf & Snow)/ K (Food)/ K (Sunset)/ C (Kids)/ E (Pet)/ D (Candlelight)/ E (Museum) e (Program)/ K (...Sensitivity Priority)/ b (Shutter Priority)/ c (Aperture Priority)/ a (Manual)/ p (Bulb) 33 Before Using Your Camera Mode Characteristics Page e (Program) Automatically sets shutter speed and aperture to the proper exposure according to as fireworks and night scenes. Take pictures...
.... Picture mode H (Scene) mode Exposure mode I (Auto Picture)/ = (Portrait)/ s (Landscape)/ q (Macro)/ \ (Moving Object)/ . (Night Scene Portrait)/ a (Flash OFF) A (Night Scene)/ i (Surf & Snow)/ K (Food)/ K (Sunset)/ C (Kids)/ E (Pet)/ D (Candlelight)/ E (Museum) e (Program)/ K (...Sensitivity Priority)/ b (Shutter Priority)/ c (Aperture Priority)/ a (Manual)/ p (Bulb) 33 Before Using Your Camera Mode Characteristics Page e (Program) Automatically sets shutter speed and aperture to the proper exposure according to as fireworks and night scenes. Take pictures...

User Manual
Page 41
Turn the camera off and on again. ...sufficient if the camera is based on measuring conditions in actual use the camera. • { does not appear on the LCD panel when using the camera in cold climates...AA Alkaline batteries Normal (Temperature) recording (23°C) 1100 ( 0°C) 900 (23°C) 700 Flash photography 50% use 100% use 550 350 440 250 400 240 ( 0°C) 500 280 190 (23...minutes 400 minutes 300 minutes 200 minutes The picture storage capacity (normal recording and flash use 50%) is used at low temperatures or when performing continuous shooting consecutively. ...
Turn the camera off and on again. ...sufficient if the camera is based on measuring conditions in actual use the camera. • { does not appear on the LCD panel when using the camera in cold climates...AA Alkaline batteries Normal (Temperature) recording (23°C) 1100 ( 0°C) 900 (23°C) 700 Flash photography 50% use 100% use 550 350 440 250 400 240 ( 0°C) 500 280 190 (23...minutes 400 minutes 300 minutes 200 minutes The picture storage capacity (normal recording and flash use 50%) is used at low temperatures or when performing continuous shooting consecutively. ...

User Manual
Page 57
For information about advanced functions and settings for shooting by setting mode dial to I (Auto Picture) to chapter 4 and onward. Basic Shooting Operation 56 Using a Zoom Lens 61 Using the Built-in Flash 62 Taking Pictures Using the Shake Reduction Function 67 Playing Back Still Pictures 70 Deleting Images 72 3 Basic Operations This chapter explains basic operations for taking pictures, refer to ensure successful capturing.
For information about advanced functions and settings for shooting by setting mode dial to I (Auto Picture) to chapter 4 and onward. Basic Shooting Operation 56 Using a Zoom Lens 61 Using the Built-in Flash 62 Taking Pictures Using the Shake Reduction Function 67 Playing Back Still Pictures 70 Deleting Images 72 3 Basic Operations This chapter explains basic operations for taking pictures, refer to ensure successful capturing.

User Manual
Page 60
... reduct]). 1 Operating the shutter release button (p.59) 1 Subjects that are Difficult to Focus on (p.60) Flash status 1 Using the Built-in Flash (p.62) 1 Selecting the Focusing Area (AF Point) (p.105) Focus indicator You can be used to change the size of the subject in the ... can preview the image in the viewfinder when the subject comes into focus. The autofocus system operates. The flash pops up automatically when necessary. (Push the K button and manually lift the flash when Flash mode is not set to view the subject. 58 3 Look through the viewfinder to I (Auto Picture)...
... reduct]). 1 Operating the shutter release button (p.59) 1 Subjects that are Difficult to Focus on (p.60) Flash status 1 Using the Built-in Flash (p.62) 1 Selecting the Focusing Area (AF Point) (p.105) Focus indicator You can be used to change the size of the subject in the ... can preview the image in the viewfinder when the subject comes into focus. The autofocus system operates. The flash pops up automatically when necessary. (Push the K button and manually lift the flash when Flash mode is not set to view the subject. 58 3 Look through the viewfinder to I (Auto Picture)...

User Manual
Page 64
... used at about 0.7 m to 5 m from the subject. Flash Mode g Auto discharge b Flash On i Auto flash+Redeye reduct D Flash On+Red-eye r Wireless Mode Function Camera automatically determines ambient light and built-in flash fully discharges for lenses without using a shutter speed likely to cause camera shake or in flash. Discharges flash manually. Lights a red-eye reduction light before automatic...
... used at about 0.7 m to 5 m from the subject. Flash Mode g Auto discharge b Flash On i Auto flash+Redeye reduct D Flash On+Red-eye r Wireless Mode Function Camera automatically determines ambient light and built-in flash fully discharges for lenses without using a shutter speed likely to cause camera shake or in flash. Discharges flash manually. Lights a red-eye reduction light before automatic...

User Manual
Page 65
OK AUTO Fn Exit The [Flash Mode] screen appears. Flash Mode Auto discharge 0.0 OK OK Fn 2 Press the four-way controller (3). Basic Operations 3 The Fn menu appears. 63 Selecting Flash Mode 1 Press the { button.
OK AUTO Fn Exit The [Flash Mode] screen appears. Flash Mode Auto discharge 0.0 OK OK Fn 2 Press the four-way controller (3). Basic Operations 3 The Fn menu appears. 63 Selecting Flash Mode 1 Press the { button.

User Manual
Page 66
... mode by pressing the K button while the built-in flash is selected in flash pops up . The flash is deactivated when A (Night Scene), K (Sunset), D (Candlelight) or E (Museum) is popped up if necessary and begins charging. The camera is set to H, I, =, q, \ or .. If Auto... discharge is ready to take a picture. 3 Basic Operations Using Auto Discharge g, i (Automatic Flash Popup) 1 Set the mode dial to e, K, b, c, a or p, g and i appear gray...
... mode by pressing the K button while the built-in flash is selected in flash pops up . The flash is deactivated when A (Night Scene), K (Sunset), D (Candlelight) or E (Museum) is popped up if necessary and begins charging. The camera is set to H, I, =, q, \ or .. If Auto... discharge is ready to take a picture. 3 Basic Operations Using Auto Discharge g, i (Automatic Flash Popup) 1 Set the mode dial to e, K, b, c, a or p, g and i appear gray...

User Manual
Page 67
...the portion indicated in the LCD panel and viewfinder. (p.27, p.29) When Flash mode is set to g or i and you pop up and begins charging. Flash On mode is taken. 4 Push down to retract the flash. 3 Using Flash On Mode b, D 1 Press the K button. Basic Operations 65 3 Press... the shutter release button fully. The picture is used regardless of the flash mode settings. The flash discharges and the picture is set to...
...the portion indicated in the LCD panel and viewfinder. (p.27, p.29) When Flash mode is set to g or i and you pop up and begins charging. Flash On mode is taken. 4 Push down to retract the flash. 3 Using Flash On Mode b, D 1 Press the K button. Basic Operations 65 3 Press... the shutter release button fully. The picture is used regardless of the flash mode settings. The flash discharges and the picture is set to...
