
User Manual
Page 1
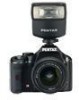
SLR Digital Camera / Operating Manual For optimum camera performance, please read the Operating Manual before using the camera.
SLR Digital Camera / Operating Manual For optimum camera performance, please read the Operating Manual before using the camera.

User Manual
Page 2
...as there are cases where limitations are placed on taking pictures even for purchasing this PENTAX e/y Digital Camera. Although the level of functioning pixels is 99.99% or better, you for... be used without permission according to their respective companies. Regarding trademarks PENTAX, K-m/K2000 and smc PENTAX are different from the camera through a few simple operations. • There is a possibility that... that recorded data may be erased or that the camera may illuminate when they should not. Images taken with this manual safe, as specified in the Copyright Act, and ...
...as there are cases where limitations are placed on taking pictures even for purchasing this PENTAX e/y Digital Camera. Although the level of functioning pixels is 99.99% or better, you for... be used without permission according to their respective companies. Regarding trademarks PENTAX, K-m/K2000 and smc PENTAX are different from the camera through a few simple operations. • There is a possibility that... that recorded data may be erased or that the camera may illuminate when they should not. Images taken with this manual safe, as specified in the Copyright Act, and ...

User Manual
Page 6
Thank you complete the product registration, which can be found on the CD-ROM supplied with the camera or on the PENTAX website. Refer to better serve you, we request that you for more information. 4 Regarding Product Registration In order to the PENTAX PHOTO Browser 3/PENTAX PHOTO Laboratory 3 Operating Manual for your cooperation.
Thank you complete the product registration, which can be found on the CD-ROM supplied with the camera or on the PENTAX website. Refer to better serve you, we request that you for more information. 4 Regarding Product Registration In order to the PENTAX PHOTO Browser 3/PENTAX PHOTO Laboratory 3 Operating Manual for your cooperation.

User Manual
Page 7
... FOR BATTERY USAGE 2 Care to be Taken During Handling 2 Contents 5 Composition of the Operating Manual 11 Before Using Your Camera 13 e/y Camera Characteristics 14 Checking the Contents of the Package 16 Names and Functions of Working Parts 17 Capture Mode 18 Playback Mode 20 Display Indicators 22 ... 40 Inserting/Removing the SD Memory Card 42 Recorded Pixels and Quality Level 44 Attaching the Lens 46 Adjusting the Viewfinder Diopter 48 Turning the Camera On and Off 49 Initial Settings 50 Setting the Display Language 50 Setting the Date and Time 54
... FOR BATTERY USAGE 2 Care to be Taken During Handling 2 Contents 5 Composition of the Operating Manual 11 Before Using Your Camera 13 e/y Camera Characteristics 14 Checking the Contents of the Package 16 Names and Functions of Working Parts 17 Capture Mode 18 Playback Mode 20 Display Indicators 22 ... 40 Inserting/Removing the SD Memory Card 42 Recorded Pixels and Quality Level 44 Attaching the Lens 46 Adjusting the Viewfinder Diopter 48 Turning the Camera On and Off 49 Initial Settings 50 Setting the Display Language 50 Setting the Date and Time 54

User Manual
Page 8
6 Basic Operations 57 Basic Shooting Operation 58 Holding the Camera 58 Letting the Camera Choose the Optimal Settings 59 Using a Zoom Lens 64 Using the Built-in Flash 65 Setting Flash Mode 65 Compensating Flash Output 70 Allowing Shooting ... Using the Autofocus 109 Setting the AF Mode 111 Selecting the Focusing Area (AF Point 113 Fixing the Focus (Focus Lock 114 Adjusting the Focus Manually (Manual Focus 116 Checking the Composition, Exposure and Focus Before Shooting (Digital Preview 119
6 Basic Operations 57 Basic Shooting Operation 58 Holding the Camera 58 Letting the Camera Choose the Optimal Settings 59 Using a Zoom Lens 64 Using the Built-in Flash 65 Setting Flash Mode 65 Compensating Flash Output 70 Allowing Shooting ... Using the Autofocus 109 Setting the AF Mode 111 Selecting the Focusing Area (AF Point 113 Fixing the Focus (Focus Lock 114 Adjusting the Focus Manually (Manual Focus 116 Checking the Composition, Exposure and Focus Before Shooting (Digital Preview 119

User Manual
Page 13
Be sure to their default settings. 12 Appendix Explains troubleshooting, introduces optional accessories and provides various resources. 11 Composition of the Operating Manual This Operating Manual contains the following chapters. 1 Before Using Your Camera 1 Explains camera characteristics, accessories and the names and functions of various parts. 2 Getting Started 2 Explains your first steps from purchasing the...
Be sure to their default settings. 12 Appendix Explains troubleshooting, introduces optional accessories and provides various resources. 11 Composition of the Operating Manual This Operating Manual contains the following chapters. 1 Before Using Your Camera 1 Explains camera characteristics, accessories and the names and functions of various parts. 2 Getting Started 2 Explains your first steps from purchasing the...

User Manual
Page 14
12 The symbols used in this Operating Manual are explained below. 1 Shows reference page number explaining a related operation. Shows useful information. Shows precautions to take when operating the camera.
12 The symbols used in this Operating Manual are explained below. 1 Shows reference page number explaining a related operation. Shows useful information. Shows precautions to take when operating the camera.

User Manual
Page 16
... shakes the CCD for removing collected dust. • Features Digital Filters to operate. • The CCD features a special SP coating against dust deposit. This enables you to capture sharp pictures with minimal camera shake regardless of the lens type. • Features a ...internally by the camera. • Features Sensitivity Priority mode K that automatically adjusts aperture and shutter speed according to adjust settings while previewing the edited image, enabling a wider range of expression. • Records in various parts of approximately 96%, for easier manual focusing. &#...
... shakes the CCD for removing collected dust. • Features Digital Filters to operate. • The CCD features a special SP coating against dust deposit. This enables you to capture sharp pictures with minimal camera shake regardless of the lens type. • Features a ...internally by the camera. • Features Sensitivity Priority mode K that automatically adjusts aperture and shutter speed according to adjust settings while previewing the edited image, enabling a wider range of expression. • Records in various parts of approximately 96%, for easier manual focusing. &#...

User Manual
Page 18
16 Checking the Contents of the Package The following accessories are included. 1 Hot shoe cover FK (Installed on camera) Eyecup FQ (Installed on camera) Body mount cover (Installed on camera) Before Using Your Camera USB cable I-USB7 Strap O-ST84 Software (CD-ROM) S-SW84 Four AA lithium batteries Operating Manual (this manual) Quick Guide PENTAX PHOTO Browser 3/ PENTAX PHOTO Laboratory 3 Operating Manual Check that all accessories are packaged with your camera.
16 Checking the Contents of the Package The following accessories are included. 1 Hot shoe cover FK (Installed on camera) Eyecup FQ (Installed on camera) Body mount cover (Installed on camera) Before Using Your Camera USB cable I-USB7 Strap O-ST84 Software (CD-ROM) S-SW84 Four AA lithium batteries Operating Manual (this manual) Quick Guide PENTAX PHOTO Browser 3/ PENTAX PHOTO Laboratory 3 Operating Manual Check that all accessories are packaged with your camera.

User Manual
Page 21
... and aperture values. (p.91, p.98, p.104) 6 Mode dial Changes Capture mode. (p.80) 7 Focus mode lever Switches between autofocus mode (p.109) and manual focus mode (p.116). 8 K button Press to pop up the built-in flash. (p.65) 9 e-dial Sets the shutter speed, aperture, sensitivity and EV compensation... 3 Main switch Move to turn the power on the target or to memorize the exposure value. (p.100, p.105, p.110) 1 Before Using Your Camera a Q button Switches to move the cursor or change items. e Four-way controller (2345) Opens the Drive Mode/Flash Mode/White Balance/ Sensitivity setup ...
... and aperture values. (p.91, p.98, p.104) 6 Mode dial Changes Capture mode. (p.80) 7 Focus mode lever Switches between autofocus mode (p.109) and manual focus mode (p.116). 8 K button Press to pop up the built-in flash. (p.65) 9 e-dial Sets the shutter speed, aperture, sensitivity and EV compensation... 3 Main switch Move to turn the power on the target or to memorize the exposure value. (p.100, p.105, p.110) 1 Before Using Your Camera a Q button Switches to move the cursor or change items. e Four-way controller (2345) Opens the Drive Mode/Flash Mode/White Balance/ Sensitivity setup ...

User Manual
Page 23
...49) 3 g (Help) button Displays an explanation of the function or operation on the monitor. (p.24) 7 3 button 1 Before Using Your Camera Press to in the menu or playback screen. 0 i button Press to delete images. (p.73) References to Button Names In this to enlarge an ... 5 Q button Press to switch to Capture mode. 21 6 M button Press to show shooting information on the monitor. (p.34) 4 e-dial Use this Operating Manual, the buttons of the fourway controller are referred to display the [Q Playback 1] menu (p.166). Next, press the fourway controller (5) to display other menus. 8 ...
...49) 3 g (Help) button Displays an explanation of the function or operation on the monitor. (p.24) 7 3 button 1 Before Using Your Camera Press to in the menu or playback screen. 0 i button Press to delete images. (p.73) References to Button Names In this to enlarge an ... 5 Q button Press to switch to Capture mode. 21 6 M button Press to show shooting information on the monitor. (p.34) 4 e-dial Use this Operating Manual, the buttons of the fourway controller are referred to display the [Q Playback 1] menu (p.166). Next, press the fourway controller (5) to display other menus. 8 ...

User Manual
Page 43
... sure connections are secure between the terminals. Be sure to the AC adapter. 8 Plug the AC cord into the power outlet. • Make sure the camera is recording or reading data. • Close the electric cable cover when not using the AC adapter. See Step 3 on p.38. 6 Connect the DC ...terminal on the AC adapter to the DC coupler. 8 6 7 7 Connect the AC plug cord to read the AC adapter kit K-AC84 Operating Manual when using the AC adapter. Getting Started 41 4 Pull out the DC coupler's electric cable as shown in the illustration. 2 5 Close the battery cover.
... sure connections are secure between the terminals. Be sure to the AC adapter. 8 Plug the AC cord into the power outlet. • Make sure the camera is recording or reading data. • Close the electric cable cover when not using the AC adapter. See Step 3 on p.38. 6 Connect the DC ...terminal on the AC adapter to the DC coupler. 8 6 7 7 Connect the AC plug cord to read the AC adapter kit K-AC84 Operating Manual when using the AC adapter. Getting Started 41 4 Pull out the DC coupler's electric cable as shown in the illustration. 2 5 Close the battery cover.

User Manual
Page 54
... OK OK Getting Started 12 Use the four-way controller (3) to select [Settings are completed MENU Cancel OK OK 13 Press the 4 button. In this manual, the menu screens hereafter are described with [Text Size] set to select [Std.] or [Large]. Selecting [Large] magnifies the selected menu item. 2 11 Press the...
... OK OK Getting Started 12 Use the four-way controller (3) to select [Settings are completed MENU Cancel OK OK 13 Press the 4 button. In this manual, the menu screens hereafter are described with [Text Size] set to select [Std.] or [Large]. Selecting [Large] magnifies the selected menu item. 2 11 Press the...

User Manual
Page 65
These also apply to manual focusing using the focus indicator ] in the viewfinder. (a) Extremely low-contrast subjects such as a white wall in the focusing area. (b) Subjects which do not reflect ... when taking pictures under the following conditions. Basic Operations If the subject cannot be focused automatically, set the focus mode lever to \ and use the manual focus mode to focus on The autofocus mechanism is displayed when (e) and (f) above apply. 63 Subjects that are difficult to focus on the subject with...
These also apply to manual focusing using the focus indicator ] in the viewfinder. (a) Extremely low-contrast subjects such as a white wall in the focusing area. (b) Subjects which do not reflect ... when taking pictures under the following conditions. Basic Operations If the subject cannot be focused automatically, set the focus mode lever to \ and use the manual focus mode to focus on The autofocus mechanism is displayed when (e) and (f) above apply. 63 Subjects that are difficult to focus on the subject with...

User Manual
Page 67
... 65 Use the following procedures to take pictures in low light or backlit conditions or when you want to manually use the built-in flash pops up. Basic Operations Setting Flash Mode Flash Mode Function g Auto discharge Camera automatically determines ambient light and built-in flash. D Flash On+ Red-eye Discharges flash...
... 65 Use the following procedures to take pictures in low light or backlit conditions or when you want to manually use the built-in flash pops up. Basic Operations Setting Flash Mode Flash Mode Function g Auto discharge Camera automatically determines ambient light and built-in flash. D Flash On+ Red-eye Discharges flash...

User Manual
Page 72
... if the background is called Daylight-Sync Shooting. Compensating Flash Output You can change the flash output in shadow. Taking pictures 1 Pop up the flash manually and confirm that the flash is fully charged. 3 Take a picture. The flash compensation values are as follows for 1/2 EV and 1/3 EV. Flash On is used...
... if the background is called Daylight-Sync Shooting. Compensating Flash Output You can change the flash output in shadow. Taking pictures 1 Pop up the flash manually and confirm that the flash is fully charged. 3 Take a picture. The flash compensation values are as follows for 1/2 EV and 1/3 EV. Flash On is used...

User Manual
Page 74
...details. 3 1 Press the Q button after taking a picture. Refer to the "PENTAX PHOTO Browser 3/PENTAX PHOTO Laboratory 3 Operating Manual" for display information details. 2 Press the four-way controller (45). 4: The previous... image appears. 5: The next image appears. Use the included "PENTAX PHOTO Browser 3" software to play back captured pictures with the largest file number) is displayed on the monitor. The most recently captured image (image with the camera...
...details. 3 1 Press the Q button after taking a picture. Refer to the "PENTAX PHOTO Browser 3/PENTAX PHOTO Laboratory 3 Operating Manual" for display information details. 2 Press the four-way controller (45). 4: The previous... image appears. 5: The next image appears. Use the included "PENTAX PHOTO Browser 3" software to play back captured pictures with the largest file number) is displayed on the monitor. The most recently captured image (image with the camera...

User Manual
Page 81
p.227 21. Display status A4 Reset Custom function Sets whether the status screen is set to f or l and a manual focus lens is released p.118 automatically when the subject comes into focus. 19. 79 Menu Item Function Page 15. Flash in Wireless Mode Sets the ...
p.227 21. Display status A4 Reset Custom function Sets whether the status screen is set to f or l and a manual focus lens is released p.118 automatically when the subject comes into focus. 19. 79 Menu Item Function Page 15. Flash in Wireless Mode Sets the ...

User Manual
Page 82
In this manual, Capture modes are referred to take pictures with settings suited for your photographic vision. Shooting Functions 4 Dial indicator The e/y features various shooting modes, enabling ... Portrait)/ a (Flash Off) A (Night Scene)/ Q (Surf & Snow)/ K (Food)/ K (Sunset)/ n (Stage Lighting)/ R (Kids)/ Y (Pet)/ m (Candlelight)/ E (Museum)/ l (Night Snap) e (Program)/ K (Sensitivity Priority)/ b (Shutter Priority)/ c (Aperture Priority)/ a (Manual) 80 Selecting the Appropriate Capture Mode You can switch Capture mode by setting the icons on the mode dial to the dial indicator.
In this manual, Capture modes are referred to take pictures with settings suited for your photographic vision. Shooting Functions 4 Dial indicator The e/y features various shooting modes, enabling ... Portrait)/ a (Flash Off) A (Night Scene)/ Q (Surf & Snow)/ K (Food)/ K (Sunset)/ n (Stage Lighting)/ R (Kids)/ Y (Pet)/ m (Candlelight)/ E (Museum)/ l (Night Snap) e (Program)/ K (Sensitivity Priority)/ b (Shutter Priority)/ c (Aperture Priority)/ a (Manual) 80 Selecting the Appropriate Capture Mode You can switch Capture mode by setting the icons on the mode dial to the dial indicator.

User Manual
Page 86
... Use the exposure modes to change the sensitivity, shutter speed and aperture and take pictures according to capture the picture with creative intent. Shooting Functions a (Manual) Lets you set the desired aperture for controlling the depth of movement.
... Use the exposure modes to change the sensitivity, shutter speed and aperture and take pictures according to capture the picture with creative intent. Shooting Functions a (Manual) Lets you set the desired aperture for controlling the depth of movement.


