
Operation Manual
Page 1
Digital Camera Operating Manual To ensure the best performance from your camera, please read the Operating Manual before using the camera.
Digital Camera Operating Manual To ensure the best performance from your camera, please read the Operating Manual before using the camera.

Operation Manual
Page 2
...in combination, PRINT Image Matching II enabled digital still cameras, printers and software help photographers to produce images more faithful to get the most out of Seiko Epson Corporation. Keep this manual before using the Optio 550 that are for anything other brands or ...product names are placed on taking pictures even for personal enjoyment during demonstrations, industrial enterprise or as items for buying the Pentax Optio 550 Digital Camera. marks of the copyright as specified in order to their respective companies. • This product supports PRINT Image Matching II...
...in combination, PRINT Image Matching II enabled digital still cameras, printers and software help photographers to produce images more faithful to get the most out of Seiko Epson Corporation. Keep this manual before using the Optio 550 that are for anything other brands or ...product names are placed on taking pictures even for personal enjoyment during demonstrations, industrial enterprise or as items for buying the Pentax Optio 550 Digital Camera. marks of the copyright as specified in order to their respective companies. • This product supports PRINT Image Matching II...
Operation Manual
Page 3
...inside of the camera should become exposed as a result of, for use of an AC adapter other than that small children do not under any other irregularity, stop using the camera immediately, remove the battery or disconnect the AC adapter and contact your nearest Pentax service center. ...Continued use of the camera may experience serious difficulties if the warnings are not heeded. Also, do ...
...inside of the camera should become exposed as a result of, for use of an AC adapter other than that small children do not under any other irregularity, stop using the camera immediately, remove the battery or disconnect the AC adapter and contact your nearest Pentax service center. ...Continued use of the camera may experience serious difficulties if the warnings are not heeded. Also, do ...
Operation Manual
Page 4
... the inside . • Storing the camera where pesticides and chemicals are handled should be avoided. Pentax is 0°C to 40°C (32°F to 104°F). • Avoid contact with garbage, dirt, sand, dust, water, toxic gases, salt, etc. This ...a blower or clean off immediately with a dry soft cloth. • Ensure that it may be damaged or malfunction. 2 as this product. • If the camera is not subjected to substantial vibrations, shocks or pressure. Remove from the lens and viewfinder using a lens brush. • Periodic checks are returned to. •...
... the inside . • Storing the camera where pesticides and chemicals are handled should be avoided. Pentax is 0°C to 40°C (32°F to 104°F). • Avoid contact with garbage, dirt, sand, dust, water, toxic gases, salt, etc. This ...a blower or clean off immediately with a dry soft cloth. • Ensure that it may be damaged or malfunction. 2 as this product. • If the camera is not subjected to substantial vibrations, shocks or pressure. Remove from the lens and viewfinder using a lens brush. • Periodic checks are returned to. •...

Operation Manual
Page 5
...; There is a possibility that recorded data may be erased or that the camera may illuminate when they should be aware that 0.01% or fewer of the pixels may not illuminate or may not function correctly when used in ...
...; There is a possibility that recorded data may be erased or that the camera may illuminate when they should be aware that 0.01% or fewer of the pixels may not illuminate or may not function correctly when used in ...

Operation Manual
Page 6
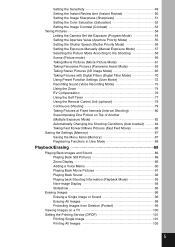
Contents FOR SAFE USE OF YOUR CAMERA 1 Care to Determine the Exposure 4 (AE Metering 48 Mode 21 Setting the Date and Time 22 Quick Start 24 Taking Still Pictures 24 Playing Back ... Operating Manual 7 Checking the Contents of the Package 8 Name of Parts 9 Names of Operating Parts 10 Getting Started 11 Attaching the Strap 11 Powering the Camera 12 Charging the Battery 12 Installing the Battery 13 Using the AC Adapter (optional 15 Installing the SD Memory Card/ MultiMediaCard 16 Turning the...
Contents FOR SAFE USE OF YOUR CAMERA 1 Care to Determine the Exposure 4 (AE Metering 48 Mode 21 Setting the Date and Time 22 Quick Start 24 Taking Still Pictures 24 Playing Back ... Operating Manual 7 Checking the Contents of the Package 8 Name of Parts 9 Names of Operating Parts 10 Getting Started 11 Attaching the Strap 11 Powering the Camera 12 Charging the Battery 12 Installing the Battery 13 Using the AC Adapter (optional 15 Installing the SD Memory Card/ MultiMediaCard 16 Turning the...
Operation Manual
Page 7
...the Image Sharpness (Sharpness 51 Setting the Color Saturation (Saturation 52 Setting the Image Contrast (Contrast 53 Taking Pictures 54 Letting the Camera Set the Exposure (Program Mode 54 Setting the Aperture Value (Aperture Priority Mode 55 Setting the Shutter Speed (Shutter Priority Mode ...(Movie Picture Mode 61 Taking Panorama Pictures (Panorama Assist Mode 63 Taking Stereo Pictures (3D Image Mode 65 Taking Pictures with Digital Filters (Digital Filter Mode 70 Using Preset Function Settings (User Mode 72 Recording Sound (Voice Recording Mode 73 Using the Zoom 74 EV ...
...the Image Sharpness (Sharpness 51 Setting the Color Saturation (Saturation 52 Setting the Image Contrast (Contrast 53 Taking Pictures 54 Letting the Camera Set the Exposure (Program Mode 54 Setting the Aperture Value (Aperture Priority Mode 55 Setting the Shutter Speed (Shutter Priority Mode ...(Movie Picture Mode 61 Taking Panorama Pictures (Panorama Assist Mode 63 Taking Stereo Pictures (3D Image Mode 65 Taking Pictures with Digital Filters (Digital Filter Mode 70 Using Preset Function Settings (User Mode 72 Recording Sound (Voice Recording Mode 73 Using the Zoom 74 EV ...

Operation Manual
Page 8
...104 Installing the software 105 Displaying and copying images using ACDSee 112 Joining panorama images using ACD photostitcher 113 Disconnecting the camera from your computer 116 Viewing Images with your Macintosh 118 About the included software 118 System environment 118 Installing the software... 118 Displaying and copying images using ACDSee 120 Disconnecting the camera from your Macintosh 121 Editing/Settings 123 Editing Images 123 Changing the Image Size 123 Trimming Images 125 Camera Settings 126 Formatting a SD Memory Card/MultiMediaCard 126 Changing the Sound ...
...104 Installing the software 105 Displaying and copying images using ACDSee 112 Joining panorama images using ACD photostitcher 113 Disconnecting the camera from your computer 116 Viewing Images with your Macintosh 118 About the included software 118 System environment 118 Installing the software... 118 Displaying and copying images using ACDSee 120 Disconnecting the camera from your Macintosh 121 Editing/Settings 123 Editing Images 123 Changing the Image Size 123 Trimming Images 125 Camera Settings 126 Formatting a SD Memory Card/MultiMediaCard 126 Changing the Sound ...

Operation Manual
Page 9
... relevant functions. Taking Pictures This chapter explains the various ways of the Package 7 Editing/Settings This chapter explains how to set the camera-related functions. The meanings of the mode dial and buttons, and how to use the menus. The icons above the title show ...contains the following chapters. memo indicates precautions to start taking pictures straightaway. Getting Started This chapter explains what to do after purchasing the camera before you how to use the SD Memory Card/MultiMediaCard. Be sure to read it if you about the messages displayed on a ...
... relevant functions. Taking Pictures This chapter explains the various ways of the Package 7 Editing/Settings This chapter explains how to set the camera-related functions. The meanings of the mode dial and buttons, and how to use the menus. The icons above the title show ...contains the following chapters. memo indicates precautions to start taking pictures straightaway. Getting Started This chapter explains what to do after purchasing the camera before you how to use the SD Memory Card/MultiMediaCard. Be sure to read it if you about the messages displayed on a ...

Operation Manual
Page 10
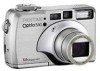
... 150. ✽ Type of the Package Camera Optio 550 Lithium-ion battery D-LI7 (Rechargeable) (∗) Battery charger (D-BC7) (∗) USB cable I-USB7 (∗) AV cable I-AVC7 (∗) AC plug cord D-C02 (∗) 3D Image Viewer O-3DV1 Digital Camera Operating Manual Software (CD-ROM) S-SW7 ...Strap O-ST5 (∗) To ensure the best performance from your camera, please read the Operating Manual before using the...
... 150. ✽ Type of the Package Camera Optio 550 Lithium-ion battery D-LI7 (Rechargeable) (∗) Battery charger (D-BC7) (∗) USB cable I-USB7 (∗) AV cable I-AVC7 (∗) AC plug cord D-C02 (∗) 3D Image Viewer O-3DV1 Digital Camera Operating Manual Software (CD-ROM) S-SW7 ...Strap O-ST5 (∗) To ensure the best performance from your camera, please read the Operating Manual before using the...

Operation Manual
Page 14
... indicator Battery To power outlet c x Getting Started Battery charger z AC plug cord Charging the Battery When using the camera for full charge is about 180 minutes maximum. The appropriate ambient temperature range for a long time. • Use the Battery charge D-BC7 to charge the ... may vary depending on the ambient temperature and charging conditions. • When the battery reaches the end of its service life, the time that the camera can be faulty.
... indicator Battery To power outlet c x Getting Started Battery charger z AC plug cord Charging the Battery When using the camera for full charge is about 180 minutes maximum. The appropriate ambient temperature range for a long time. • Use the Battery charge D-BC7 to charge the ... may vary depending on the ambient temperature and charging conditions. • When the battery reaches the end of its service life, the time that the camera can be faulty.

Operation Manual
Page 15
... the battery correctly. When you have inserted the battery, check that it may be damaged or malfunction. • Do not remove the battery when the camera is turned on. • If you inserted the battery, and pull the battery out. If the battery is left without the battery for a long period... by the arrow to press the battery lock lever in the same direction as when you do not intend to use any other battery the camera may cause malfunction. 13 To remove the battery, release the battery by the arrow. x Insert the battery with the label facing towards the lens while...
... the battery correctly. When you have inserted the battery, check that it may be damaged or malfunction. • Do not remove the battery when the camera is turned on. • If you inserted the battery, and pull the battery out. If the battery is left without the battery for a long period... by the arrow to press the battery lock lever in the same direction as when you do not intend to use any other battery the camera may cause malfunction. 13 To remove the battery, release the battery by the arrow. x Insert the battery with the label facing towards the lens while...

Operation Manual
Page 16
...: Approx. 400 (when 50% shooting uses flash, LCD monitor ON) Playback time : Approx. 210 min. * The description above is based on Pentax measuring conditions and may vary depending on (lit green) : Adequate power remains. ↓ (lit green) : Battery is running low. ↓ ...running very low. ↓ (lit red) : Battery is exhausted. ↓ [Battery depleted.] : After the message is displayed, the camera will be recovered when the batteries are returned to low temperature will turn off. 14 symbol displayed on capture mode and shooting conditions. Caution ...
...: Approx. 400 (when 50% shooting uses flash, LCD monitor ON) Playback time : Approx. 210 min. * The description above is based on Pentax measuring conditions and may vary depending on (lit green) : Adequate power remains. ↓ (lit green) : Battery is running low. ↓ ...running very low. ↓ (lit red) : Battery is exhausted. ↓ [Battery depleted.] : After the message is displayed, the camera will be recovered when the batteries are returned to low temperature will turn off. 14 symbol displayed on capture mode and shooting conditions. Caution ...

Operation Manual
Page 17
... turned off when connecting or disconnecting the AC adapter. • Make sure that the camera is turned off and opening the terminal cover. Getting Started z Terminal cover x AC adapter To power outlet v c AC plug cord Using the AC Adapter (optional) ... securely. x Connect the DC terminal on the AC adapter to a PC, use the LCD monitor for a long time or connect the camera to the DC input terminal on the camera. c Connect the AC plug cord to read the operating manual accompanying the AC adapter. 15 If the cord becomes disconnected while you...
... turned off when connecting or disconnecting the AC adapter. • Make sure that the camera is turned off and opening the terminal cover. Getting Started z Terminal cover x AC adapter To power outlet v c AC plug cord Using the AC Adapter (optional) ... securely. x Connect the DC terminal on the AC adapter to a PC, use the LCD monitor for a long time or connect the camera to the DC input terminal on the camera. c Connect the AC plug cord to read the operating manual accompanying the AC adapter. 15 If the cord becomes disconnected while you...

Operation Manual
Page 18
...shooting conditions specified by the arrow, and pull it clicks. x Rotate the card with a capacity of the card towards the lens and with this camera. To remove the card, eject the card by pressing it cannot be stored on the SD Memory Card/MultiMediaCard. z Open the battery chamber/card cover...before inserting or removing the SD Memory Card/ MultiMediaCard. c Close the battery chamber/card cover. To take pictures in the direction indicated by 16 PENTAX and may not be used with the pin-connector edge of 32MB or more. • The above table indicates the number of images when ...
...shooting conditions specified by the arrow, and pull it clicks. x Rotate the card with a capacity of the card towards the lens and with this camera. To remove the card, eject the card by pressing it cannot be stored on the SD Memory Card/MultiMediaCard. z Open the battery chamber/card cover...before inserting or removing the SD Memory Card/ MultiMediaCard. c Close the battery chamber/card cover. To take pictures in the direction indicated by 16 PENTAX and may not be used with the pin-connector edge of 32MB or more. • The above table indicates the number of images when ...

Operation Manual
Page 19
...remove the SD Memory Card/MultiMediaCard immediately after using USB cable as this may cause the card to be damaged and become unreadable. Pentax does not accept any liability for data that is erased • when the SD Memory Card/MultiMediaCard is mishandled by pro- Precautions... When Using a SD Memory Card/MultiMediaCard • Make sure that the camera is turned off while data is being accessed. • The SD Memory Card/MultiMediaCard has a limited service life. ber/card cover. •...
...remove the SD Memory Card/MultiMediaCard immediately after using USB cable as this may cause the card to be damaged and become unreadable. Pentax does not accept any liability for data that is erased • when the SD Memory Card/MultiMediaCard is mishandled by pro- Precautions... When Using a SD Memory Card/MultiMediaCard • Make sure that the camera is turned off while data is being accessed. • The SD Memory Card/MultiMediaCard has a limited service life. ber/card cover. •...

Operation Manual
Page 20
...on the LCD moni- If no SD Memory Card/MultiMediaCard has been inserted, appears on . When the camera is turned on the lens cover opens and the lens extends. matically performs a card check. The camera will be displayed instead of , and the images or sound cannot be recorded. 000 02/20/2003... 11:19 18 Getting Started Turning the Camera On and Off z Power switch z Press the power switch. Press the power ...
...on the LCD moni- If no SD Memory Card/MultiMediaCard has been inserted, appears on . When the camera is turned on the lens cover opens and the lens extends. matically performs a card check. The camera will be displayed instead of , and the images or sound cannot be recorded. 000 02/20/2003... 11:19 18 Getting Started Turning the Camera On and Off z Power switch z Press the power switch. Press the power ...

Operation Manual
Page 21
Getting Started Adjusting the Viewfinder z Viewfinder If the subject through the viewfinder, move the diopter adjustment lever to the left or right until the subject appears in the range of -3 m-1 to see, you can adjust the diopter in the sharpest focus. z Aim the camera at a subject with clearly defined outlines. 19 For easy adjustment, point the camera at the bright subject. While looking through the viewfinder are hard to +1 m-1 (per meter).
Getting Started Adjusting the Viewfinder z Viewfinder If the subject through the viewfinder, move the diopter adjustment lever to the left or right until the subject appears in the range of -3 m-1 to see, you can adjust the diopter in the sharpest focus. z Aim the camera at a subject with clearly defined outlines. 19 For easy adjustment, point the camera at the bright subject. While looking through the viewfinder are hard to +1 m-1 (per meter).

Operation Manual
Page 22
... format and current date and time. If the date and time that appear at the bottom right of the LCD monitor when you turn the camera on for the first time is English. Setting the Display Language You can change the setting after it has been made. z Turn the... camera on. The screen for "Changing the Date/Time" (p.130) to set the correct date and time. x Use the four-way controller ( ) to "Changing the Display ...
... format and current date and time. If the date and time that appear at the bottom right of the LCD monitor when you turn the camera on for the first time is English. Setting the Display Language You can change the setting after it has been made. z Turn the... camera on. The screen for "Changing the Date/Time" (p.130) to set the correct date and time. x Use the four-way controller ( ) to "Changing the Display ...

Operation Manual
Page 23
.../ English z Press the four-way controller ( ) City NYC DST to "Setting the World Time" (p.130). The screen for setting the next item will use the camera. Refer to select the desired city (Home Town).
.../ English z Press the four-way controller ( ) City NYC DST to "Setting the World Time" (p.130). The screen for setting the next item will use the camera. Refer to select the desired city (Home Town).


